In this example, you will create a custom launch pad on the Easy Access screen in SAP, from which you can quickly navigate to commonly-used transactions, such as the VA01 transaction we will use in this example. To create a custom launchpad with Designer, please do the following.
- Log into SAP.
- Launch GuiXT Designer.
- Delete any existing elements on the Easy Access screen.
-
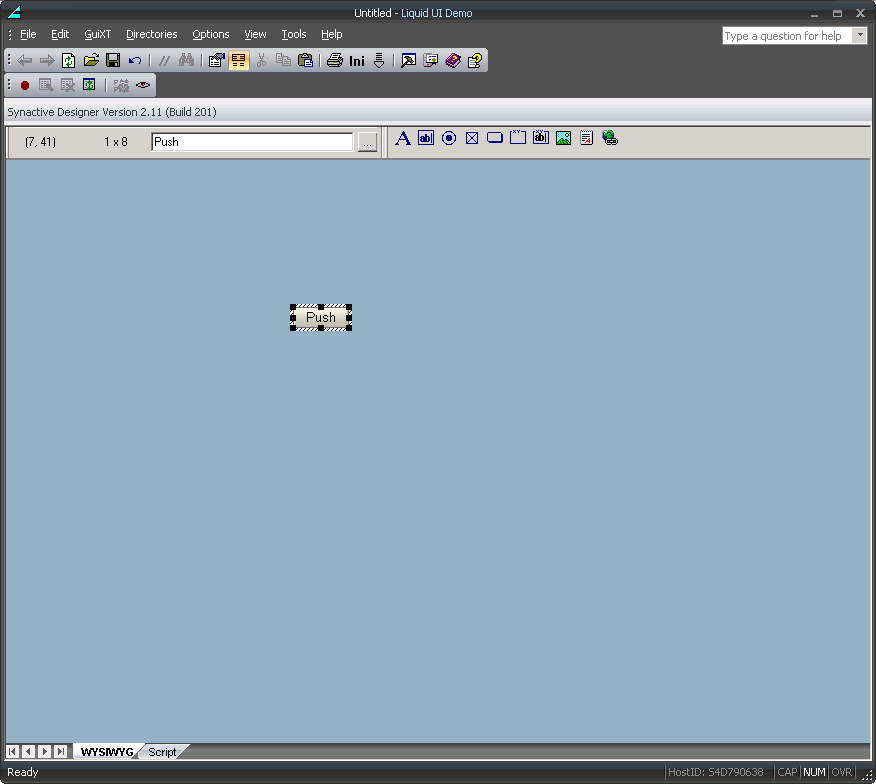
Add a new pushbutton by clicking on the icon for the pushbutton element and then clicking on the screen in Designer where you want to place the pushbutton. The screen now appears as shown below.
- To change the pushbutton size, click on the corner of the new pushbutton and drag it to your preferred size.
-
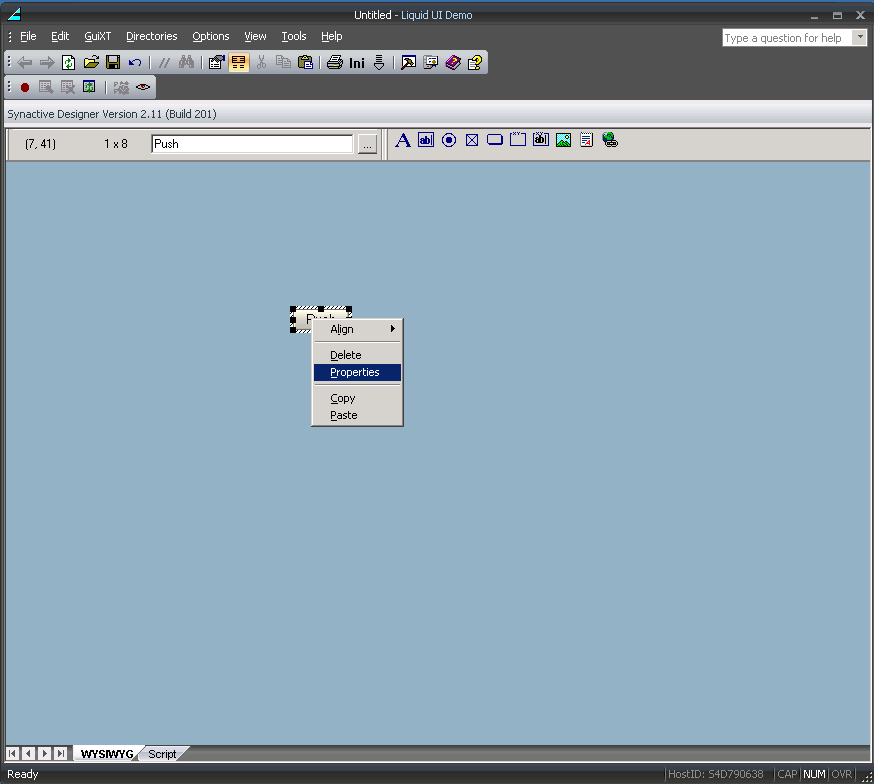
Open the Properties dialog shown below by right-clicking on the pushbutton and choosing the Properties option as shown below.
-
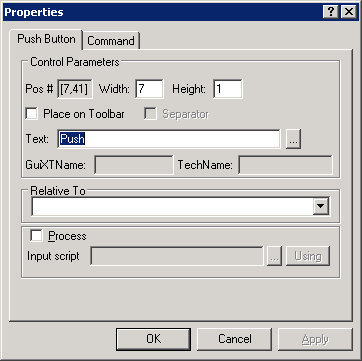
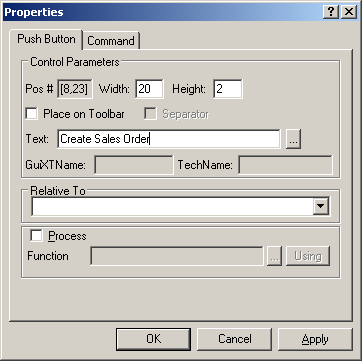
The Properties dialog will display as shown below. Enter Create Sales Order in the Text field.
-
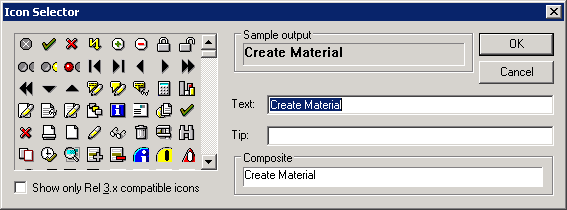
Click the ... button immediately to the right of the Text field. The Icon Selector window will display as shown below.
-
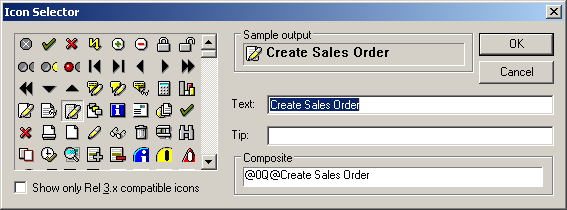
Choose the icon shown below. The text in the Composite field will change to '@OY@Create Material'.
Note: The '@OY'specifies the icon that will be used for this pushbutton. The 'Create Material' is the pushbutton label.

-
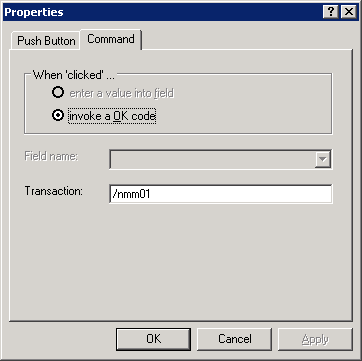
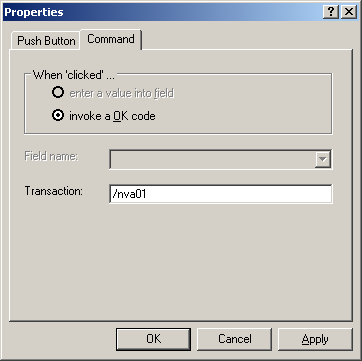
Click the Command tab and enter /nva01 in the Transaction field as shown below. Then click OK.
-
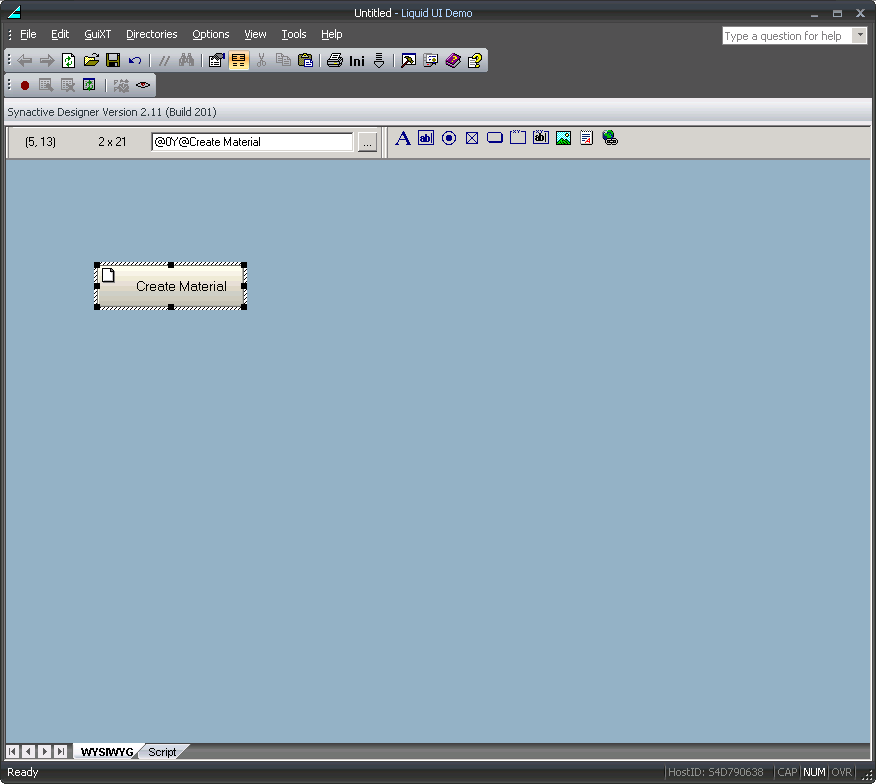
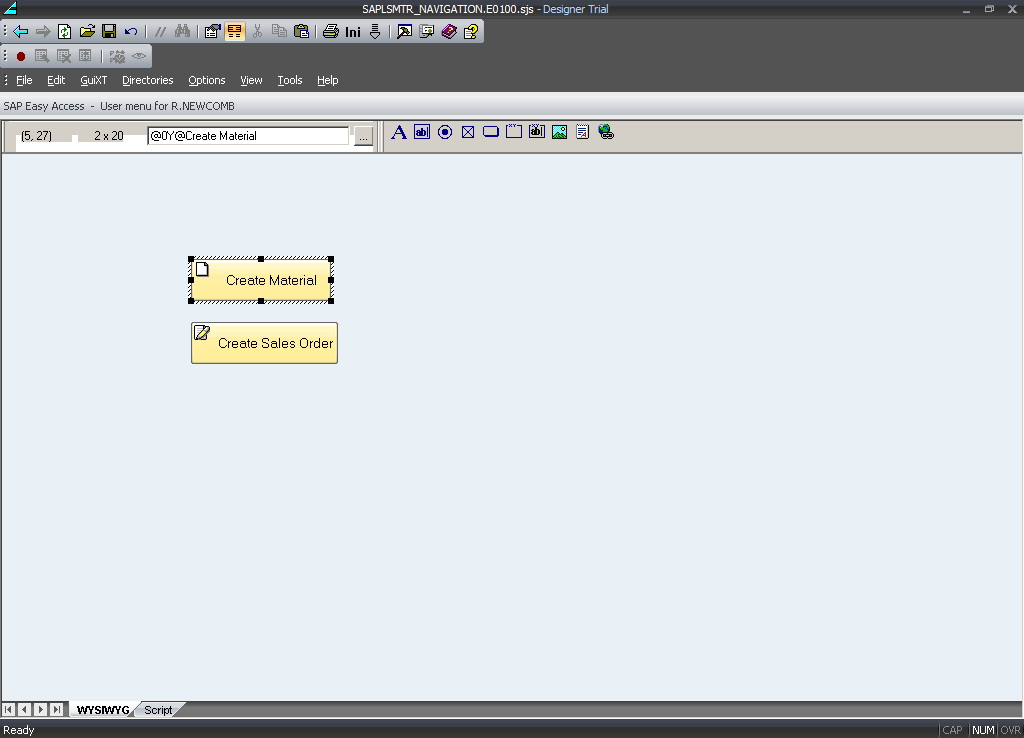
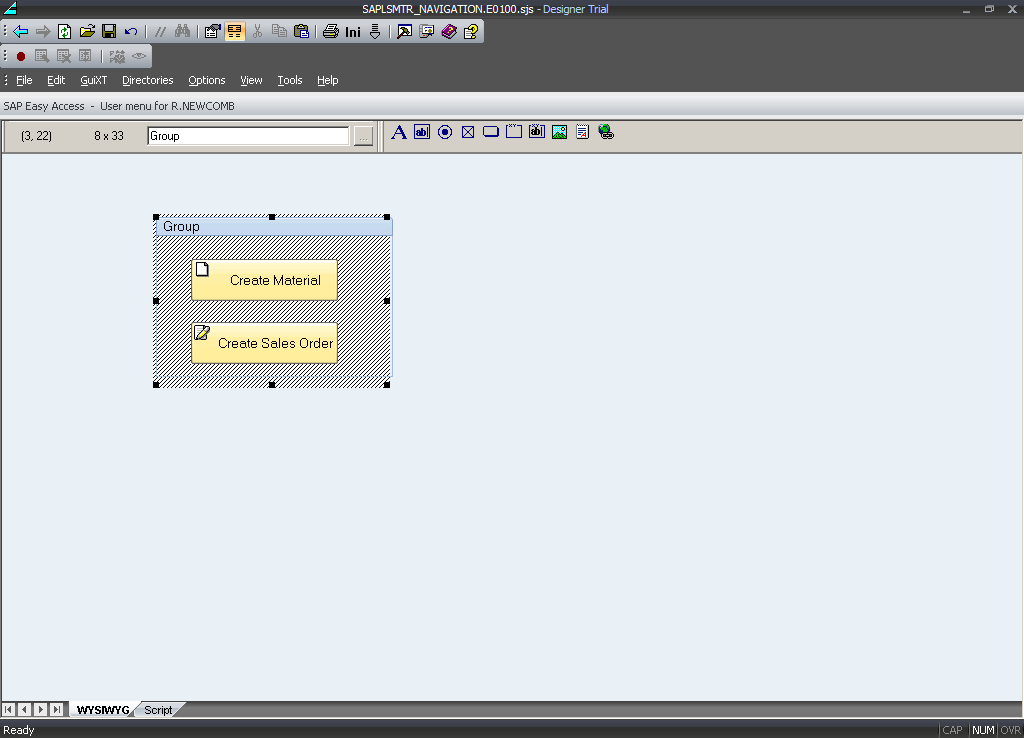
The screen in Designer now appears as follows.
-
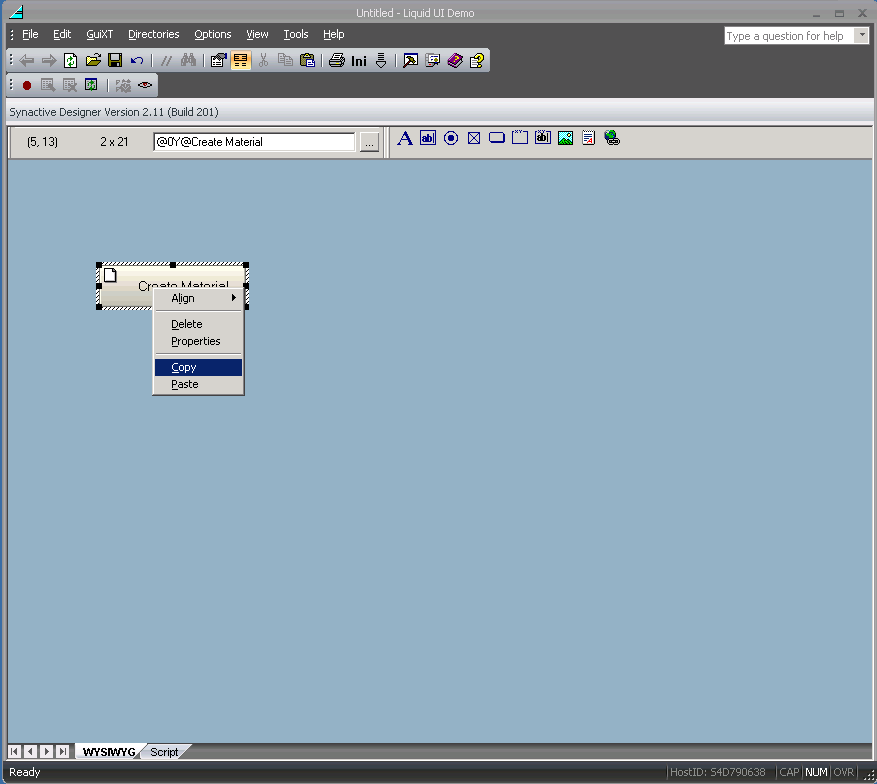
Right-click on the pushbutton and select Copy from the context menu as shown below.
-
A new pushbutton that is an exact copy will be created on the screen. Drag it to your preferred location. In our example, we will position it directly below the first pushbutton, as shown below.
-
Open the Properties dialog and enter Create Sales Order in the Text field as shown in the example below.
-
Click the ... button and select the icon shown below. The Composite field in the Icon Selector dialog will now display @OQ@Create Sales Order.

-
Click the Command tab and type /nva01 in the Transaction field as shown below.
-
Type Launch VA01 in the Tip field of the Icon Selector dialog as shown below. The Composite field will now display @0O\QLaunch VA01@Create Sales Order. The tooltip is inserted between the icon code and the pushbutton label.
-
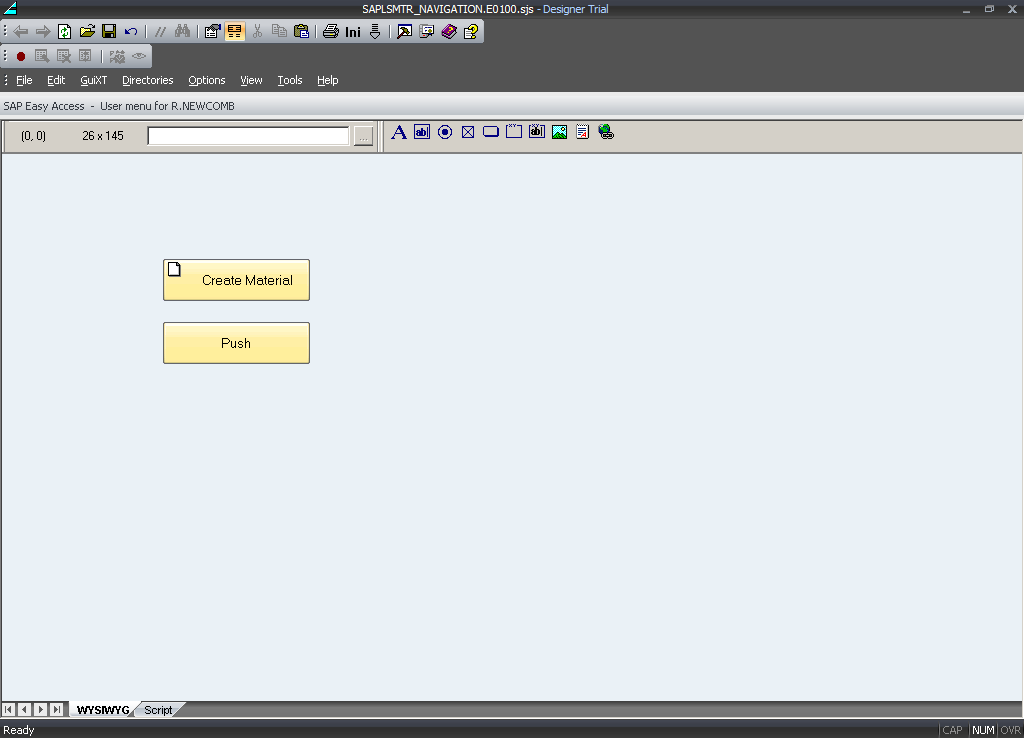
Click OK in the Icon Selector and then click OK on the Properties dialog as well. The screen will now appear as shown below.
-
Click on the groupbox icon in Designer and place the new groupbox on the screen as shown below. You can drag to resize and position it where you want it to be.
-
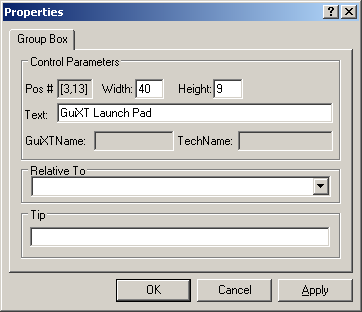
Open the Properties dialog and type GuiXT Launch Pad in the Text field as shown below. Then click OK.
-
Click the Save icon or choose Save from the File menu. You can also press Control-S to save your file.
-
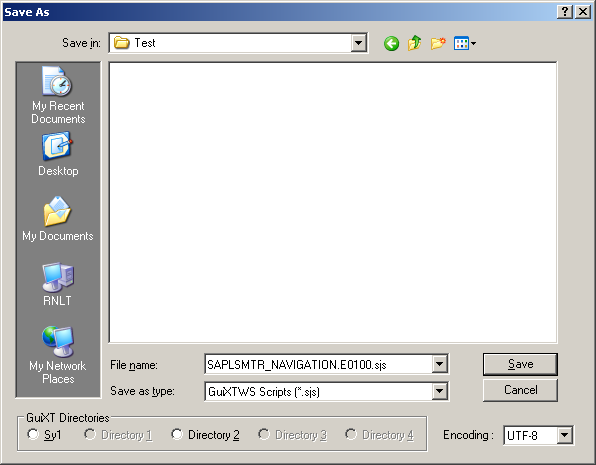
The Save As... dialog will appear as shown below. Enter the correct name for your new script file. In our example, we are putting the launchpad on the Easy Access screen so we will use the name 'SAPLSMTR_NAVIGATION.E0100.sjs'.
Note: Make sure you use the correct extension for your file or it will not be recognized. Script files should have the .SJS extension.
-
Your new launchpad is now done. Log out of SAP and then log back in to see the changes.


