In this scenario, you will learn how to add the functionality to the scripts and run the customized screens successfully. You will also understand how easy to create a sales order after combining various screens.
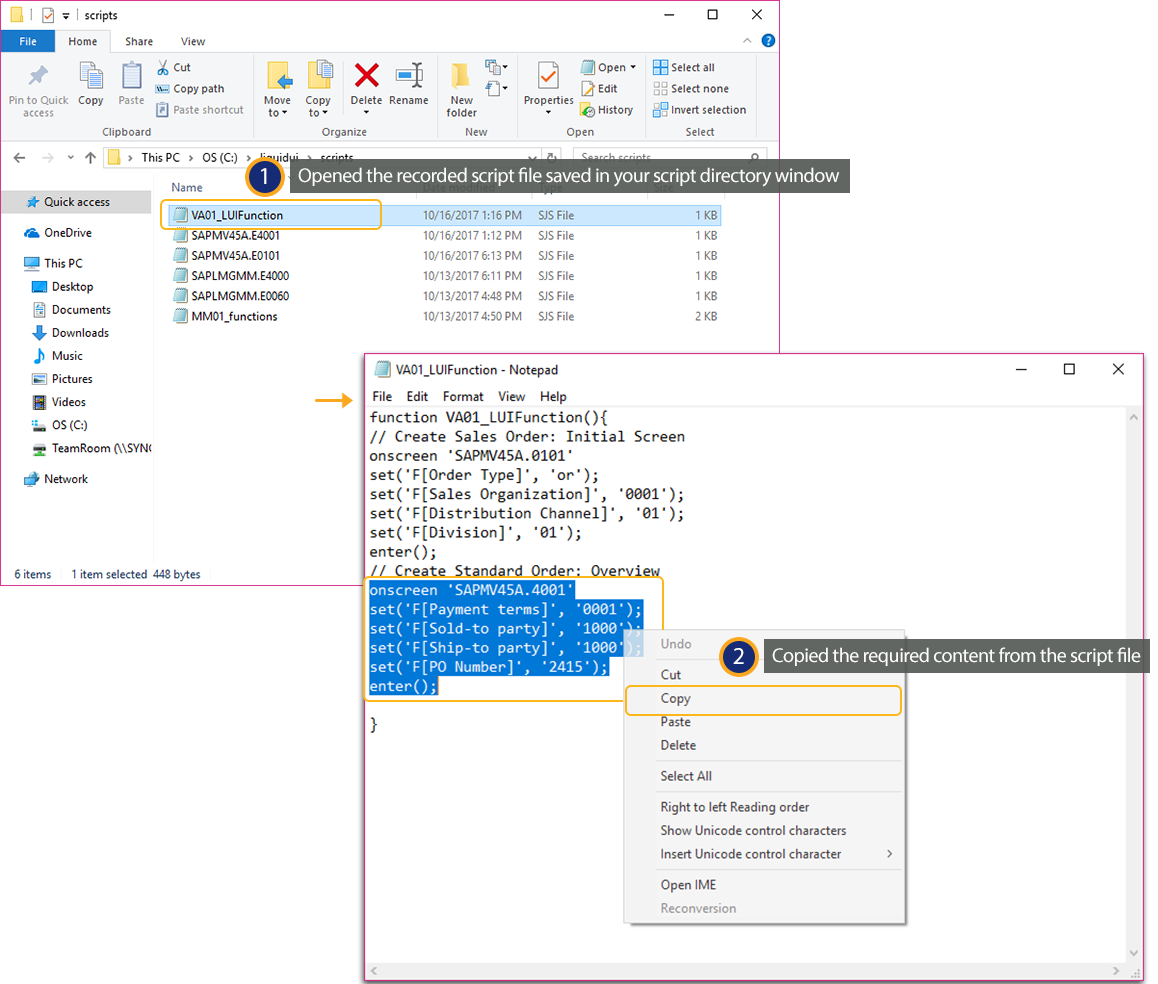
- Open the recorded script file, which is generated after recording the customization of your Create Sales Order screen.
- Copy the required script from the recorded script file for adding functionalities to the transaction as shown below:
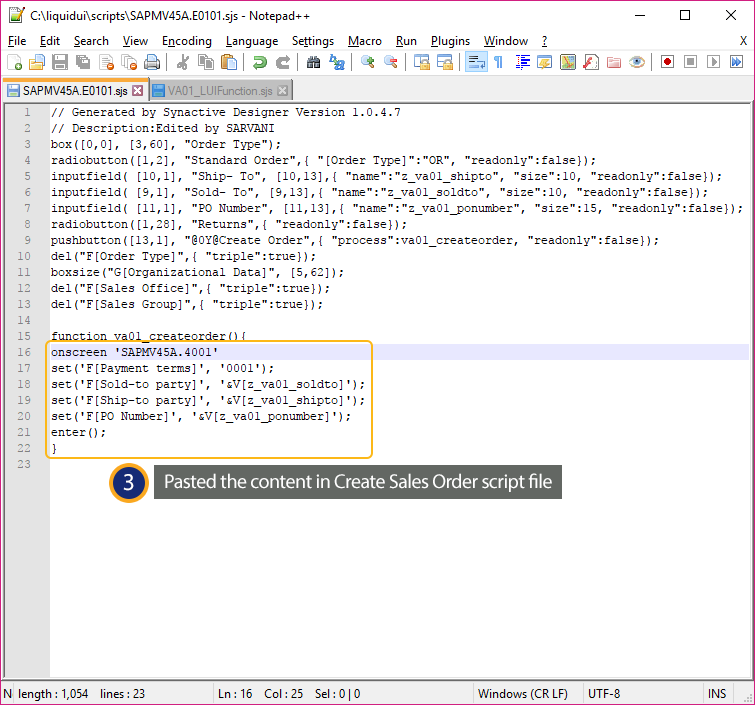
- Paste the script in the VA01 script file(SAPMV45A.E0101.sjs) and save the changes as shown below:
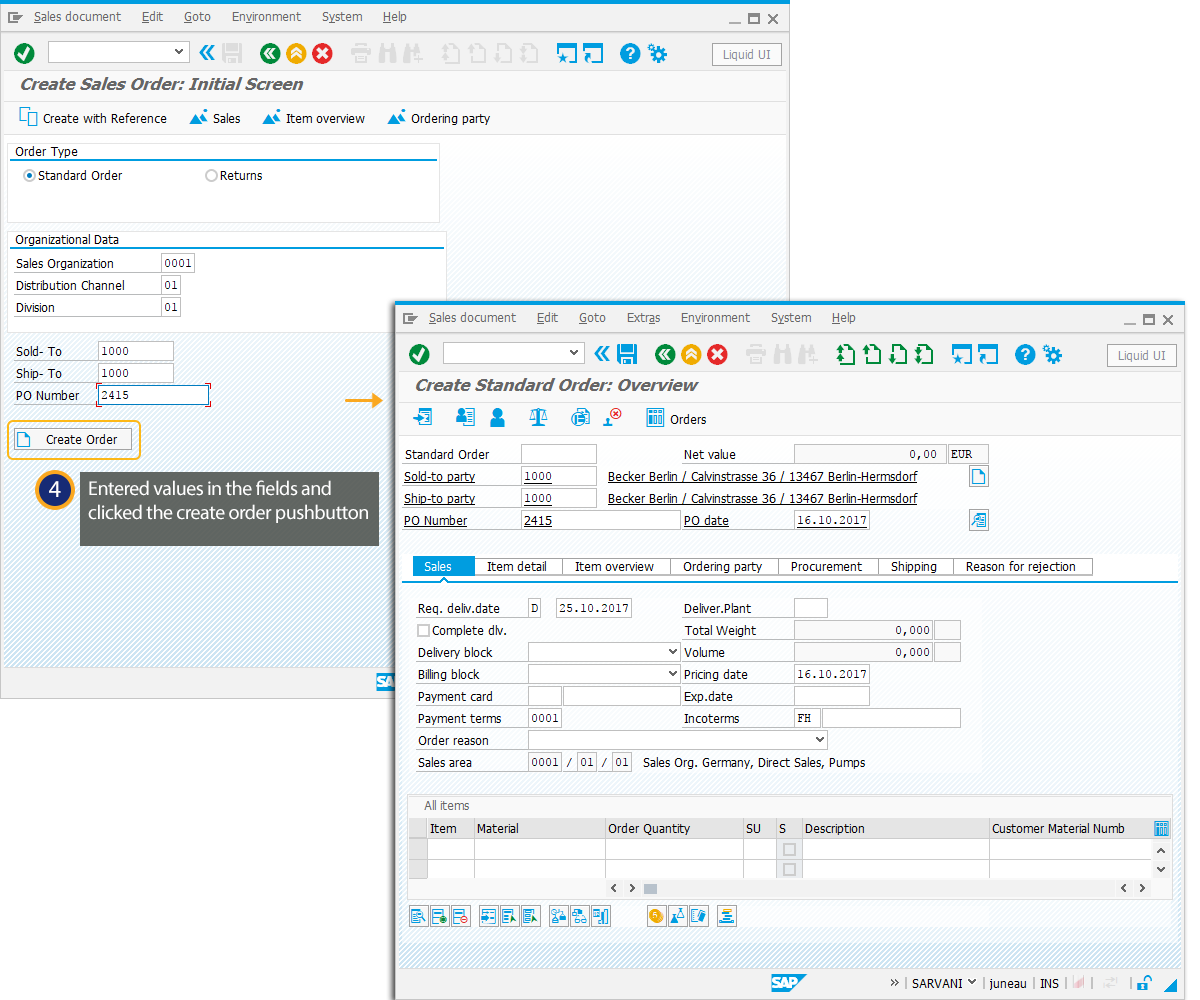
- Go to Create Sales Order screen (VA01) and enter the values in the fields. Click the Create Order pushbutton to navigate to the overview screen.
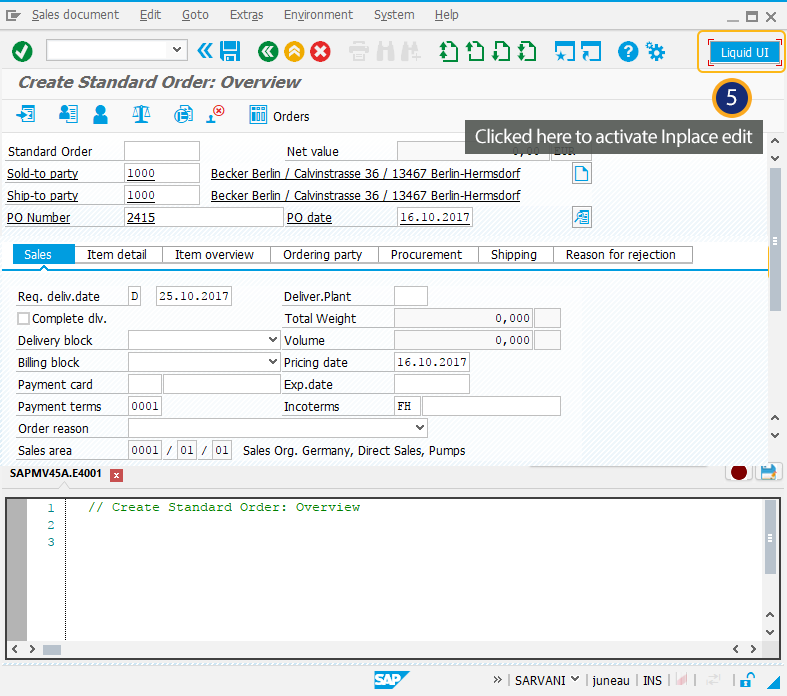
- You are navigated to Create Sales Order: Overview screen. Activate Inplace Edit to customize the screen as per your requirement.
- Right Click on the tabstrip and select the delete tabstrip to delete the Item detail tab.

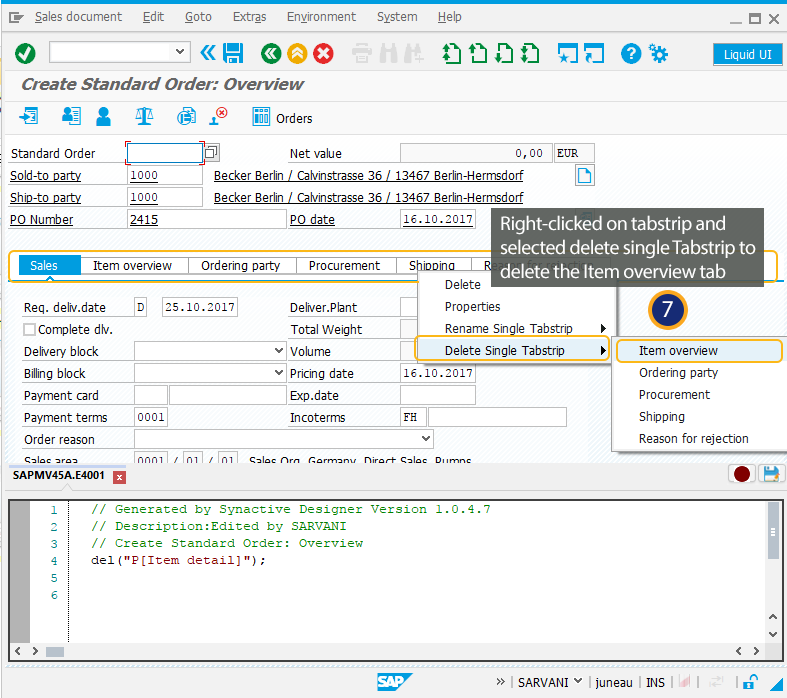
- Right Click on the tabstrip and select the delete tabstrip to delete the Item Overview tab.
- Similarly, you can right click on the tabstrip to delete required number of tabs and the resultant screen appears as shown below after deletion.

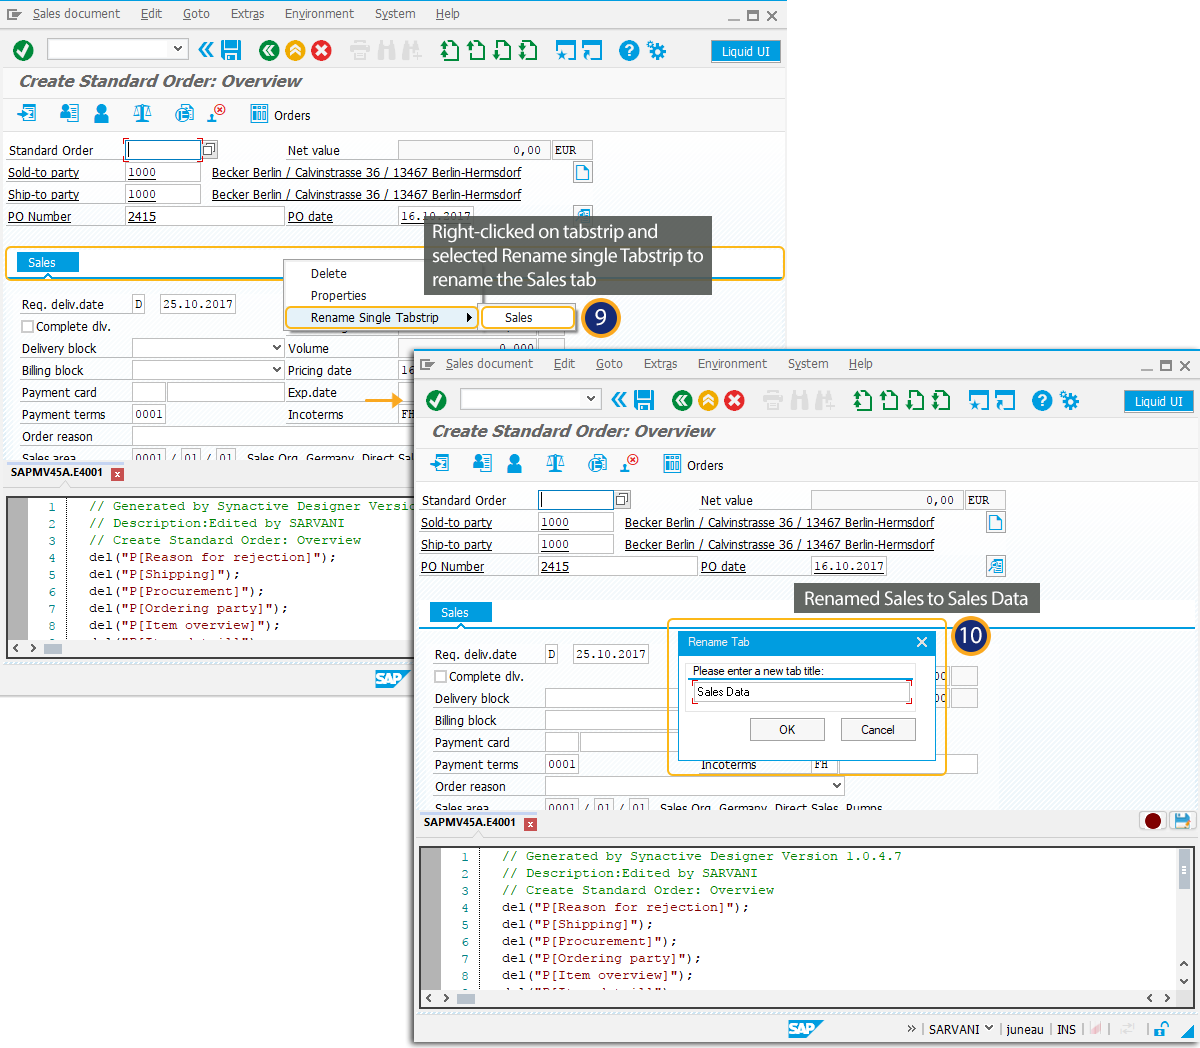
- Right Click on the tabstrip and select the Rename the tabstrip to rename the Sales tab.
- You can rename the tab in Rename Tab pop up window as shown below:
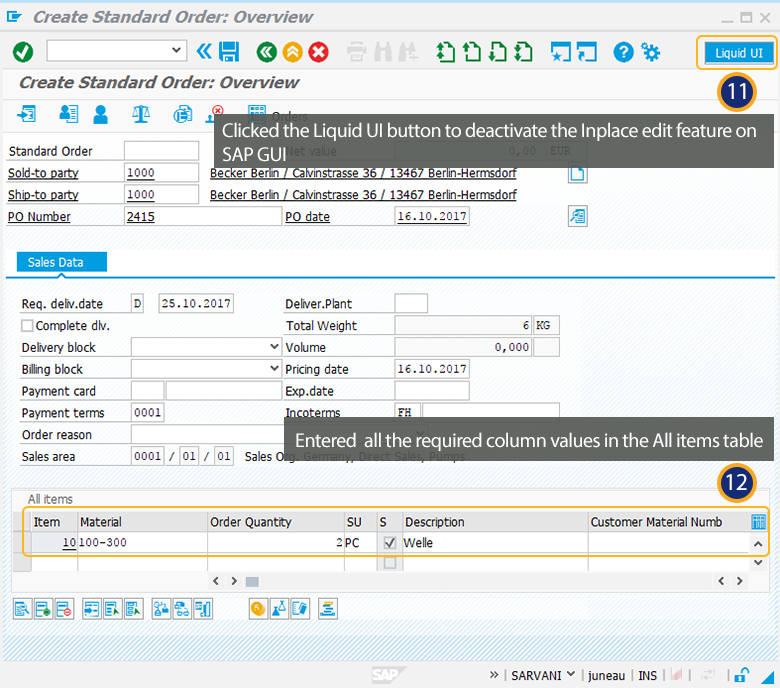
- Click Liquid UI button again to Deactivate the Inplace Edit to stop customization.
- Enter the values under Material and Order Quantity columns as shown below and click enter.
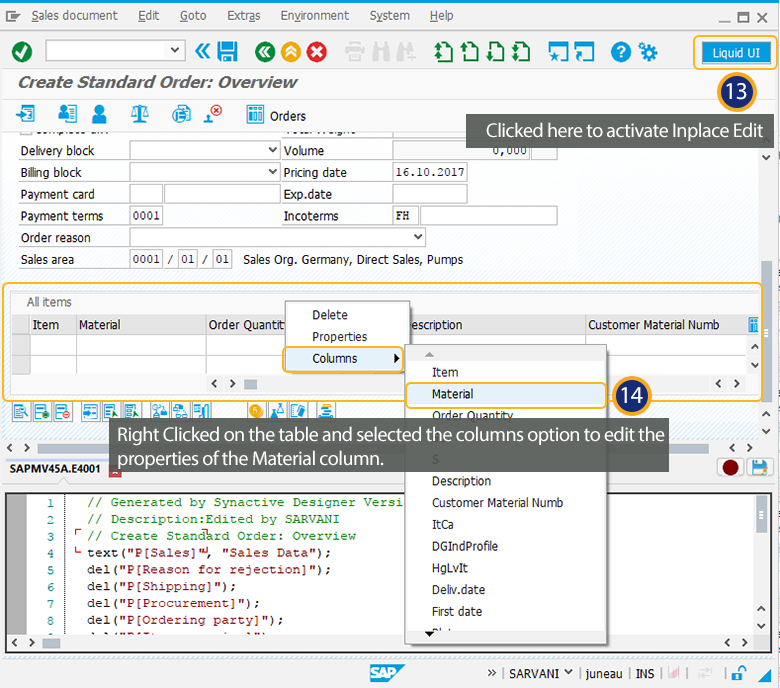
- Activate the Inplace Edit to customize the SAP table.
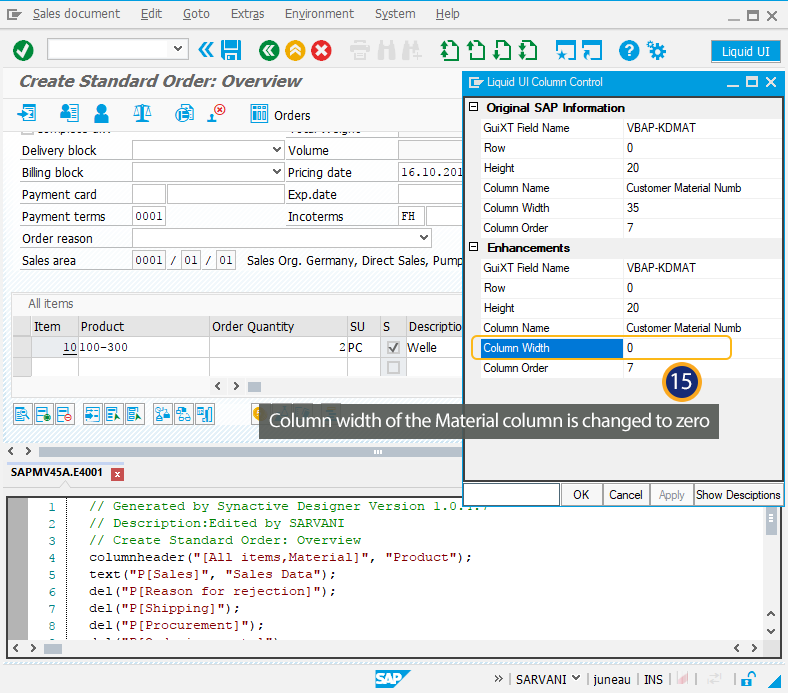
- Right Click on the All items table to rename the Material column as shown below:
- Right Click on the table to hide the Customer Material Number column as shown below:
- Right Click on the table to change the order of the Description column.
- You can change the order or position of the table column as shown below:

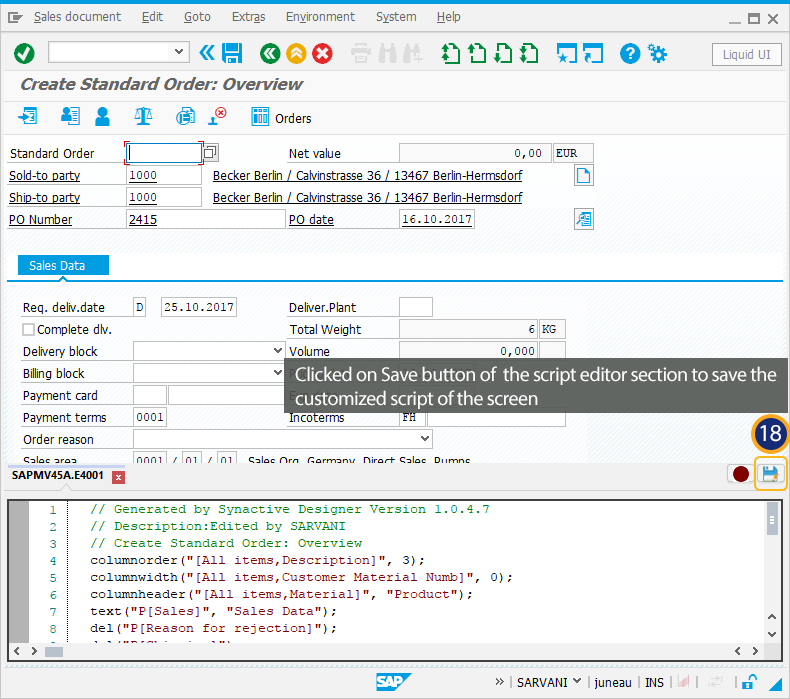
- Click on the save button placed on the script editor to save the customized script file of the VA01 second screen as shown below: