Prerequisites
- Products: Liquid UI WS, Liquid UI Server or Local DLL, Client Software
- Commands: message(), pushbutton(), enter(), del()
Purpose
You will learn how to create a pop-up on the SAP screen to confirm the action to be performed. Using the message command, you can create different types of pop-ups for different scenarios and perform different logics depending on their choice. We will walk you through the following steps.
- Delete unnecessary screen elements on the SAP screen using the del command
- Add a toolbar pushbutton to call the function that creates a popup with options
- Add a function to create a popup with options
//Create this file inside your script folder for customizing the SAP Easy Access screen: SAPLSMTR_NAVIGATION.E0100.sjs
//Now, let's start adding the Liquid UI script to the above file and save it.
- Delete unnecessary screen elements on the SAP Easy Access screen using the del command.
//Deletes unnecessary screen elements from the SAP Easy Access screen
del("X[IMAGE_CONTAINER]");
del("P[Documentation]");
del("P[Assign Users]");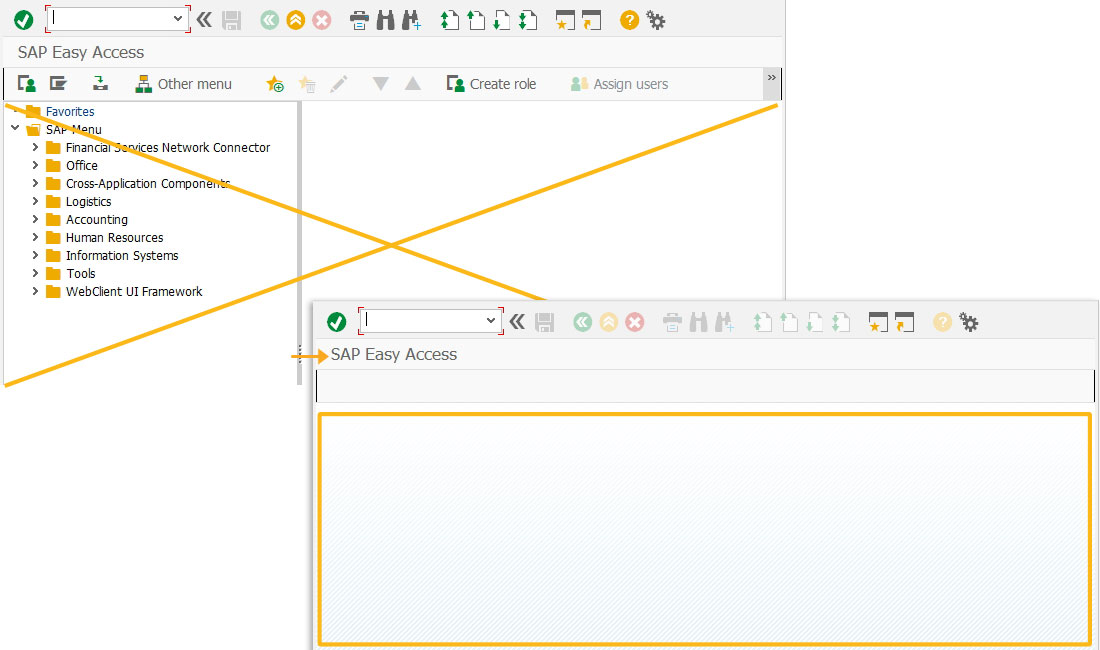
- Add a toolbar pushbutton with the label GO TO VA02 to run the process navigateVA02 on click.
//Creates a pushbutton with the label GO TO VA02 to run the process navigateVA02
pushbutton([TOOLBAR],"GO TO VA02","?",{"process":navigateVA02});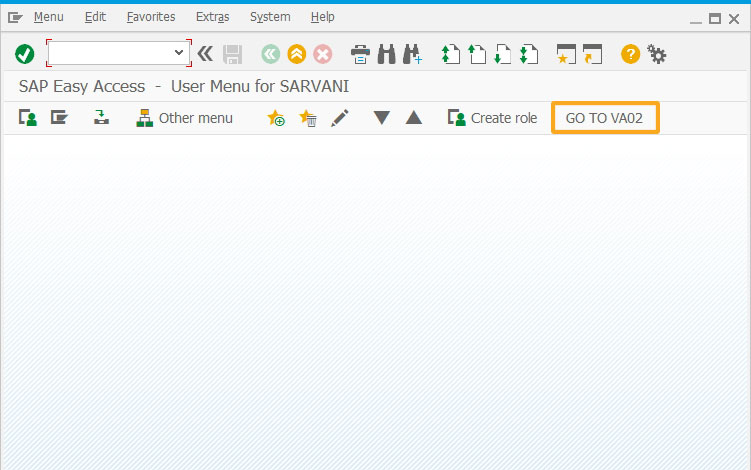
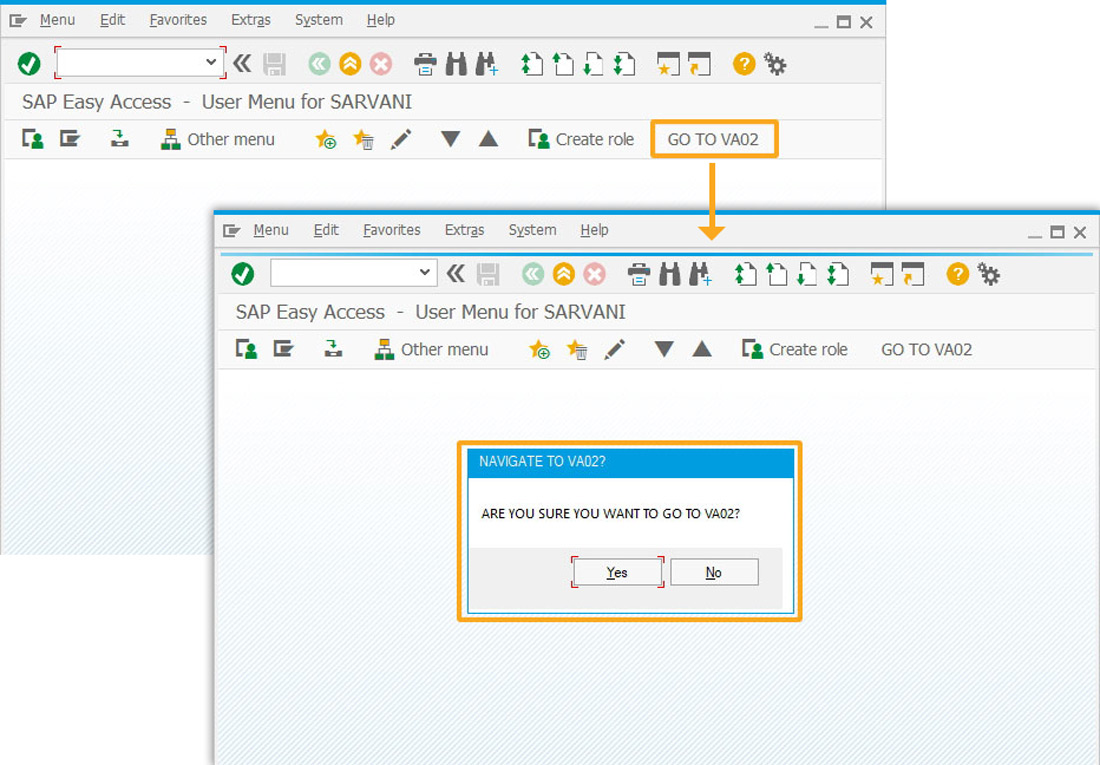
- Add the navigateVA02 function to create a popup with YES and No options. Based on the option selected, you will be navigated either to the VA02 transaction or remain on the same screen.
//Creates a popup with options
function navigateVA02(){ onscreen 'SAPLSMTR_NAVIGATION.0100' // message_result will hold a value that depends on what the user clicks in the pop-up // in the message command, specify the type, 4 is a Yes or No message box // in the message command, specify the title you want the message box to have message_result = message("ARE YOU SURE YOU WANT TO GO TO VA02?", {"type":4,"title":"NAVIGATE TO VA02?"}); // if the result is 6, the user clicked yes if(message_result == 6){ enter("/nva02"); } // if the result is 7, the user clicked no else if(message_result == 7){ enter("?"); } } - Click the GO TO VA02 toolbar pushbutton. Then, you will see a popup message to decide an action with a message.
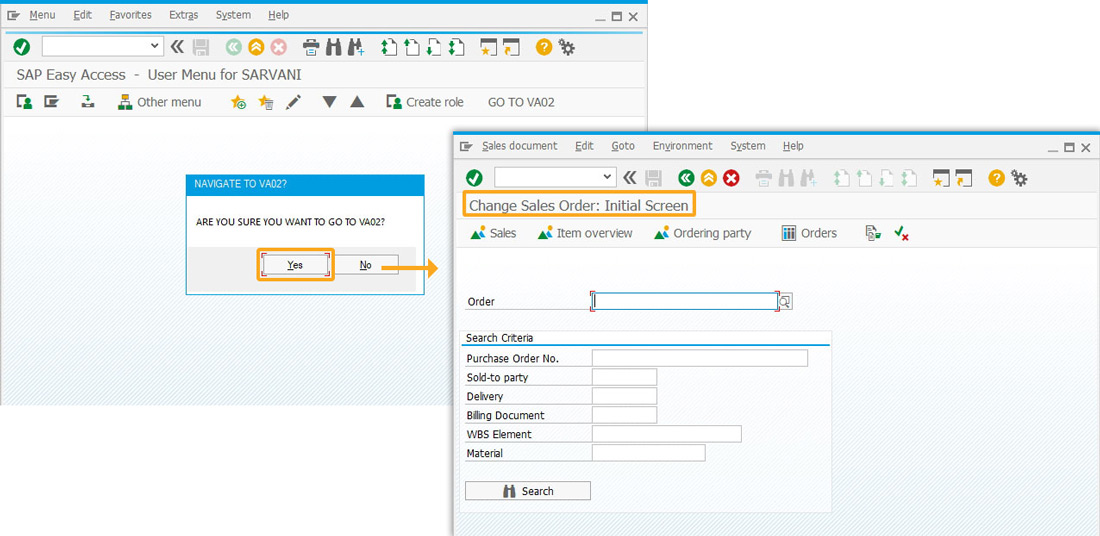
- Select either Yes or No to navigate either to VA02 transaction or stay on the same screen. Clicking on Yes will navigate you to the Change Sales Order: Initial Screen, as shown below.
- The pop-up will vary on how it looks depending on the type specified in the options for the message command. The type is calculated by adding the Icon constant and Pop-up type constant.
POP-UP TYPE VALUE ABORT, RETRY, IGNORE 2 CANCEL, TRY, CONTINUE 6 HELP 16384 OK 0 OK, CANCEL 1 RETRY, CANCEL 5 YES, NO 4 YES, NO, CANCEL 3 ICON TYPE VALUE INFORMATION ICON 64 QUESTION ICON 32 STOP ICON 16 - Using the table above, we have created a pop-up with the options ABORT, RETRY, and IGNORE along with a STOP icon, and then performed the sum of 2 and16. Also, displayed the message as CALCULATED TYPE is 18!.
message("CALCULATED TYPE is 18!",{"type":18});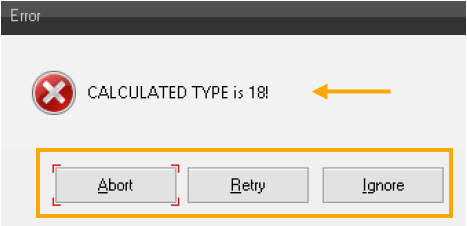
- Our process can flow in a certain way depending on the button that the user clicks. Here, each button has a specific value and can be used to check in an “if” condition.
BUTTON VALUE FUNCTION FAIL 0 ABORT 3 CANCEL 2 CONTINUE 11 IGNORE 5 NO 7 OK 1 RETRY 4 TRY 10 YES 6
Next Steps
This article is part of the Conditional scripts tutorial.


