The Settings tab is available when a recording is open in the Workbench and appears as follows:
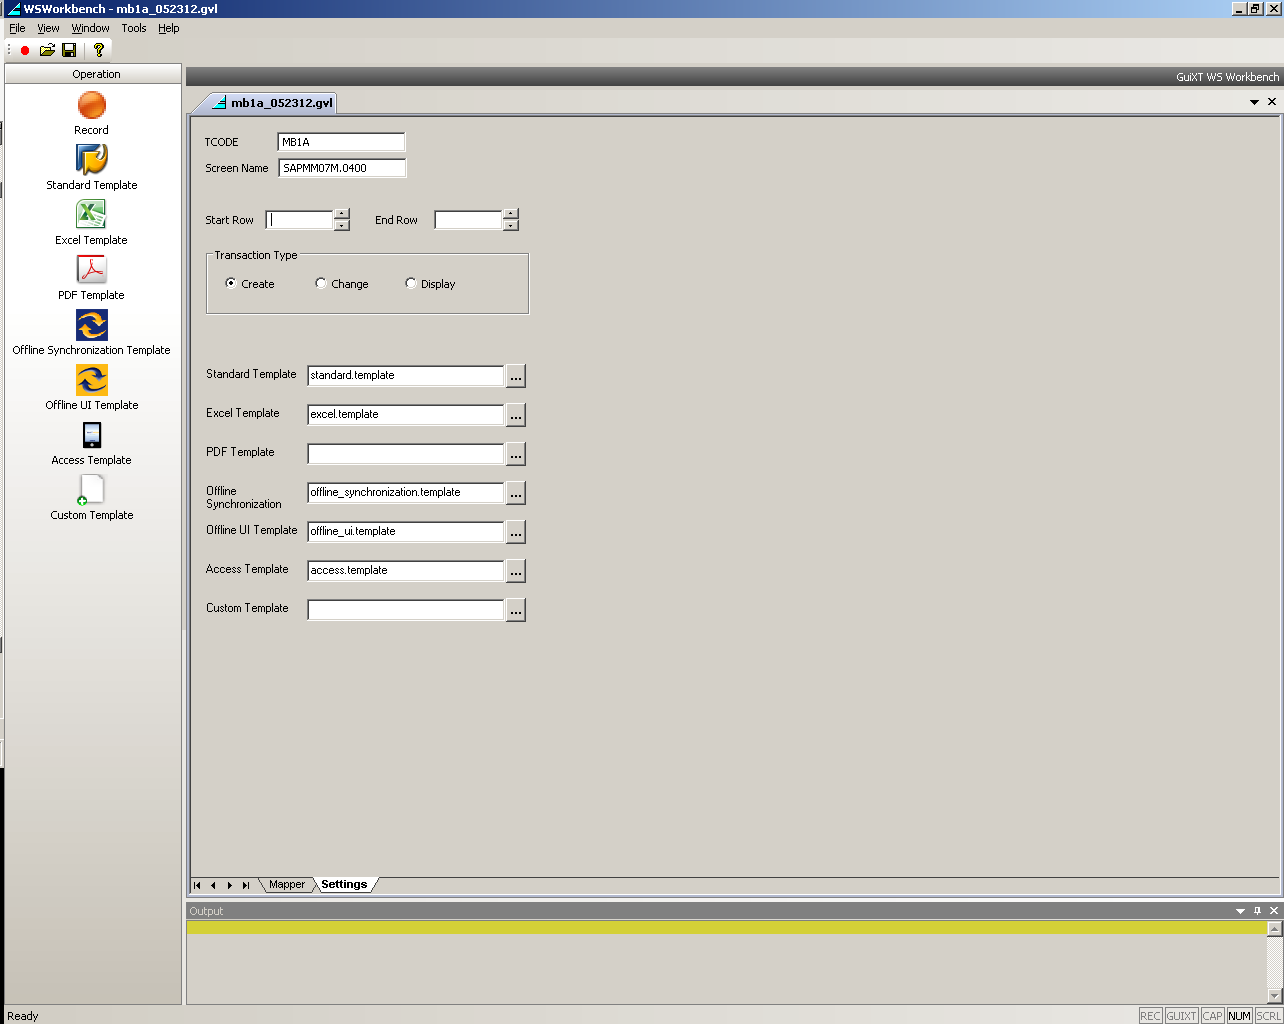
This tab contains the following fields and controls.
- TCODE
-
The TCODE field contains the SAP transaction code for the transaction that is being recorded. If you are editing a previously recorded file, the TCODE field will contain the transaction code that was used to make the recording. An example of an SAP transaction code is shown below.

- Screen Name
-
The actual DynPro name of the SAP screen is listed in this field. An example of an SAP screen name is shown in the following screenshot.

- Start and End Row
-
The Start and End Row files are used to specify the tables that will be drawn in SAP. The usage differs slightly depending on whether you are using a Standard or an Excel template. For a Standard template, the start and end rows must be specified for the table to be drawn correctly. The start row must be set to '0' and the End row must be set to a value larger than '0'.
For Excel templates, the Start and End rows define which rows in the spreadsheet will be uploaded to SAP. If you set a start row, the end row must be greater than '2'. Please note that the Excel template will set the start row to '2' by default if you do not manually specify a start row. You can also specify a range of rows to be uploaded. For example, if you only want to upload data from rows 7-14, you can set the start row to '7' and the end row to '14'. Only data contained in these rows will be uploaded.
Transaction Type
As previously discussed, not all transaction types are supported by every template. For the script to work, you must set the correct transaction type by clicking on the appropriate radiobutton. The available transaction types are as follows.
-
- Create
- Change
- Display
 Note: Please see the Transaction Types section of this document for a more detailed discussion of transaction types.
 - Template Files
-
At the bottom of the Settings tab are seven fields where you can specify custom paths to the template files. These are automatically set at install time, but you can manually change them if you wish. The available templates are as follows.
- Standard Template
- Excel Template
- PDF Template
- Offline Synchronization Template
- Offline UI Template
- Access Template
- Custom Template
Changing Template Locations
To use a template in a different directory than the default templates, please do the following.
- Click on the ... button to the right of the template field.
-
The File Open dialog will appear, as shown below.
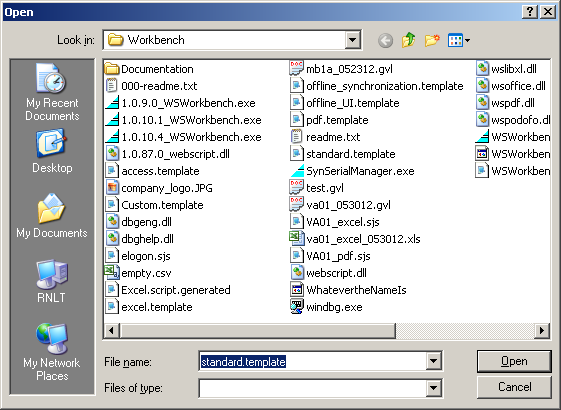
- Locate the file and click on the Open button.
-
The template you chose is now set as the default in the Settings tab. Please note that for the pre-installed templates, the full path will not display in the field, but for a user-defined template, the full path will display, as shown below.


