Purpose
With pos(), you can shift fields, groupbox, pushbuttons, radiobuttons, checkboxes and tables to new positions on SAP screen.
This command enables you to move native SAP screen elements and re-organize them. This ability is often useful to group certain elements together, when you add or delete elements.
The pos command works on the following native SAP screen elements.
- ActiveX controls
- Inputfields
- Pushbuttons
- Radiobuttons
Syntax
pos(F["screen_element"],["row,col"],{"option":true…});
Properties
- screen_element - name of the screen elements.
- row, col - row & column co-ordinates
Options
The pos() command takes the following options:
|
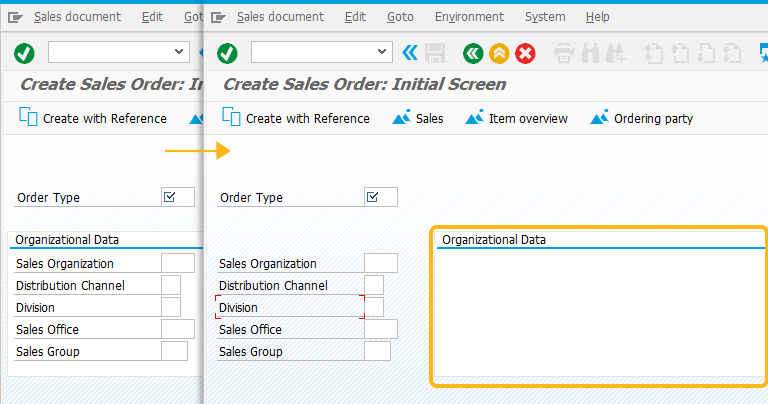
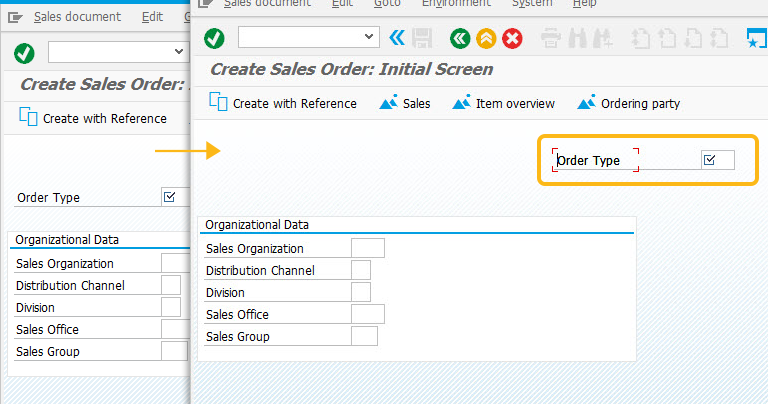
"box":true - This option changes the position of the groupbox which is surrounding a group of elements, while leaving the elements inside the groupbox in the original location. |
|
|
"field":name of screen element - This option is used to offset a screen element based on the position of a another screen element. This option is used together with the 'offset' option. |
|
|
"offset":[row,col] - This option offsets a screen control based on the position of another control. This option must be used together with the 'field' option. |
|
|
"text":true - This option is used to move only the label of a screen element and textfield of the screen element remain in its position. The control itself will remain in its previous position. |
|
|
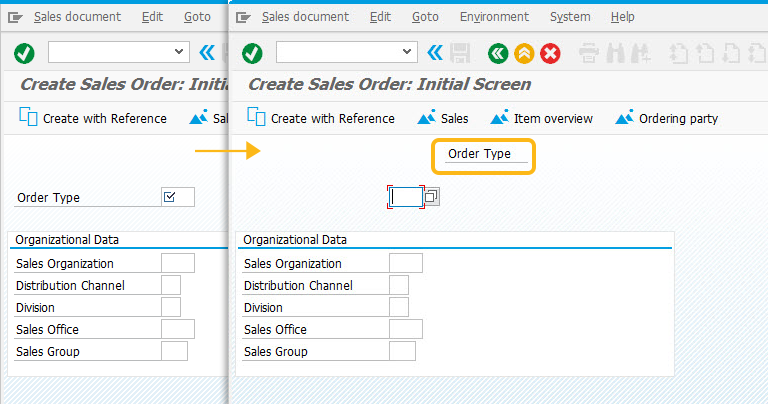
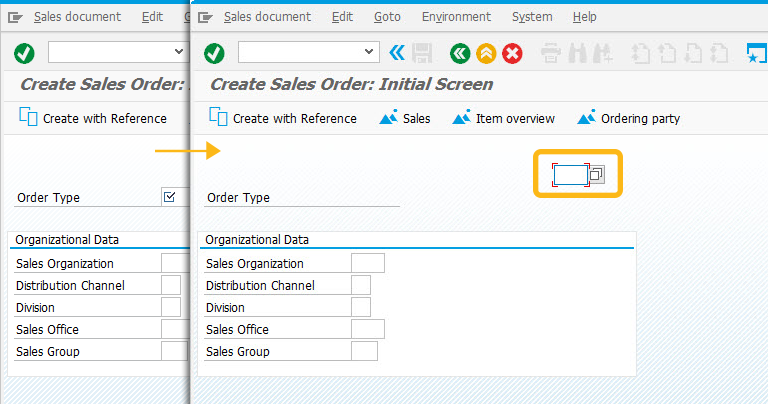
"triple":true - This option is used to move the position of the label, actual screen control and its description. |
|
|
"value":true - This option is used to move only the textfield of the screen control element, and the label will remain in its original position. |
Options Detail
Goto the VA01 Overview screen in SAP and Create the 'SAPMV45A.E4001.sjs' Script File in the Liquid UI scriptfolder. All additions will be made to this file. The VA01 overview screen appears for the following options as shown below:

Example
The following Create Sales Order example shows the usage of pos() command for the scenarios:
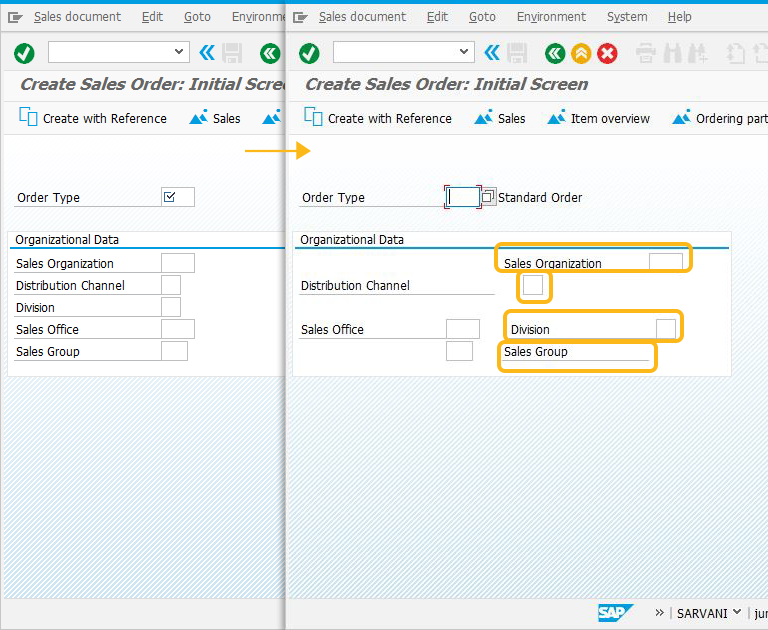
Script
pos('F[Sales Organization]',[5,30]});
pos('F[Distribution Channel]]',[6,33],{"value":true});
pos('F[Sales Group]',[9,30],{"text":true});
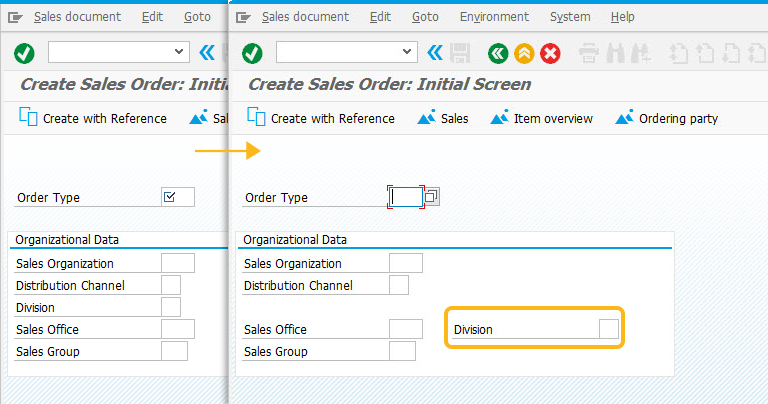
pos('F[Division]',{"field":"F[Sales Office]","offset":[0,30]});
Script details
Usage Details
If you wish to move all the fields of a field group except one, you can first remove this field from the box using pos and then move the rest.
-
Swapping Fields
If you want to swap over the position of two fields, it is not correct to do it in the following way:
pos('F[Sales Organisation]',[Order Type]});
pos('F[Order Type]',[Sales Organisation]});
You can either use the offset option to swap the screen elements
pos('F[Sales Organisation]',{"field":"F[Order Type]","offset":[0,0]});
pos('F[Order Type]',{"field":"F[Sales Organisation]","offset":[5,0]});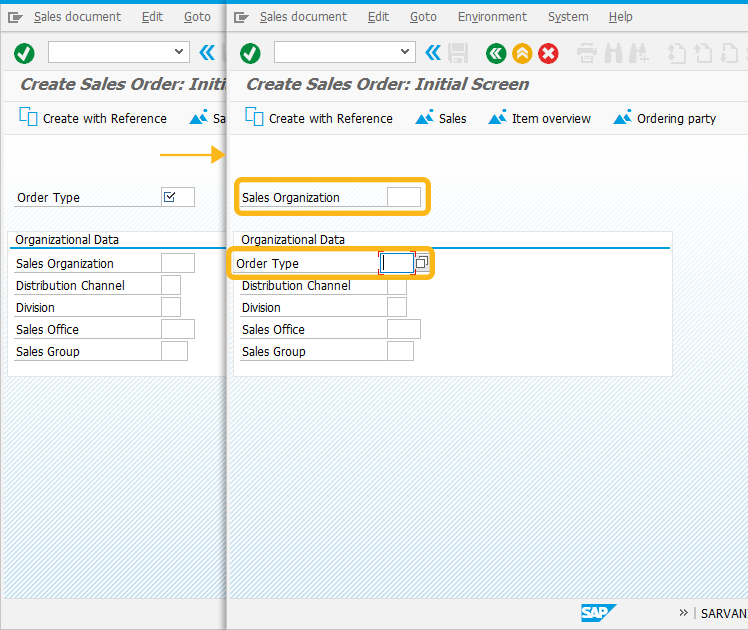
-
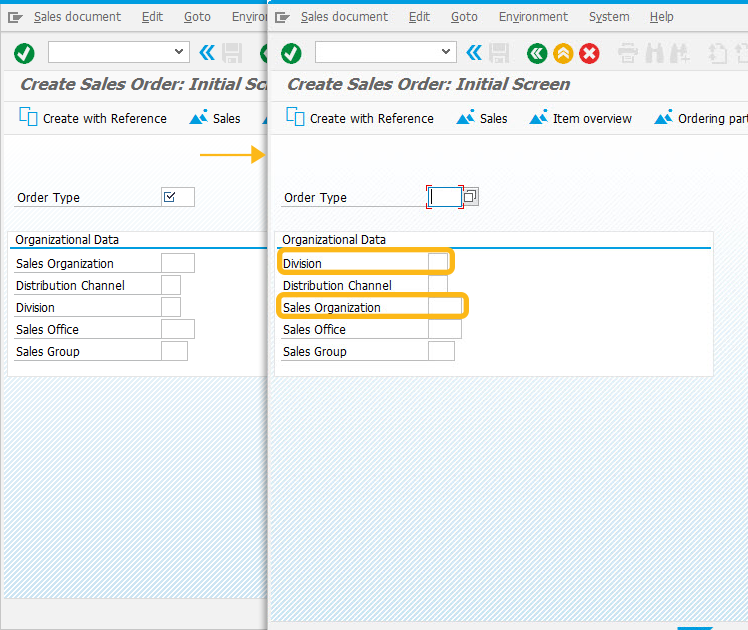
Swapping Fields using the absolute co-ordinates
Instead you can use absolute coordinates to refer to a fixed screen element.
pos('F[Sales Organization]',[7,1],{"triple":true});
pos('F[Division]',[5,1],{"triple":true});