In this example, you will create a custom launch pad on the SAP Easy Access screen, from which you can quickly navigate to commonly-used transactions, such as the VA01 transaction which is used in this example. To create a custom launchpad with Liquid UI Inplace edit, please do the following.
-
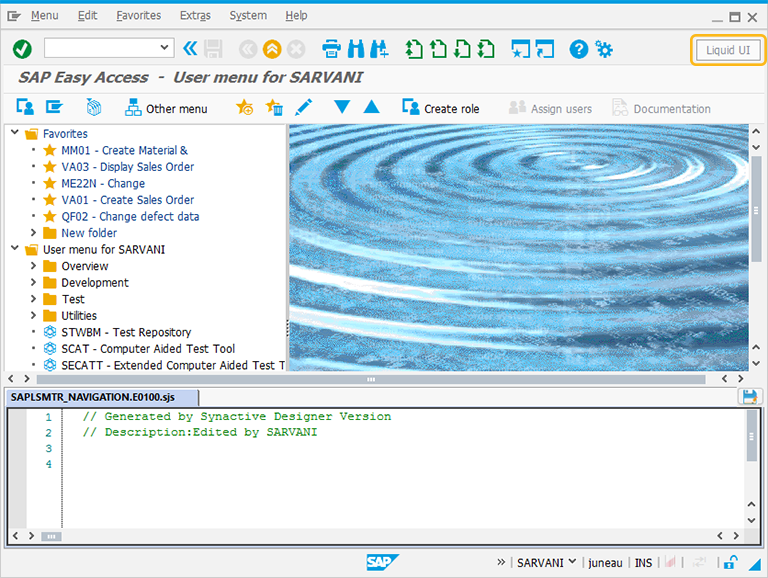
Click on the Liquid UI button on toolbar, then SAP Easy Access screen appears as shown below:
-
Delete any existing elements on the Easy Access screen.
-
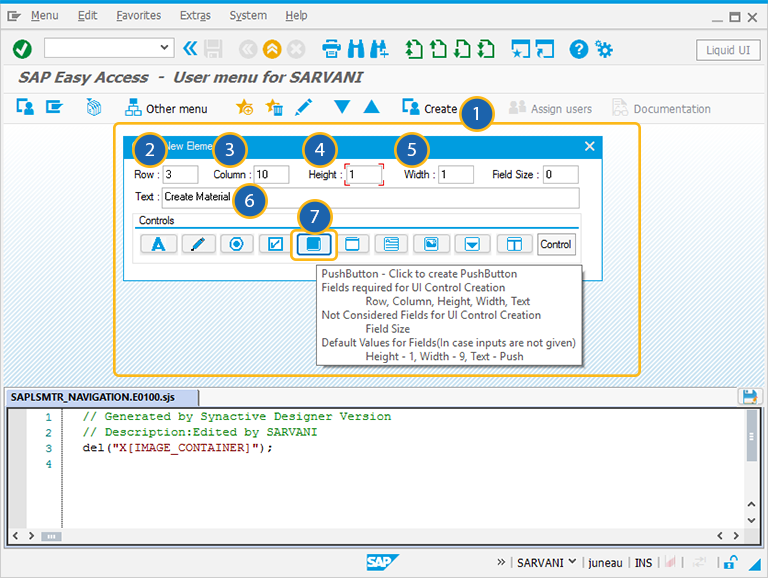
Perform a Right Click on the SAP Easy Access screen, you can view Create New Element window on the screen as shown below.
-
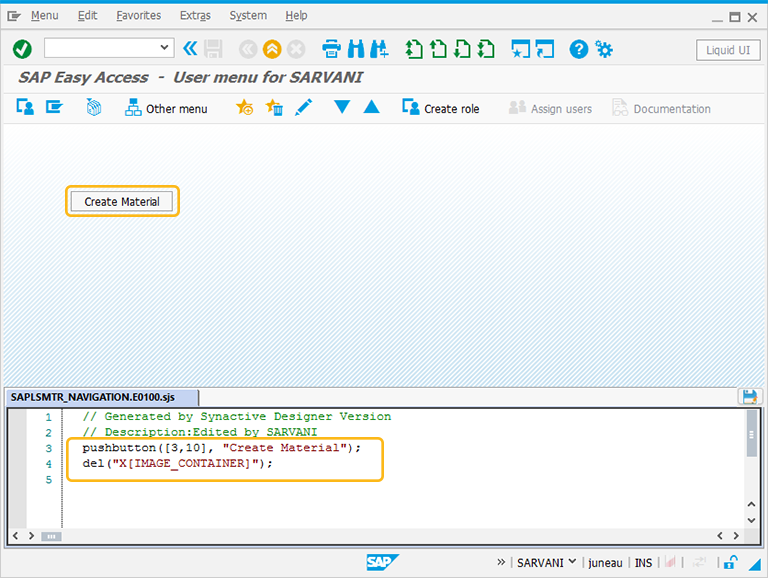
Click on the pushbutton icon to add a new pushbutton and then you can drag the element to the required new position on the SAP screen. The screen now appears as shown below.
-
Double click on the pushbutton to open the Properties window. You can edit the required fields.
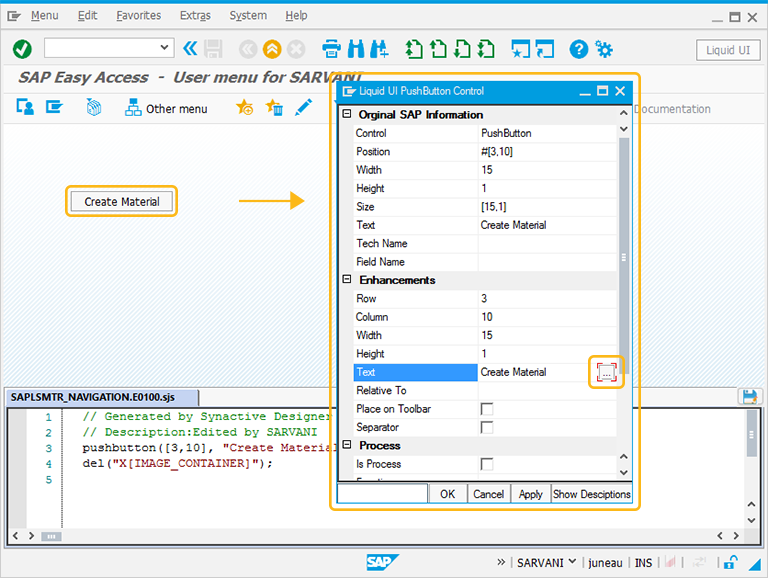
-
The Properties dialog will appear as shown below. Enter Create Material in the Text field.
-
Click the ... button immediately to the right of the Text field. The Icon Selector window will display as shown below.
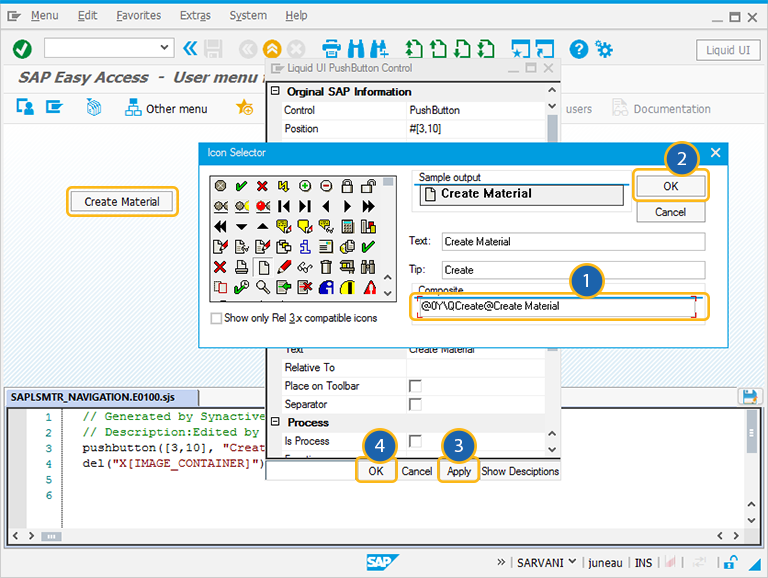
-
Choose the icon shown in the Icon Selector window. The text in the Composite field will change to '@OY@Create Material'.
-
Note: The '@OY' specifies the icon that will be used for this pushbutton. The 'Create Material' is the pushbutton label.
-
Select the Command section and enter /nmm01 in the Transaction field as shown below. Then click OK.
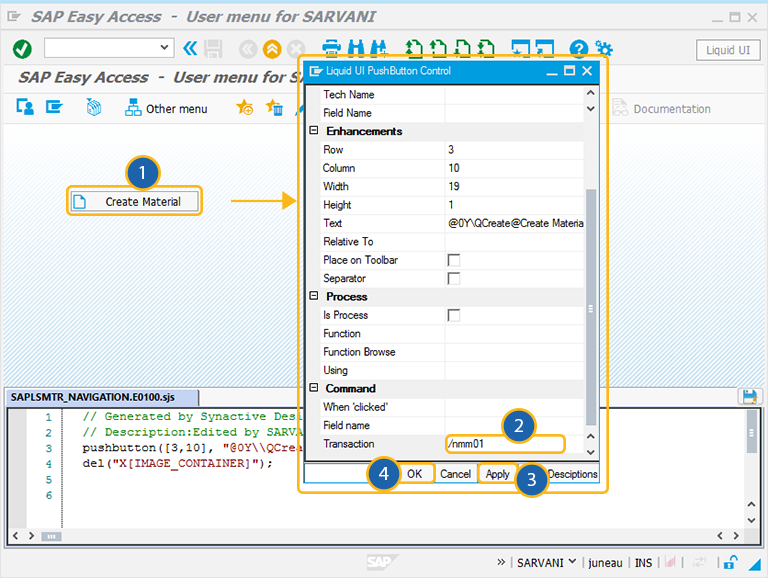
-
Perform Right-Click on the SAP screen. Select the pushbutton icon on Create New Element window.
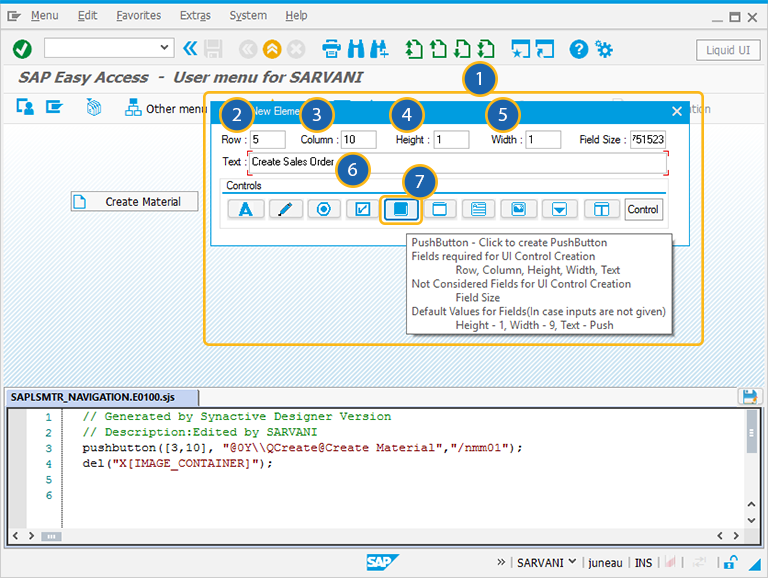
-
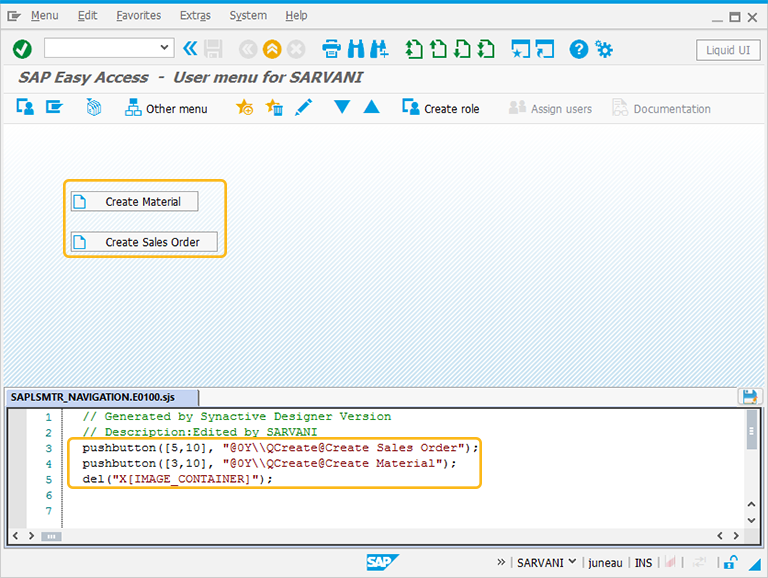
A new pushbutton will be created on the screen. Drag it to your preferred location. In our example, we will position it directly below the first pushbutton, as shown below.

-
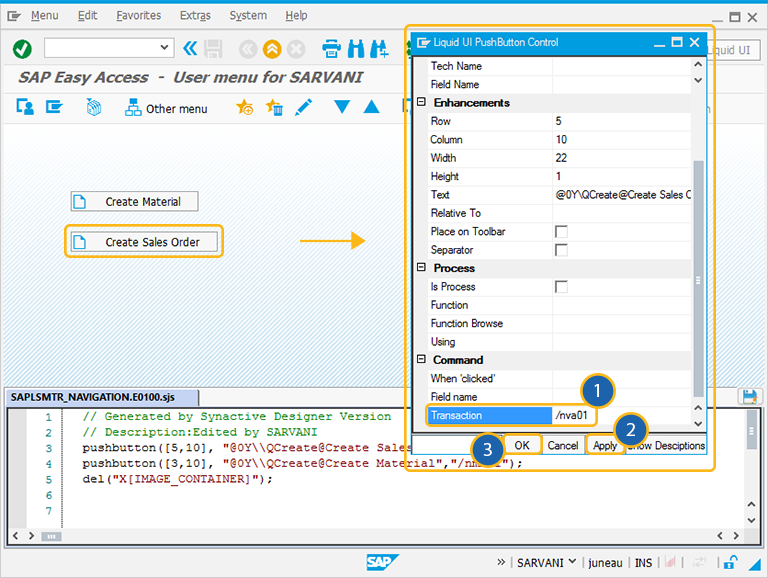
Double click on the pushbutton to open its properties window and type Create Sales Order in the Text field as shown in the example below.
-
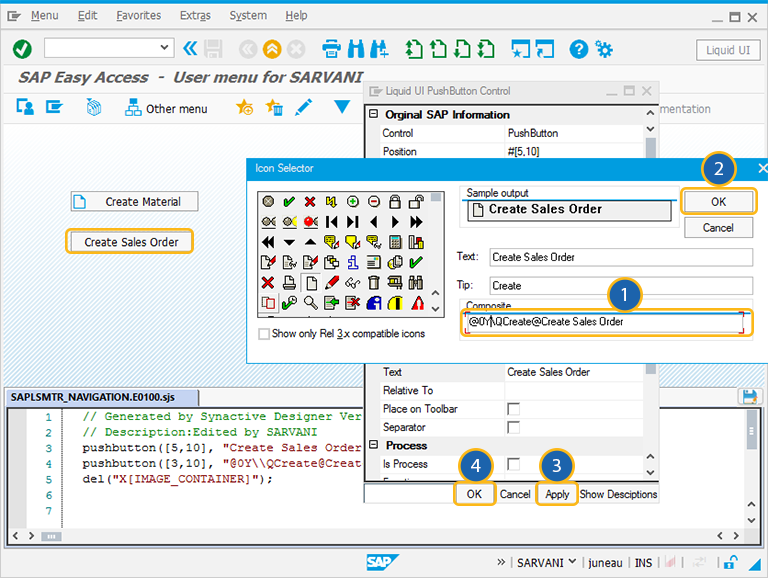
Click the ... button and select the icon shown below. The Composite field in the Icon Selector dialog will now display @OY//Create@Create Sales Order.
-
Goto the Command section in the properties window and type /nva01 in the Transaction field as shown below.
-
Enter Launch VA01 in the Tip field of the Icon Selector dialog as shown below. The Composite field will now display @\QLaunch VA01@Create Sales Order. The tooltip is inserted between the icon code and the pushbutton label.
-
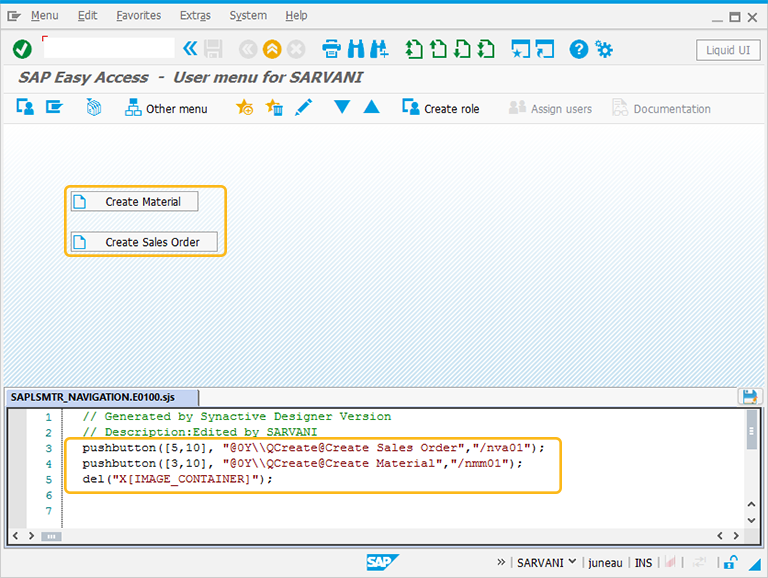
Click OK in the Icon Selector. Then click Apply and Ok on the Properties dialog as well. The screen will now appear as shown below.
-
Click on the groupbox icon in Create New Element and place the new groupbox on the screen as shown below.
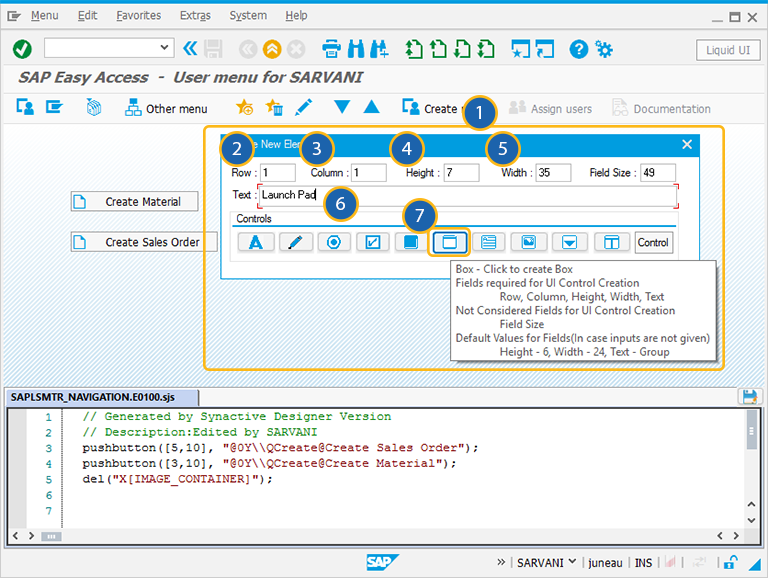
-
You can drag the Groupbox to place around the two pushbuttons and double-click on it to open its Property window.
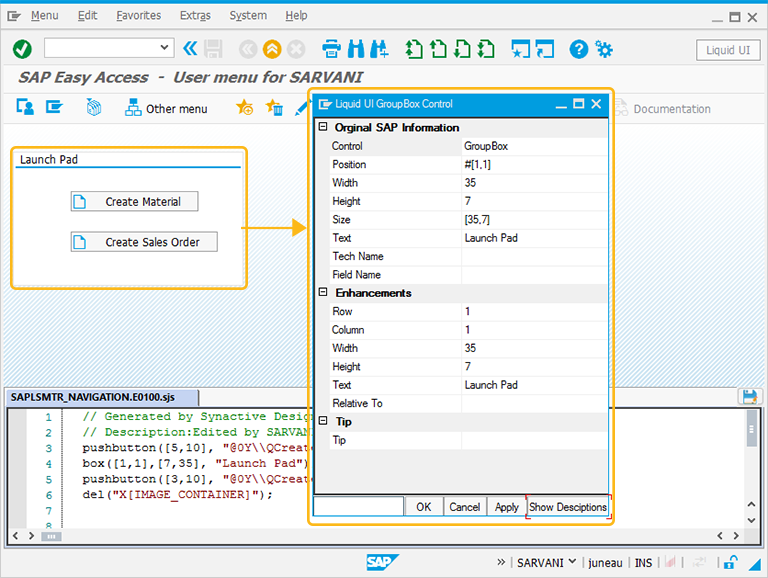
-
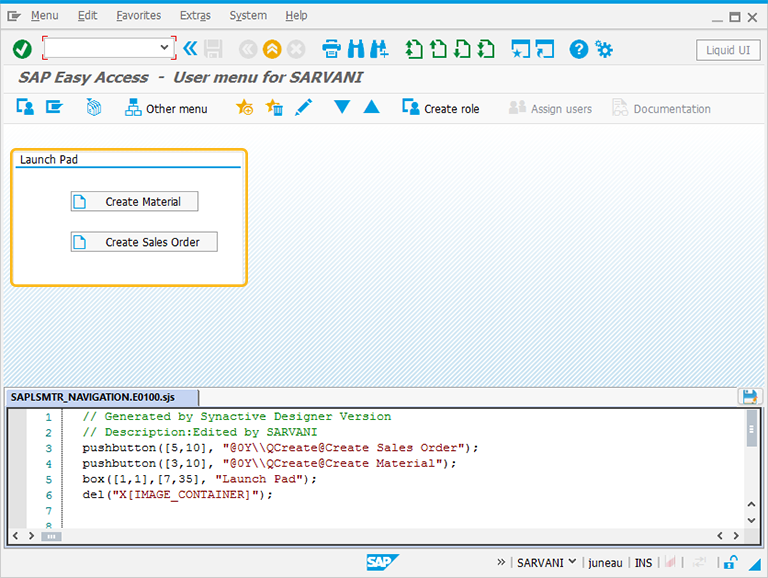
Click the Save icon placed on the right corner of the script editor to save your file.
-
Your new launchpad is now done. Click on the Liquid UI button again to view the Launch Pad screen. Log out of SAP and then log back in to see the changes.