The PDF template transfers data from a PDF form to the corresponding fields in SAP. However, you first must edit the PDF form before you can successfully transmit data to SAP. In order to edit the forms, you must have Adobe LiveCycle Designer 8.2 or above. LiveCycle Designer is integrated into Adobe Acrobat Professional 9.0 and above. To enter data into the PDF form, you will need the following application:
- Adobe Acrobat Reader 9.0 or above
Note: PDF functionality is not available with the following versions of Web Server: 1.2.145.0 - 1.2.150.0
To run a PDF script, please do the following.
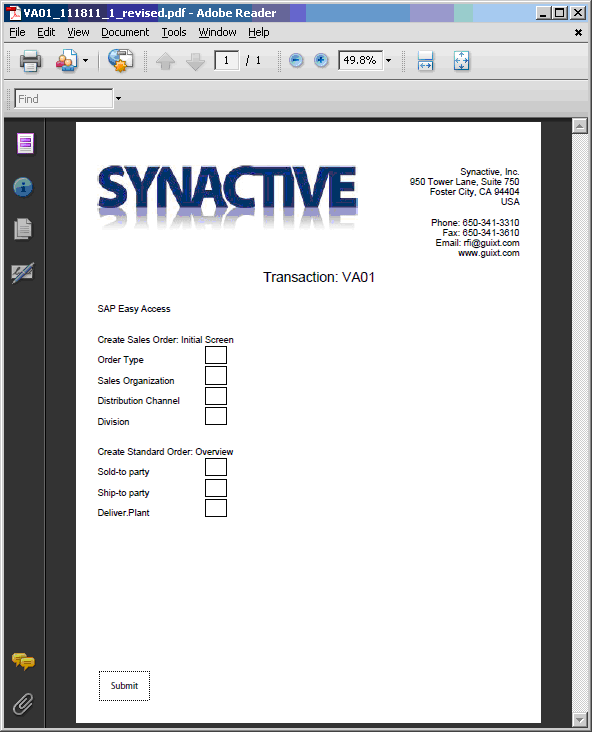
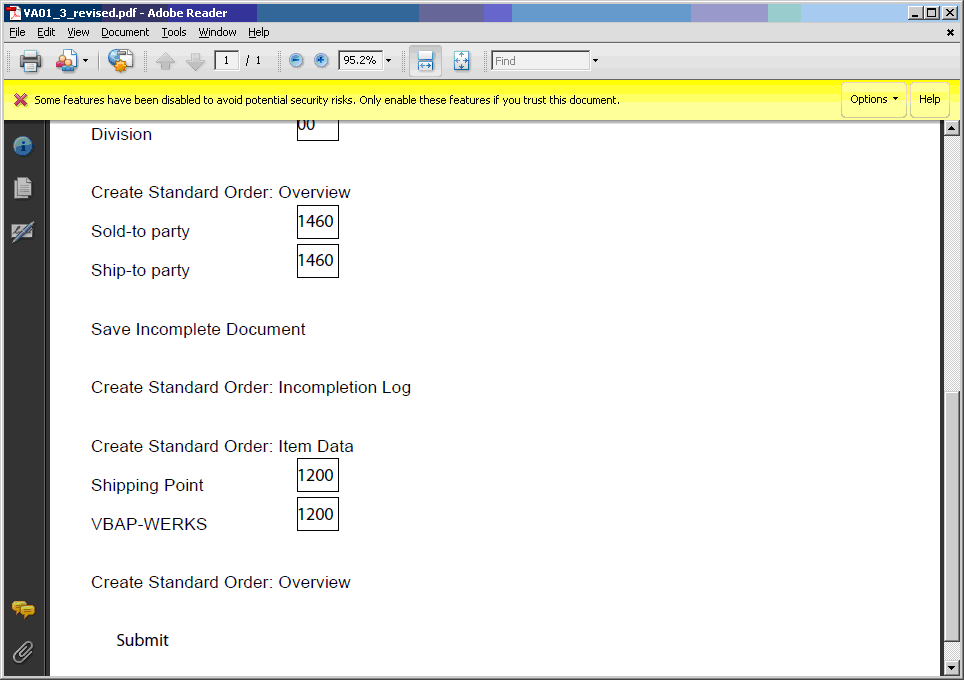
- Open the PDF form, and enter the data to be uploaded. Then click the Submit button as shown in the example form below.
Note: PDF forms can be modified for style after they are created, but the generated forms will be very basic as in the example.
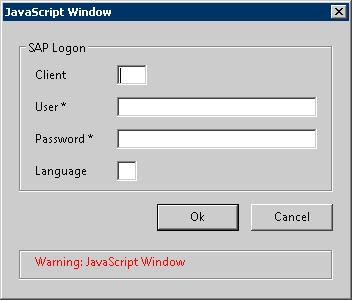
- A dialog box as shown below will appear asking for the user's SAP login credentials. Enter the SAP username and password and click 'OK'. The SAP client number and language can also be specified if you wish.
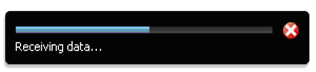
- Once you click the Submit button, a progress bar will appear in the lower right corner of the PDF form as shown below.
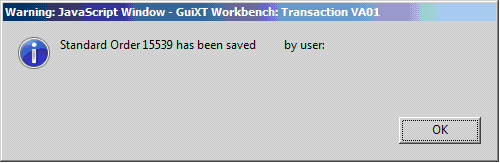
- Once the data has been successfully uploaded to SAP, another dialog will display as shown below. This dialog will contain the identification number of the newly created record and the SAP username of the whomever created the record. Click OK to close this dialog window.
Note: The username has been deleted in this example.
- In some PDF forms, this message will not appear after the first attempt to upload data to SAP. Instead, a yellow bar will appear at the top of the PDF form as shown below, stating that some features are disabled.
- To resolve this issue and successfully upload the data to SAP, click the Options button in the yellow bar. A dialog containing two choices will appear as shown below.
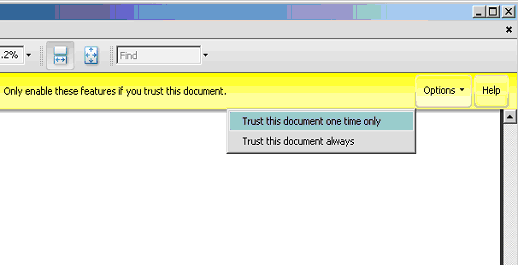
- Select the Trust this document always option, then click the Submit button again. This time, the upload should complete as intended and the dialog containing the new order number will appear, marking a successful upload.


