Liquid UI - Documentation - 4.1.4.2 Creating Offline UI for SAP Using Workbench

4.1.4.2 Creating Offline UI for SAP Using Workbench


The Offline UI script, as previously introduced, performs two main functions, which are as follows.

  • Generates the screens for Offline
  • Performs the data upload and download to the GuiXT Server. The communication between the GuiXT Server and the SAP system is performed by the Offline Synchronization script previously described.

To run an Offline UI script, please do the following.

Note: You must have the Offline Synchronization script as well in order to successfully complete an Offline data transfer. The UI scripts only paint the screens on the Offline device and upload data to the GuiXT Server.
  1. Open the MB1A transaction you previously recorded and used to create the Offline Synchronization script. Make sure that the transaction type is set to 'Create'.
  2. Click the Offline UI Template button to generate the script.
  3. Rename the script to the following: 'MB10_menu.js'
  4. Use Microsoft ActiveSync to move the script to the Offline script folder.

    The script folder location will differ depending if the target is a laptop or a handheld. These locations are as follows.

    • Laptop script folder: C:\Program Files\Synactive Inc\GuiXTOffline\Desktop\SynScript.
    • Handheld script folder: \Program Files\GuiXTOffline\SynScript.
  5. In the 'config.js' file in the Offline script directory, change the following entries as shown below.
    • SR3SetStartupTransaction: MB1A_menu
    • SR3OnlineEntryTCode: mb1a
  6. Save your changes and close the 'config.js' file.
  7. Go to the 'SynR3.js' file also located in this directory and verify the following settings.

    If the settings in your SynR3.js file do not match, please change them. The SynR3.js settings should be as follows.

    SR3_OnlineEntryTCode = "mb1a";
  8. Ensure that the GuiXT Server and the Offline server both are running, and then launch and log into Offline. The following screen should display.

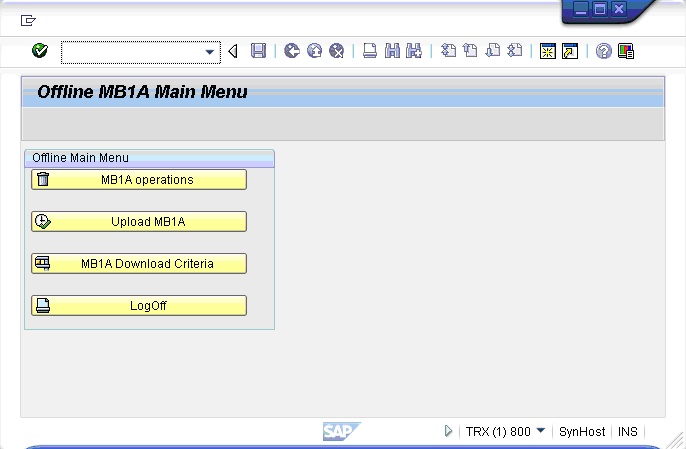
  9. Click the MB1A Operations button. The following screen will display.

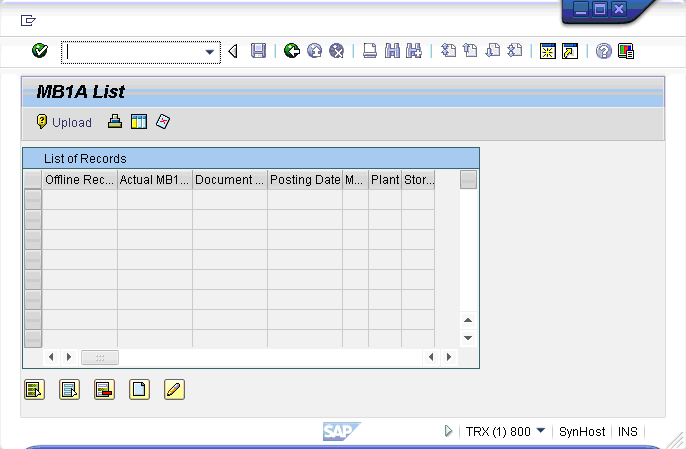
  10. Click the Create Entry icon shown below.

  11. The following screen will display.

  12. Enter the following data.
    Document Date

    11.22.2006

    Posting Date

    12.22.2006

    Movement Type

    531

    Plant

    1000

    Storage Location

    0001

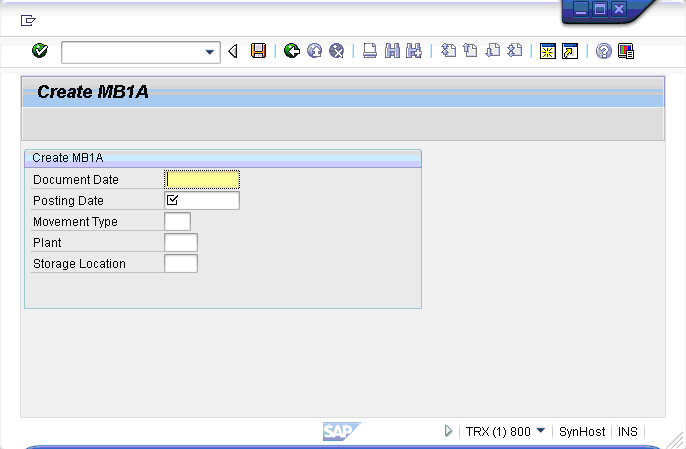
  13. Click the Save icon shown below.

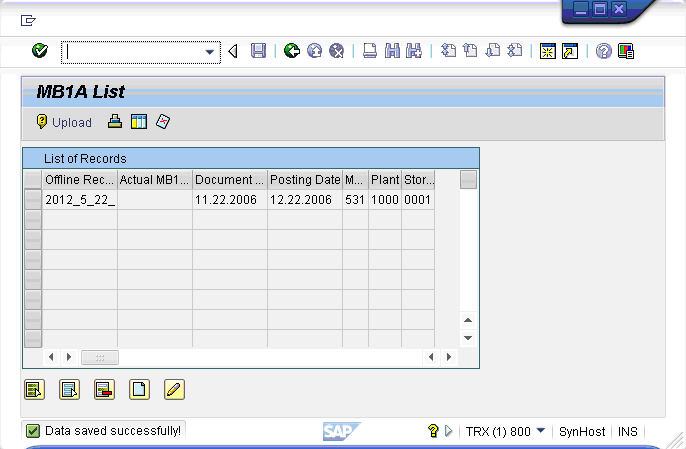
  14. The new record will display in the list screen as shown below.

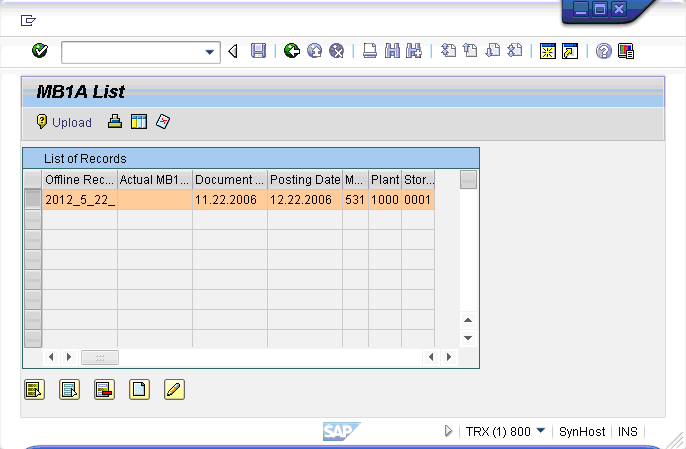
  15. Click one or more rows to select them for uploading. You can also click the Select all icon shown below to select all populated rows in the table.

  16. The selected rows will now appear as follows.

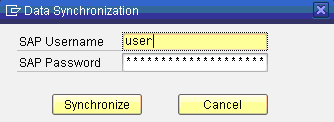
  17. Click the Upload button. The SAP login dialog will display as shown below
    Note: Make sure that the Offline Synchronization scripts have already been placed on the GuiXT Server. If they are not there, the upload operation will fail.

  18. Your user name should already be populated. Enter your password and click Synchronize. The upload process will start and the data will be uploaded to SAP. In our example, no 'success' message is displayed - we are only displaying failure messages.
  19. You have now suxccessfully uploaded the data to SAP.

Can't find the answers you're looking for?