Editing Recordings
Once a SAP transaction has been recorded in Workbench, users can subsequently merge those screens to create new transactions. Users can also check or uncheck fields to specify their inclusion or exclusion from a generated script. This functionality is available once a recording has been either completed or saved in Workbench. Screens can be merged either with the preceding or the following screen, under the following rules:
- Not all screens can be merged. If a screen cannot be merged, the Merge option will be unavailable. The 'Unmerge' option will not be available if a screen cannot be un-merged.
- The first recorded screen (screen zero) cannot be merged to a previous screen and the final screen recorded cannot be merged with any subsequent screen.
- In order to merge a screen, both screens must have the same screen name and number. Any actions that you performed on the screens to be merged must also match. For instance if the SAPMV45A.E4001 screen is recorded twice but one such record has an enter action and one does not, you cannot merge the two screens even though they otherwise are identical.
In the following section, we will explain how to merge and unmerge previously recorded screens.
Merging Recorded Screens
-
Click the Record button to stop the recording if you have not already done this. Then save the recording.
-
Right-click on the screen to be merged and a context menu will appear as shown below:
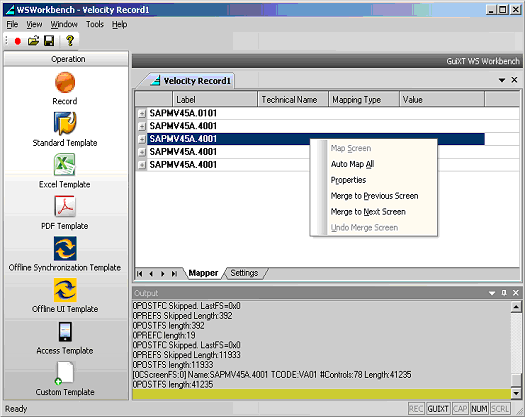
-
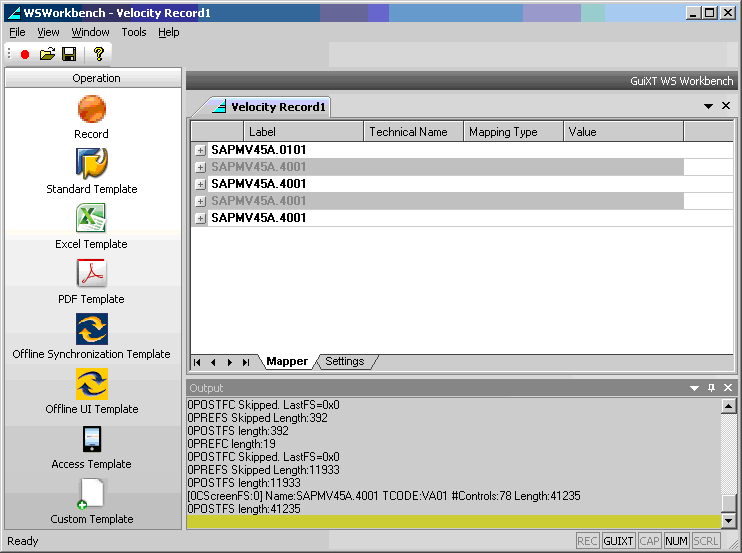
There are four instances of a SAPMV45A.E4001 screen in our example record. Since we have selected an instance that is neither the first nor the last, we either can merge this with the previous screen or the subsequent screen. We will choose to merge the first instance with the second and the third instance with the fourth. This results in the following appearance:
-
The duplicate screens are now merged, leaving us with one screen where we can make any necessary modifications before we save the recording. Note that the screens we merged are now grayed out, providing clear proof that they are no longer editable.
Un-merging Screens
Even after you merge screens, you can still edit them if you reverse the merging operation. This operation also can be done in Workbench. To un-merge a screen once you have merged it with another screen, please do the following.
-
Open the recording that contains the merged screens.
-
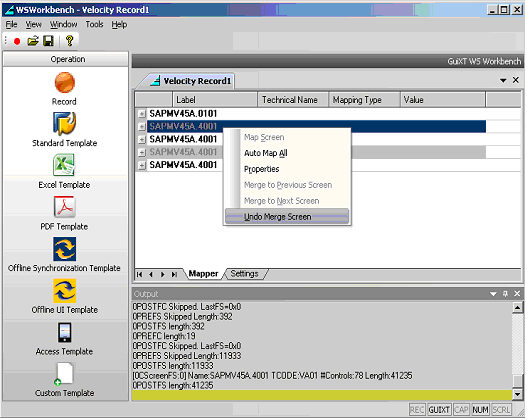
Right-click on the previously merged screen and select the Undo Merge Screen option from the context menu as shown below.
-
Workbench will reverse the merge operation and the previously merged screens will now be available for editing


