Purpose
With the image() command, you can display images on the SAP screen or toolbar. These images provide a recognizable context for users, help navigate within the screen, and allow customization of specific screens. They can also convey useful information, particularly when they are data-dependent. Moreover, images can be used as links to open various windows, such as help windows, launch webpages, or open files like Word, PDF, and more.

Note: The use of the image is restricted to design scripts - it will not be available in functions.
Prerequisite
Pinnacle.dll is a SAP GUI viewer component, installed in your SAPgui folder. It shows HTML and RTF files in SAP GUI and also runs the image command.
If you find trouble in loading the image on SAP GUI, please update the .dll file to a newer version.
Syntax
You can display an image at the specified row and column on the SAP screen. Here the coordinates (row, column) indicate the upper left corner of the image.
image([startrow,startcol],"Image name",{"options":"value"...});
Note: You can specify the position of the image in different ways. Learn more about positioning the screen elements.
The image command supports the following file types:
- BMP
- GIF
- JPG
- PNG
Note: It is recommended to use the BMP format for small images (e.g. icons) and GIF or JPG format for large images.
Properties
- startrow,startcol - row and column coordinates
- Image name - image filename/path
Available Option
You can use the following options with the image:
|
"nobuffer": true - This option updates an image from the image path instead of reading it from buffer or cache. |
|
|
"nostretch": true - This option maintains the height/width ratio of the original image. |
|
|
"plain": true - This option will remove the 3D frame displayed around the image. |
|
|
"start": "path" - This option adds a link to an image. The path can be a URL or location of the executable file in the local drive. |
|
|
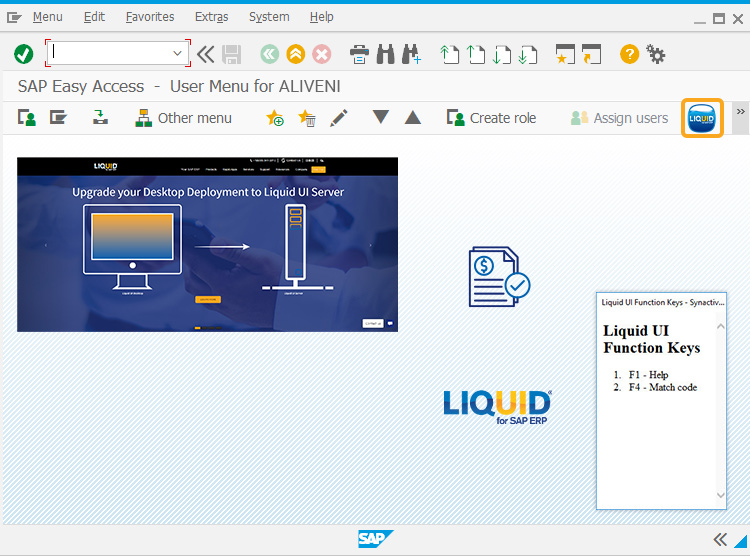
This option will place an image on the SAP toolbar. |
|
|
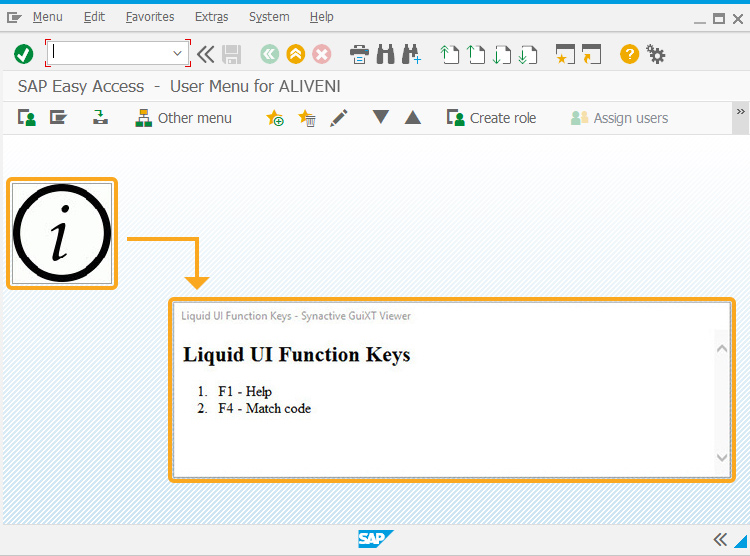
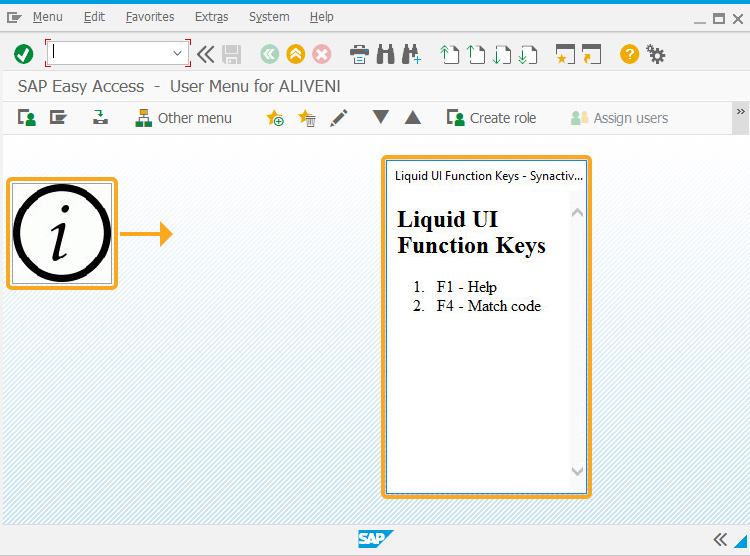
"viewhelp": "HTML/RTF" - You can specify HTML or RTF file. Clicking on the image will display the specified file on the SAP window. |
|
|
"viewhelp_height": "X" - X specifies the height of the window to be displayed. |
|
|
"viewhelp_position":"[row, column]" - Row and column coordinates determine where the viewhelp window appears on the screen. |
|
|
"viewhelp_width":"X" - X specifies the width of the window to be displayed. |
Options Detail


Example
This example demonstrates the usage of the image command. Here we are using the SAP Easy Access screen, to display the following usages of image()
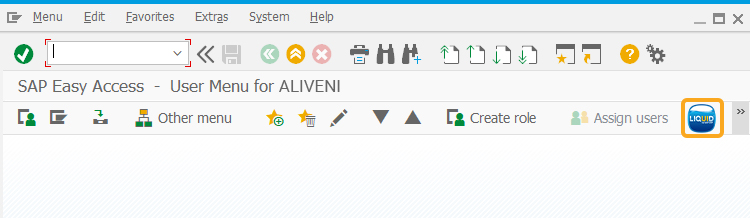
- Image on toolbar
- On image click - navigating to the website
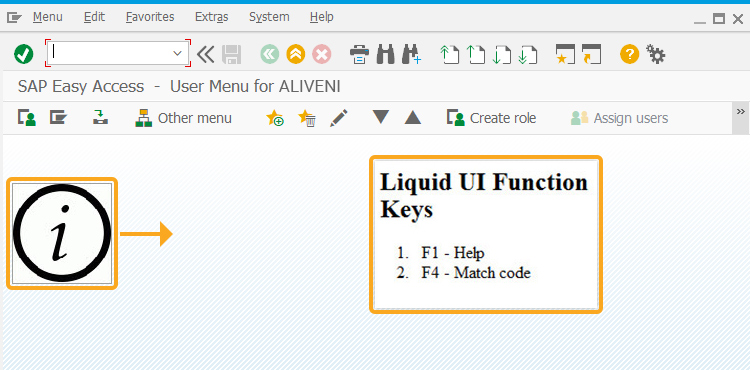
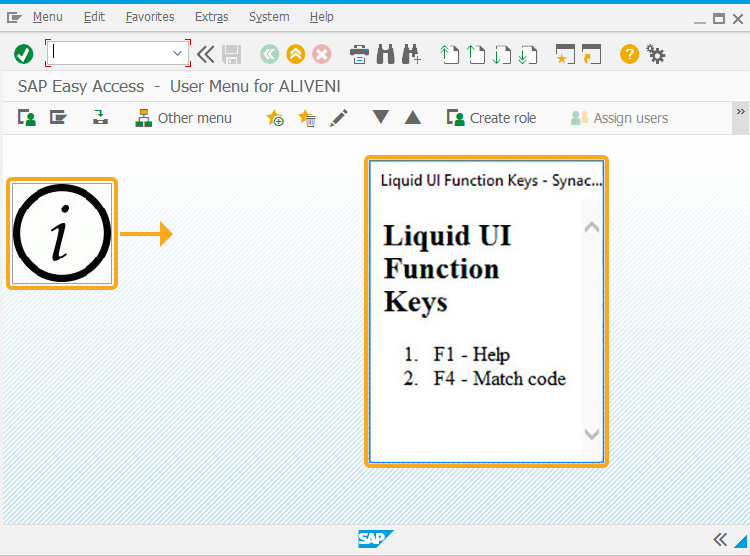
- On image click - viewing help
Script
//Adds URL link to the image
image([4.4,23.7],[13,103.5],"http://www.guixt.com/images/ws_documentation/onscreen.jpg");

//Deletes Image Container
del("X[IMAGE_CONTAINER]");

//Adds image on toolbar and URL link to it
image([TOOLBAR],"http://www.guixt.com/images/ws_documentation/createnotification.jpg/toolbarimage.jpg");

//Adds URL link to the image
image([18,120],"http://www.guixt.com/images/ws_documentation/createnotification.jpg/toolbarimage.jpg",{"viewhelp_height":"15","viewhelp":"E:\\WS Commands Scenarios\\Scripts\\IMAGE\\ViewHelp.html","viewhelp_position":"[15,140]","viewhelp_width":"30"});

image([8,120],"http://www.guixt.com/images/ws_documentation/createnotification.jpg/salesorder.jpg",{"start":"http://www.guixt.com"});
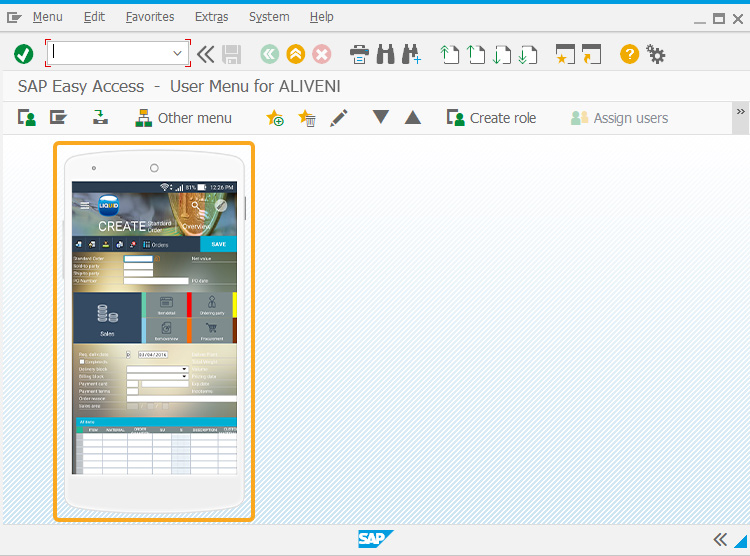
Figure: Image on the SAP Easy Access screen
Tips and Tricks
-
Display images dynamically on the screen
Image command is used to display images on the SAP screen.
image([6,10],"&V[z_mm01_material].jpg",{"nostretch":true});
Learn more about how to display images dynamically on the SAP screen.
-
Data-dependent images
Before the image is loaded, the variables in the image file name can be replaced with their values. Example:
image([1,1],"C:\guixt\orca&F[Material].jpg");
In the input field, 'F[Material]', if the user enters the value '2168', then the filename of the image becomes 'orca2168.jpg.


