Purpose
Liquid UI for Android allows you to attach files right within SAP transactions from your Android device. The attaching file option allows you to include additional information related to a record or transactions directly into the transaction. For instance, in an employee data transaction, you can attach files related to the employee, such as address proof, photo, emergency contact details, PAN card, etc. File formats can be .doc, .docx, .jpg, .pdf, and more. Under the attachment option, you can attach files and view existing attachments within the SAP transactions. The options available in the attaching file feature are listed below.
- Using the inbuilt document viewer, you can view distinct attachment types, such as pdf documents and images without using any third-party application, providing you enhanced security over your information.
- Using the Store business document, you can attach or drag and drop a document to the transaction and save it as a BDS document in SAP.
- Using the Create Attachment, you can upload a new file of any type, such as a document, image, video, or signature, to the transaction.
In this document, you will learn how to attach, view, and download different types of files within an SAP transaction using the Liquid UI for Android app. Here, we are using the IW32 transaction to walk you through the process.
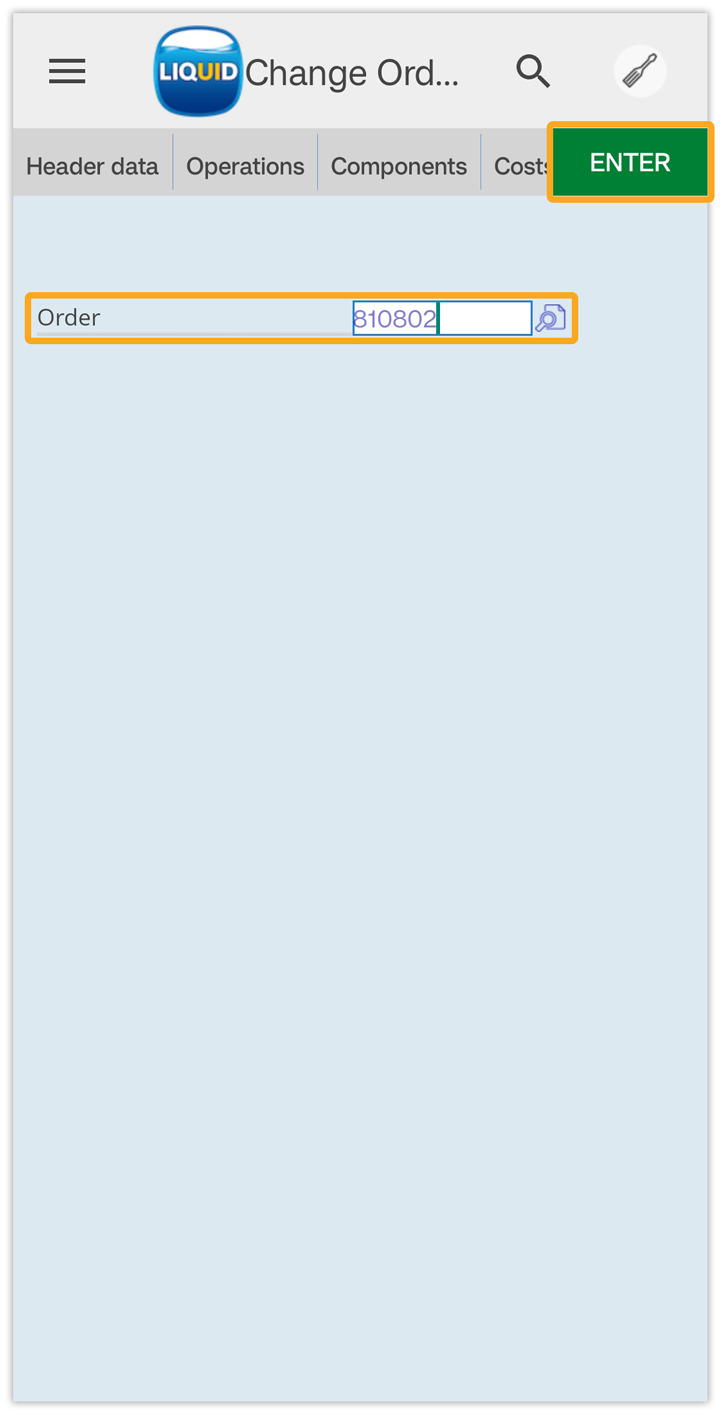
- Log in to SAP and navigate to the IW32 (Change Order: Initial Screen) screen. For instance, enter the order number 810802 in the Order Input Field and click Enter.
- Click the attachment icon located on the upper right-hand side of the screen. Then, you will navigate to choose an object screen, as shown in the image below.
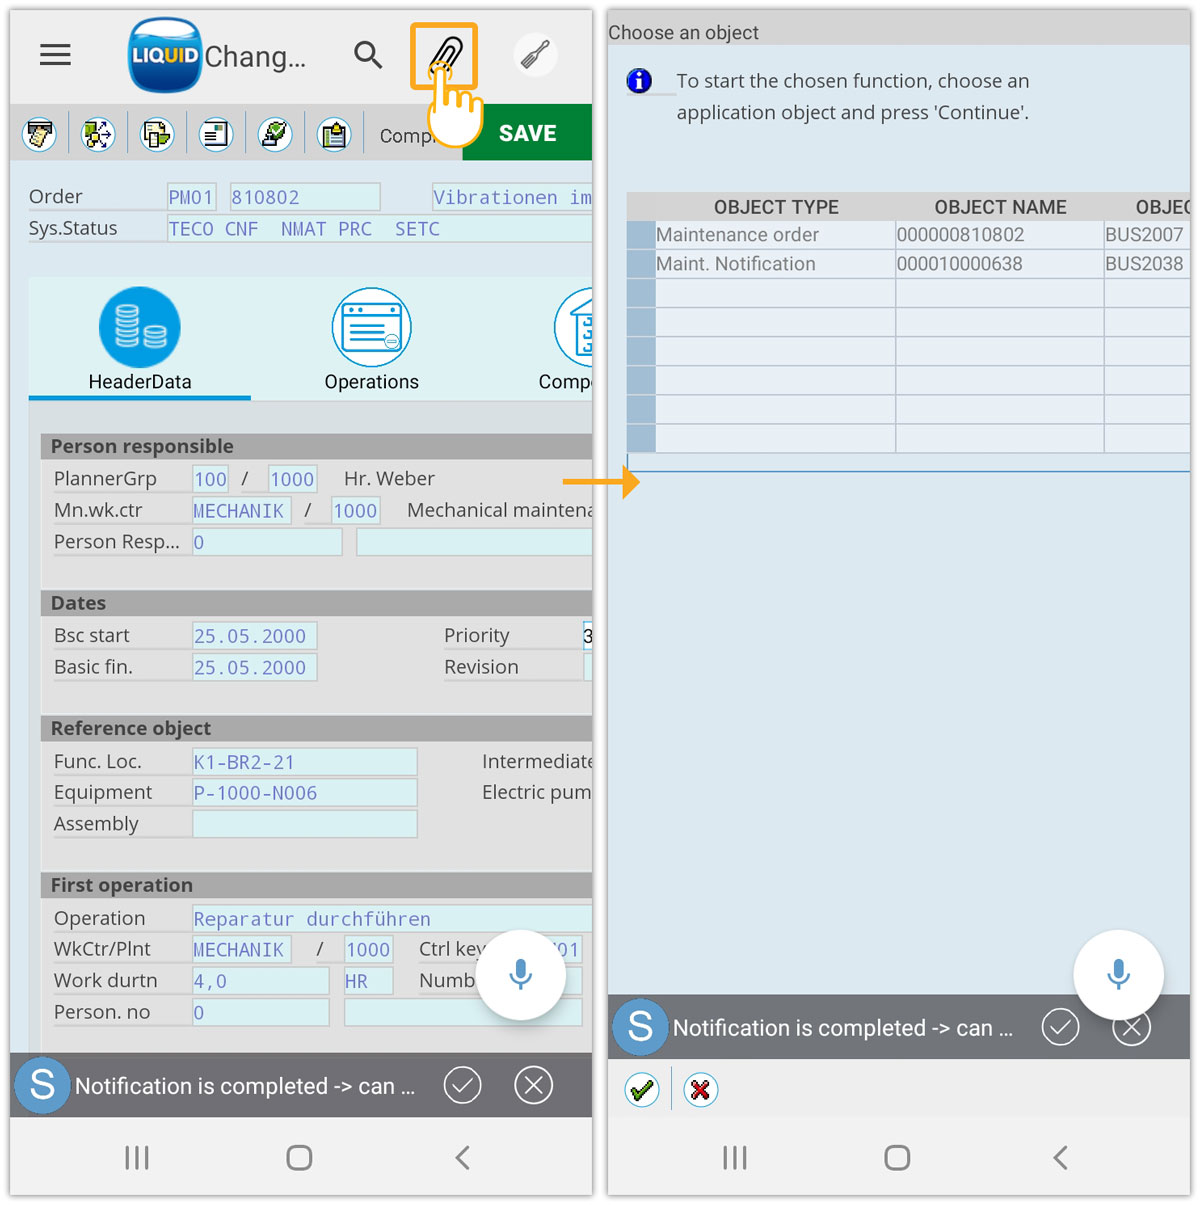
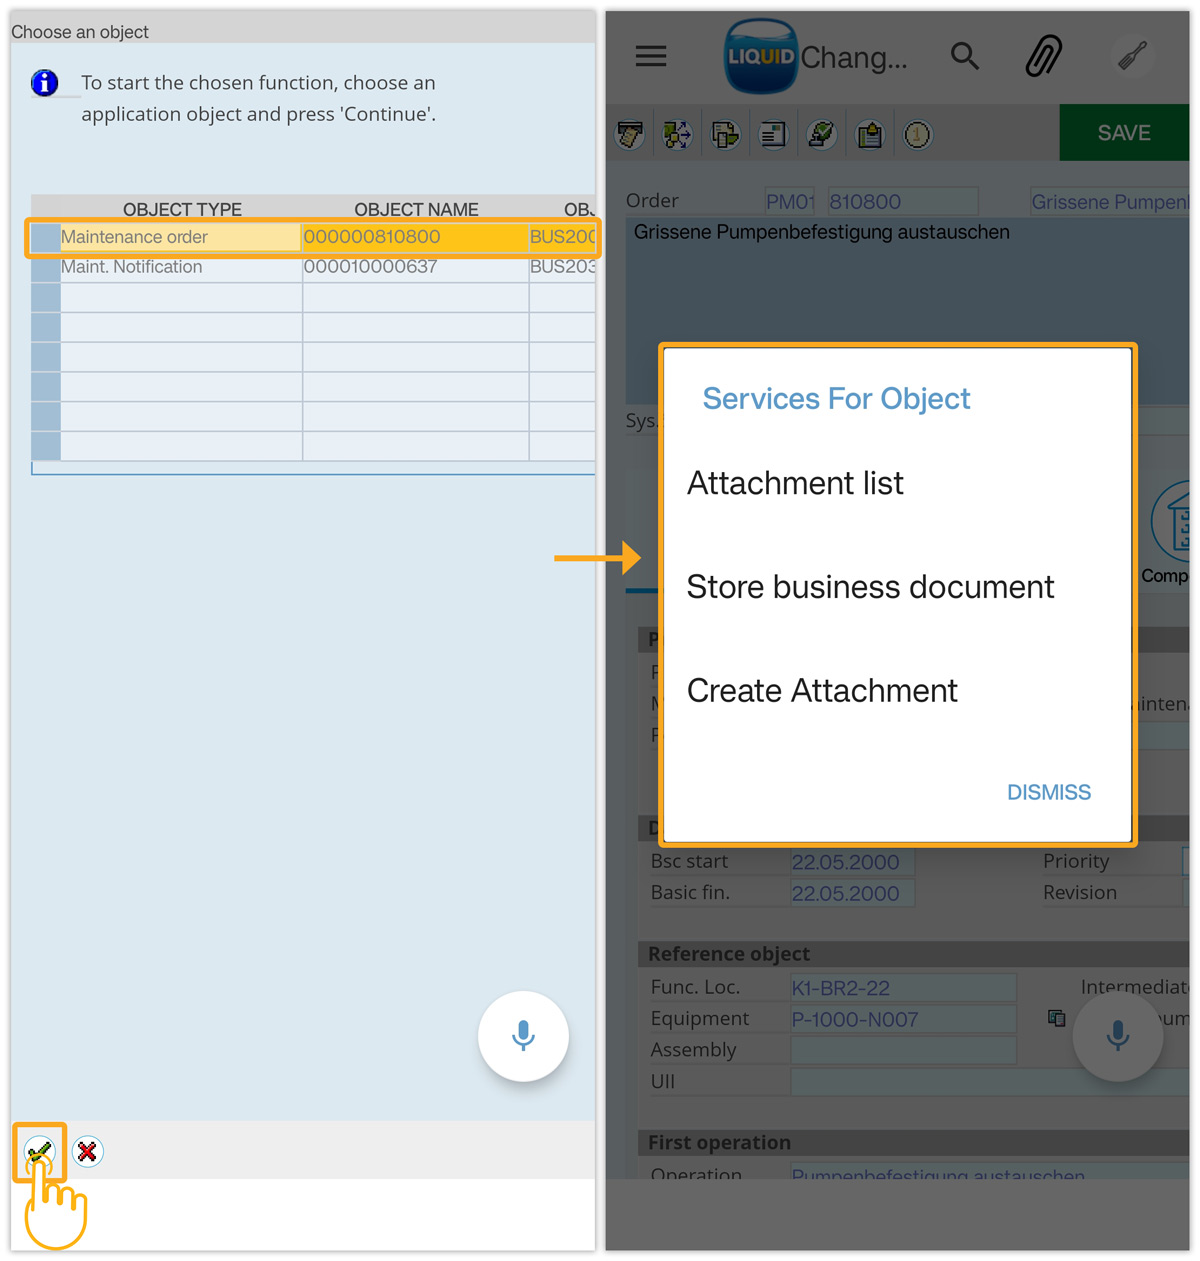
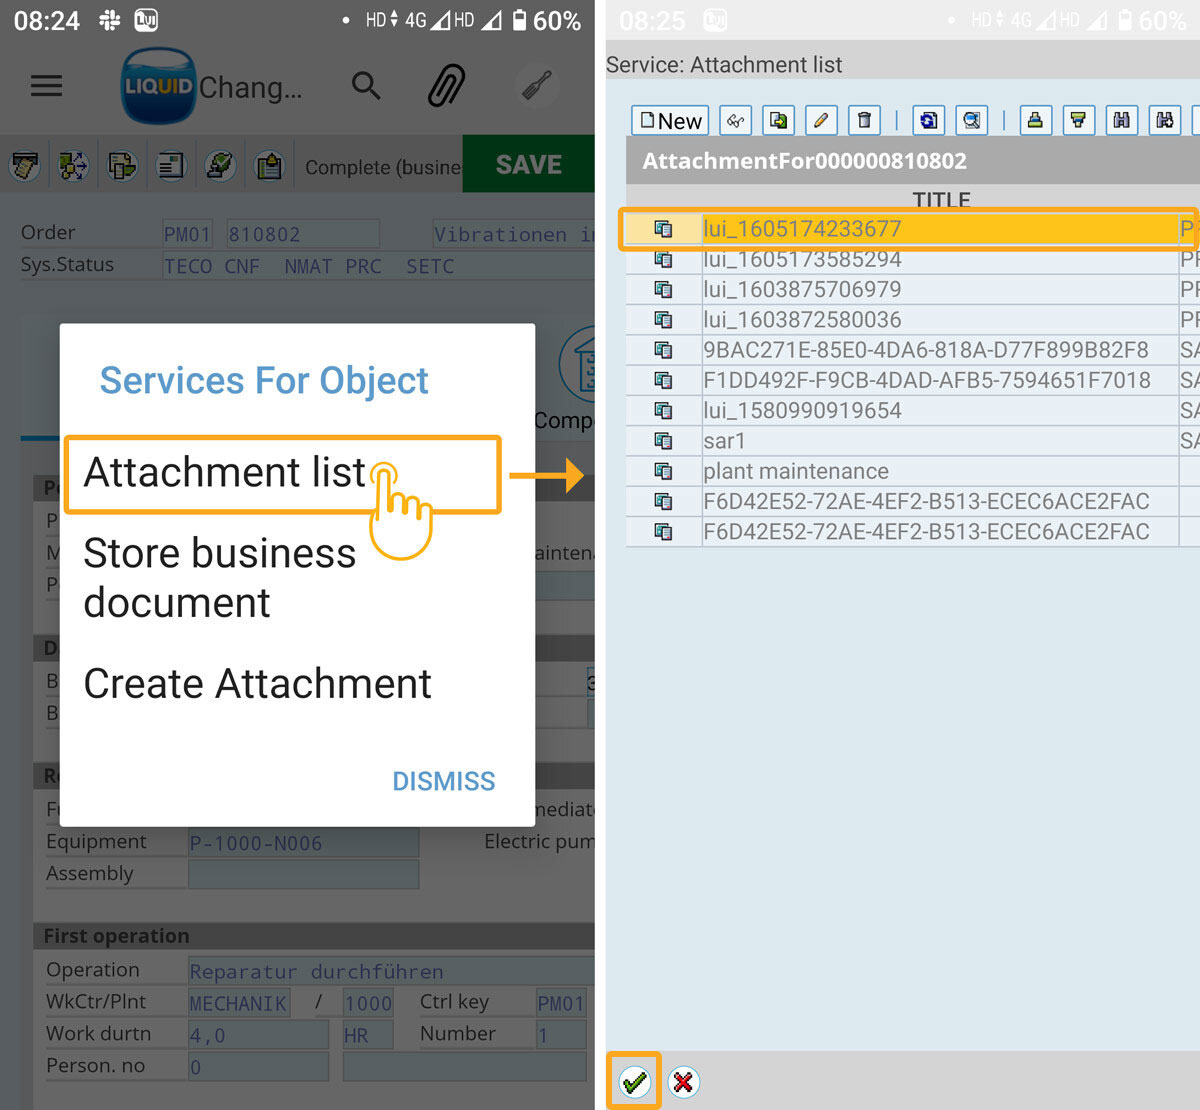
- Select an object type to initiate the file attachment process, and press the continue button. Next, it displays the Services For Object context menu with the following options.
Let's dive deep into each of these options.
Attachment list
Using the Attachment list option, you can view the file from the existing list of attachments, including pdf documents, images, and more. For better understanding, we'll guide you through the following steps.
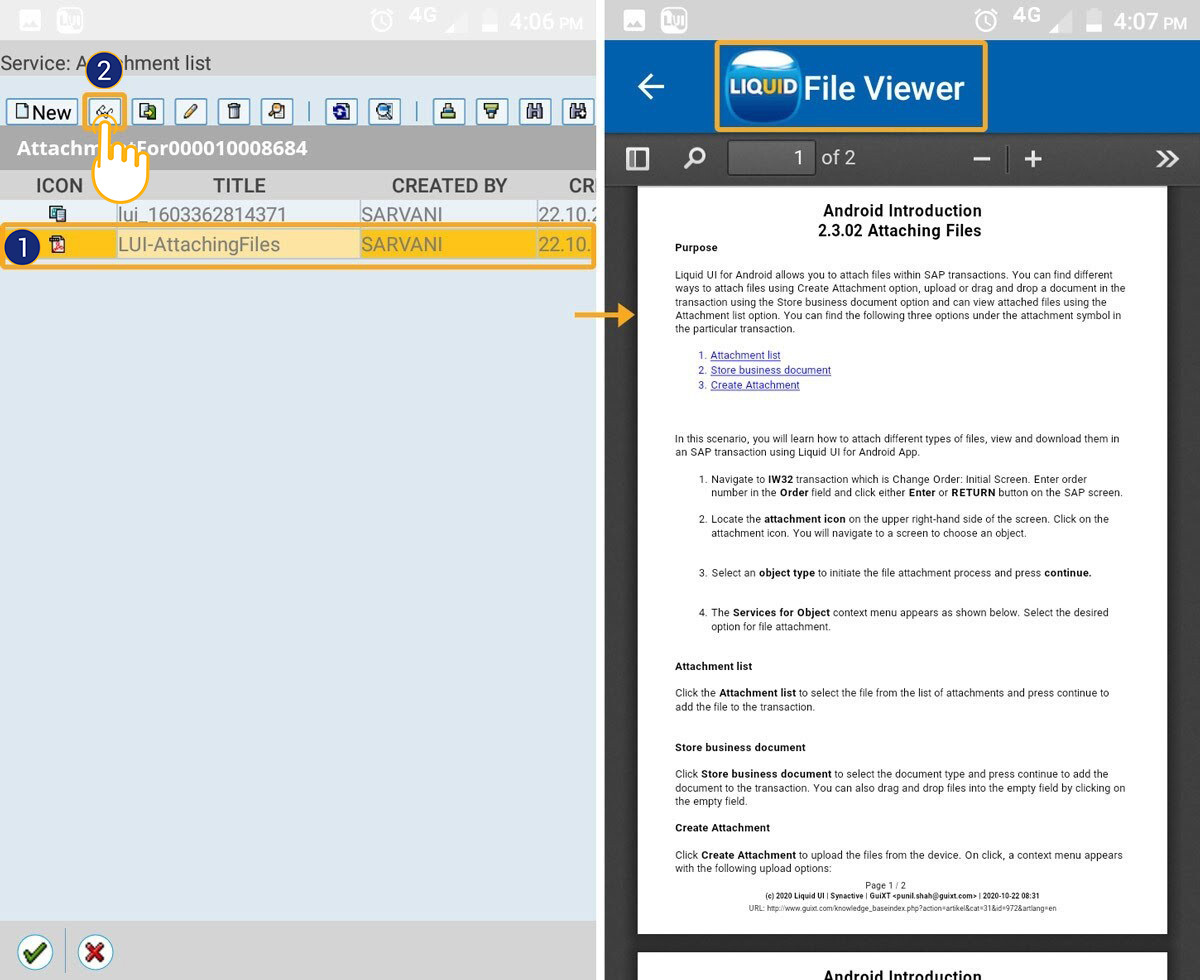
- Click on the Attachment list option, select the file you want to add, and then press continue, as shown below.
- You can view the attachments right away inside the app using the inbuilt document viewer without using any third-party application. When you click on any attachment, that specific file will appear on the File Viewer screen.
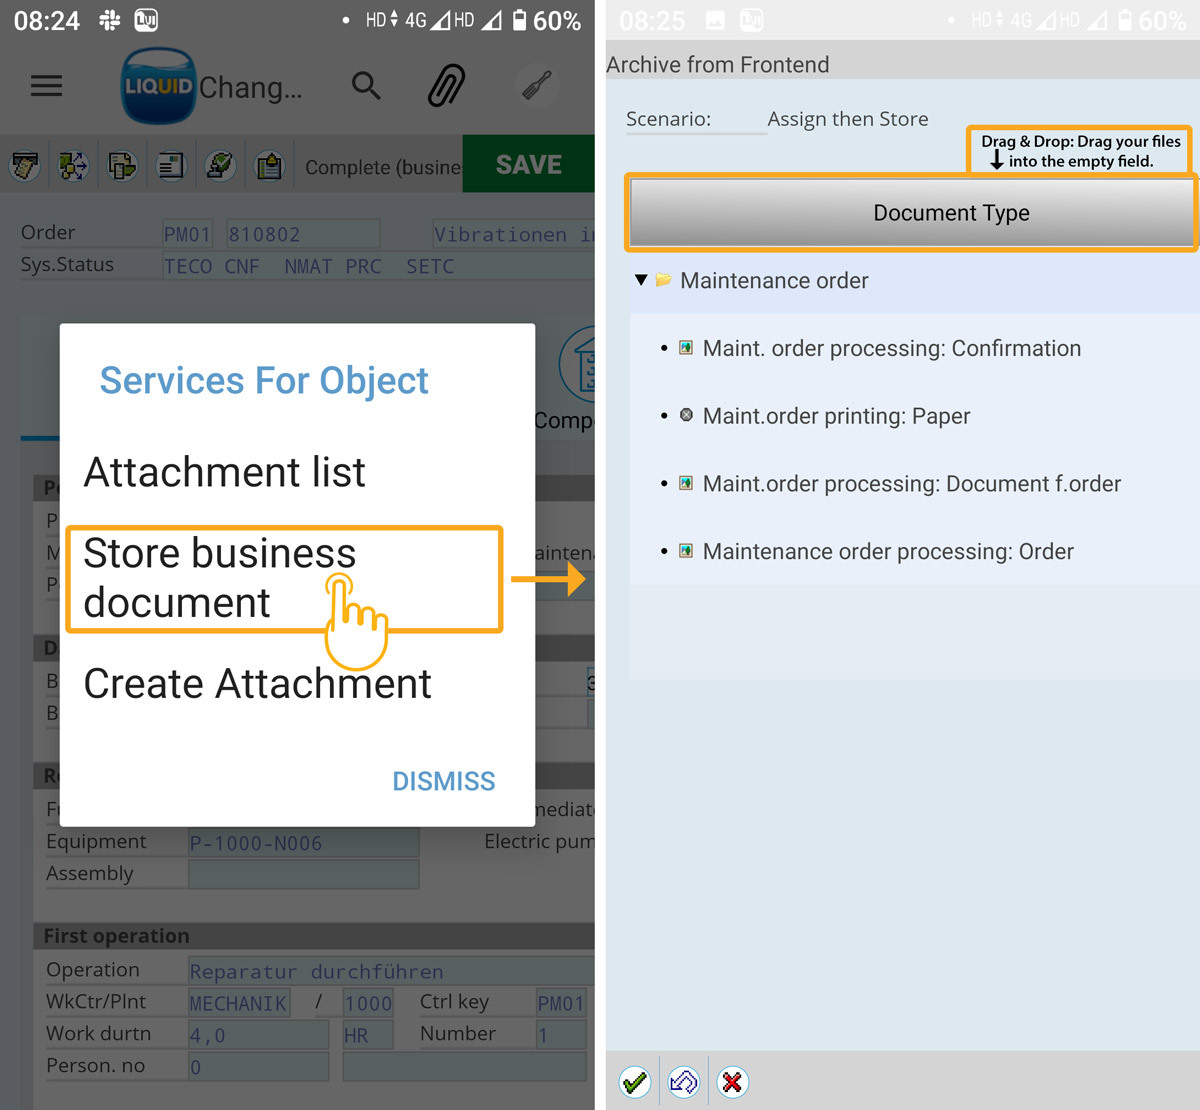
Store business document
Click the Store business document to select the document type, and press continue to add the document to the transaction. You can also drag and drop files into the empty field by clicking on it.
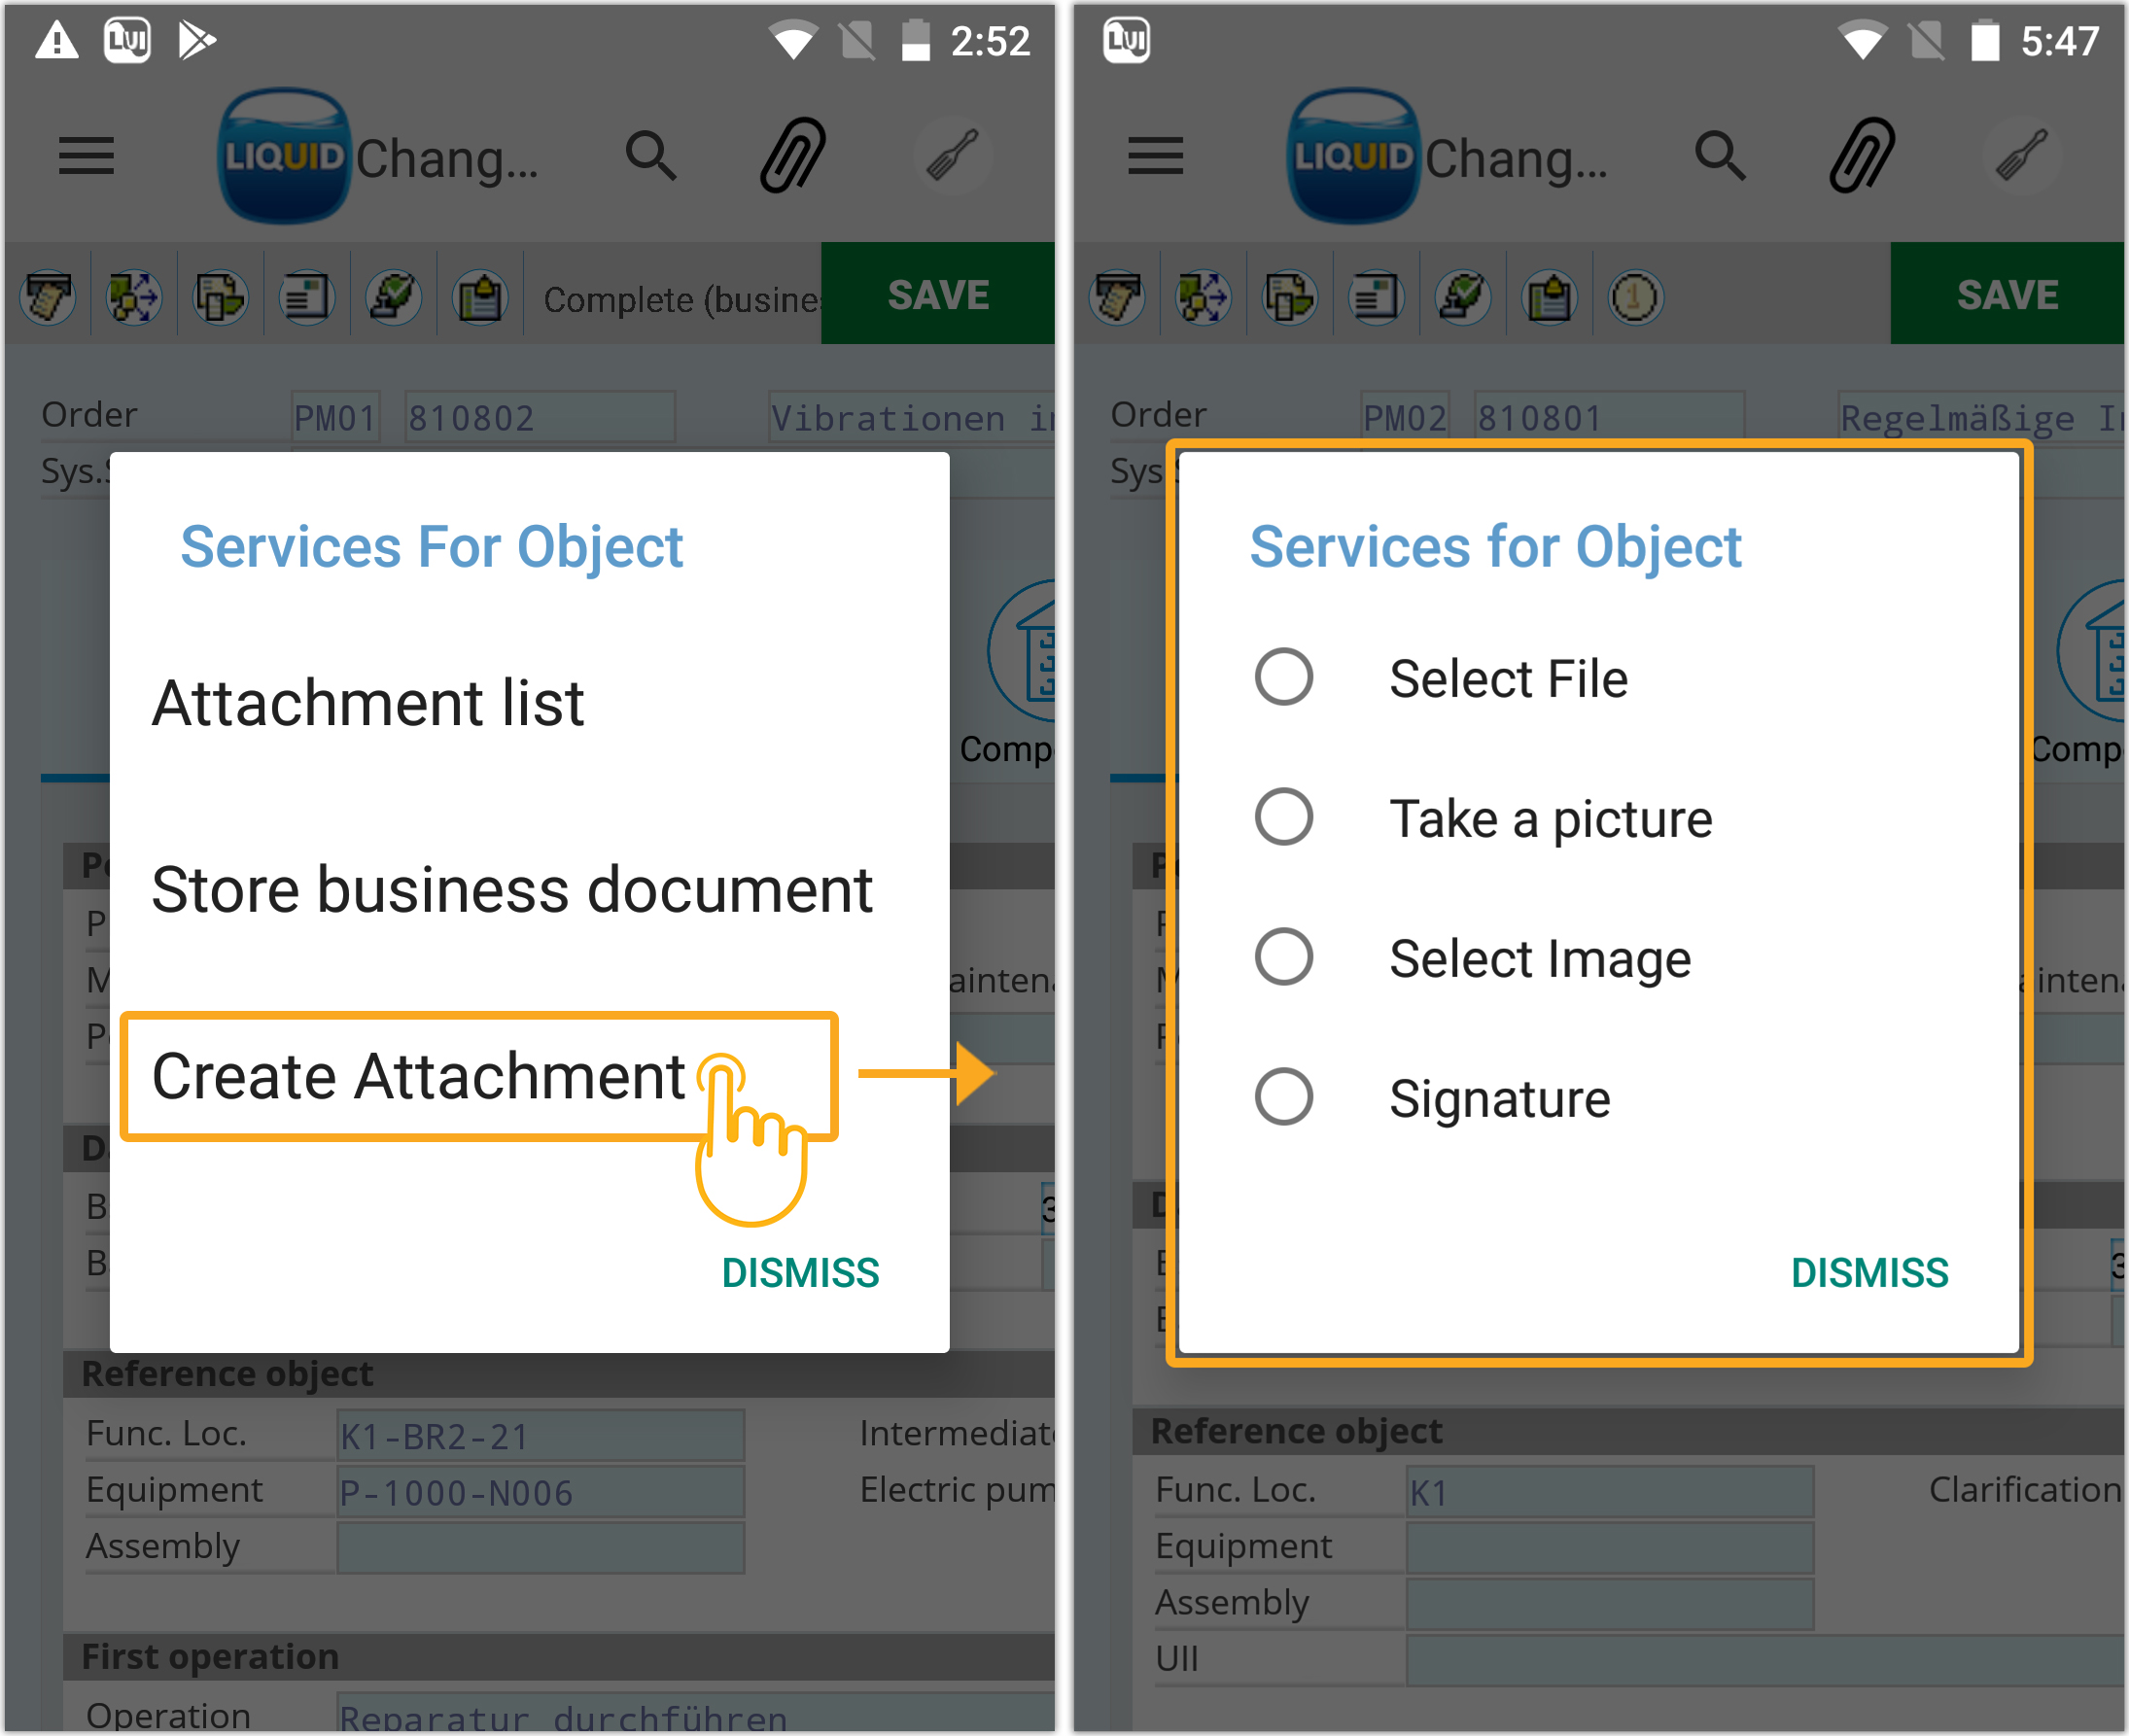
Create Attachment
Click Create Attachment to upload the files from the device. This displays, a context menu with the following upload options:
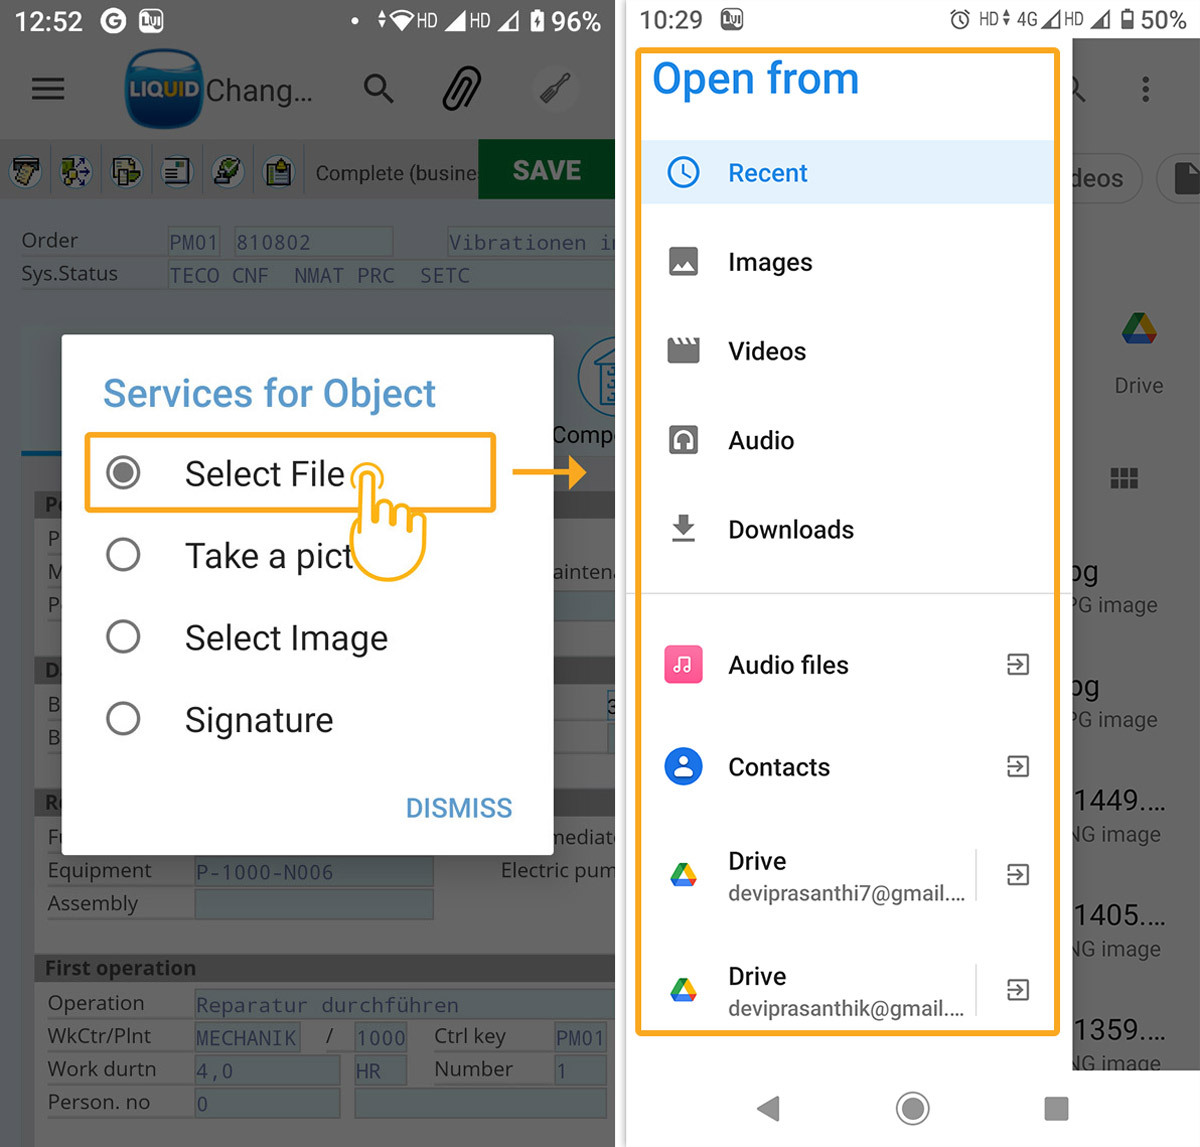
- Select File
- Take a picture
- Select Image
- Signature
Select File
Choose Select File to upload an existing file from your device. This option allows you to upload multiple attachments like audio, video, or text-related files from your device, cloud storage like Google Drive, and external memory.
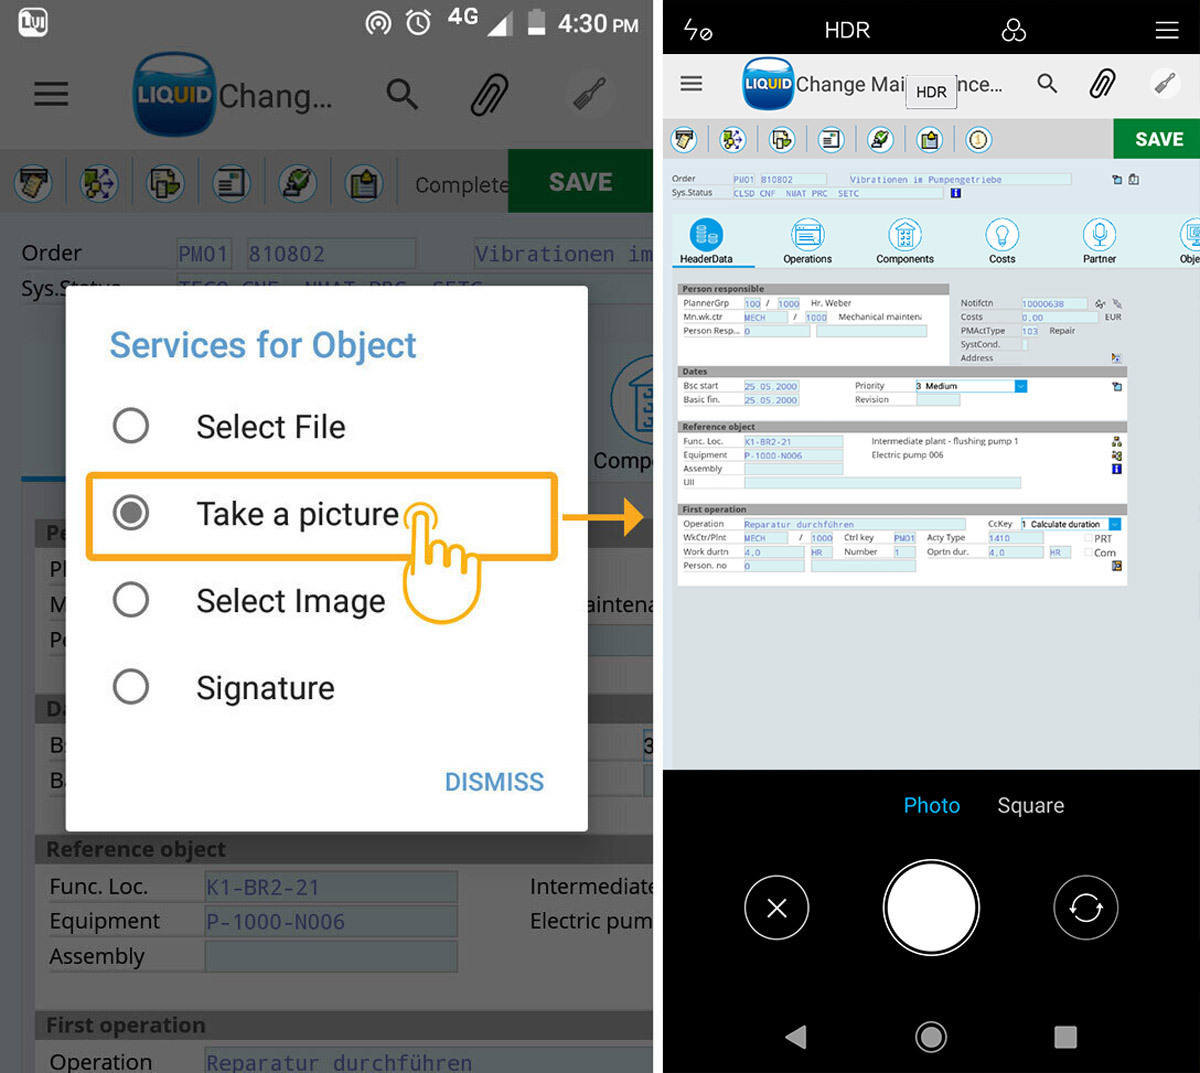
Take a picture
To demonstrate the Take a picture option under Create Attachment, we’ll guide you through the following sequence.
- Choose the Take a picture option to capture and upload the image using the device’s built-in camera, this enables the camera where you can click the picture and upload it instantly.
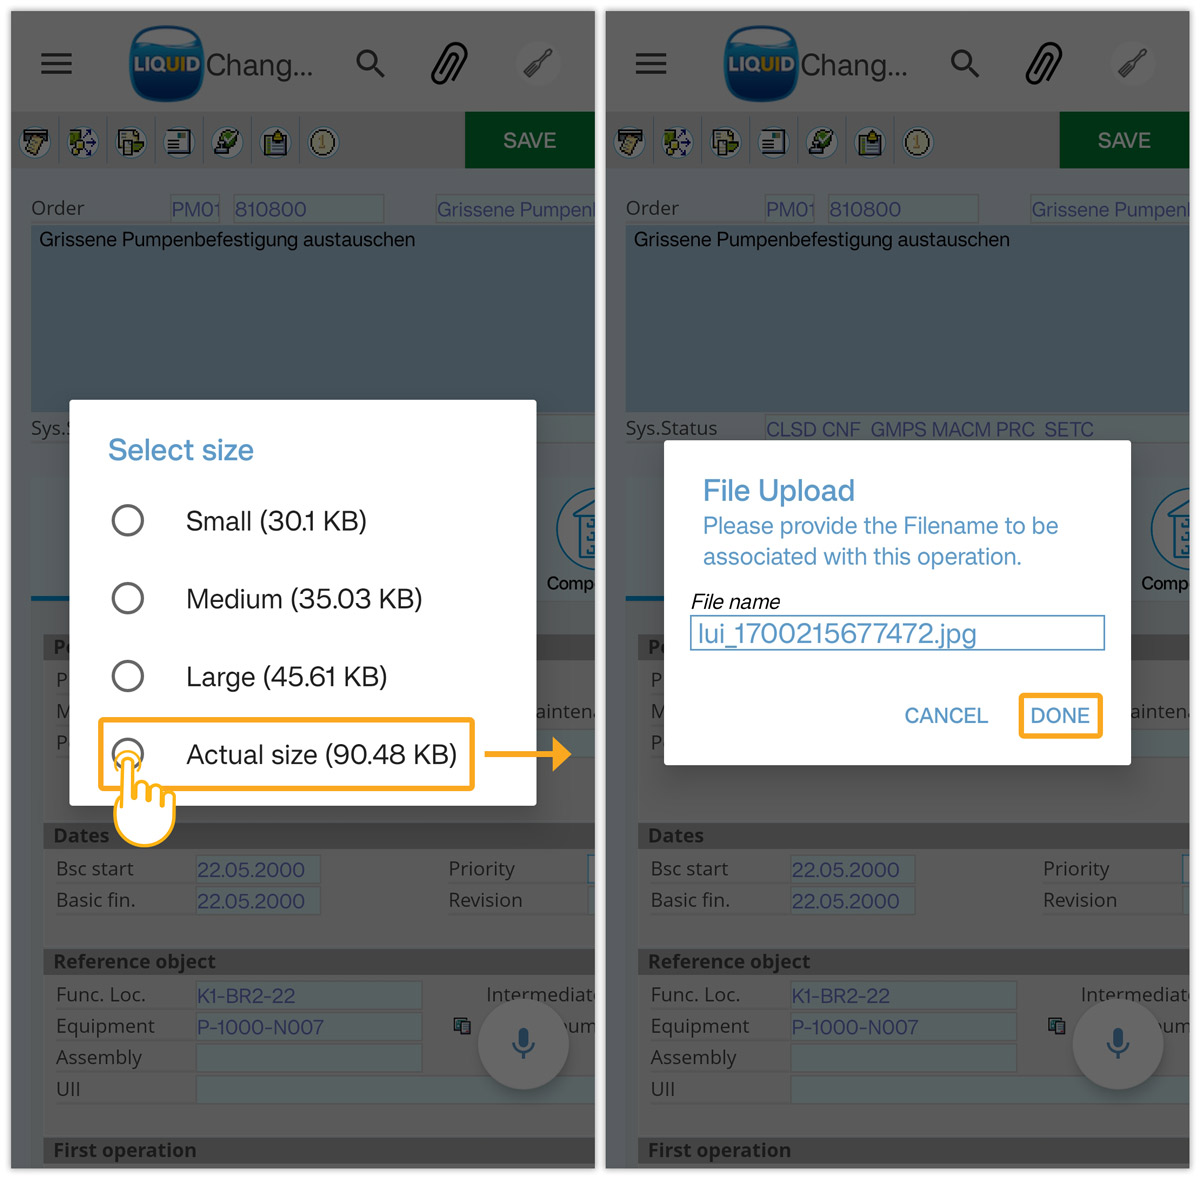
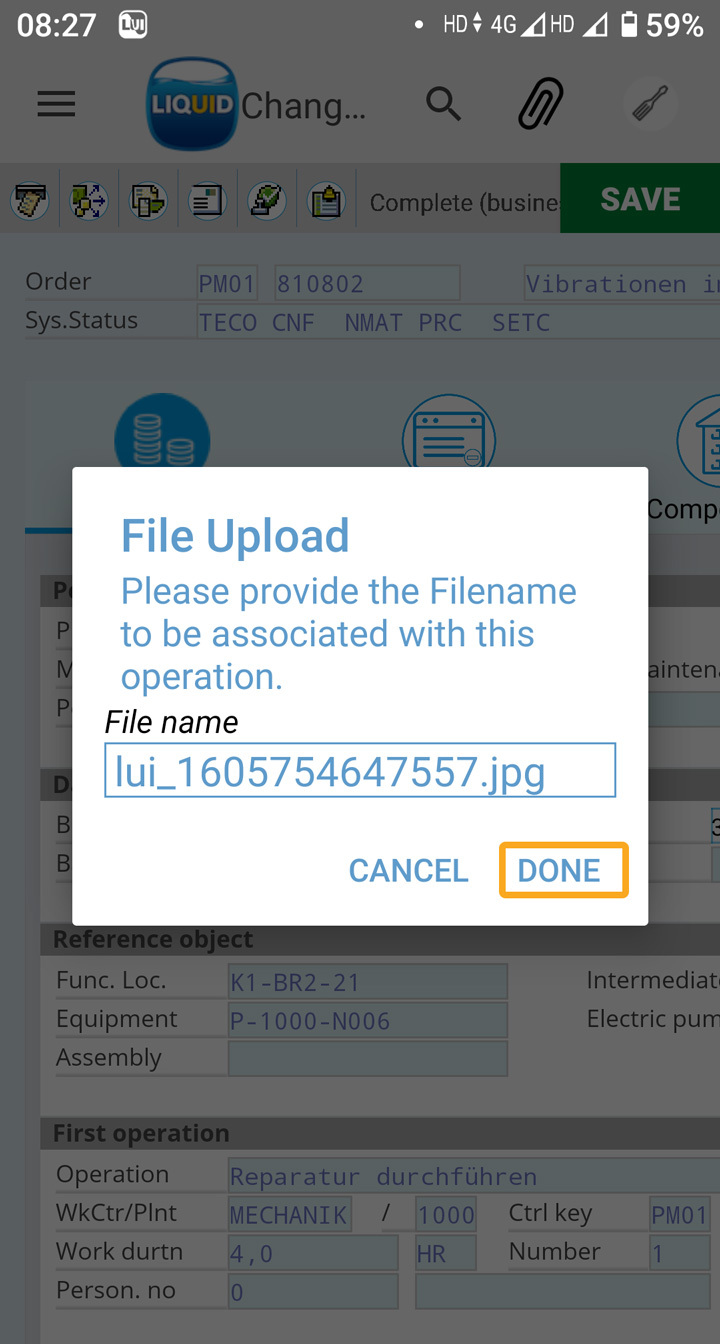
- Choose the image size using the size options according to the requirement, as shown below. Then a pop-up appears stating to provide the file name, change the file name as per your naming convention, and click DONE to save.
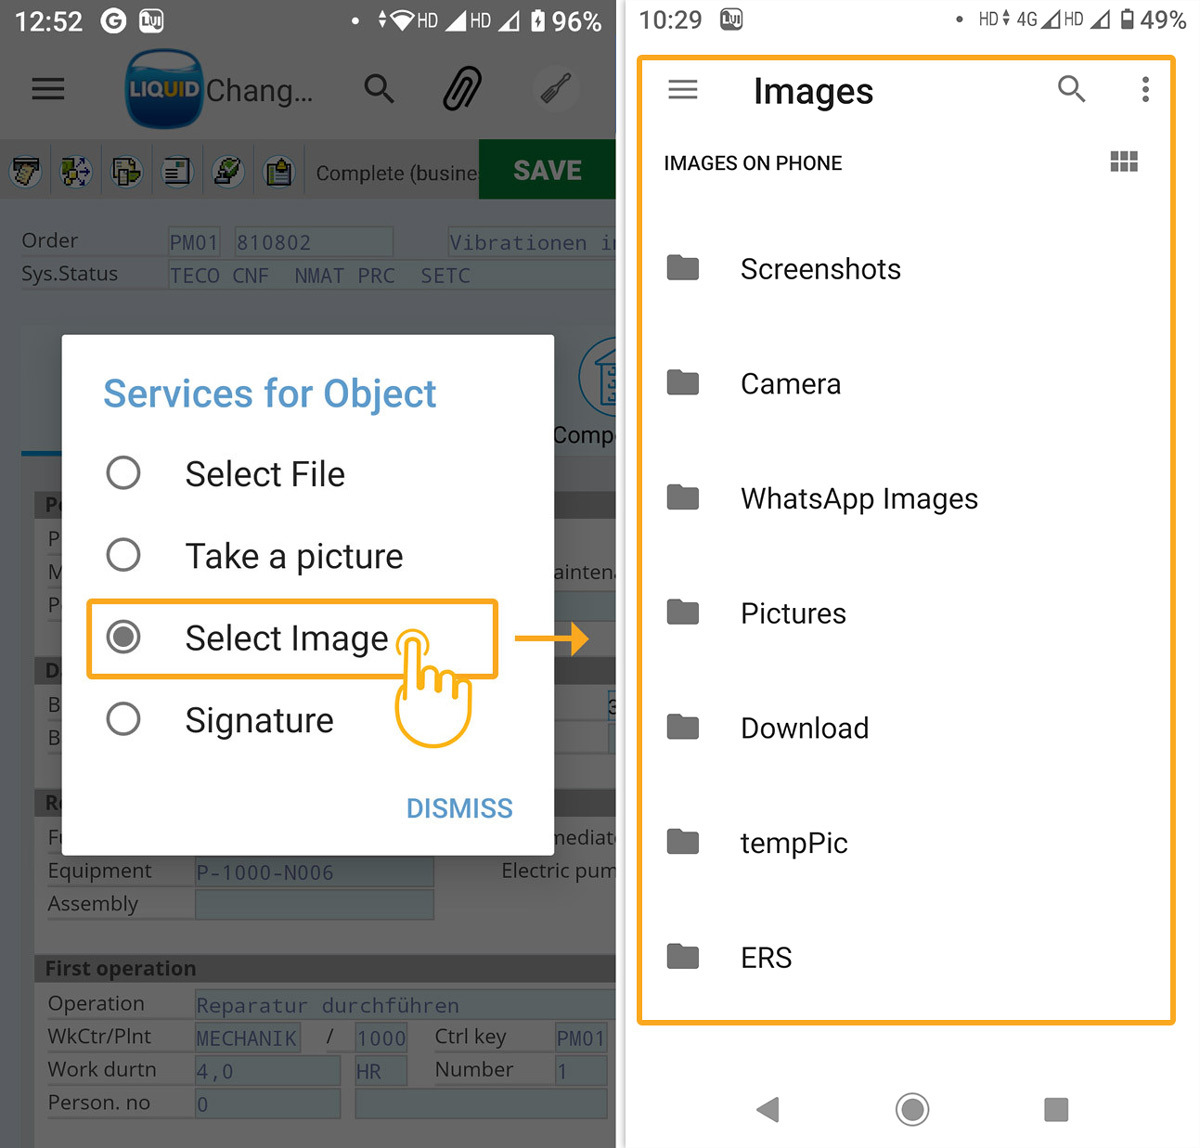
Select Image
Using the Select Image option, you can upload the images from the gallery. For a better understanding, we'll guide you through the following sequence for better understanding.
- Choose the Select Image option to upload an image from the device gallery.
- You can change the filename as per your naming convention. Next, click DONE to save, this uploads the file to the transaction.
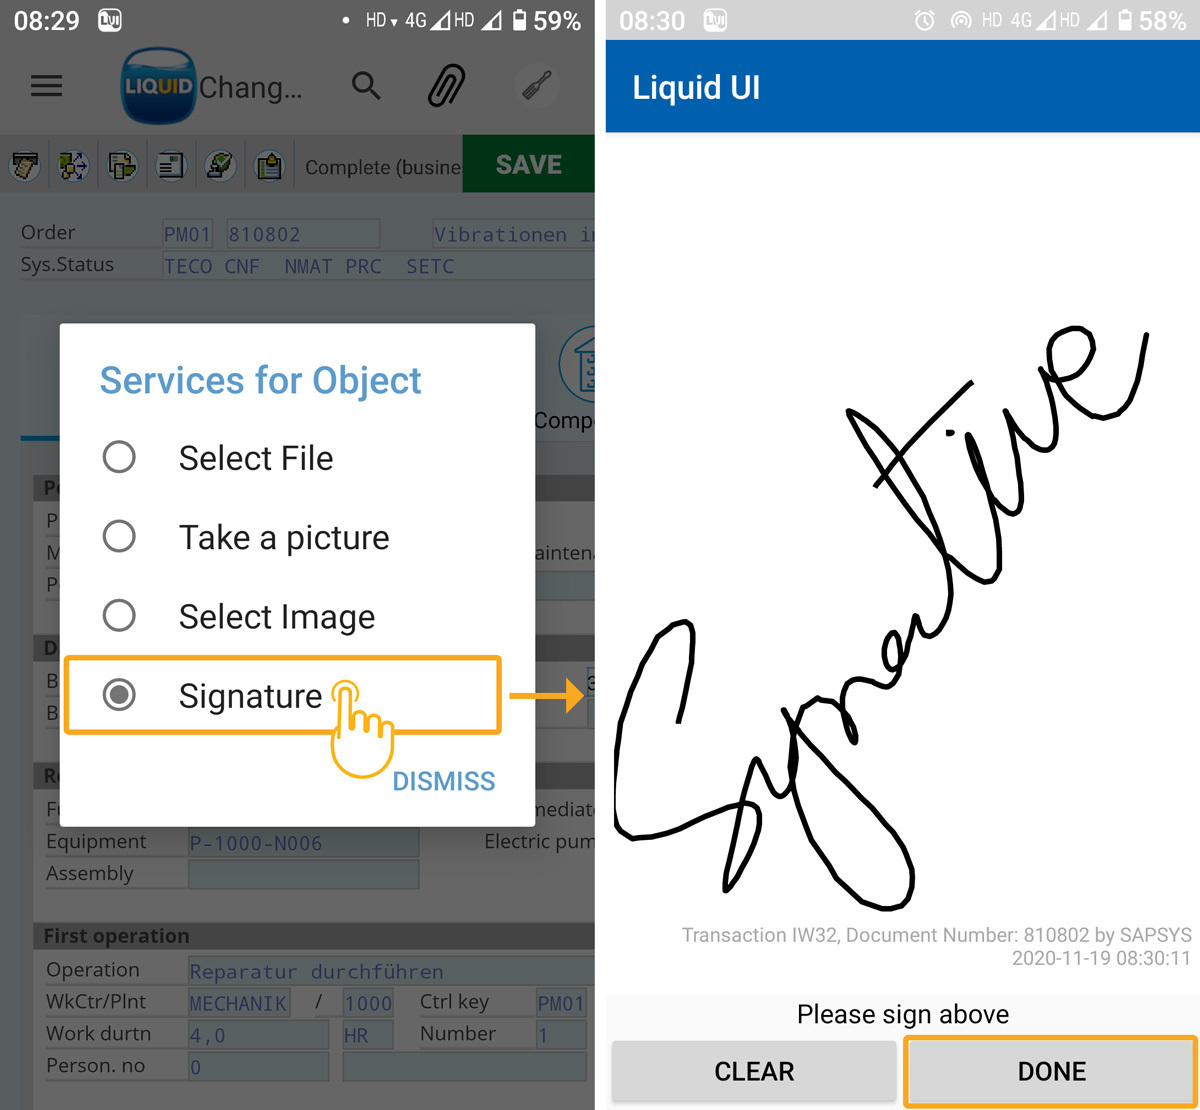
Signature
Choose the Signature option to save your signature and attach it as a file in SAP. You can sign on the device's screen, as shown in the following image: