Liquid UI for Android App consists the Main Menu located at the upper left corner of the home screen and helps users in configuring the App. You can either tap on the top left corner of the Application or slide to the left side of the application screen to access the Main Menu. The Main Menu consists of various settings for your Liquid UI Client, which helps in the configuration of your Application. These settings are described in detail below:
- App Settings
- License Server Sync
- Scan Liquid UI QR Code
- Connections
- About
- Help
- Request License
- Certificate Management
- Configure Barcode Scanner
- Gallery
- Invite
App Settings
App Settings present in the Main Menu provide access to the Liquid UI Insider, which consists of Copyright, Client Application Version, and License-related information. It also consists of settings for configuring your Android App, such as font size and color adjustments, background image changes, default printer selection, table layout modification, and theme choices.

Click here to learn more about App Settings.
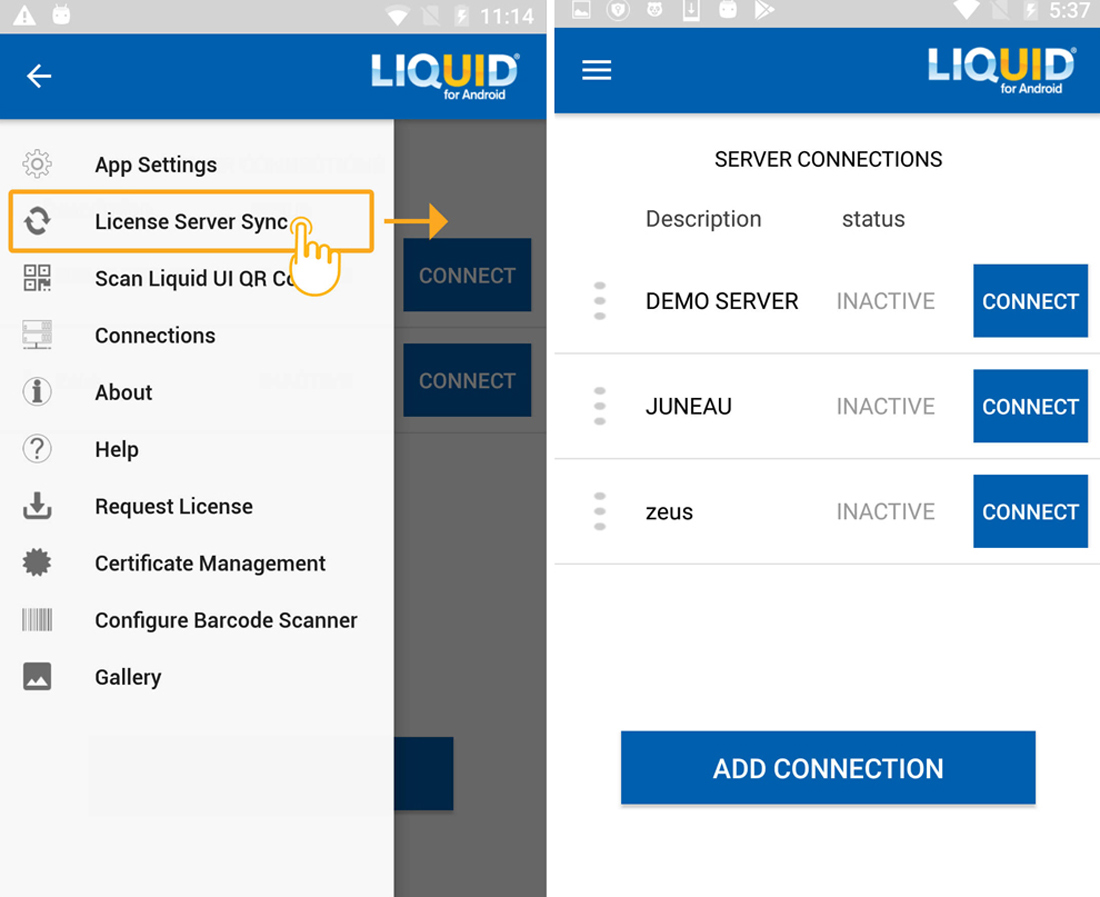
License Server Sync
The License Server Sync option is present under Main Menu, just below the App Settings option. This option can restore the InApp license (bought from Google Playstore). Additionally, for a LAMP license, SAP Server connection detail will also be updated. To get more information on the process to renew your license, you can check the License pack renewal process.
Scan Liquid UI QR Code
Scan Liquid UI QR Code setting enables users to scan all the QR codes generated by the Liquid UI platform. QR code is an effortless and straightforward way of installing a license or adding an SAP Connection to Liquid UI for Android App.
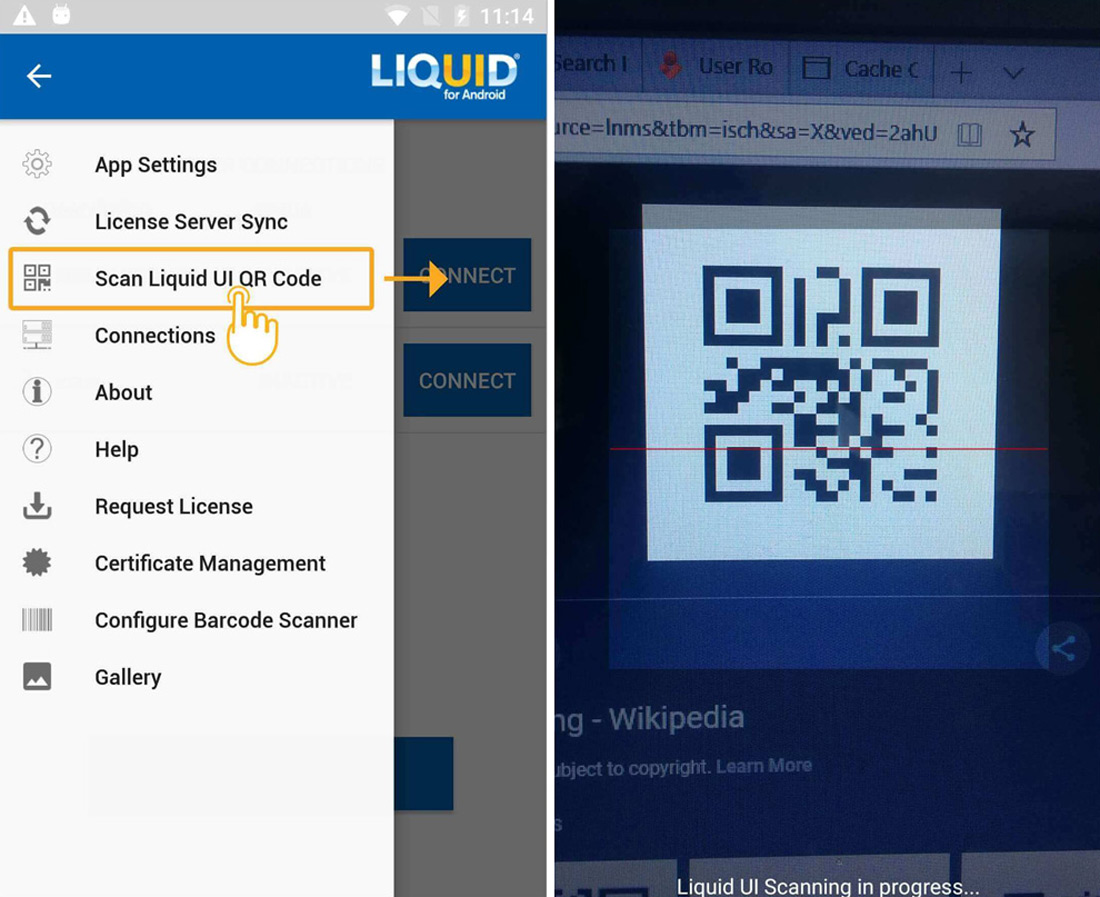
The below-given video tutorial will guide you through the process of scanning QR codes with the help of the Connection Transmitter application to add new SAP connections to our App.
Below mentioned are the different ways in which QR Code can be used in our App:
- QR Code generated by LMP to add a server connection
- QR Code generated by Connection Transmitter to add a server connection
- QR Code sent from LMP to install Liquid UI App license
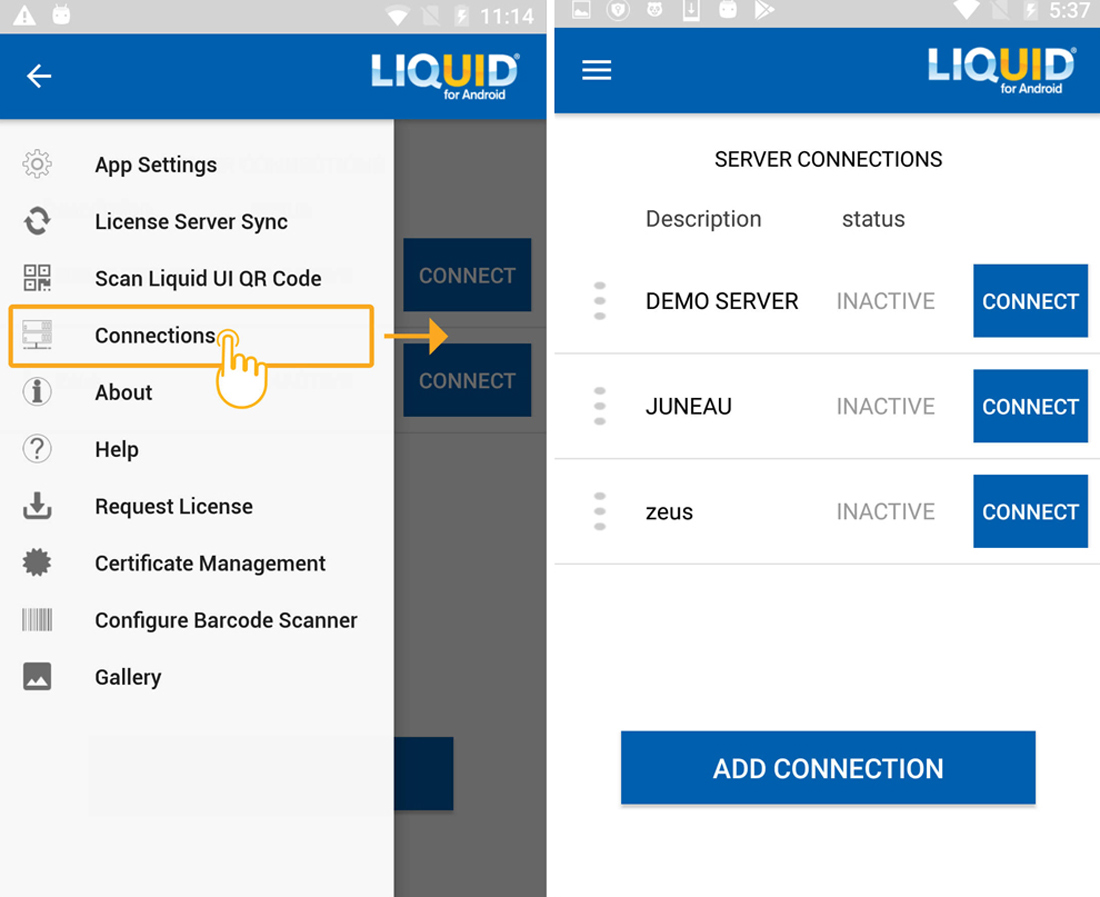
Connections
The Connections setting of the Main Menu contains the SERVER CONNECTIONS list. To know more about Server Connections, click here.
About
The About dialog box showcases your Liquid UI for Android App details and licensing information, as shown below:
- Copyright: Displays Copyright information about Liquid UI.
- Version: Displays the currently installed version number of the released Liquid UI Client.
- URL: Displays Synactive's website link.
- Patent: Displays the number of App patents currently held by Synactive.
- Support: You can contact Synactive's support using the Telephone and Email information provided here.
- Synactive ID: Lists the name of the registered owner.
- License: Specifies the type of license installed on the device.
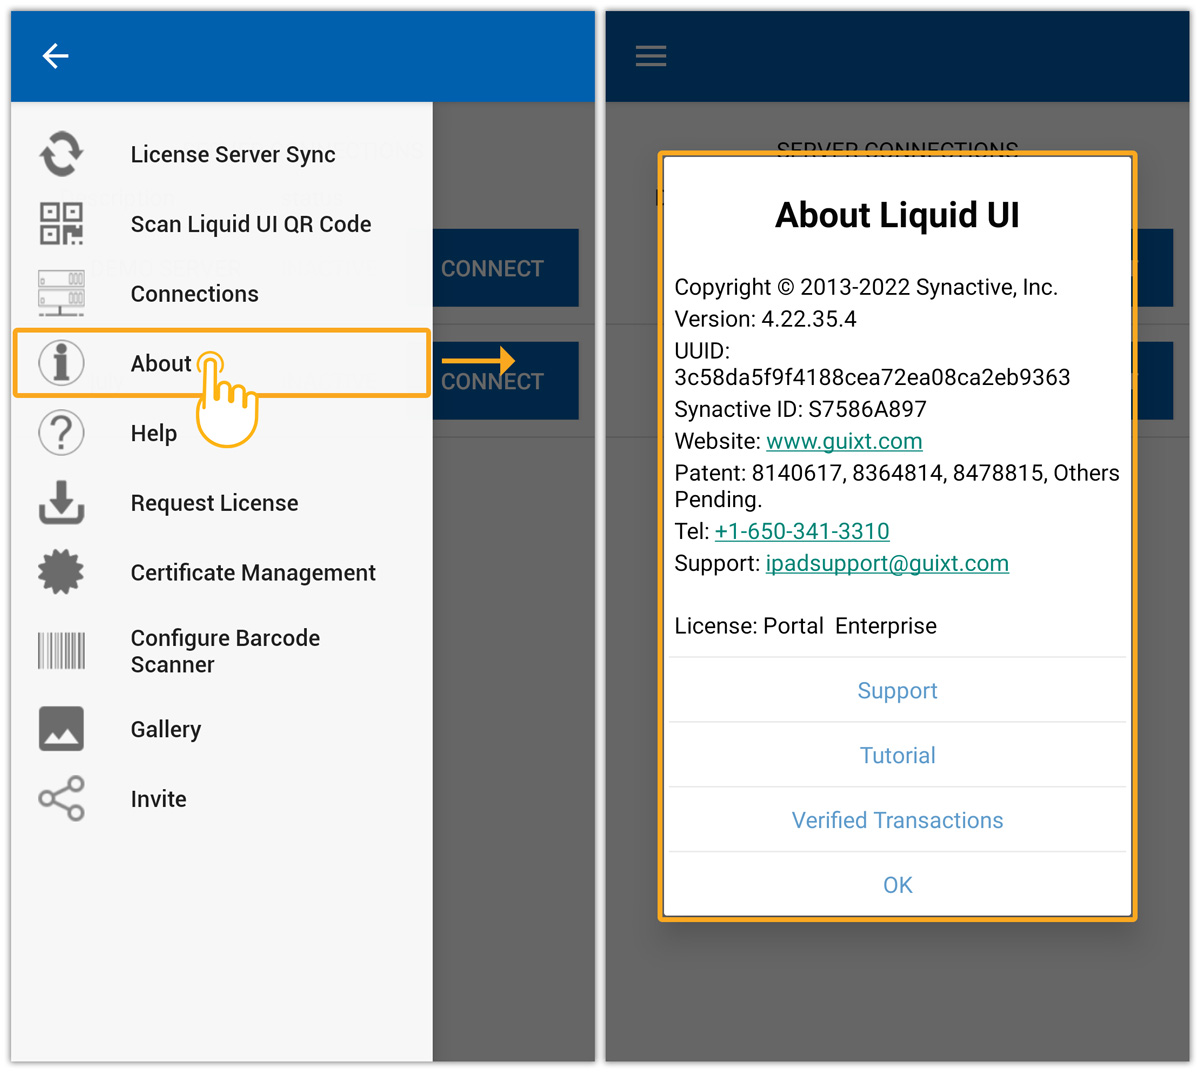
The About dialog box also consists of options, including which redirects the users to send queries/suggestions, the Tutorial consists of help guides to get you up and running on our App, and the Verified Transactions link contains a list of SAP transactions supported in our App.
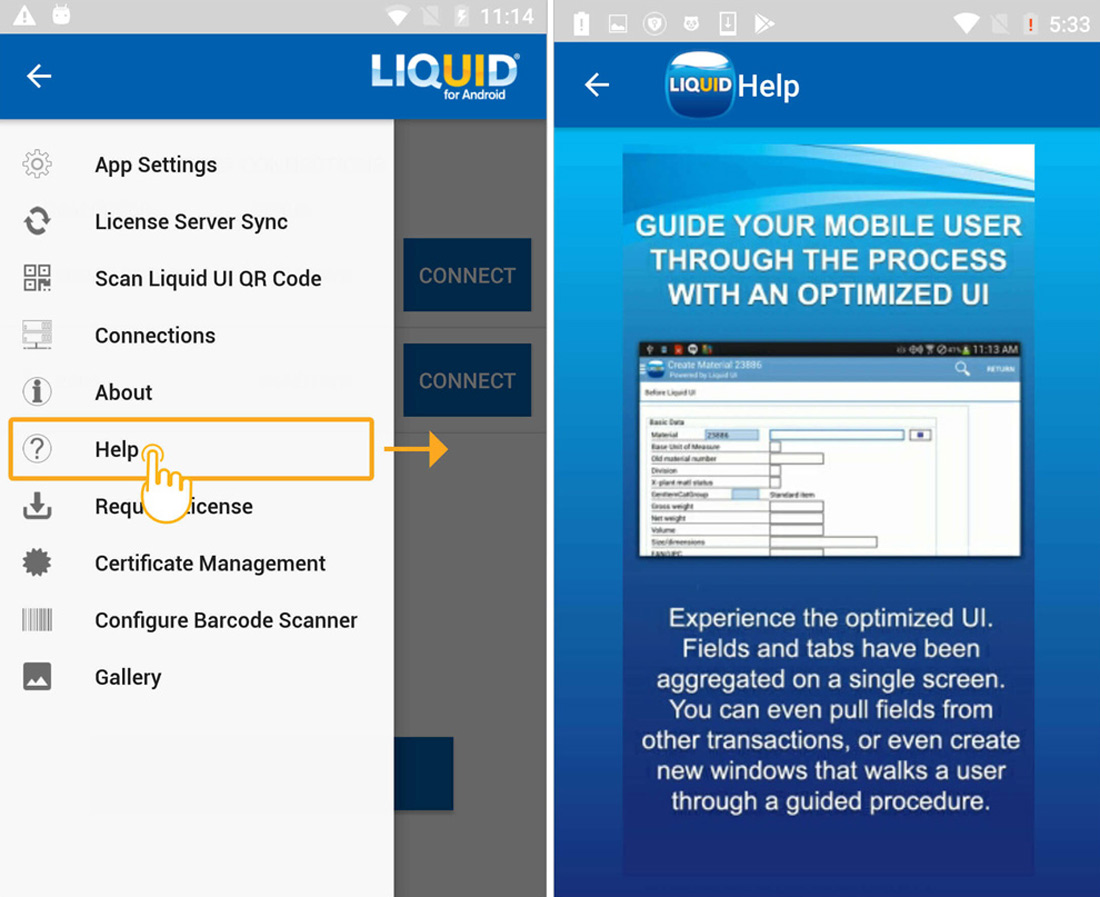
Help
The Help option displays a series of user guide screens, which pilot the user through the configuration of Liquid UI. It provides information related to getting started with the DEMO server, then further connecting to your SAP server and using the functionalities provided by Liquid UI. This screen appears when you open the Help option on your device.
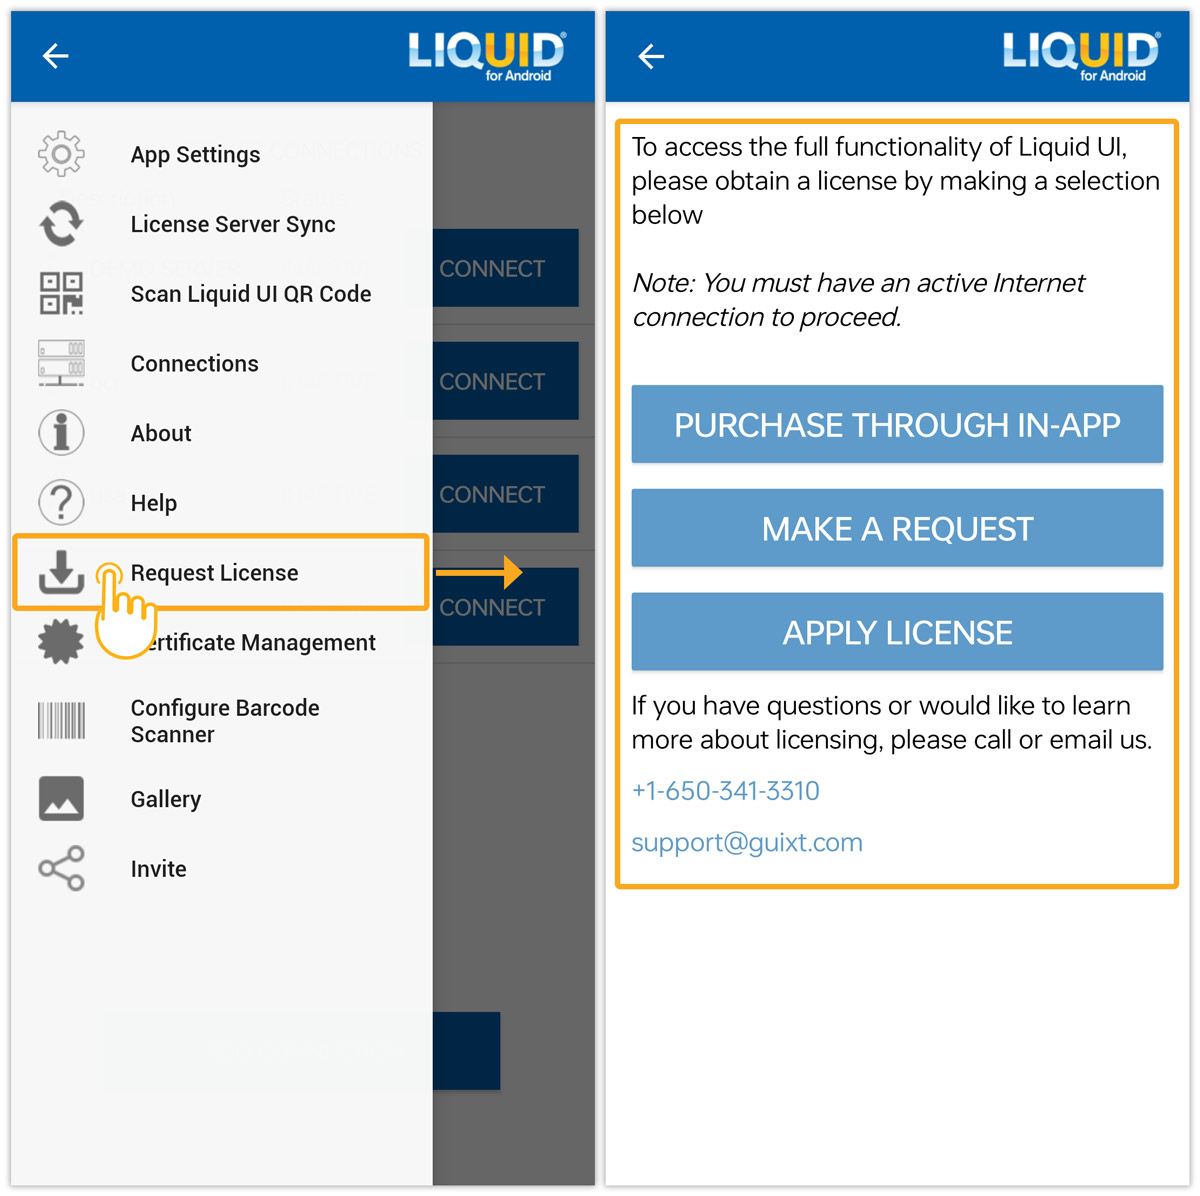
Request License
The Request License setting available in the Liquid UI for Android App helps users to request a license. It consists of three options that a user can choose from to proceed with the request: Purchase Through In-App, Make A Request, and Apply License. Click here to learn more about the process of Requesting a License.
Certificate Management
The Certificate Management setting available in the Liquid UI for Android App displays all the installed certificates and also allows the users to delete the installed certificates if required.
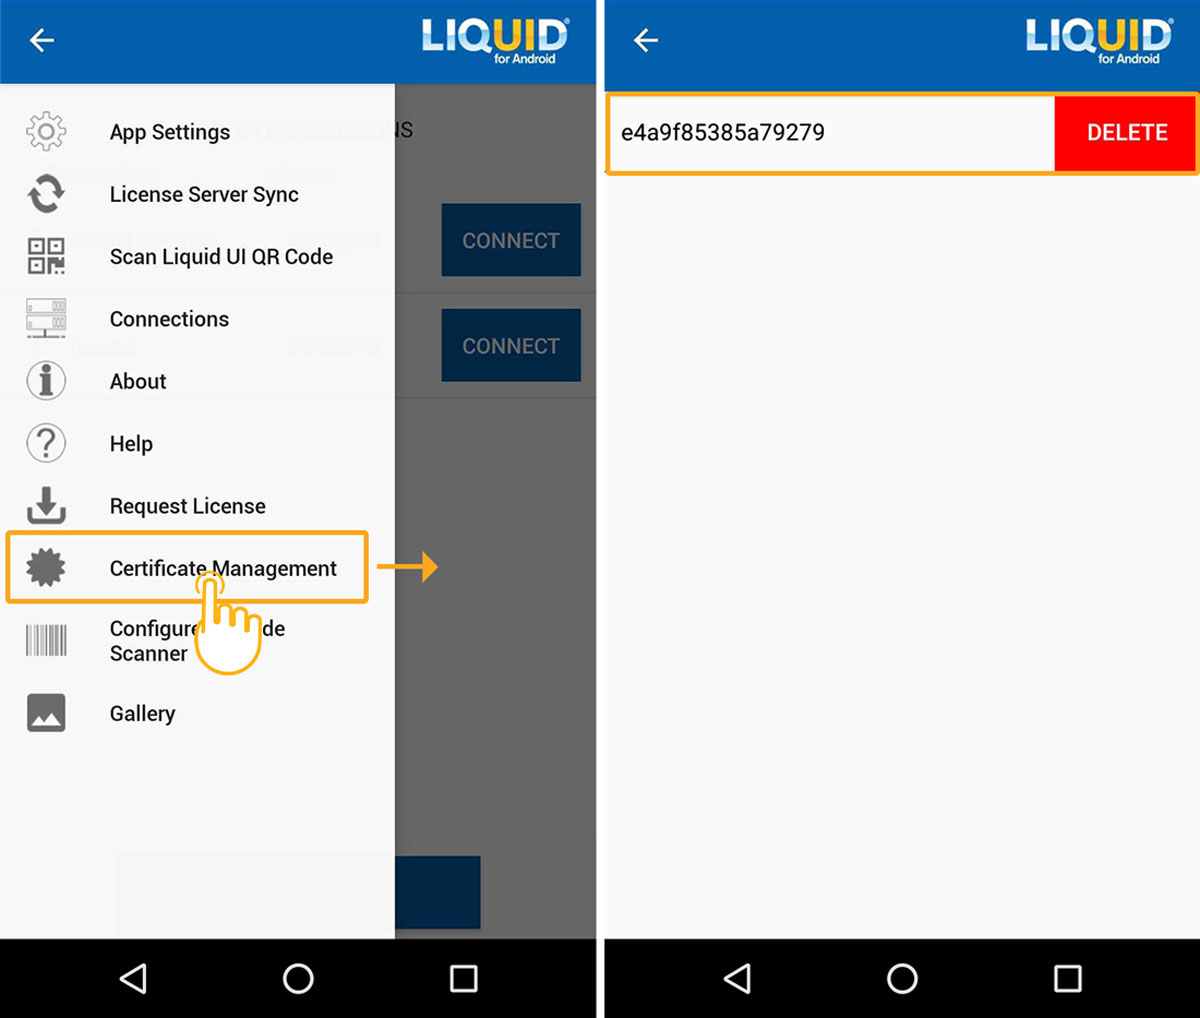
For more information on Certificate Management, click here.
Configure Barcode Scanner
Liquid UI for Android App supports full native scanner configuration. The Configure Barcode Scanner setting present in the App enables the users to edit the Default Barcode type or add a new Barcode type. It also allows you to add prefixes/suffixes under the Barcode types, to remove them from the barcode scanned value based on your requirement.
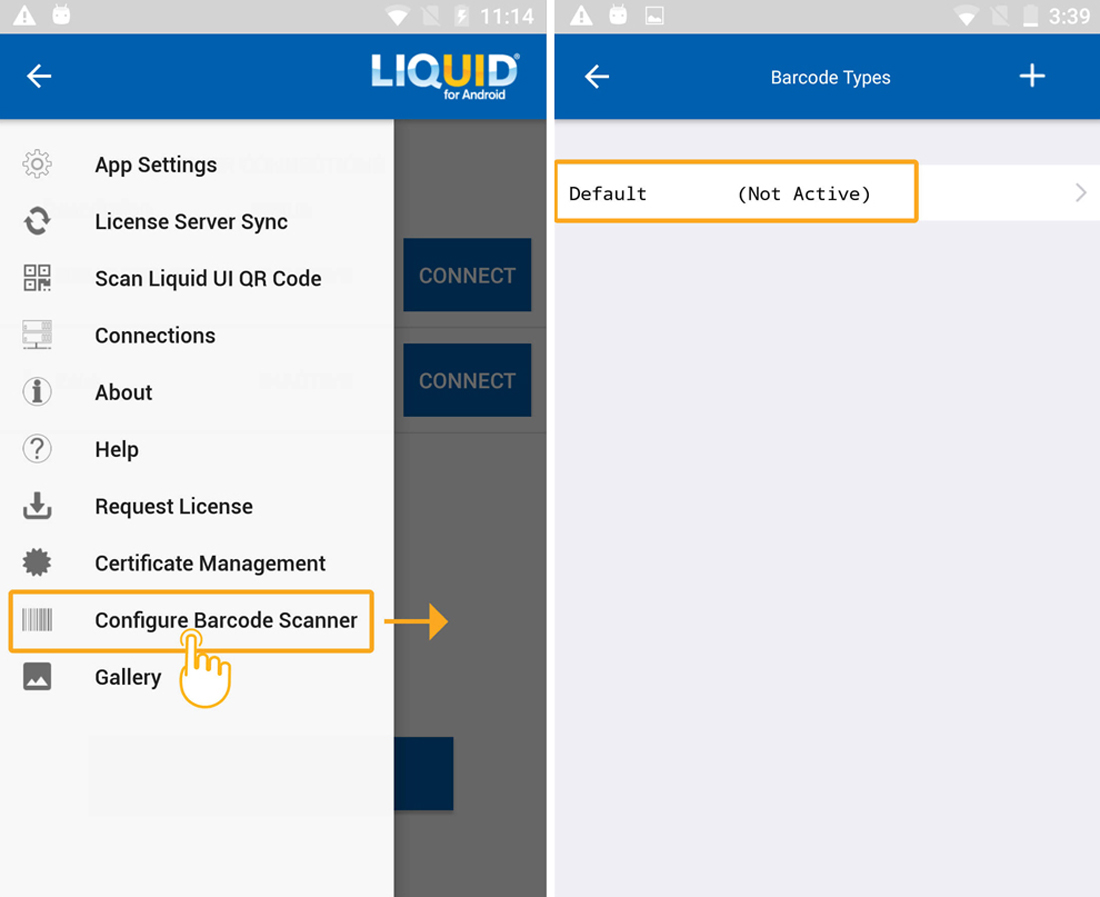
For more information on Configure Barcode Scanner, click here.
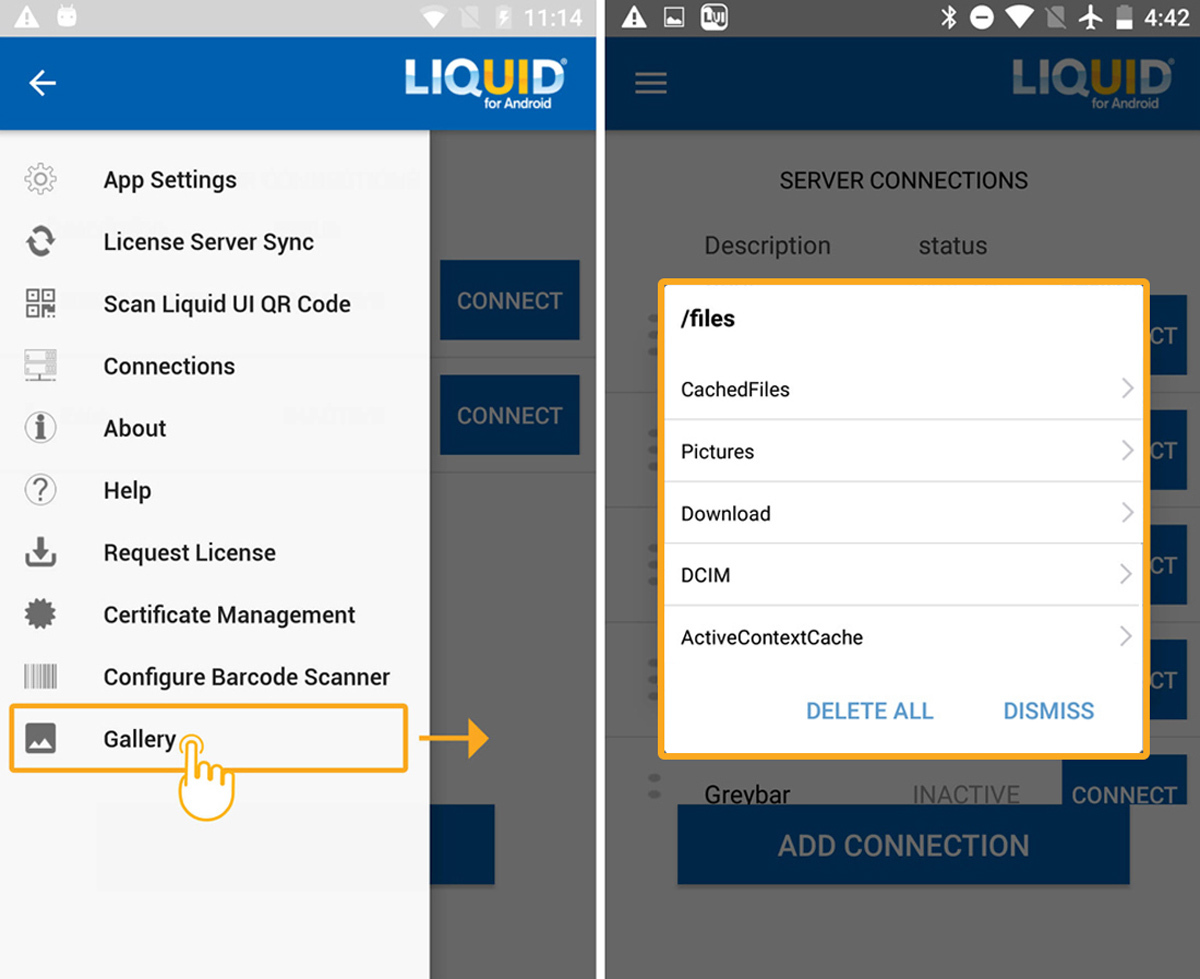
Gallery
The Gallery option enables you to see all the files uploaded and downloaded to your device through the Liquid UI for Android app, and allows a user to access internal cache files that are stored in different operations. You can view all the files such as images, videos, mp3, PDF, etc., with or without login to a particular SAP server. It includes the following folders, namely: CachedFiles, Download, DCIM, ActiveContextCache, and Pictures.
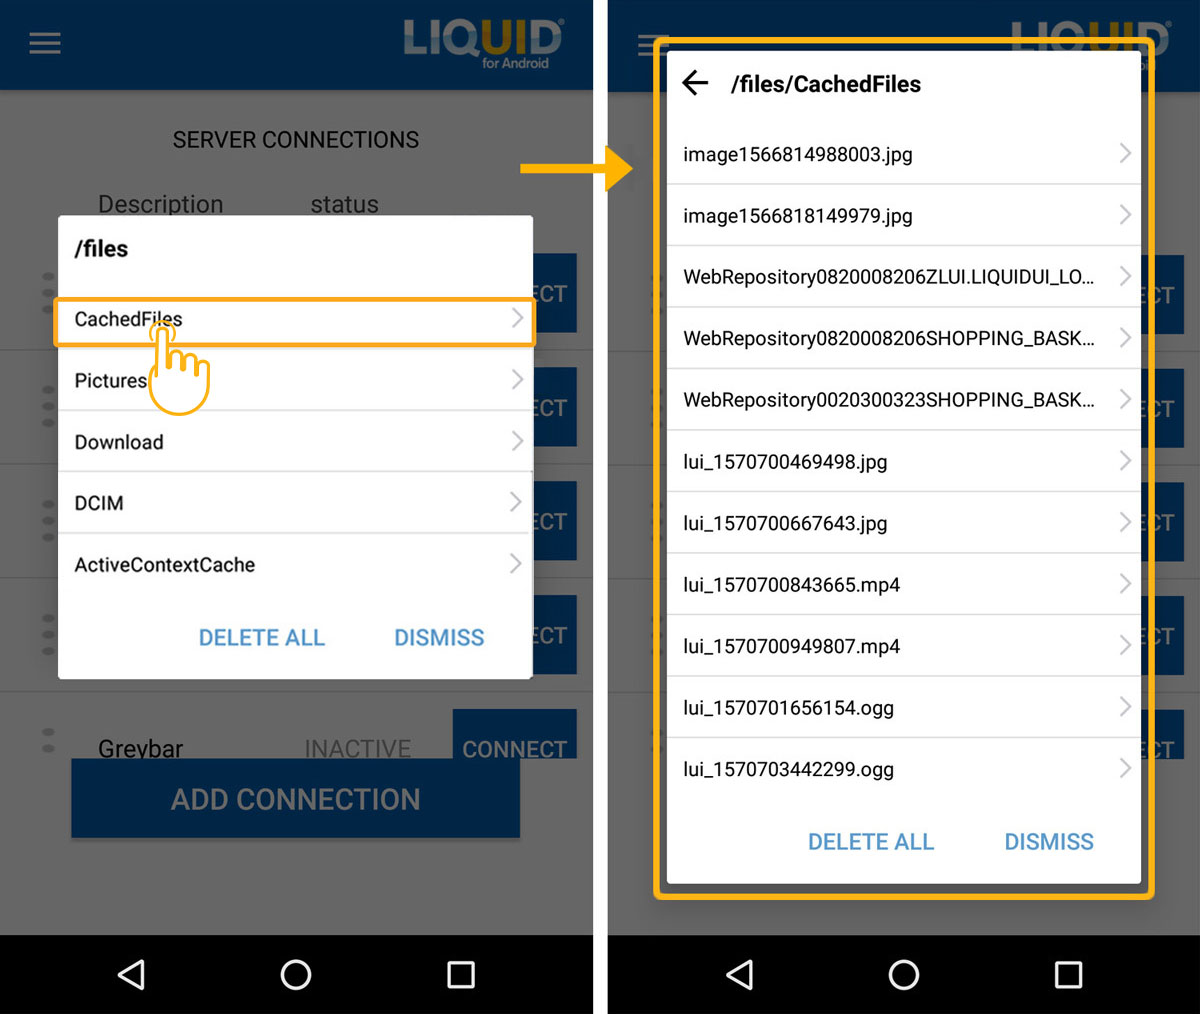
- To view all the files present in the folder of our App, tap on the CachedFiles option. Click on the back arrow to navigate back to the gallery options.
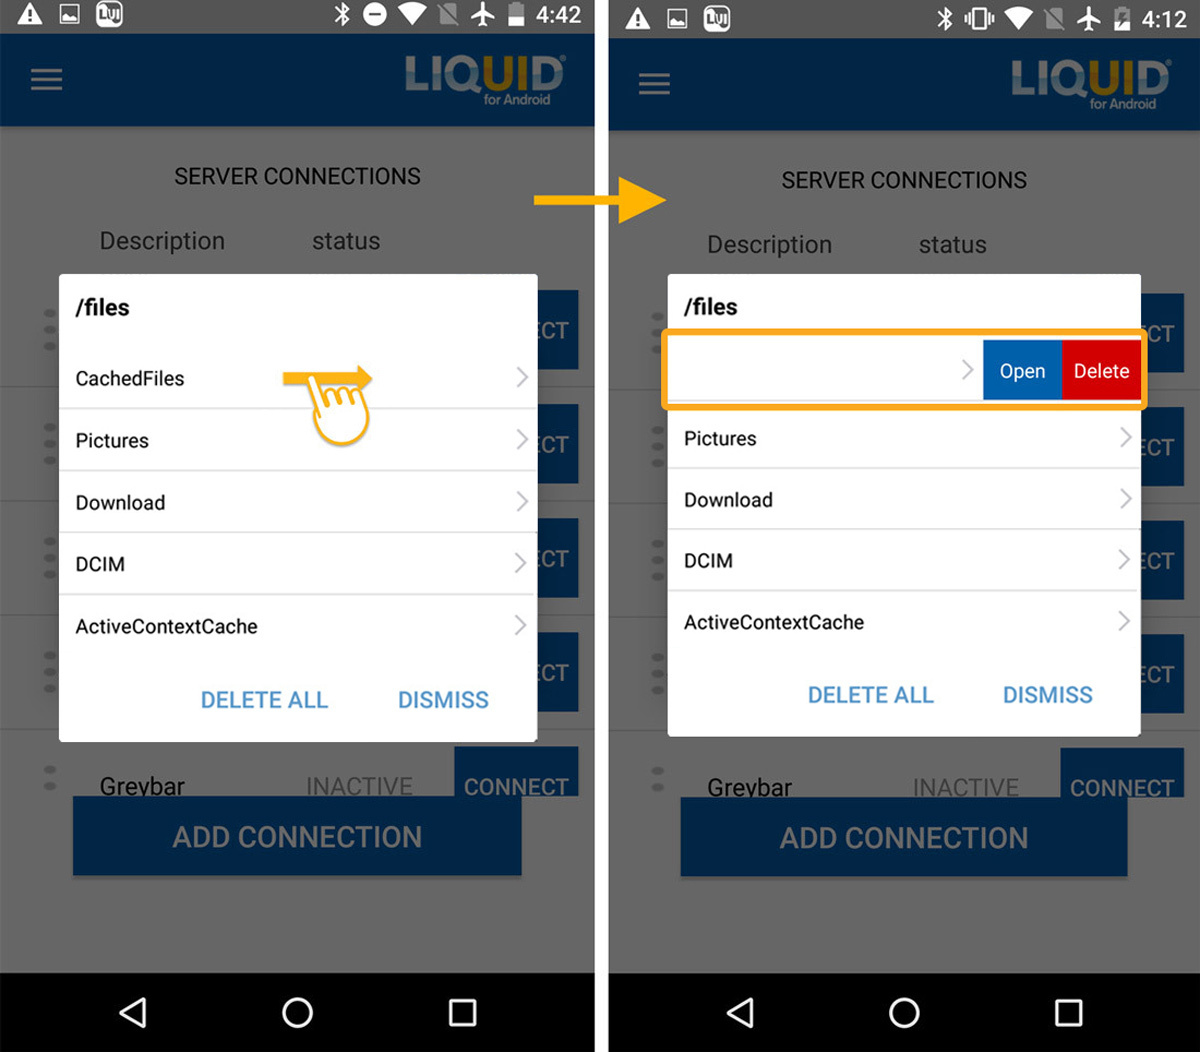
- Swipe left on the CachedFiles option, it allows you to either open the CachedFiles folder with the Open option or delete the folder with the Delete option.
- To view all the pictures present in the folder of our App, tap on the Pictures option. You can either swipe left to open or delete the pictures using the Open and Delete option, or you can navigate back using the back arrow button.

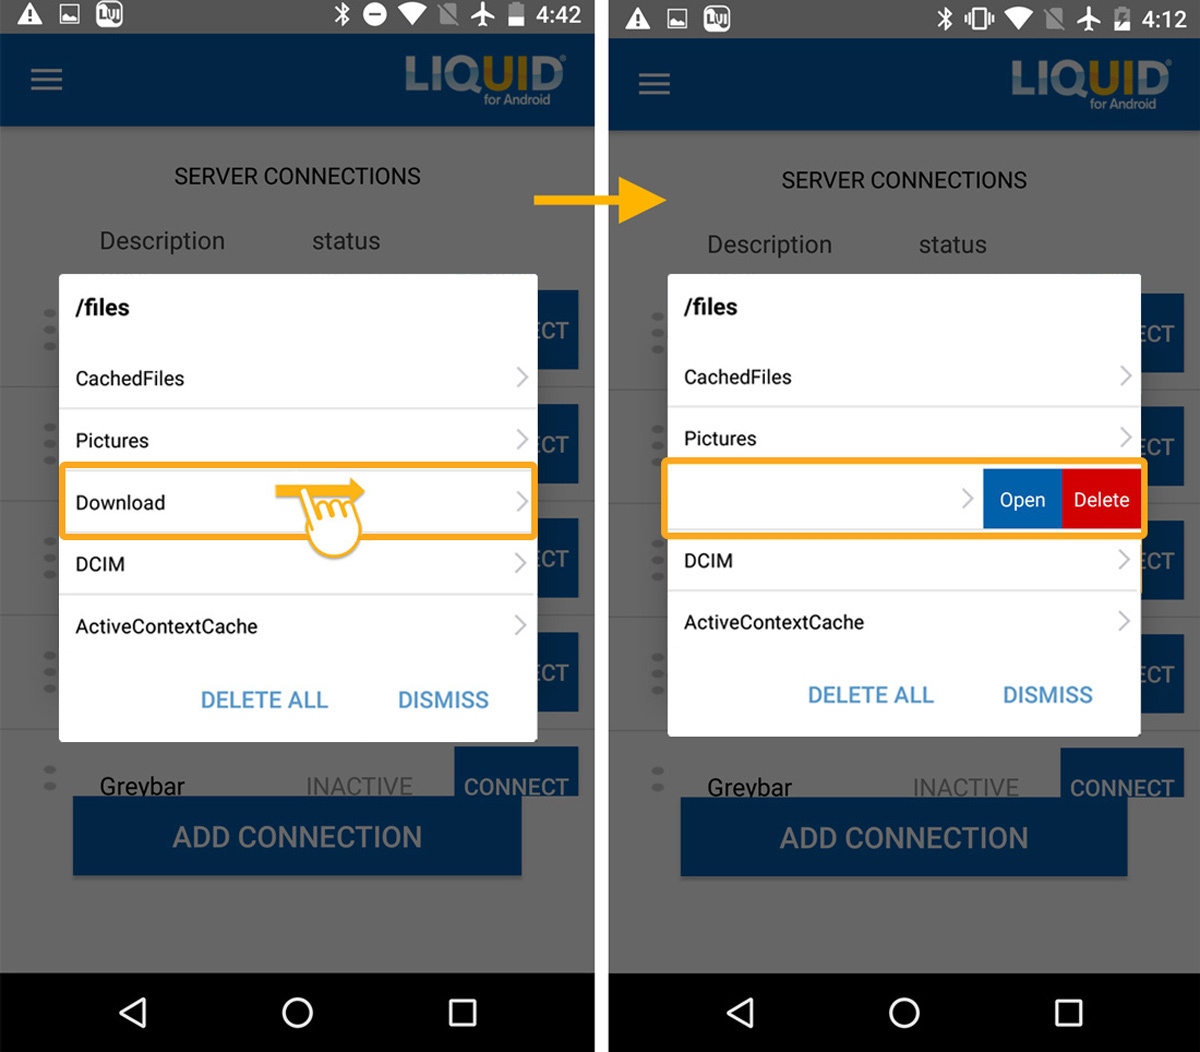
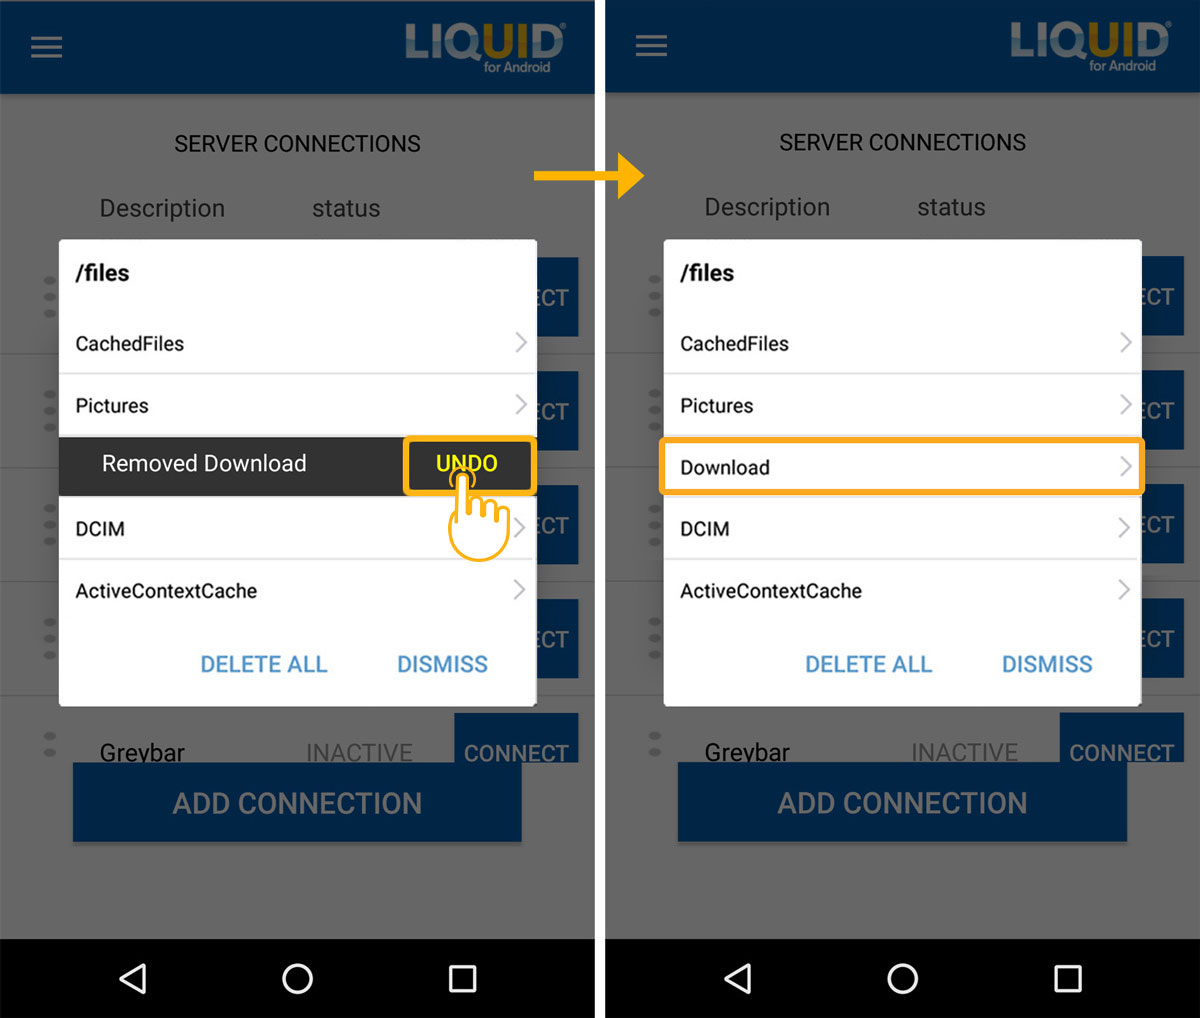
- To view all the downloaded files in our App, tap on the Download option. Swipe left on the Download option to either open or delete all the downloaded files, using the Open and Delete option.
- To restore the deleted Download folder from the gallery, click the UNDO option.
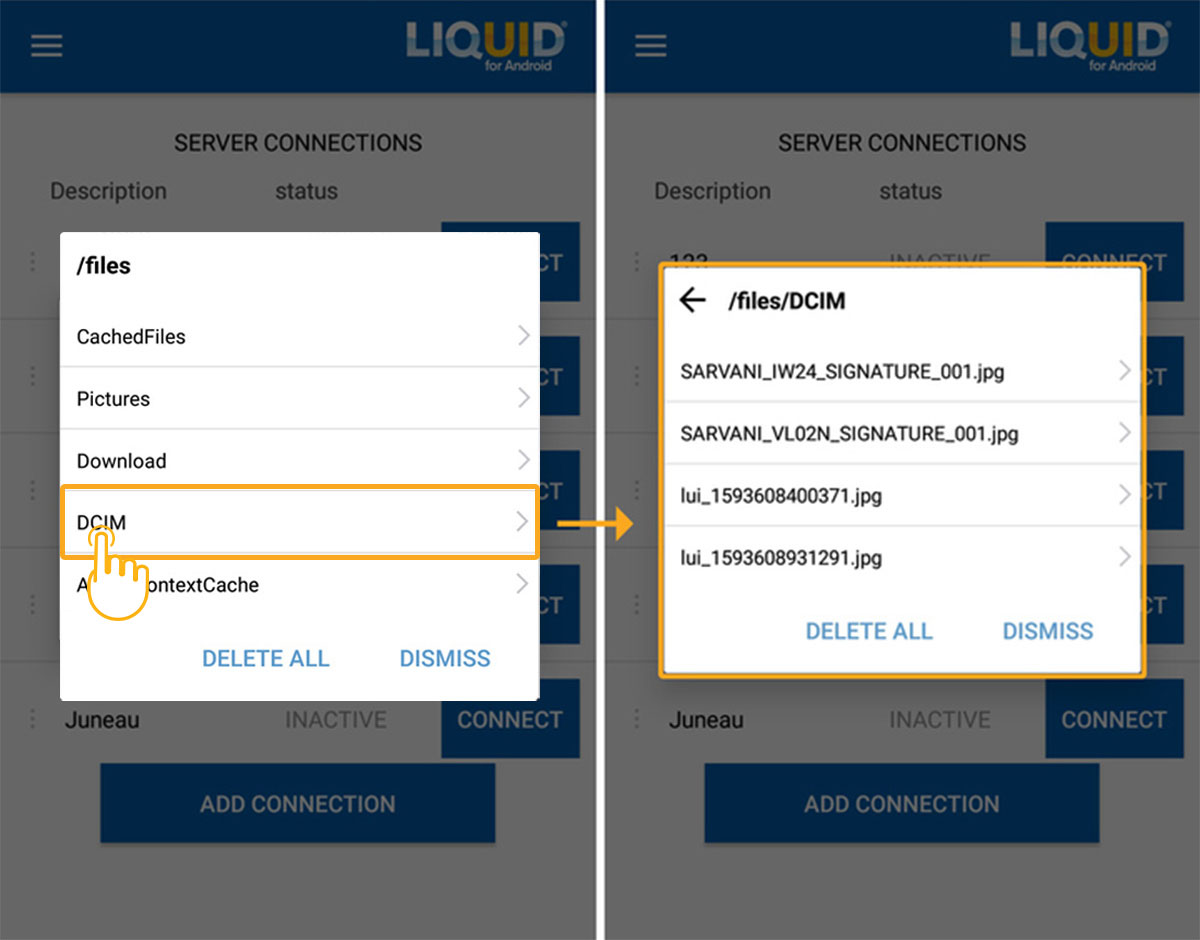
- To view all the uploaded image files to our App, tap on the DCIM folder. Swipe left on the DCIM option to either open or delete all the uploaded image files, using the Open and Delete option.
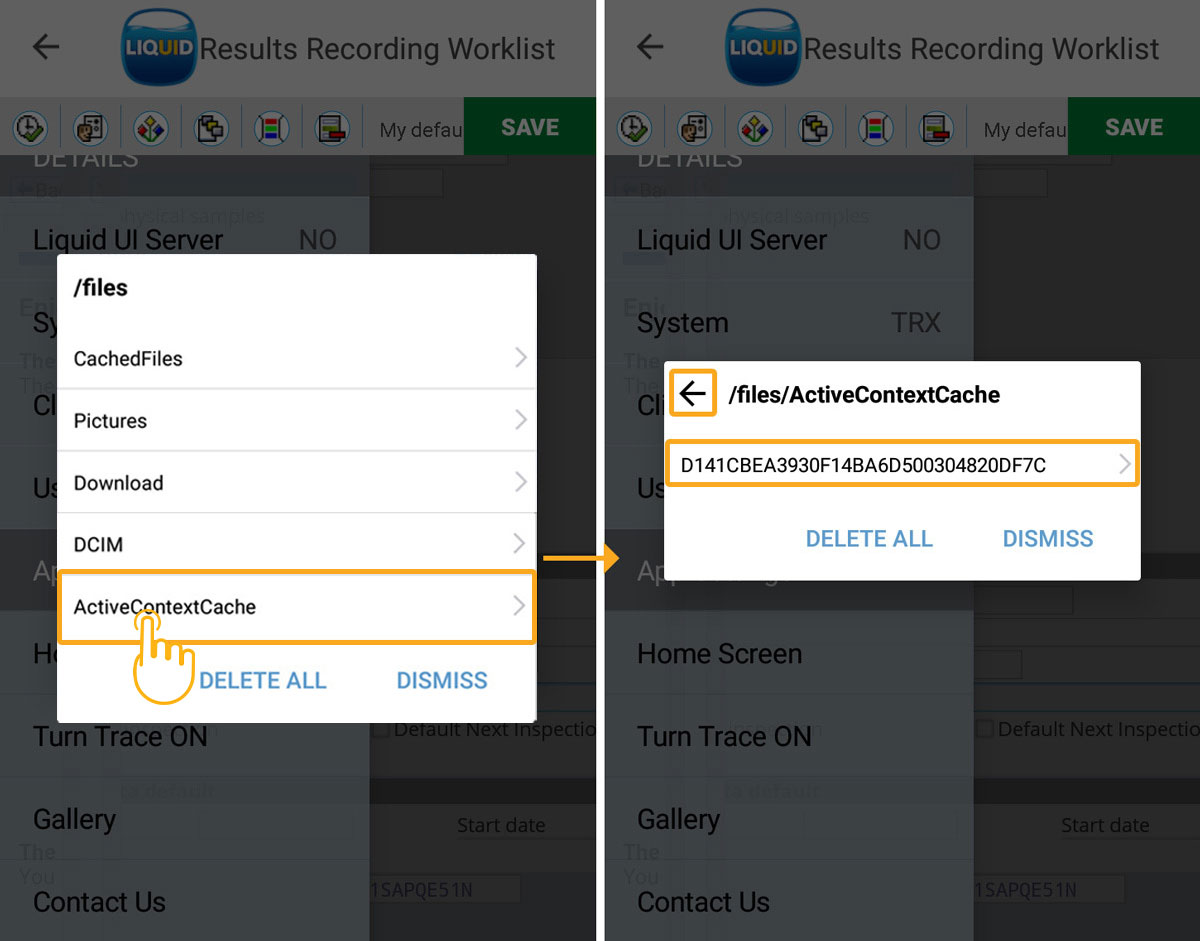
- The ActiveContextCache folder consists of all the cache files that get stored here as a result of the HTML content in our App. To view all the cache files, tap on the ActiveContextCache folder. Swipe left on it to either open or delete all the uploaded cache files, using the Open and Delete options.
- Click the DELETE ALL option to delete all the files at the same time from the Gallery.
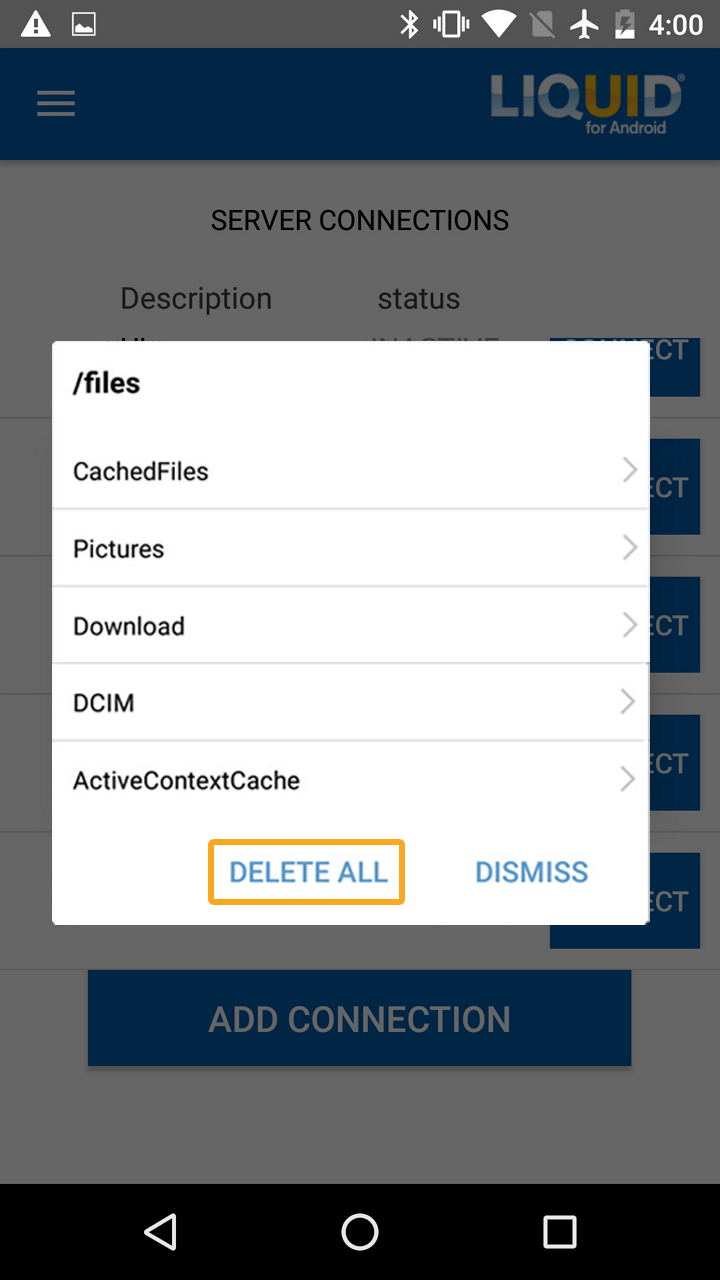
- Click the DISMISS option to exit from the gallery.

Invite
The Invite option enables users to share their excitement and experiences with others using Liquid UI's Refer a Manager program. It allows users to refer the Liquid UI app to their managers, fellow employees, or cross-functional colleagues from other SAP departments.
For more information on Inviting managers through Refer a Manager program, click here.


