Purpose
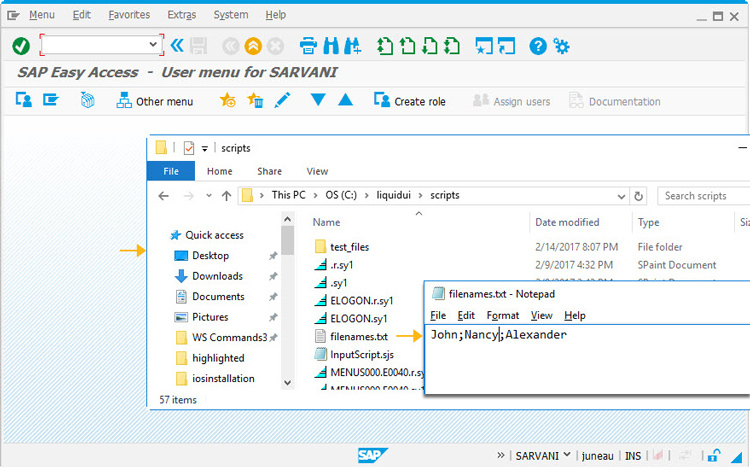
With appendfile(), you can append content to the file. This command enables users to quickly add data into a file from SAP with the help of variables. For instance, to add SAP table data into a file, you need to assign the table values to the variables and define variables in this command. If the variable is marked as 'true', then the value in the variable will be appended to the file and if the variable is marked as 'false', then the value in the variable will not be appended. The supported file types are as follows:
- .csv
- .txt
- .xls
The appendfile command returns a boolean value based on the writing/appending status of the file.
- True: If the data is written to the file successfully
- False: If the file cannot open or failure happens while writing

Note: Initially, you need to open the file to append the data. After appending the data, you need to close the file.
Syntax
Format 1: This command will search for the file in your scripts folder and append the values in the variables into the file.
appendfile("filename.ext",{"var1":true,"var2":true,"var3":true,"var4":true});
Format 2: This command will search for the file in the specified file path and append the values in the variables into the file.
// You need to place double backward slashes between the folder names in the file path.
appendfile("C:\\LiquidUI\\MMModule\\filename.ext",{"var1":true,"var2":true,"var3":true,"var4":true});
Note: You need to specify the file path in the command if the file does not exist in your scripts folder.
Properties
- filename - Name of the file
- variables - variable names
Option
|
"user-selected variable": true - This option enables you to add specified variable data to the file. If marked true, the data will be appended to the file. If marked false, the data in that particular variable will not be appended to the file. Please see the examples below for demonstrations on some of the possible usages. |
Option Detail
Example: Appending records to a file
In the following example, we will show the process to append the input field values entered on an SAP screen into an external file.
Learn how to add values entered in the input fields on the Create Sales Order screen to an external file. We will walk you through the following steps.
- Open a file
- Assign input field values into variables
- Add the values in the variables into a file using appendfile()
//Create this file inside your script folder for customizing the Display Sales Order Screen: SAPMV45A.E0102.sjs
//Now, let's start adding the Liquid UI script to the above file and save it.
- Initially, use the openfile command to open a file to make it ready for appending values into it.
openfile("VA03file.txt",{"append":true,"delimiter":";"}); - Assign values entered in the input fields on the Display Sales Order: Initial Screen using the set command.
set("V[gz_ordertype]",'&F[Order Type]'); set("V[gz_salesorg]",'&F[Sales Organization]'); set("V[gz_distchan]",'&F[Distribution Channel]'); set("V[gz_division]",'&F[Division]'); set("V[gz_salesoff]",'&F[Sales Office]'); set("V[gz_salesgroup]",'&F[Sales Group]'); - Now, add the variable values into the required file using the appendfile command, as shown below.
appendfile("VA01file.txt",{"V[gz_ordertype]":true,"V[gz_salesorg]":true,"V[gz_distchan]":true,"V[gz_division]":true,"V[gz_salesoff]":true,"V[gz_salesgroup]":true}); - Then, using the closefile command, you can save and close the file, as shown below:
closefile("VA01file.txt"); - After adding the above scripts in the screen script file, save it and then refresh the relevant SAP screen to see the applied changes.
- Now, enter the values in the input fields and click the continue button to append the values into the file.
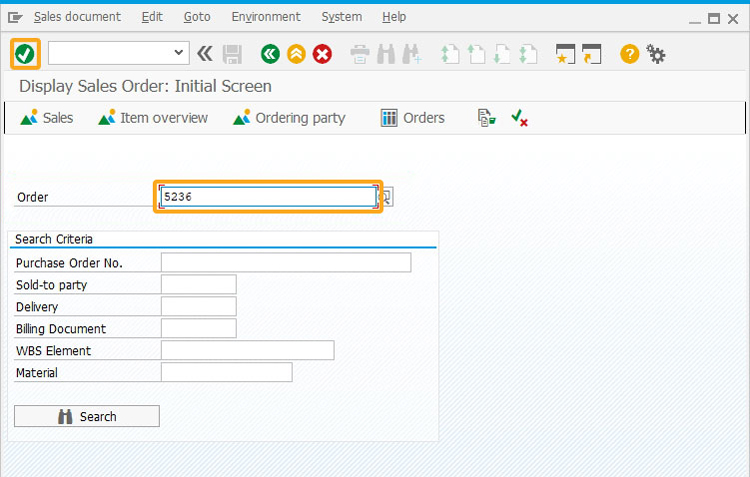 Here, the values of Order Type, Sales Organization, Distribution Channel, Division, Sales Office, and Sales Group input fields are added to the file 'VA03file.txt'.
Tips and Tricks
- You can append more than 60 variable values to the file
-
Increment counter using appendfile()
Here we used the appendfile command to increment the counter variable value and update it in the file.
appendfile(fileName,{"lastcounter":true});
Learn more about appendfile() in practical.


