The Server Connections appears on the first screen when you launch Liquid UI. This is where you will create and manage your connections to SAP and Liquid UI Server.
On Server Connections, you can perform the following actions.
- Add an SAP connection
- Open an SAP connection
- Edit an existing SAP connection
- Remove an SAP connection
Add an SAP Connection
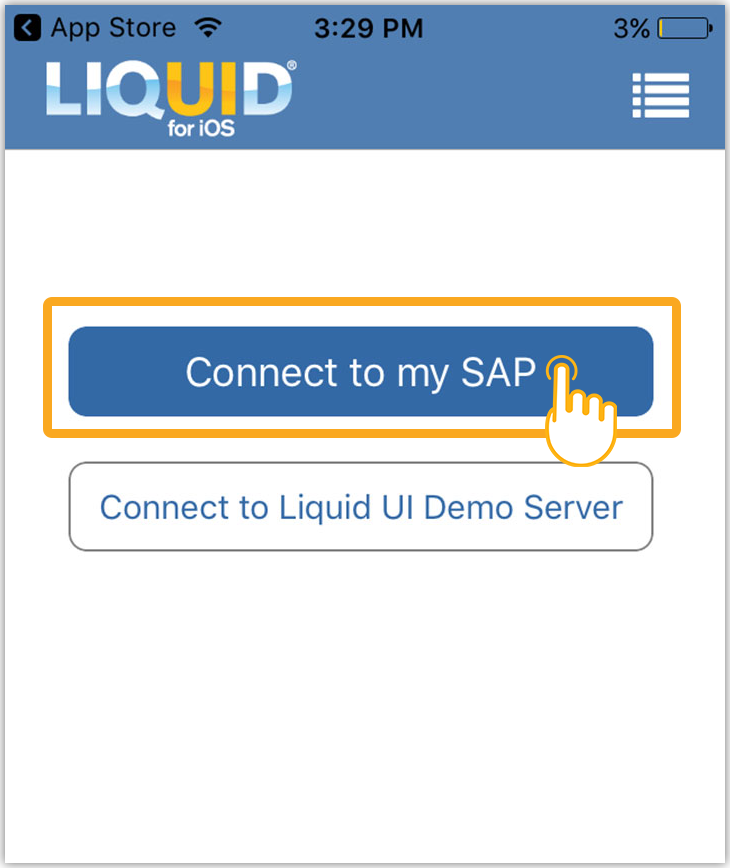
Initially, you will see CONNECT TO MY SAP option to add a new connection on the Server Connection screen. To add an SAP server connection, please follow the instructions below.
- Click Connect to my SAP, if you are adding a connection for the first time. The new connection screen will display.
- Enter the necessary data as explained in the following and then click Update Connection details button to create a new connection.
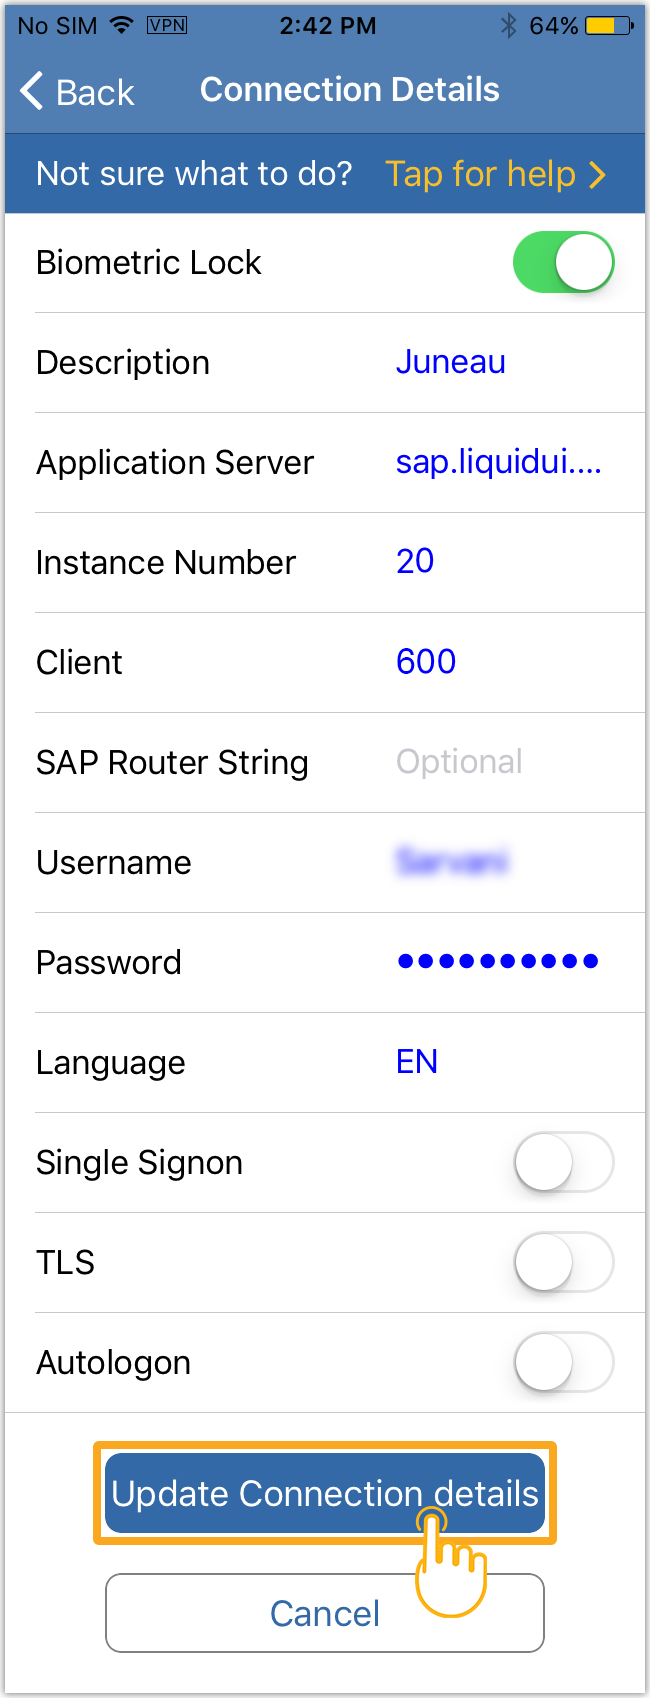
- Description
-
Enter a short description of the target server. This can be anything, but it should be informative.
- Group/Server
-
Enter the SAP application server, the GuiXT Server, or the SAP message server in this field. If you are connecting from an external location, you will need to input the full name (e.g. test.guixt.com). This entry is required and can be either a name or an IP address.
 Note: Server names are case-sensitive. Make sure you enter the name of your server exactly as it appears in the SAP GUI Logon Pad.
 - Instance Number
-
This two-digit number is the last two digits of the port number your device will use to connect to the target server. If the SAP server is using port 3220, then your entry would be '20'. This is a required entry.
- Client
-
This three-digit number is your SAP client's ID number. In our example, we are using '800', but you will need to use the correct number for your deployment. The client ID can be found in the 'Usage data' section of the SAP Status screen. Like the preceding entries, this is a required field.
- User Name:
-
This is your SAP user name. It should be entered exactly as you would when you log into SAP GUI. This is only a required field if you are using Auto Login.
- Password:
-
This is your SAP password. Enter this exactly as you would when you log into SAP GUI. Please note that passwords entered into the Connection List do not display in plain text. Like the 'User Name' field, this is only a required field if you are using Auto Login.
- Language:
-
You can enter the two-digit language code used by the SAP application server here. Each language has its code, and the code for English is 'EN'.
- TLS:
-
TLS feature provides additional security for data being transmitted wirelessly.
- Auto-logon:
-
This pushbutton enables and disables the Auto Logon feature - it is off by default. When Auto Logon is active, Liquid UI will automatically log you into the current default connection when you launch the application.
- After adding a connection, click Connect to login to the specified SAP Server.
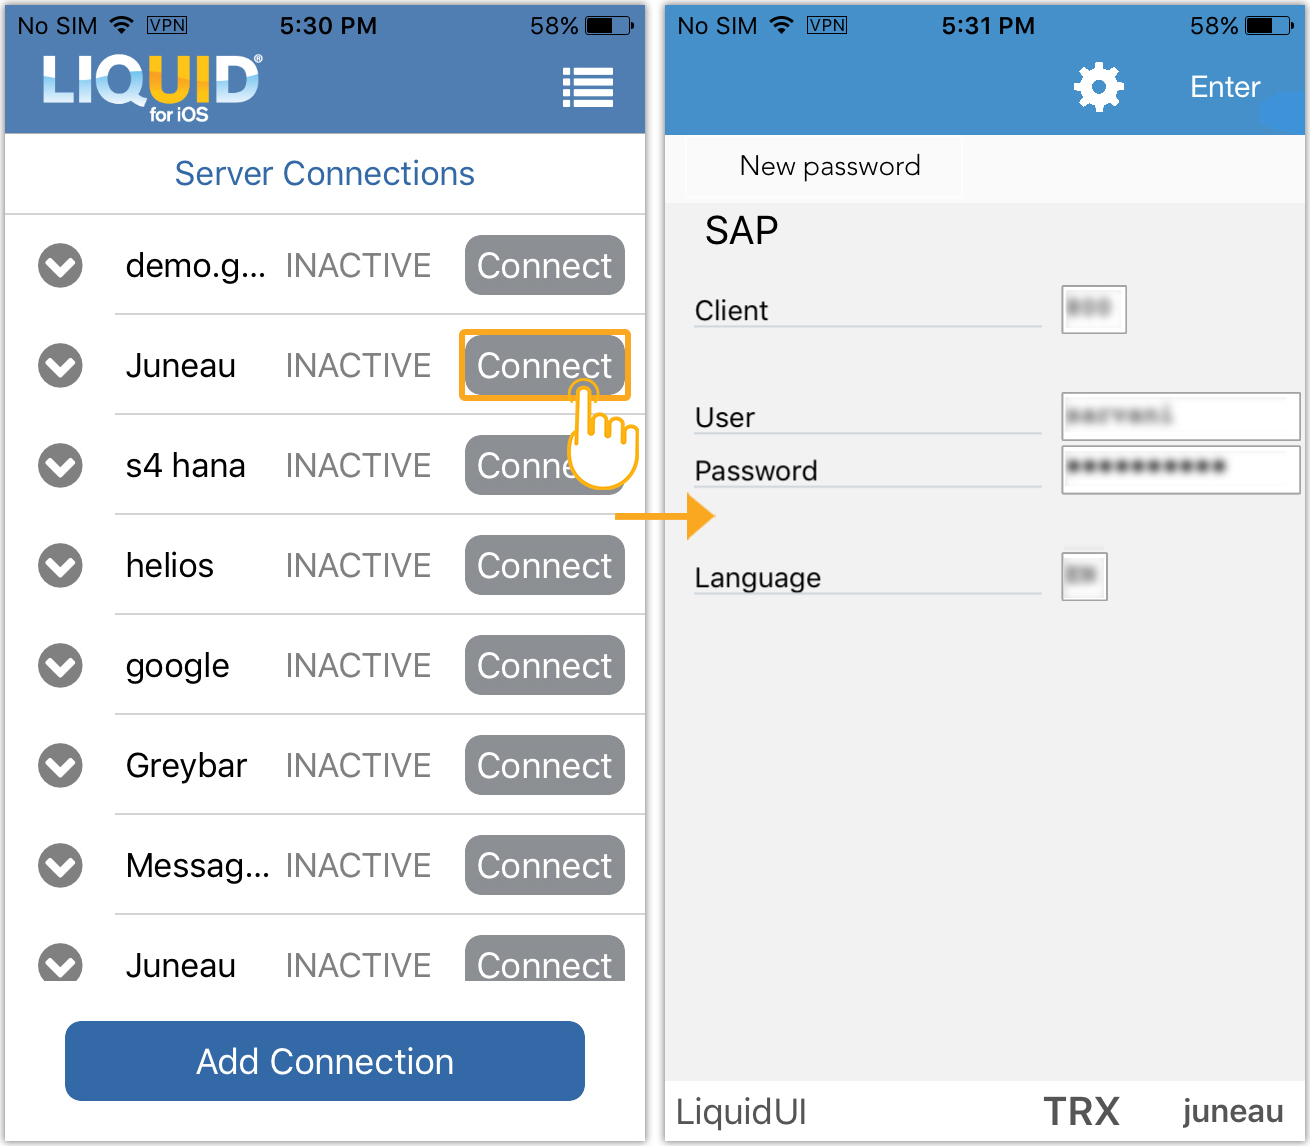
Open an SAP connection
To open an SAP connection if multiple connections are present, please do the following.
- Open Liquid UI for iOS and you will be navigated to Server Connections screen where multiple SAP server connections are present.

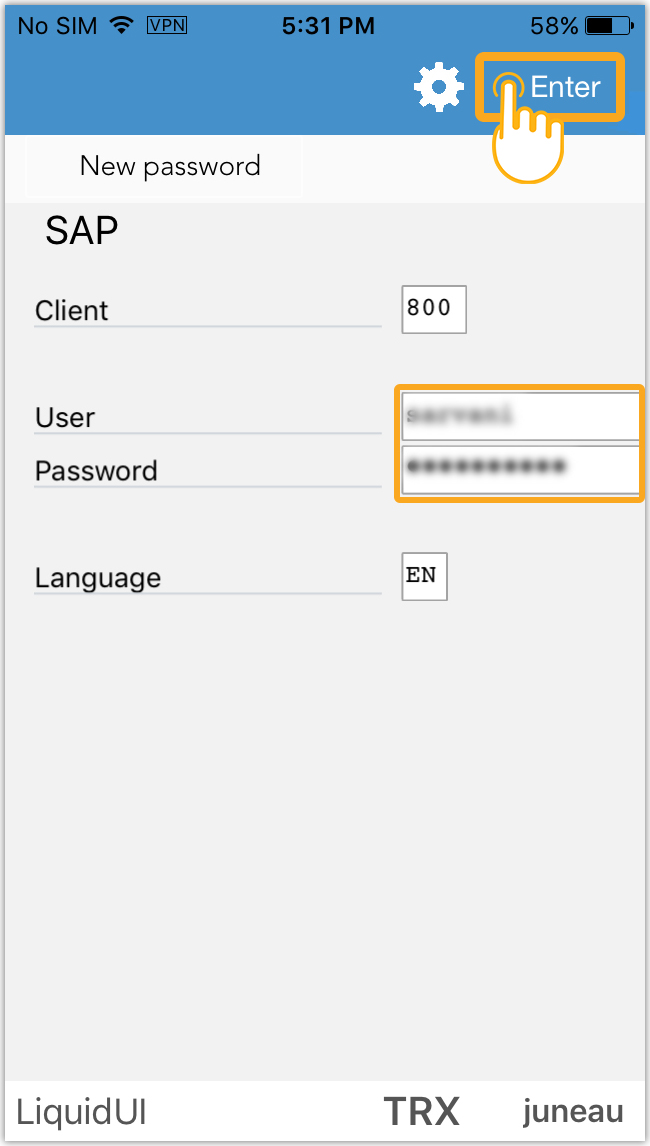
- Click Connect, located right next to the server name to enter into that particular SAP server connection. Then, you will be navigated to the SAP logon screen as shown below.
- Enter your SAP server login credentials and click Enter to open the connection.
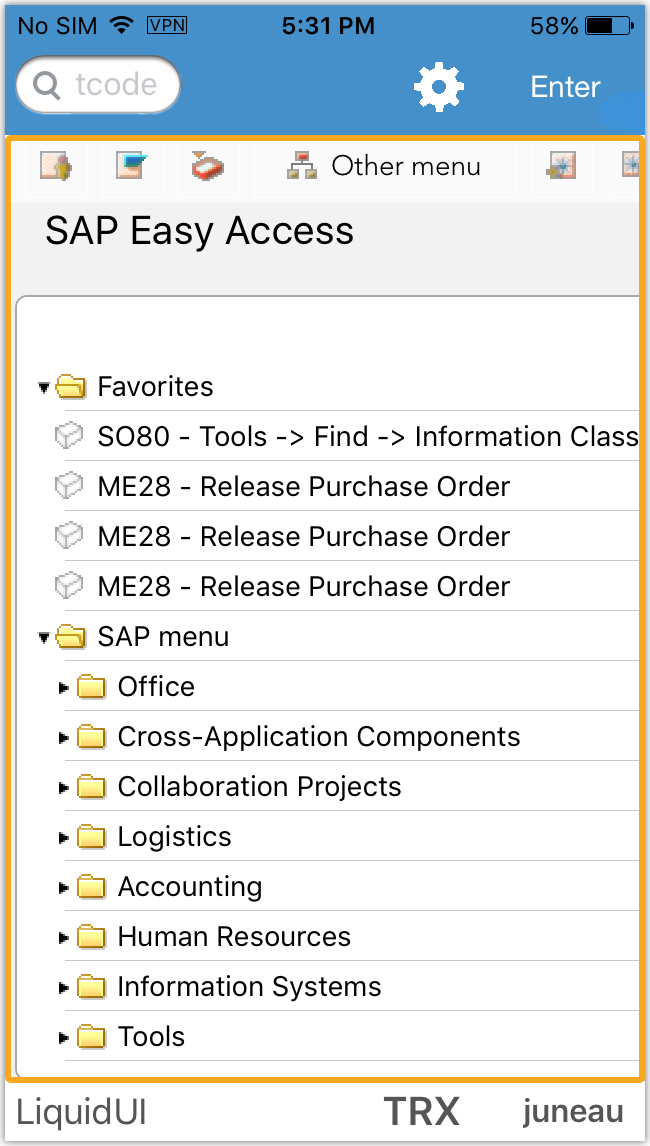
- You will be navigated to the selected SAP server connection as shown below.
Edit an existing SAP connection
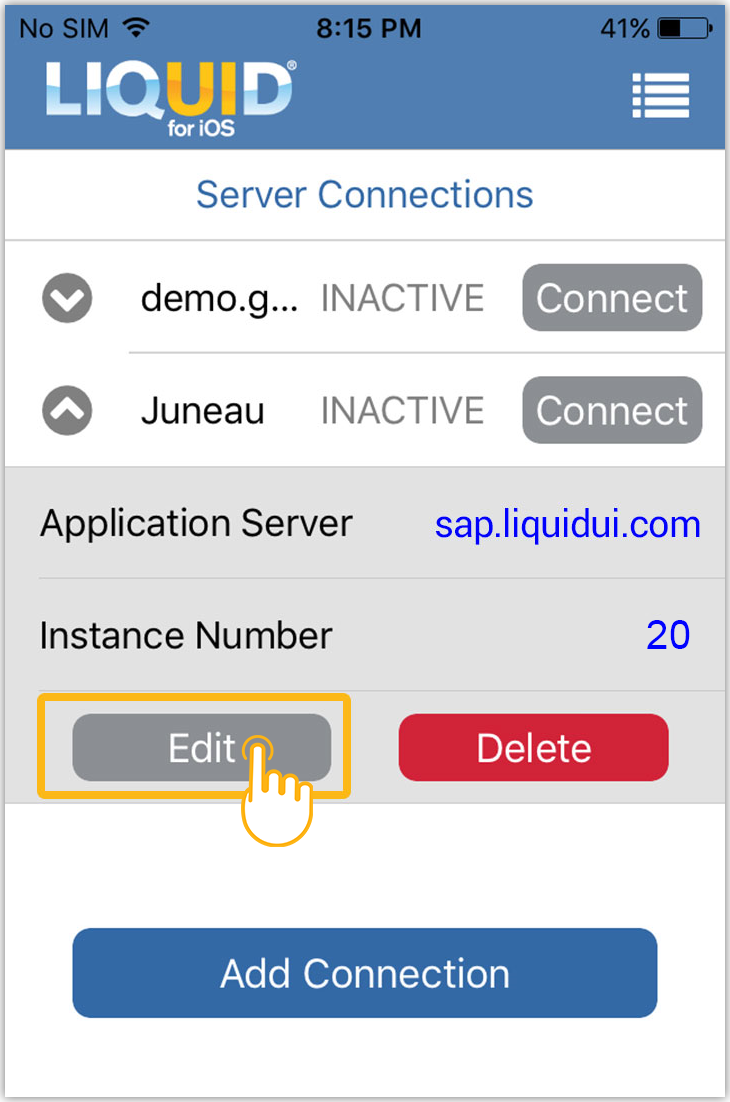
Once a connection is created, you can edit it from the Connection List.
- To edit an existing connection, open the Server Connections and tap on the connection you wish to perform an edit operation.

- You will find two options, Edit and Delete. Choose Edit to edit the SAP connection details.
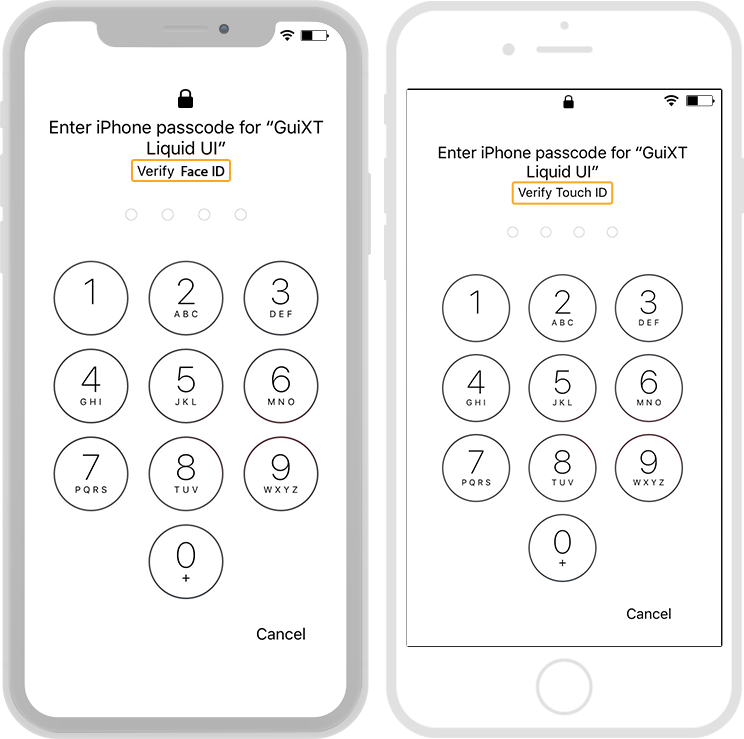
- If the Biometric feature is enabled for the connection, then you will need to authenticate using a Face ID/Touch ID to make any connection changes.
- Tap on each field that you want to edit and use the device keyboard to make changes. Once you are done with editing, click the Update Connection details button to save your changes.
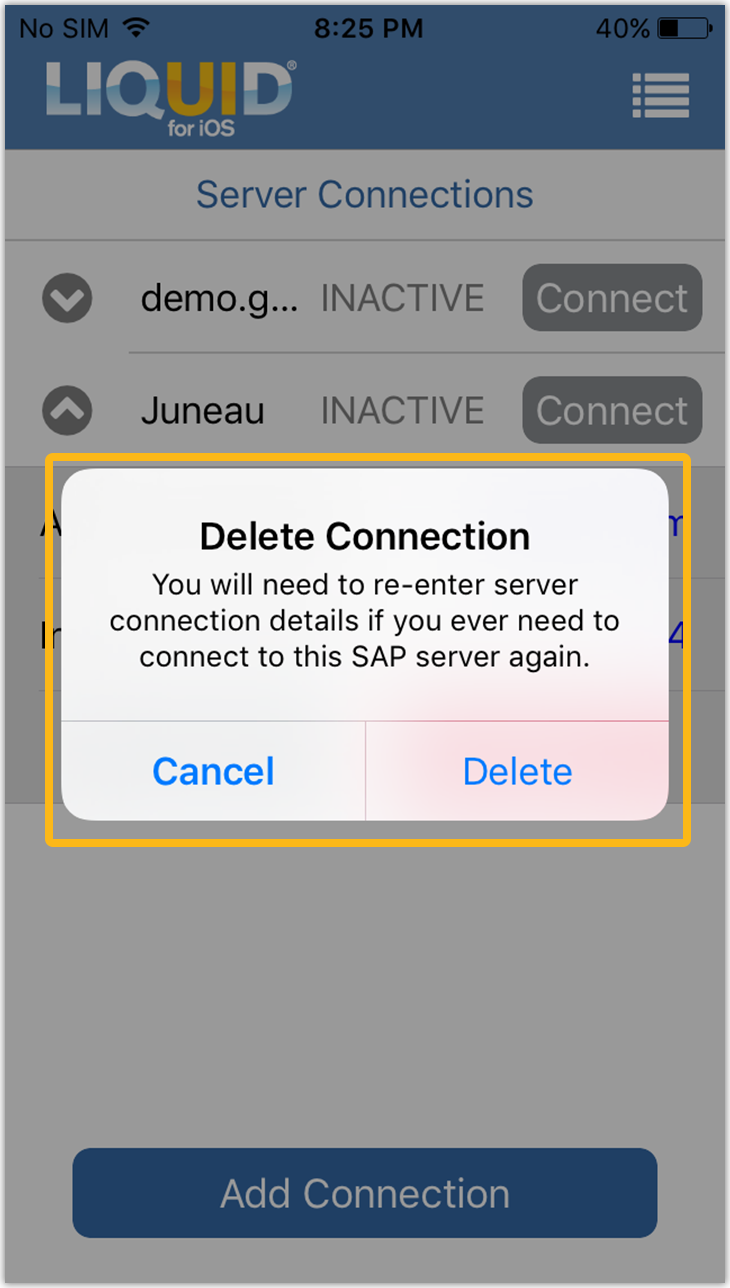
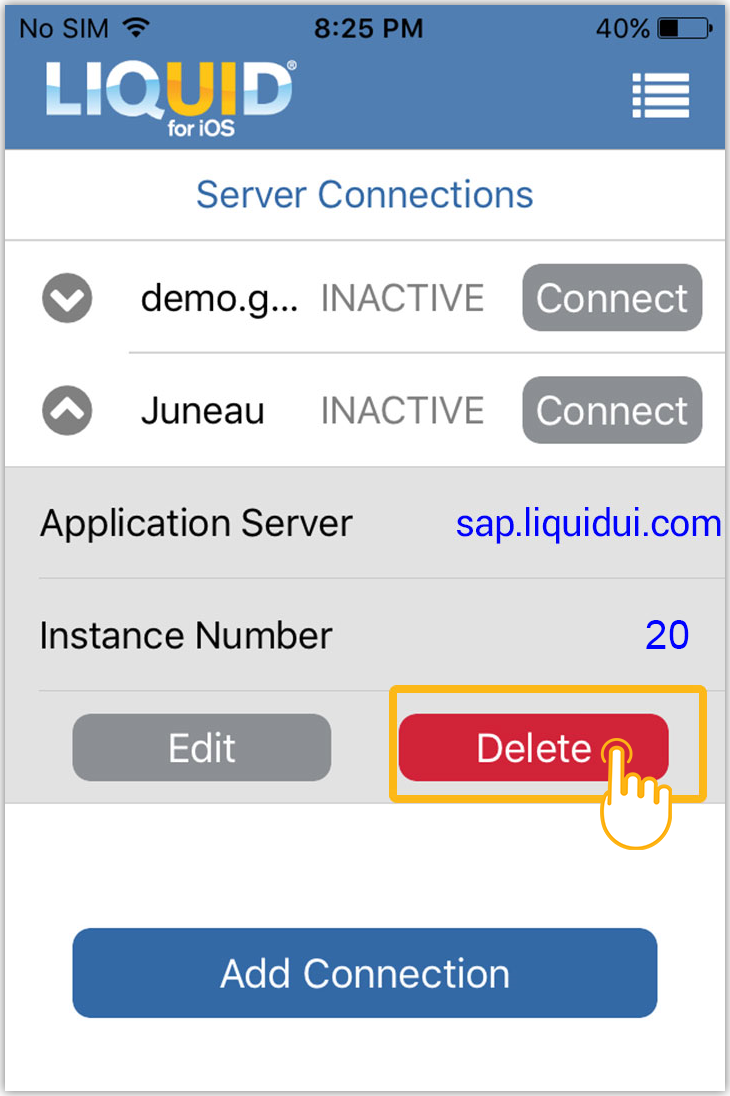
Remove an SAP Connection
All user-created connections can be deleted. To delete a connection, please do the following.
- Open the Server Connection screen and then tap on the SAP server connection you want to remove.
- You will find two options, Edit and delete. Tap on the 'Delete' button to remove the connection.
- You will get a Delete Connection popup window and click Delete option. Then, the connection will be removed from the Server Connections.