Liquid UI for Handheld Scanguns offers users the ability to read RFID tags and utilize the information contained within SAP transactions. This ability can be used with both Mobile and with the Offline solution when the Mobile client is used in conjunction with that product. Please see the WS Reference Library for a more detailed explanation of how to script RFID reads into your code.
Required Files
Using RFID requires that you have an additional file with Mobile. This file is as follows.
- SynRFUI.dll
The SynRFUI.dll should be installed in the same directory as the other Mobile files.
Editing LiquidUI-Mobile.sy3
You also must edit the Liquid UI-Mobile.sy3 file in order to read RFID tags. This edit will depend on the type of device you are using. Currently, we support two different device types for RFID tag reading.
The devices we support are as follows.
- Intermac
-
To use the Intermac devices, please add the following line to your LiquidUI-Mobile.sy3 file.
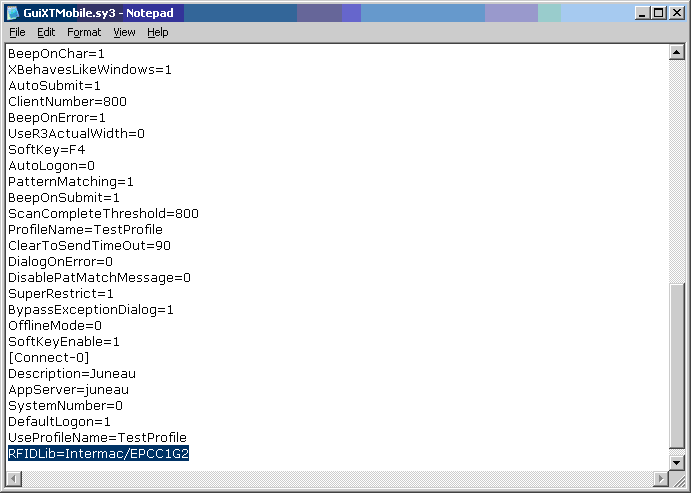
RFIDLib=Intermac/EPCC1G2
- TransCore
-
To use the TransCore devices, please add the following line to your LiquidUI-Mobile.sy3 file.
RFIDLib=TransCore/XXX
The ID following the forward slash specifies the type of tag the user wishes to read. TransCore devices do not require a tag type, so this can be designated with 'XXX' instead of an actual tag type.
A sample LiquidUI-Mobile.sy3 file containing the Intermac RFID entry is shown below:

Reading RFID Tags
To read RFID tags with Liquid UI for Handheld Scanguns, please do the following.
- Using a handheld device that supports RFID, navigate to any Liquid UI-created field that has an RFID tag. If the Mobile device is a scangun, press the trigger. Users can also create either a pushbutton or a toolbar button and associate it with an RFID smart attribute that will be explained later in this document.
- If there is a single RFID tag, the entry for that tag will automatically appear in the field on the device.
- If there are multiple RFID tags, a list box will appear and the user must select the desired RFID tag. Users can select multiple RFID tags for input although due to the character limitations in inputfields, we recommend only doing this in long text fields.
- Once an RFID tag is selected, the data from that tag will be entered into the appropriate fields in the table.
- You can also type '/rfid' into the transaction field as shown below and that will also force a RFID read, just as though the user had pressed the trigger of the device.


