Prerequisites
- Products: SAP GUI, Liquid UI for iOS (Optional), Liquid UI for Android (Optional)
- Client and Server devices should be in the same network
Most of the Liquid UI SDK is pre-configured. All of your SAP customizations will render through the Liquid UI Server. You can view the sample customized screens when you get connected to a pre-configured Liquid UI SDK connection on the SAP GUI.

Note: After installing the Liquid UI SDK software with a valid license, you need to Activate GuiXT in SAP GUI and then configure SDK.
Now, let's set up your local infrastructure to develop and configure the Liquid UI SDK in two easy steps, as shown below:
- Configure your Liquid UI Server to talk to your SAP Server
- Configure your script's directory path in guixt.sjs file
- Configure your proxy server details in the sapproxy.ini file
- Restart your Liquid UI Server
- Configure your SAP GUI (/clients) to talk to Liquid UI Server
- Configure your SAP GUI in client devices to connect to your Liquid UI Server
- Configure your SAP GUI in client devices to connect to your Liquid UI Server
Configure your Liquid UI Server to talk to your SAP Server
To connect to your SAP server, you need to configure guixt.sjs and sapproxy.ini files, and then restart your Liquid UI Server. You can find these configuration files in the Liquid UI Server folder present in the Liquid UI SDK.
For 64 bit OS: C:\Program Files (x86)\Liquid UI SDK\LUI Server
For 32 bit OS: C:\Program Files\Liquid UI SDK\LUI Server
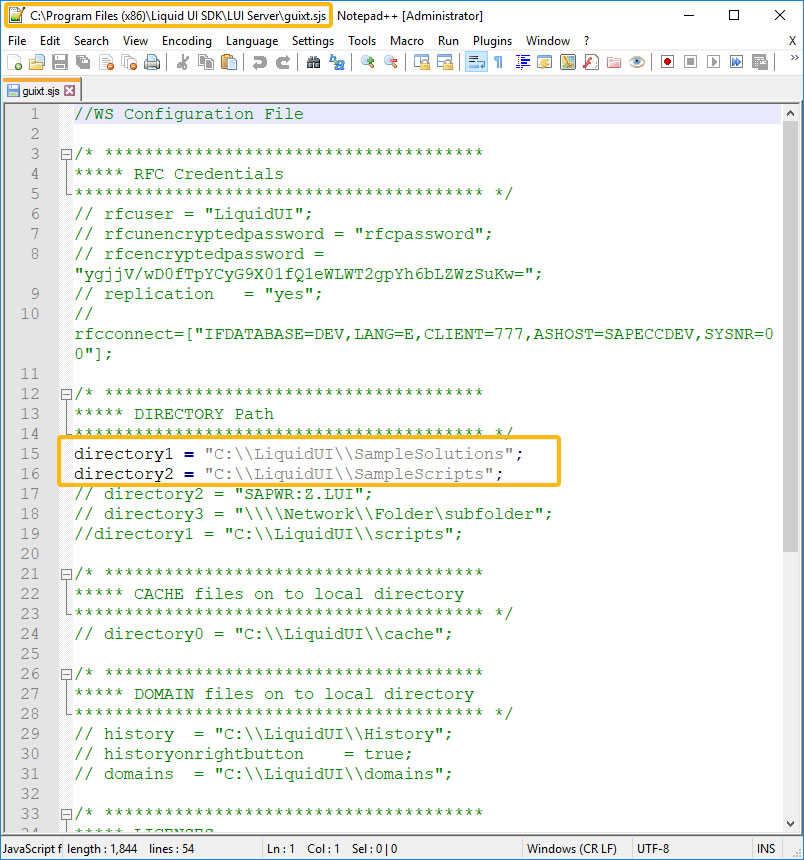
The guixt.sjs is the configuration file that defines various parameters like script directory path, license key, debug flags and more. This file is present in the Liquid UI Server folder and can be opened with any text editor.
By default, guixt.sjs file is pre-configured with all settings required for Liquid UI SDK.

Note: Save the file in administrator mode to see the effected changes.
//guixt.sjs file
//WS Configuration File

/* **************************************
***** RFC Credentials
***************************************** */
// rfcuser = "LiquidUI";
// rfcunencryptedpassword = "rfcpassword";
// rfcencryptedpassword = "ygjjV/wD0fTpYCyG9X01fQ1eWLWT2gpYh6bLZWzSuKw=";
// replication   = "yes";
// rfcconnect=["IFDATABASE=DEV,LANG=E,CLIENT=777,ASHOST=SAPECCDEV,SYSNR=00"];

/* **************************************
***** DIRECTORY Path
***************************************** */
directory1 = "C:\\LiquidUI\\SampleSolutions";
directory2 = "C:\\LiquidUI\\SampleScripts";
// directory2 = "SAPWR:Z.LUI";
// directory3 = "\\\\Network\\Folder\subfolder";
//directory4 = "C:\\LiquidUI\\scripts";

/* **************************************
***** CACHE files on to local directory
***************************************** */
// directory0 = "C:\\LiquidUI\\cache";

/* **************************************
***** DOMAIN files on to local directory
***************************************** */
// history	= "C:\\LiquidUI\\History";
// historyonrightbutton    = true;
// domains	= "C:\\LiquidUI\\domains";

/* **************************************
***** LICENSES
***************************************** */
//license = [];
//license.push({"license":"1-12-31333-70-5104-GUIXT-E4KFC","data":{"company":"Synactive","systemid":["TRX","DEV"]}});

/* **************************************
***** DEBUG  Window Details
***************************************** */
OPENCONSOLE 	= 	0x00008000;			// Display Cornelius Window
HIDECONSOLE 	= 	0x00000000;			// Hide Cornelius Window
// TRACE_RFCCALL	= 	0x10000000;			// RFC Trace Flags

// _blackbox=true;
// debug = 1;
// _log=true;
// _rawrfc=true;

TRACEFLAGS = HIDECONSOLE;
//TRACEFLAGS = TRACE_RFCCALL | OPENCONSOLE;
//TRACEFLAGS = OPENCONSOLE;
The configuration parameters are defined as follows:
| Directory1 | Specifies the path for the WS scripts |
| OPENCONSOLE |
Enables to view the output in the console mode |
| HIDECONSOLE | Disables the console mode output |
| TRACEFLAGS | Trace flags are used for developers debugging. It can be set to either Open console or Hide console |
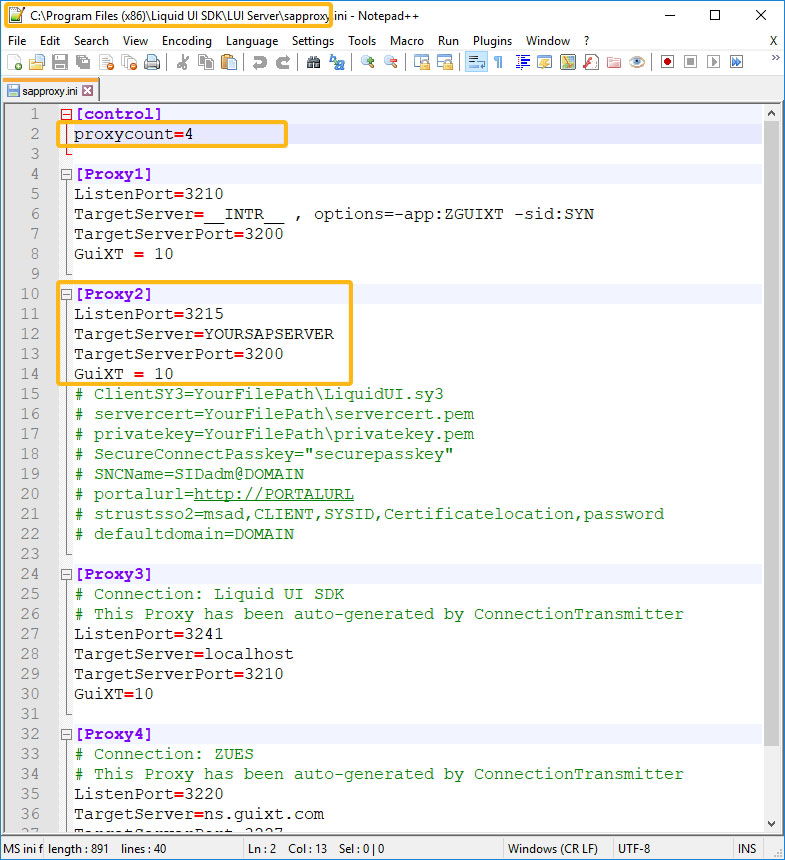
The sapproxy.ini is another configuration file present in the Liquid UI Server folder. In this file, you can add your proxy server connection details that let your SAP GUI connect to your SAP Server using Liquid UI Server.
To work on more than one SAP server, you need to define the proxycount parameter and add the SAP server connection details. You can add a maximum of four proxy server connection details in this configuration file.
Note: Save the file in administrator mode to see the effected changes.
[control]
proxycount=4

[Proxy1]
ListenPort=3210
TargetServer=__INTR__ , options=-app:ZGUIXT -sid:SYN
TargetServerPort=3200
GuiXT = 10

[Proxy2]
ListenPort=3215
TargetServer=YOURSAPSERVER
TargetServerPort=3200
GuiXT = 10
# ClientSY3=YourFilePath\LiquidUI.sy3
# servercert=YourFilePath\servercert.pem
# privatekey=YourFilePath\privatekey.pem
# SecureConnectPasskey="securepasskey"
# SNCName=SIDadm@DOMAIN
# portalurl=http://PORTALURL
# strustsso2=msad,CLIENT,SYSID,Certificatelocation,password
# defaultdomain=DOMAIN

[Proxy3]
# Connection: Liquid UI SDK
# This Proxy has been auto-generated by ConnectionTransmitter
ListenPort=3241
TargetServer=localhost
TargetServerPort=3210
GuiXT=10

[Proxy4]
# Connection: ZUES
# This Proxy has been auto-generated by ConnectionTransmitter
ListenPort=3220
TargetServer=192.168.1.12
TargetServerPort=3254
GuiXT=10
The Server configuration parameters are defined as follows:
| proxycount | Enter the number of connections between the SAP Server and Liquid UI Server. |
| ListenPort | Enter the port number of the Liquid UI Server to accept connections. Note: You must use only port numbers that start with 32. (32xx series) |
| TargetServer | Specifies the name or IP address of the SAP application server. |
| TargetServerPort | Specifies the SAP server port number to which Liquid UI Server connects |
| GuiXT |
|
Restart Liquid UI Server
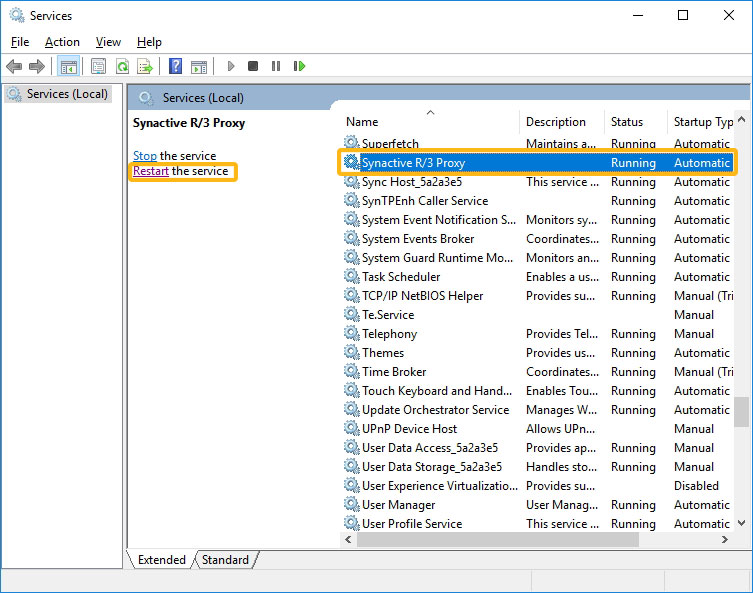
After updating the guixt.sjs and sapproxy.ini files you need to restart your Liquid UI Server service to apply the changes made. This service appears as a Synactive R/3 Proxy in Windows.
-
Open Services, select Synactive R/3 Proxy service and click Restart the service.
Configure your SAP GUI (/clients) to talk to Liquid UI Server
You need to configure your client devices to connect to your Liquid UI Server. To add a connection to the Liquid UI Server in your client device, you need to enter the server connection details.
Configuring SAP GUI
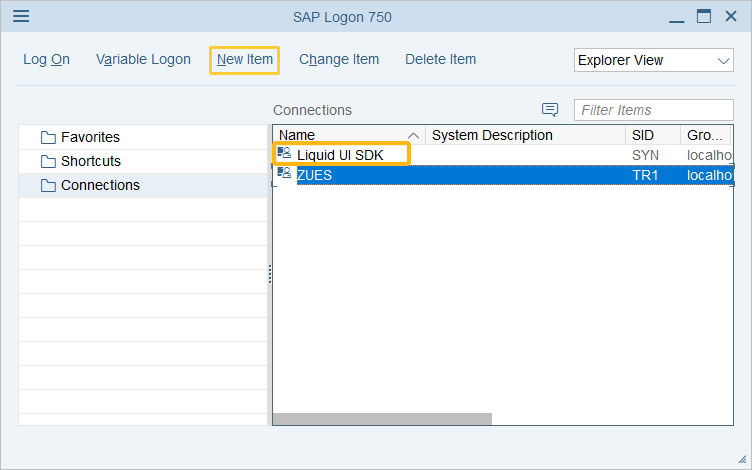
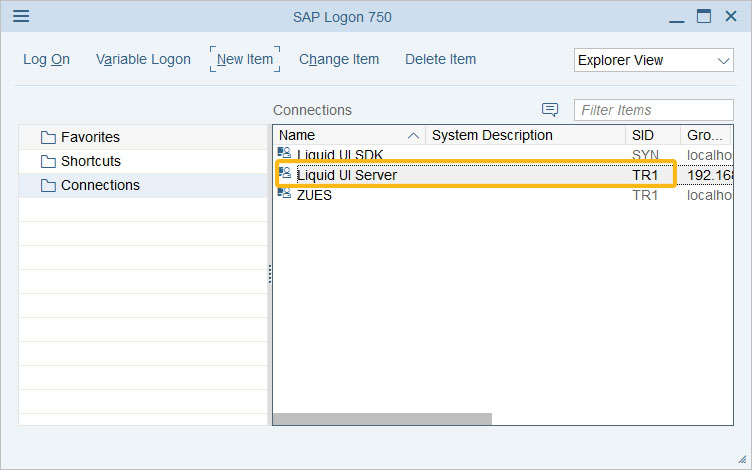
After installing Liquid UI SDK, by default, Liquid UI SDK connection appears on your SAP GUI connection screen. You can add a new Liquid UI Server connection in your SAP GUI, as shown below:
- Open your SAP logon window. Click New Item icon to add a new Liquid UI Server connection.
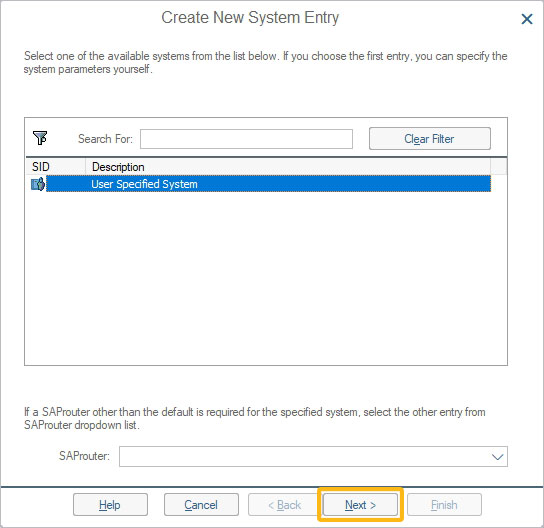
- Then, appears the Create New System Entry window. Click Next.
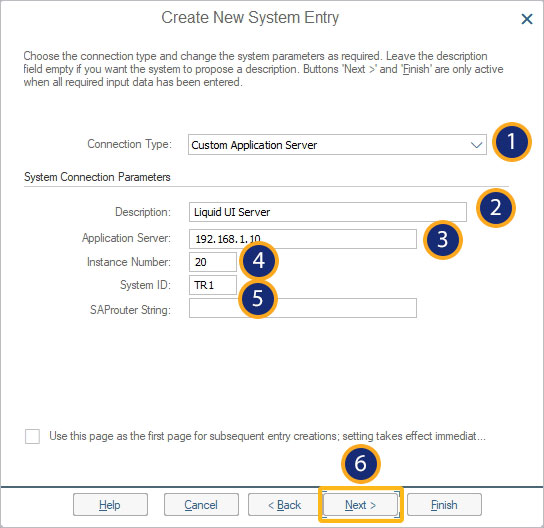
- Now, fill out your Liquid UI Server information in the form, and then click Next.
- Connection Type - Select Custom Application Server
- Application Server - localhost (if on a network machine, enter IP address)
- Instance Number - 10 (last two-digit values of the listen port of the proxy connection)
- System ID - The system id of your SAP server
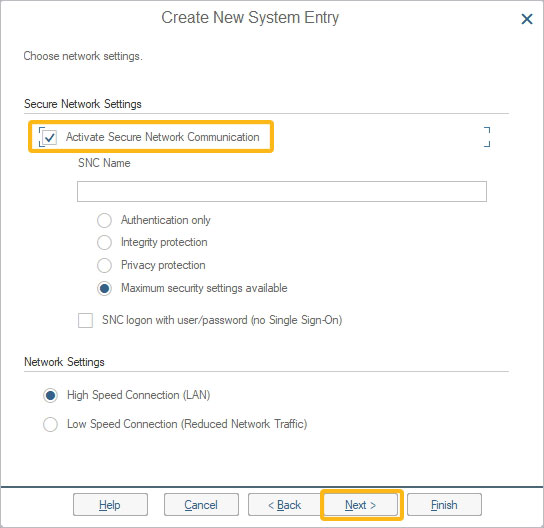
- You will be asked to choose the network settings. Select the Activate Secure Network Communication, and click Next.
- Select the preferred language from the Language drop-down list, and click Finish.
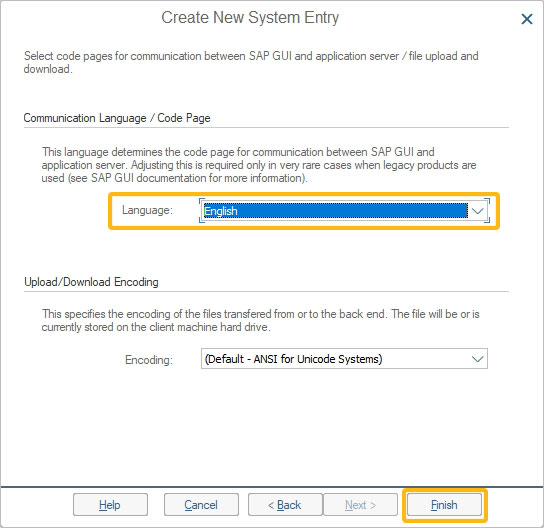
- Then, the Liquid UI Server connection appears in the list of connections on your SAP logon pad.
Configuring Liquid UI for iOS (Optional)
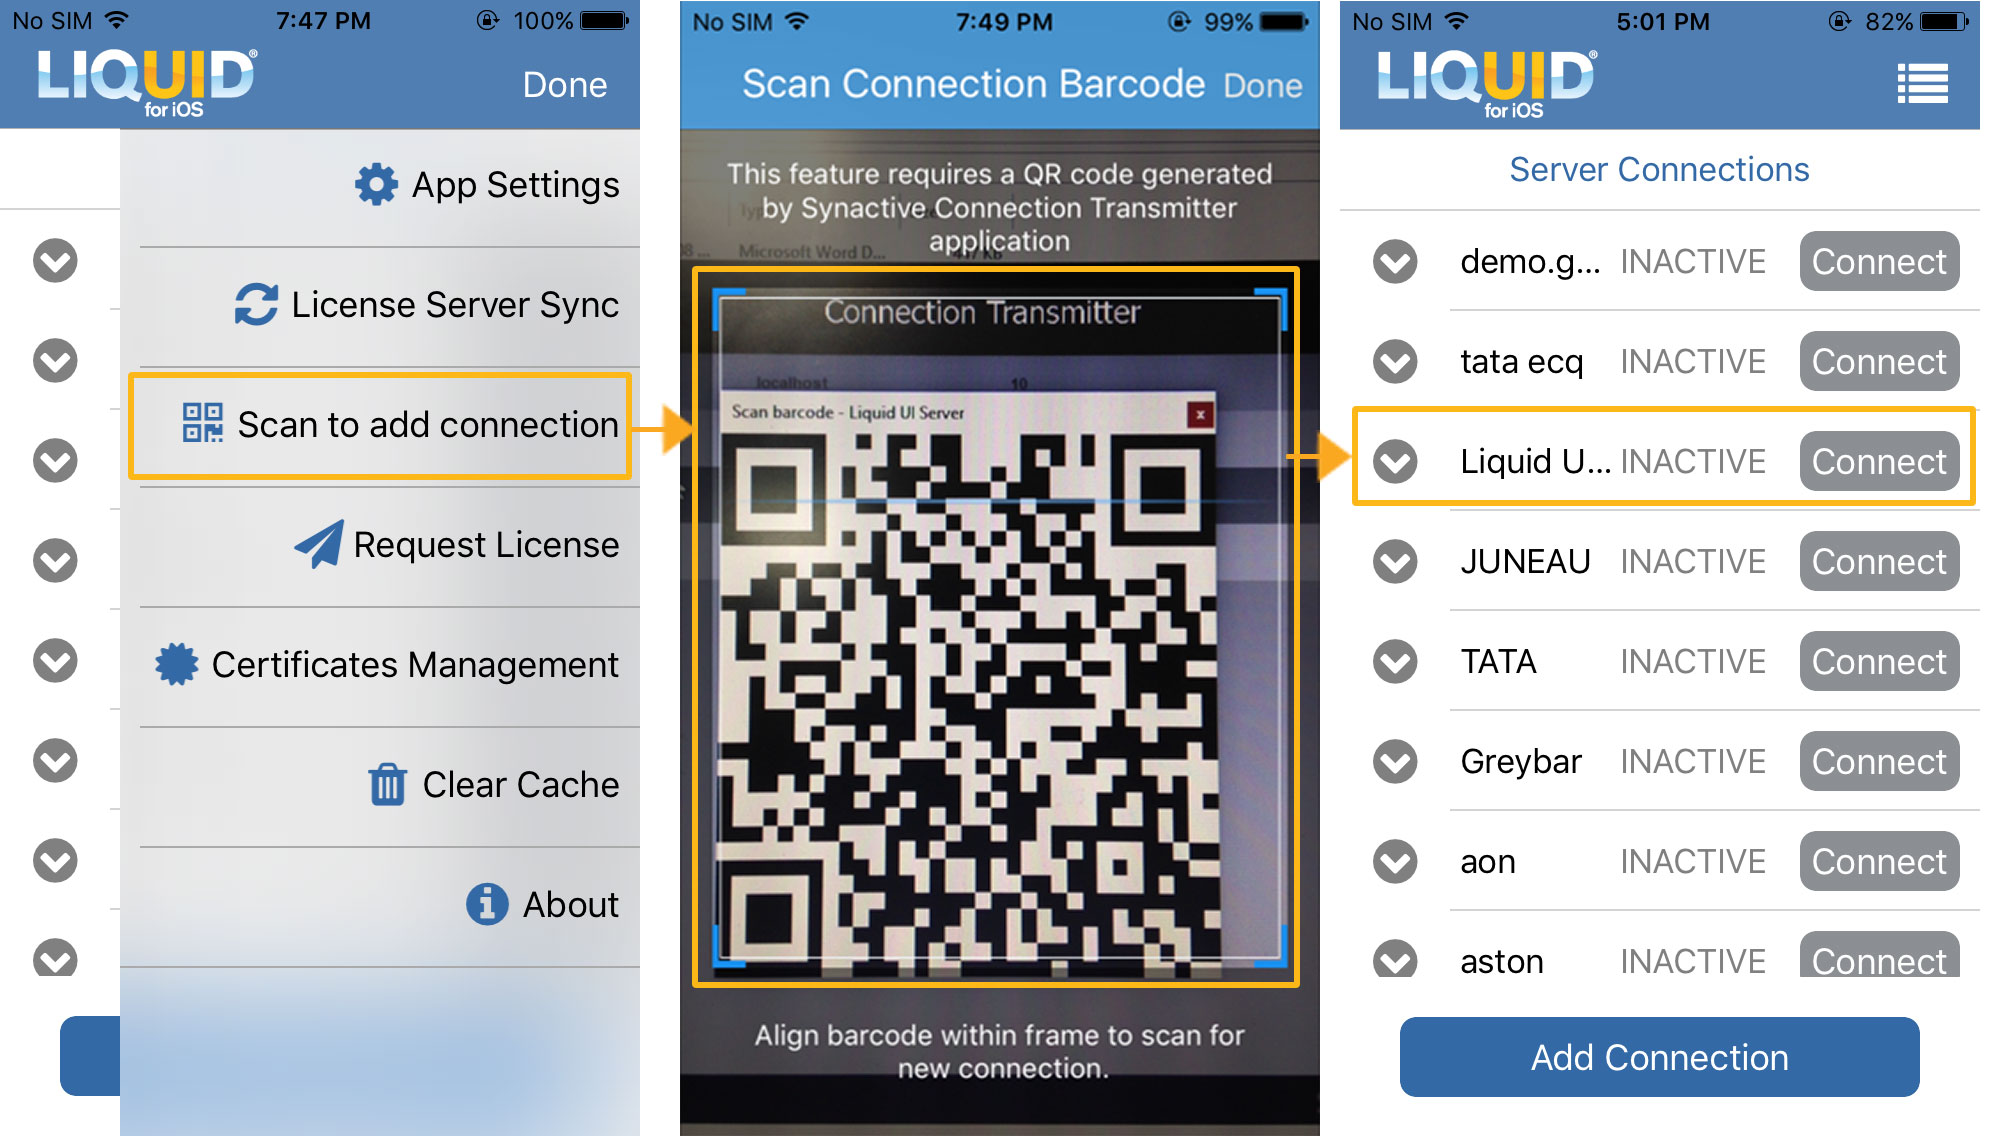
Note: To learn more about the connection transmitter, click here.
Configuring Liquid UI for Android (Optional)
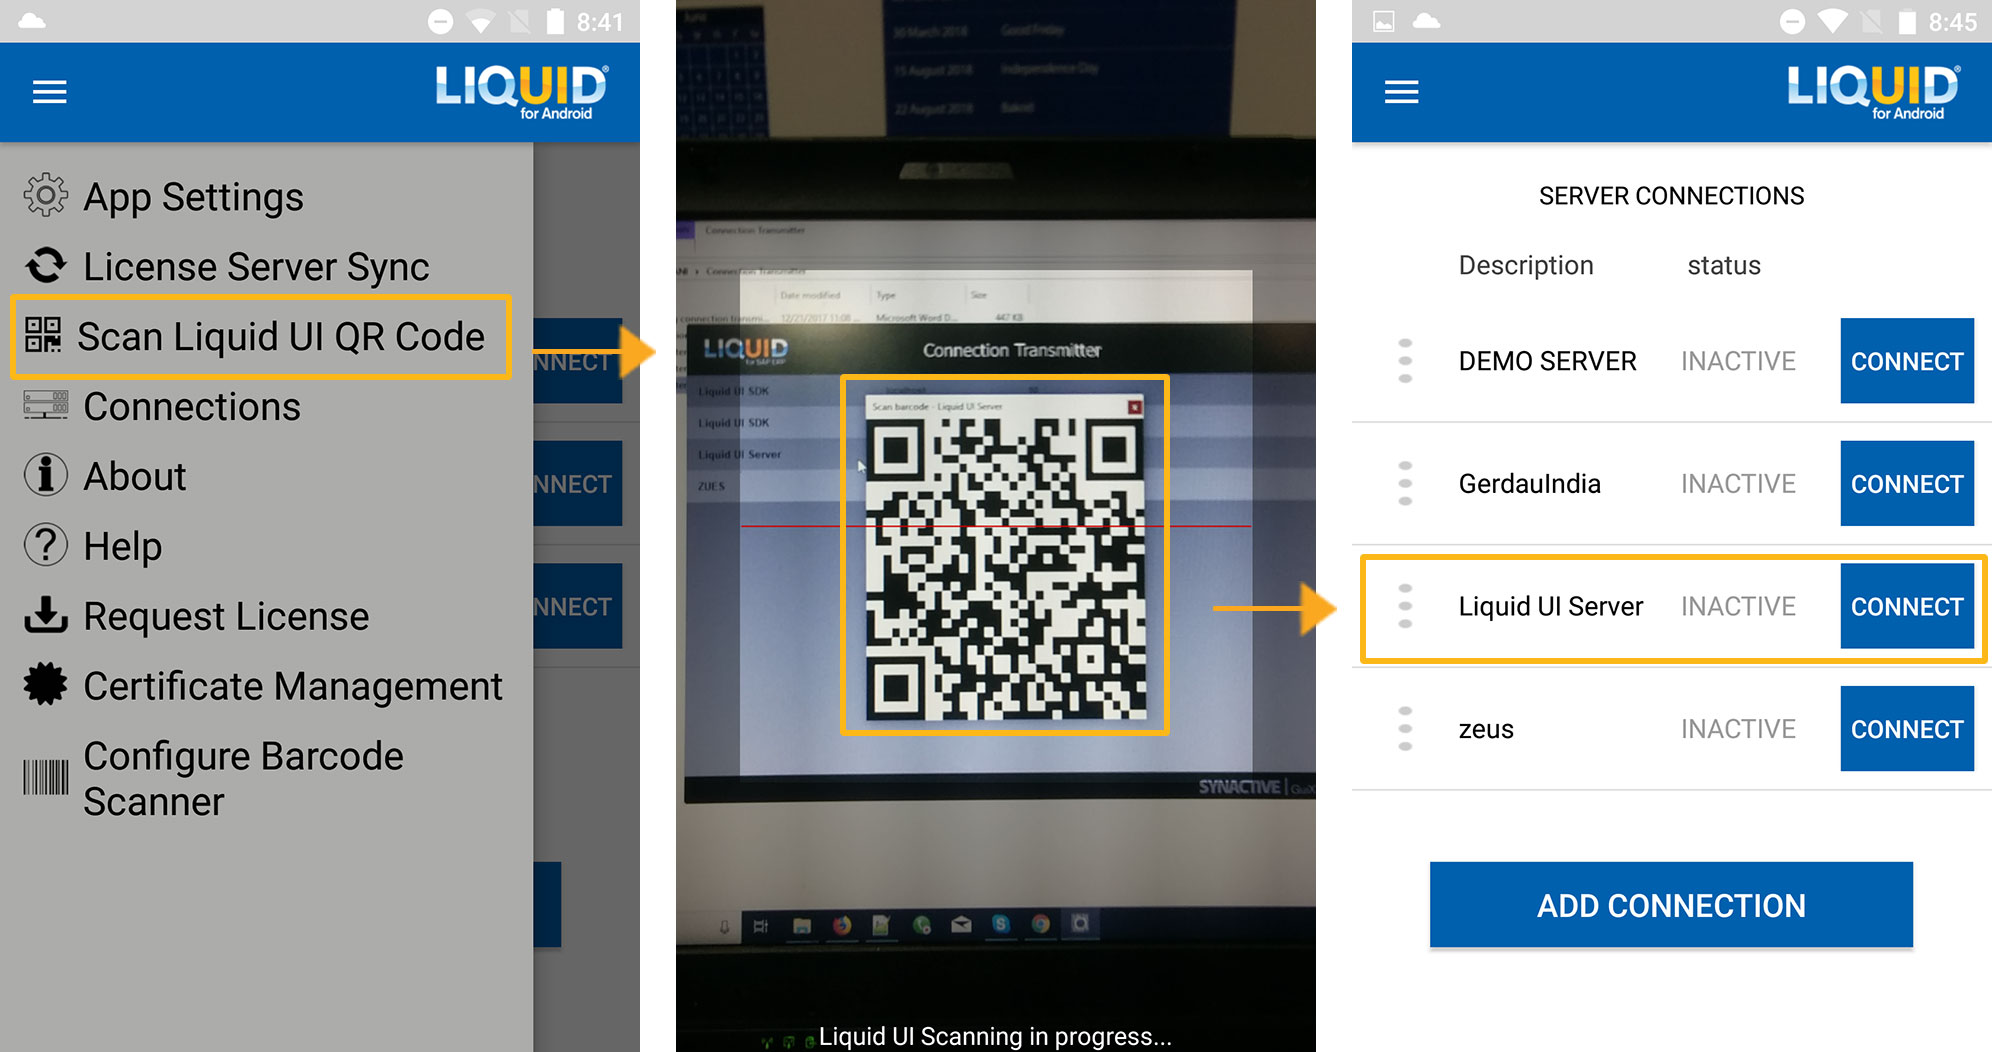
Note: Check whether Liquid UI Server and your SAP GUI (client device) are connected to the same network and check if the windows firewall allows the Liquid UI App in your client devices to connect to the Liquid UI Server.
Next Steps
Customizing screen layout using Designer
Create your first SAP customization script using Designer and deploy it on desktop and mobile
Customizing screen layout using Text Editor
Create your first SAP customization script using Text Editor and deploy it on desktop and mobile.
5 min.
5 min.
This article is part of the 1.0 Get started with the Liquid UI development tutorial.


