You can adjust your Liquid UI for iOS app settings and customize it per your requirements. The Liquid UI for iOS app features two types of app settings, outlined below.
This article walks you through two distinct methods to access app settings, and each method displays different options.
- Navigate through Main Menu→ App Settings
- Navigate through the transaction screen→click on the SAP connection

Settings 1: Navigate through Main Menu→ App Settings
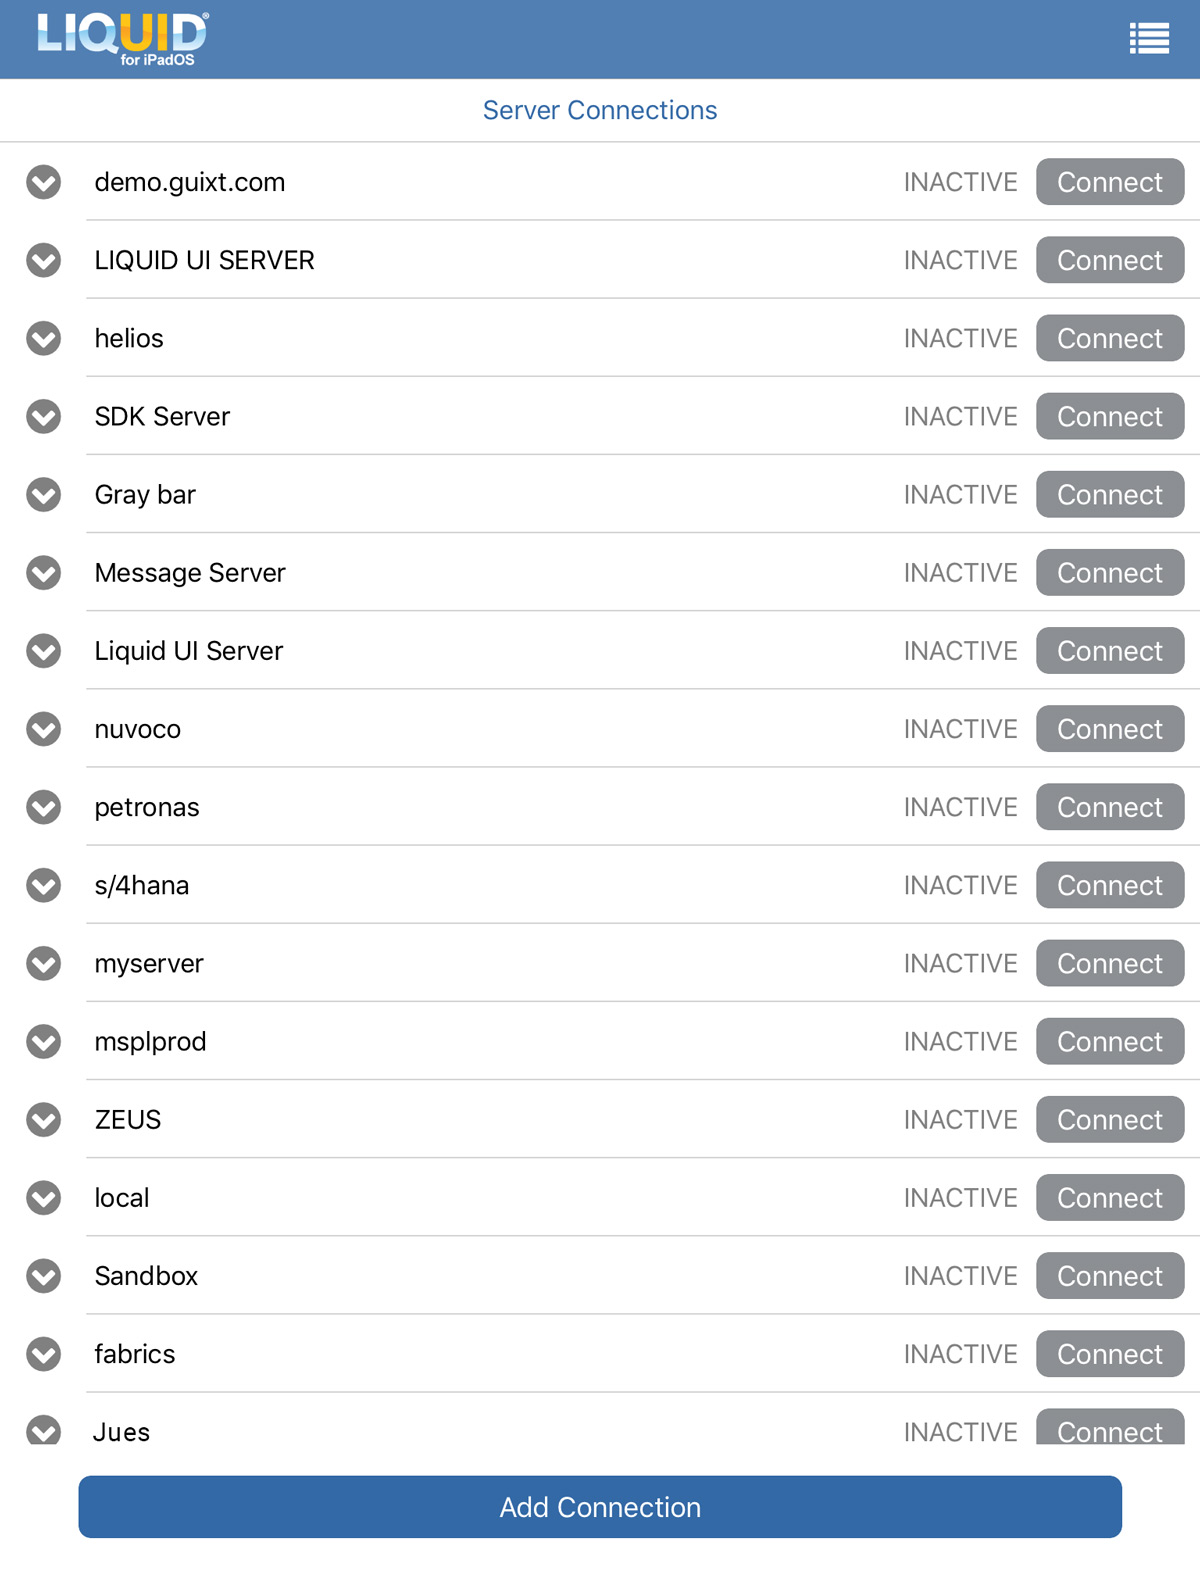
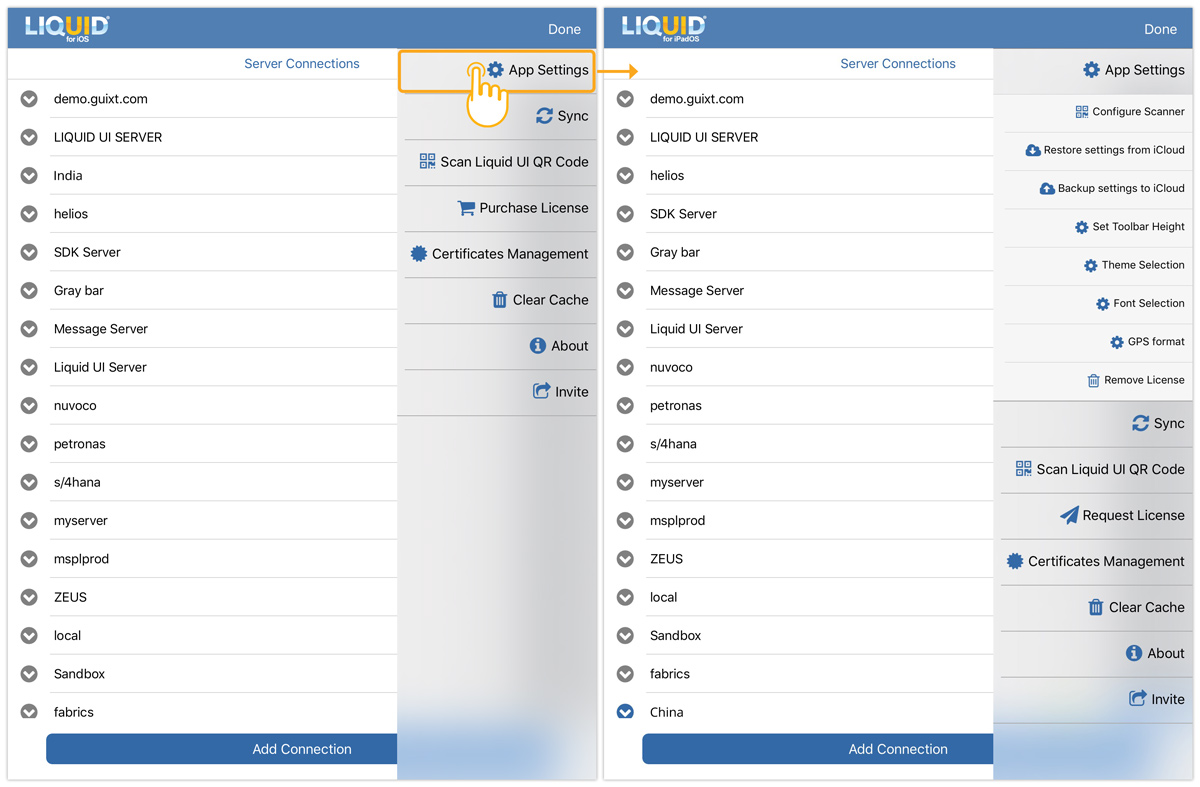
This section has settings through which you can modify the application's Main functions. You can find the App Settings on the home screen under the main menu, as shown below.
- App Settings
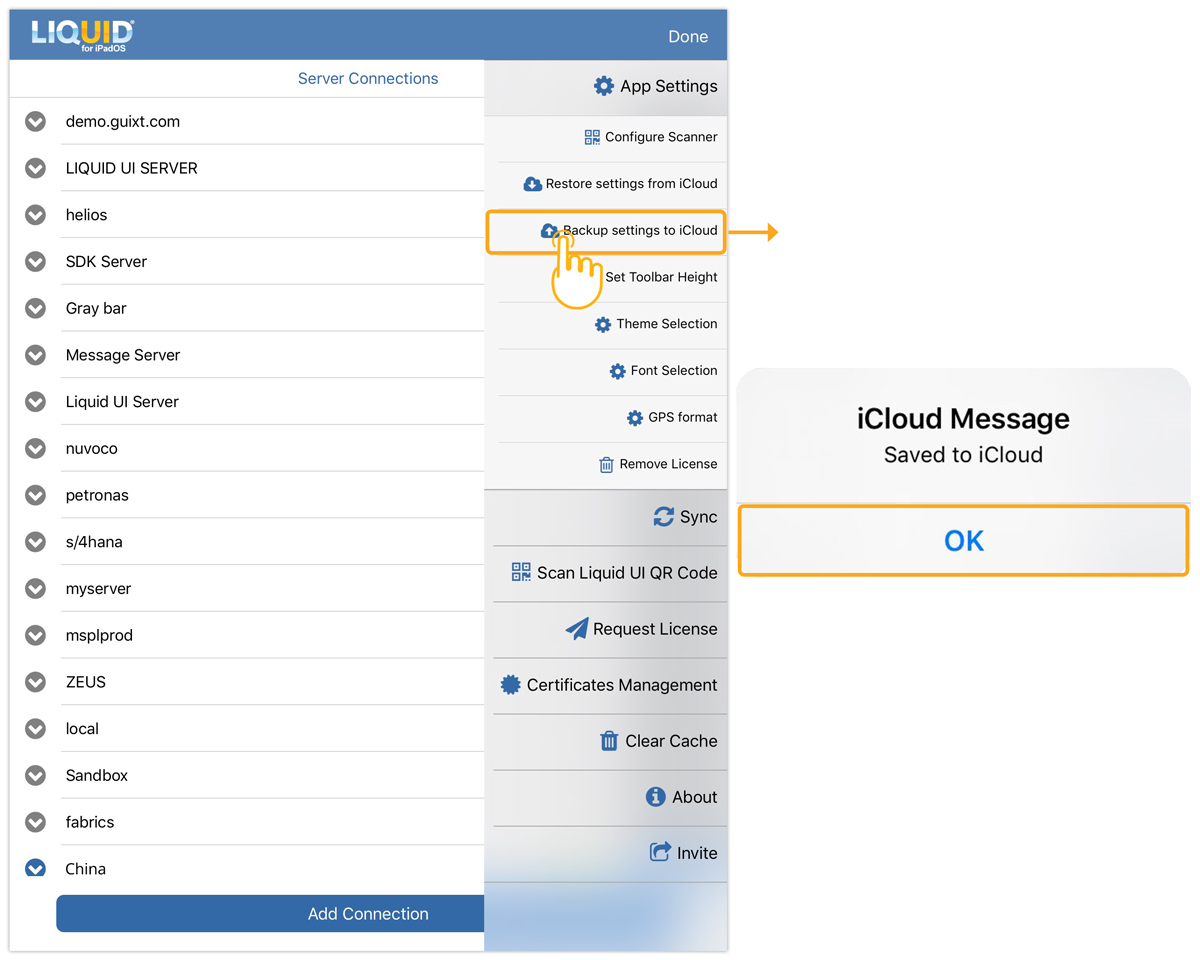
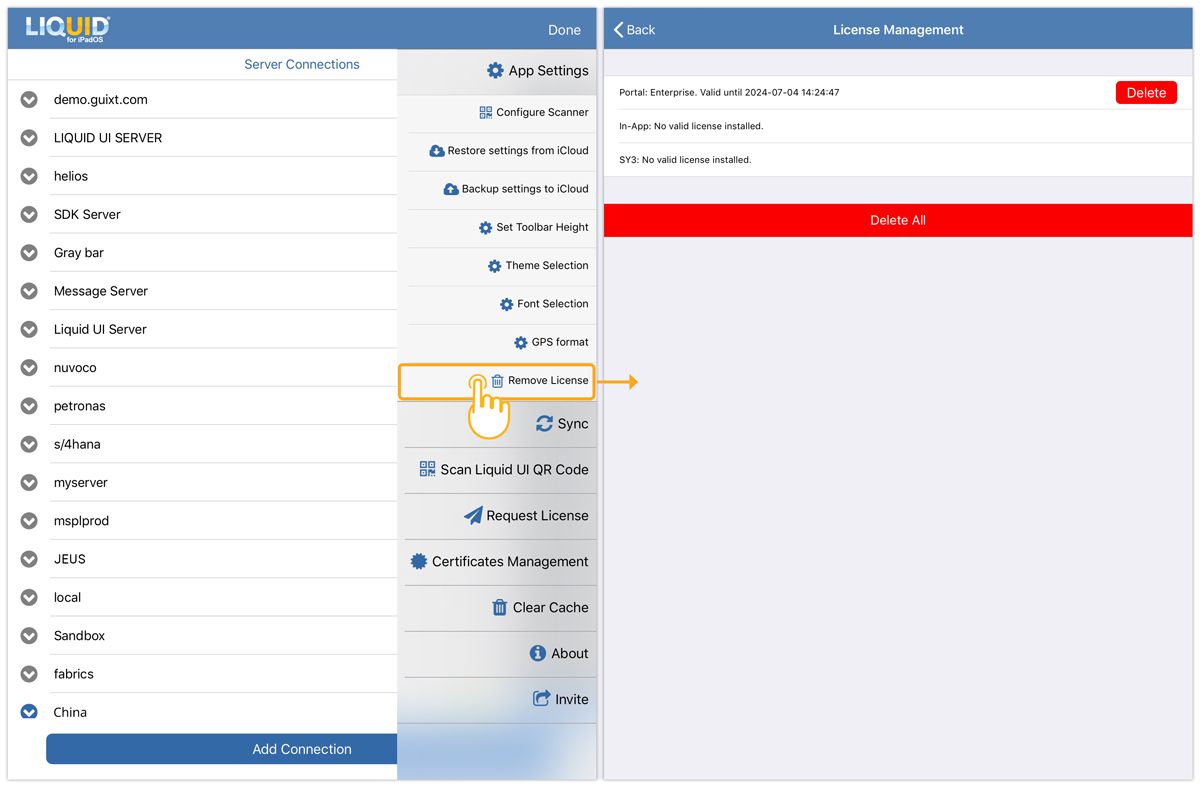
Click App Settings, and you can access the configure scanner, restore settings from iCloud, backup settings to iCloud, set toolbar height, theme selection, font selection, GPS format, and remove license.
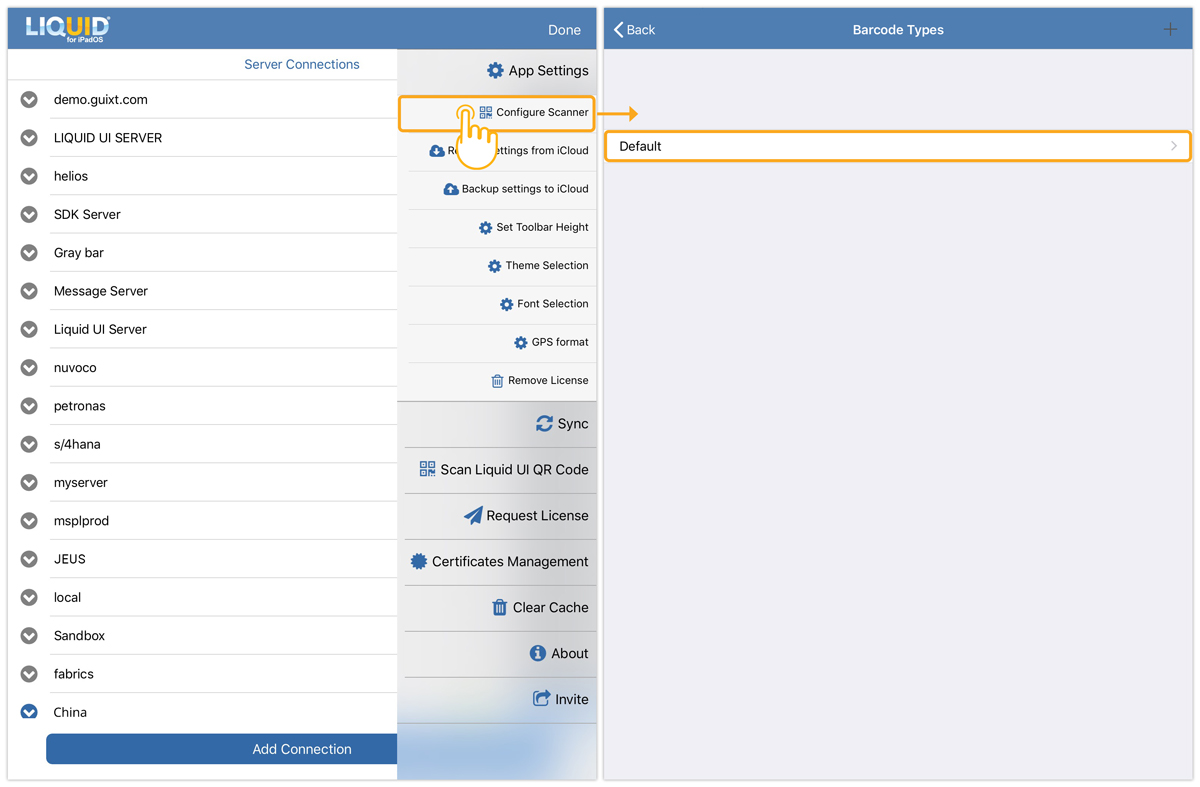
- Configure Scanner
This option lets you configure a barcode scanner. Liquid UI for iOS supports barcode scanning and enables iOS users to populate any SAP field with a single click.
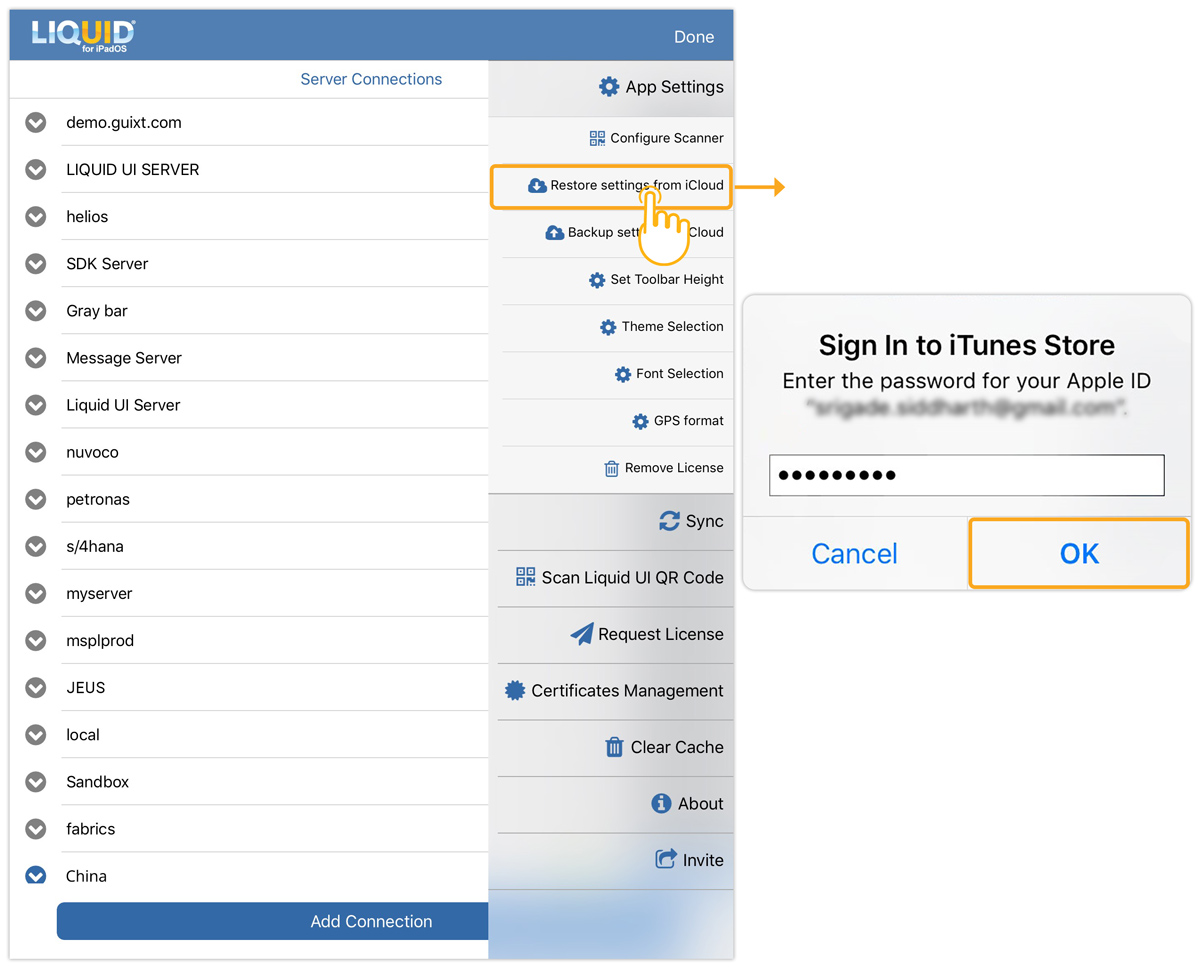
- Restore settings from iCloud
Enables iOS users to restore SAP connections from iCloud.
- Backup settings to iCloud
This option offers iCloud backup and restoration of your SAP connections. If you delete the Liquid UI for iOS app accidentally, it prevents you from reconfiguring and reinstalling licenses.
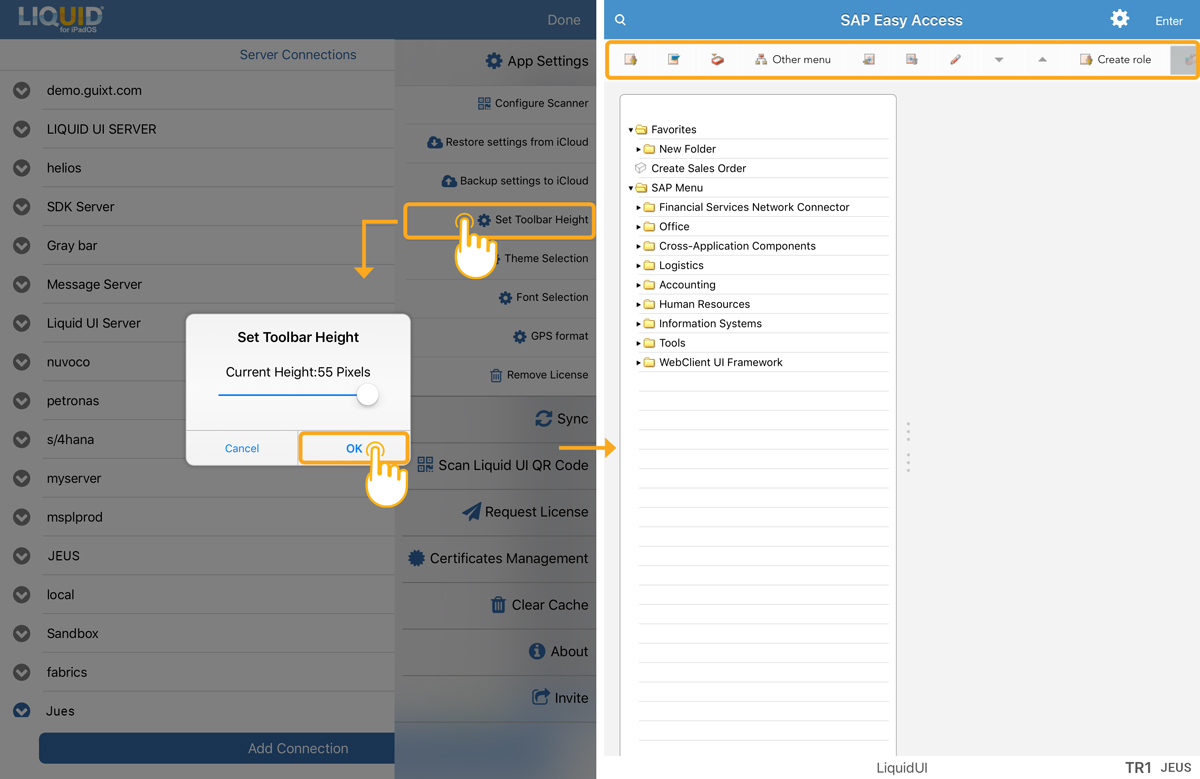
- Set Toolbar Height
This option allows you to change the height of the toolbar on SAP screens. The toolbar height varies from 35 pixels to 55 pixels. Choose the desired height and click OK. The selected toolbar height will then be displayed on the SAP screen, as shown below.
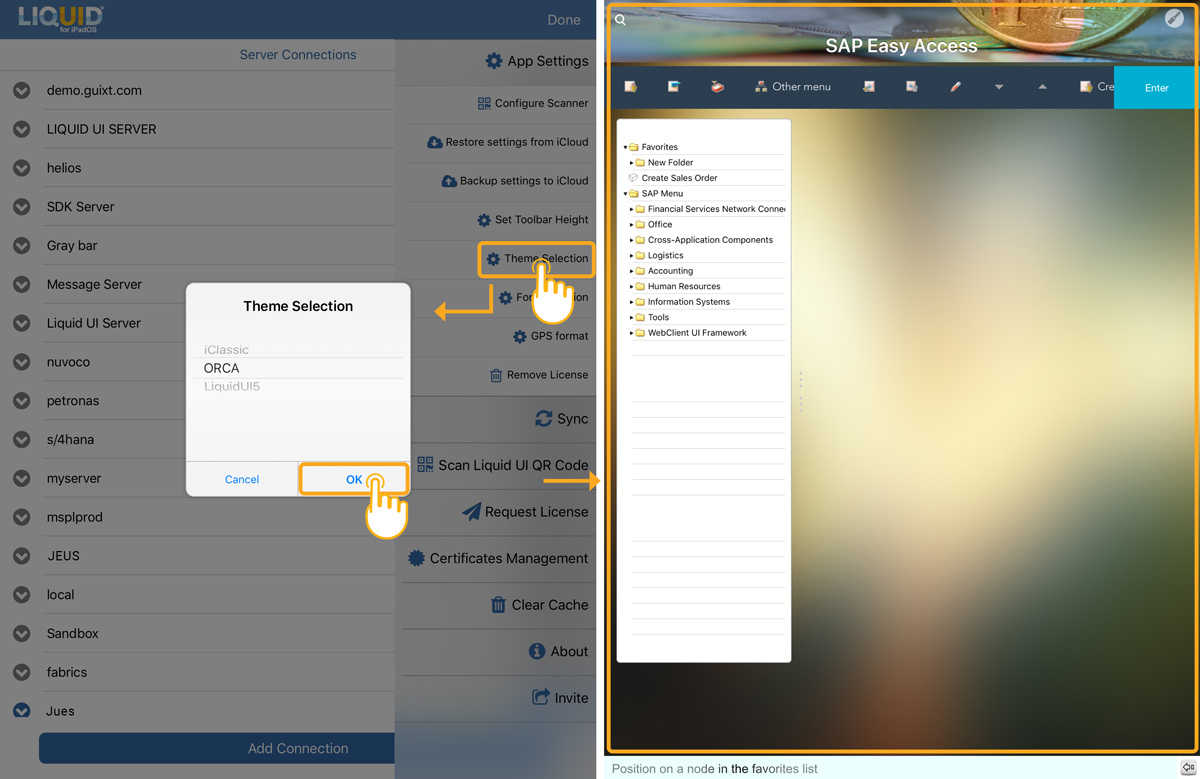
- Theme selection
This option allows you to change the background theme on your SAP screens. Select the desired theme you want to set and click OK. Then, you can see the required theme you have chosen on the SAP screen, as shown in the image below.
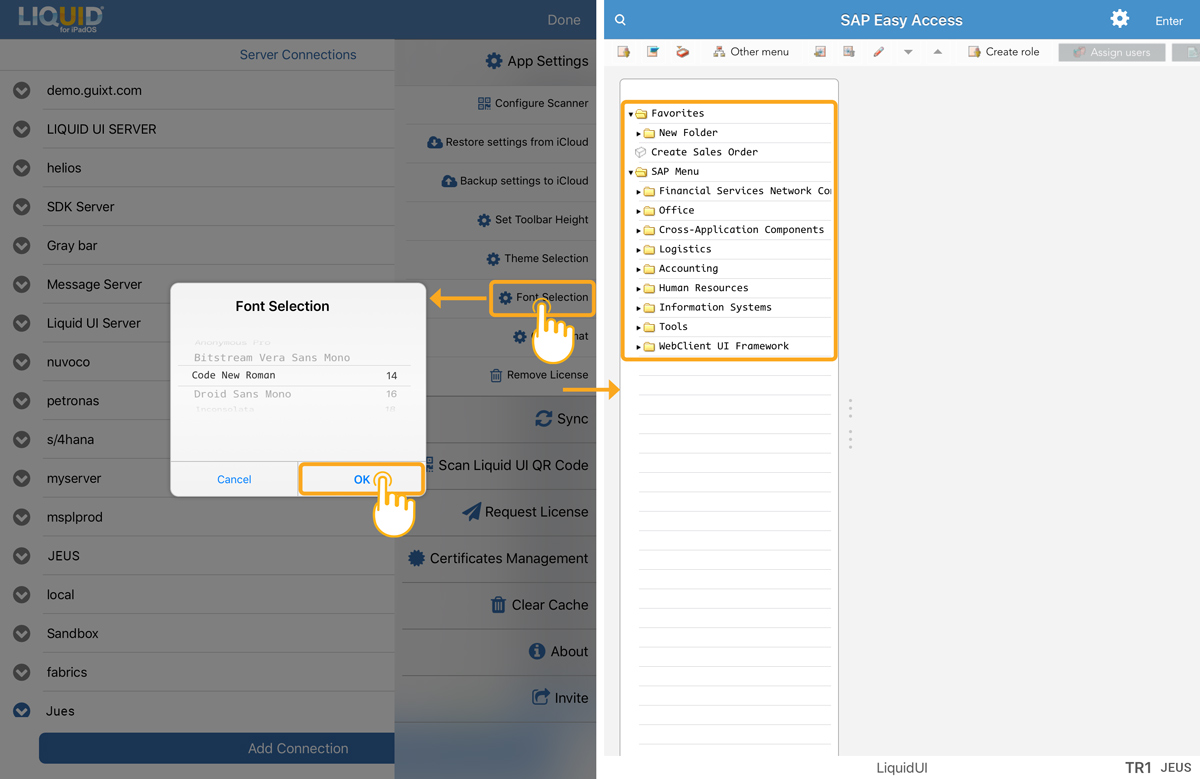
- Font Selection
This option lets you change different types of font styles on your SAP screens. Select the desired font style that you want to set and click OK. Then, you can see the chosen font on the transaction screen.
- GPS format
Allows users to specify different types of GPS formats.

- Remove License
This option lets you remove all your licenses from the Liquid UI iOS device.
Settings 2: Navigate through the transaction screen→click on the SAP Connection.
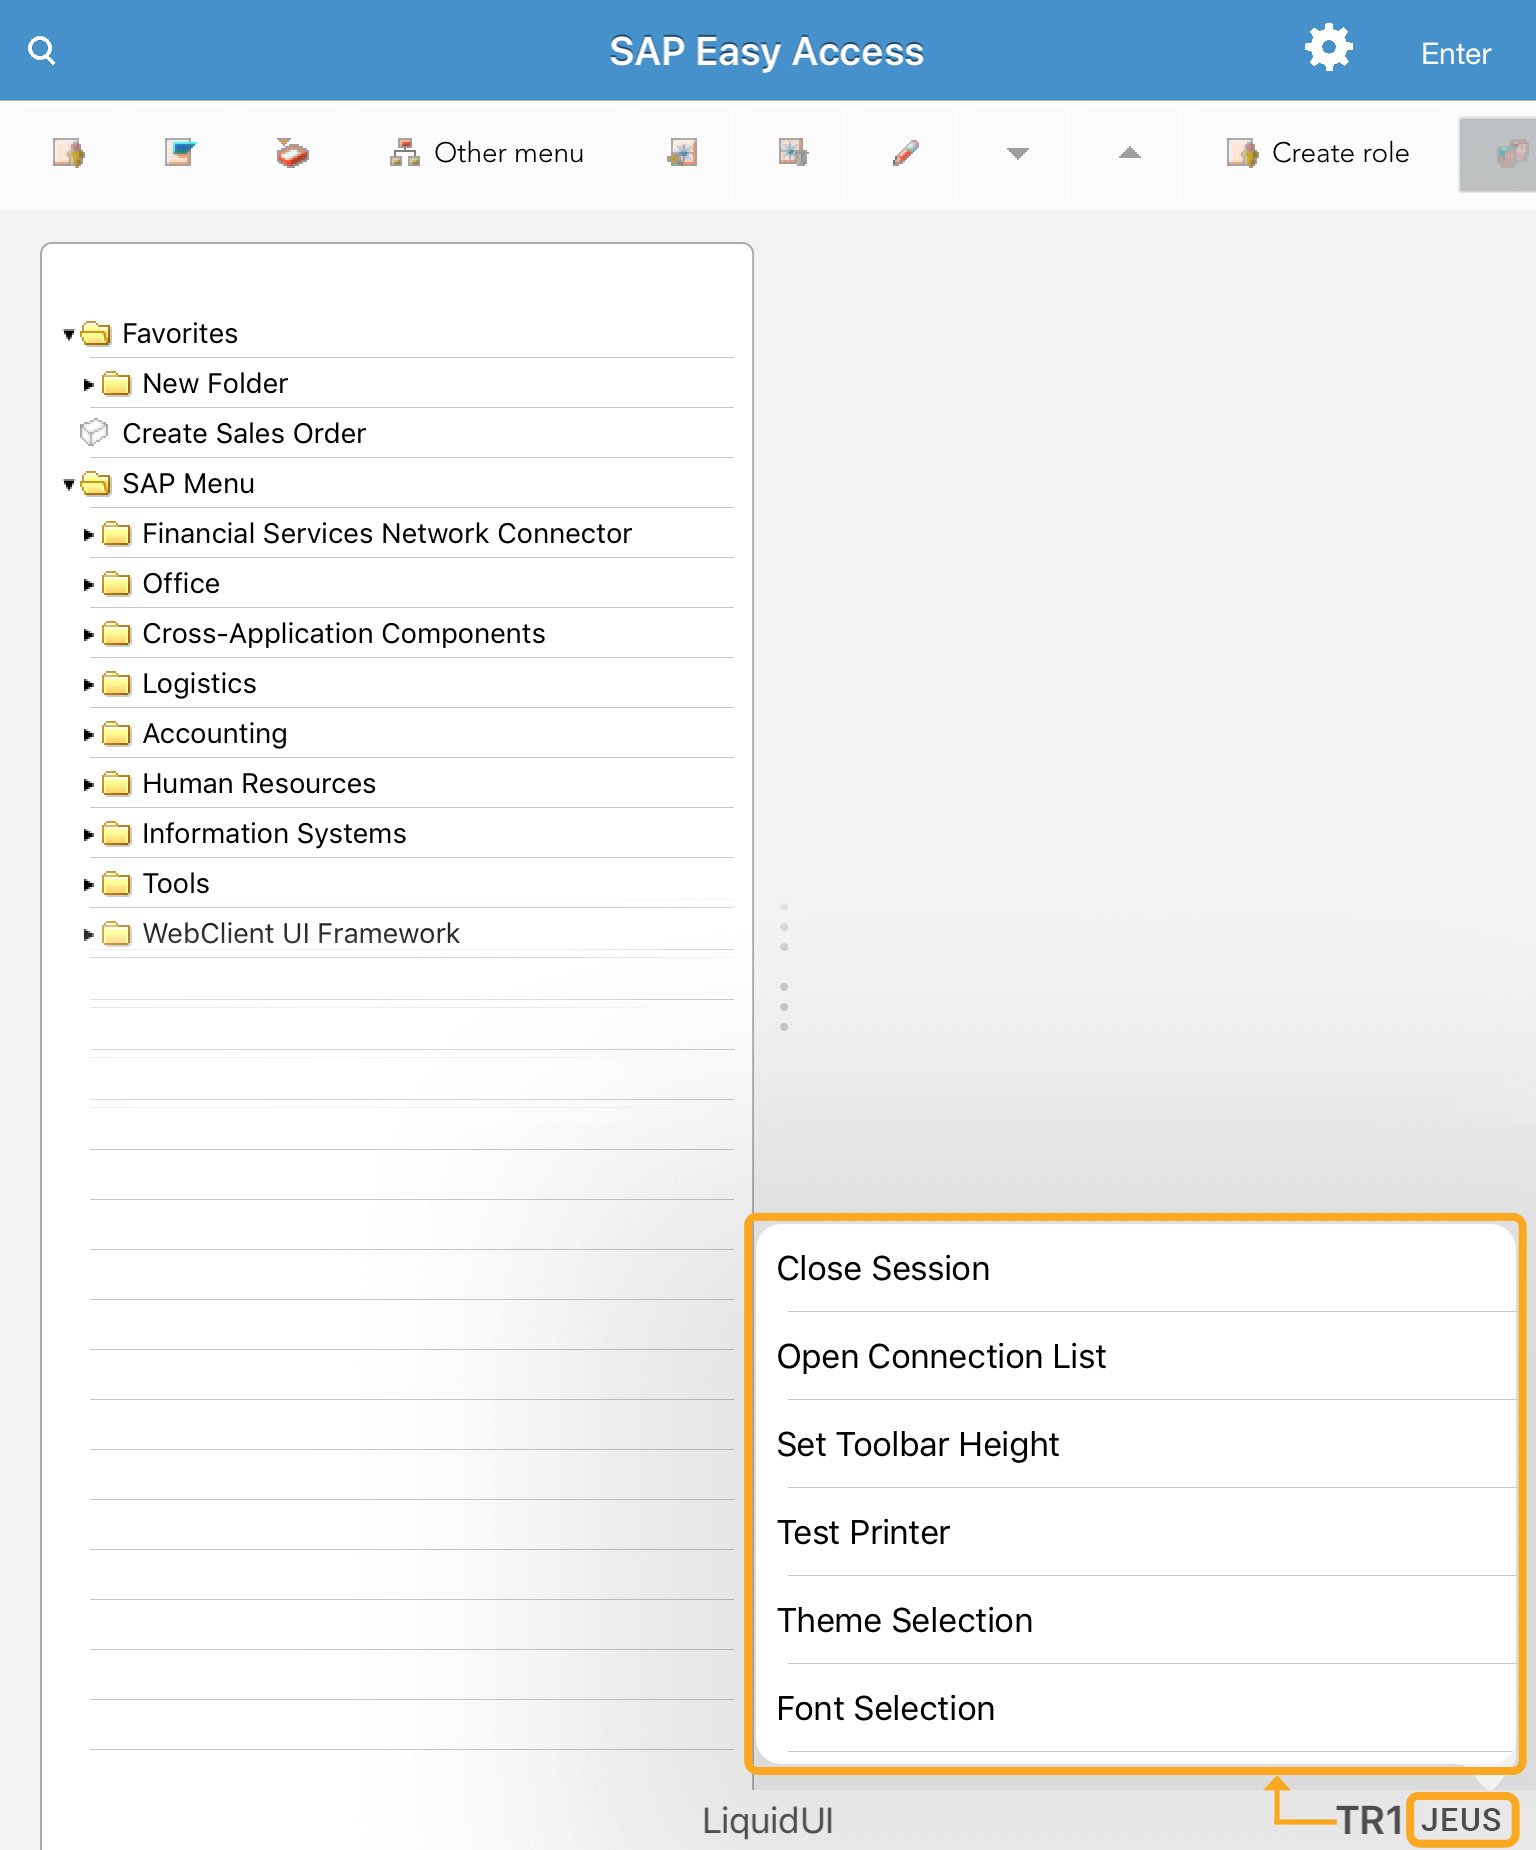
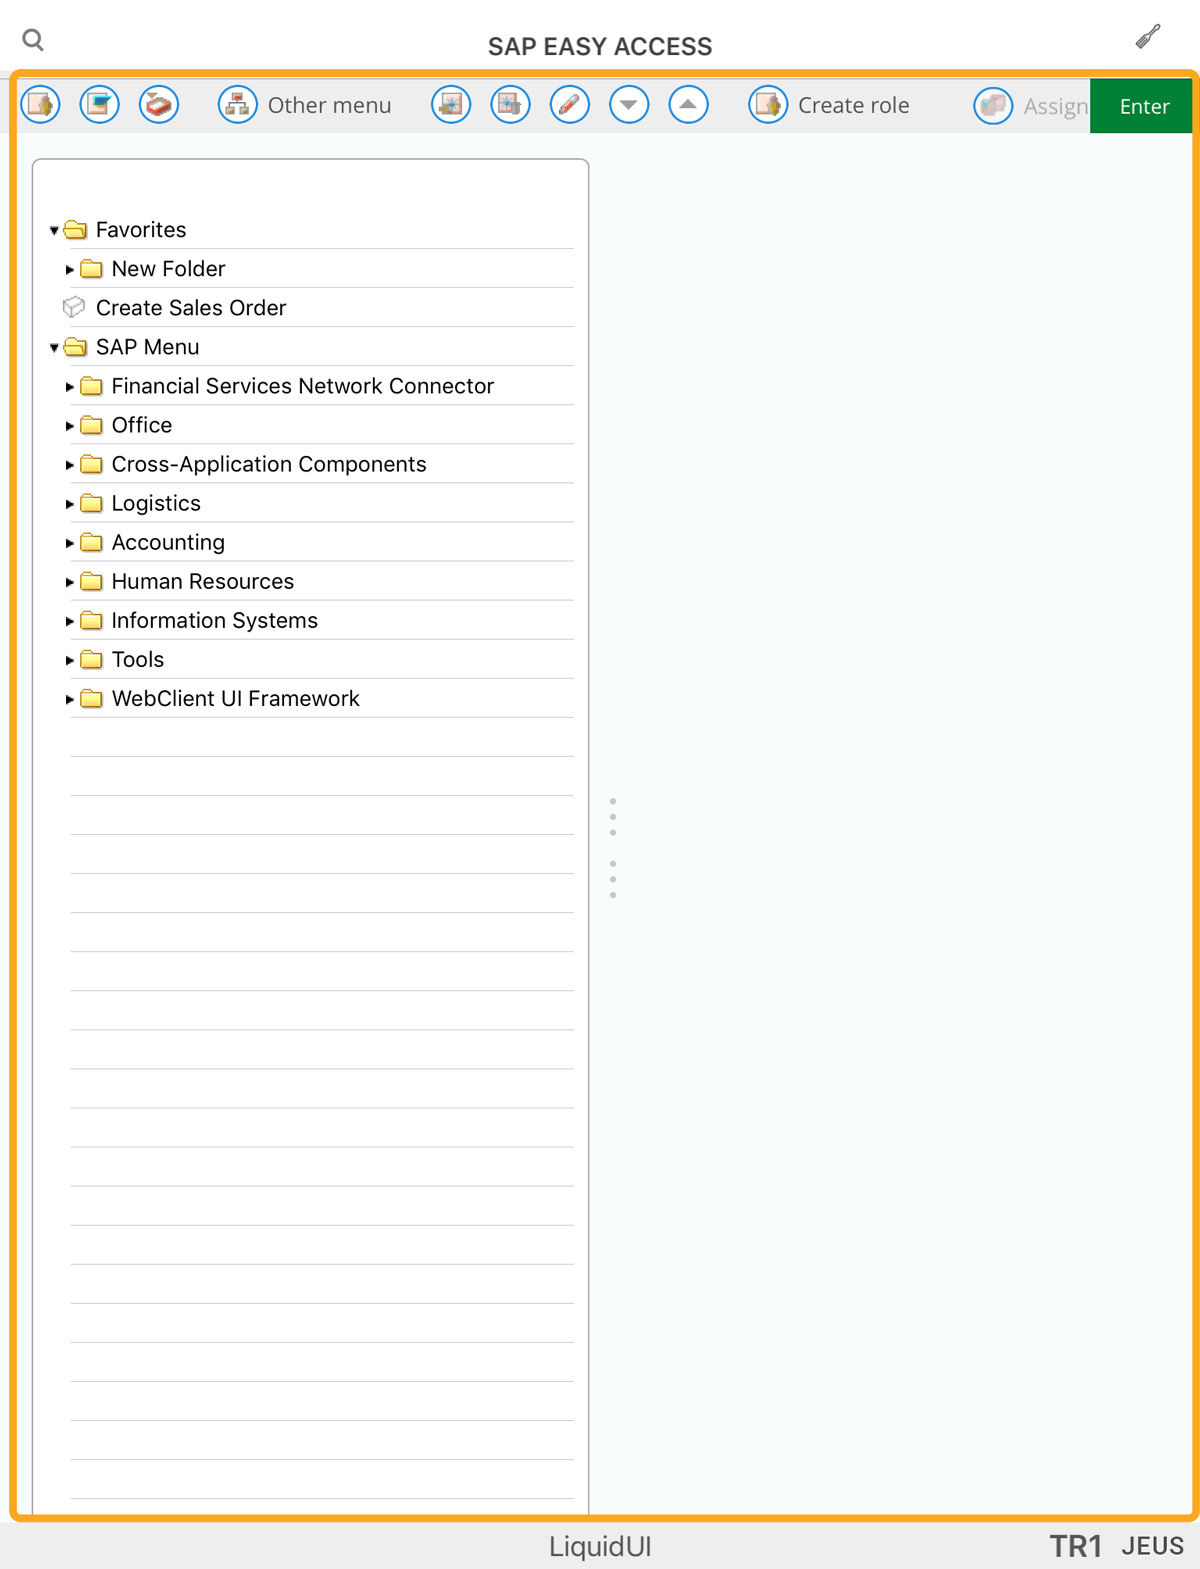
- Navigate to any SAP screen, and click on the SAP connection in the bottom right corner. Then a pop-up appears with the connection settings, as shown in the image below.
- Font Selection
This option lets you change the font style or set the font size on your transaction screens. The font size varies from 14 to 48. Select the desired font that you want to set and click OK.
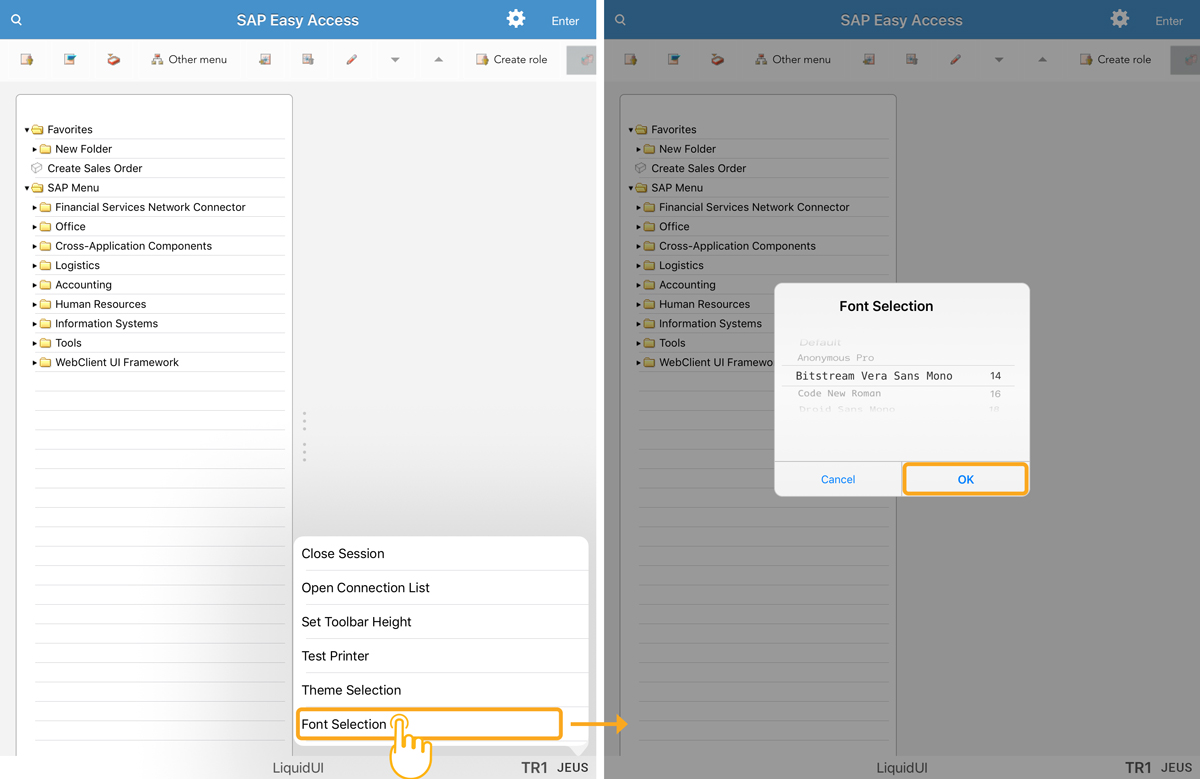
- Then, you can see the transaction screen with the chosen font style, as shown below.

- Theme Selection
This option lets you select the theme from Tile, iClassic, ORCA, and LiquidUI5. By default, the theme selection is set to Tile. Select your desired theme, and click OK.
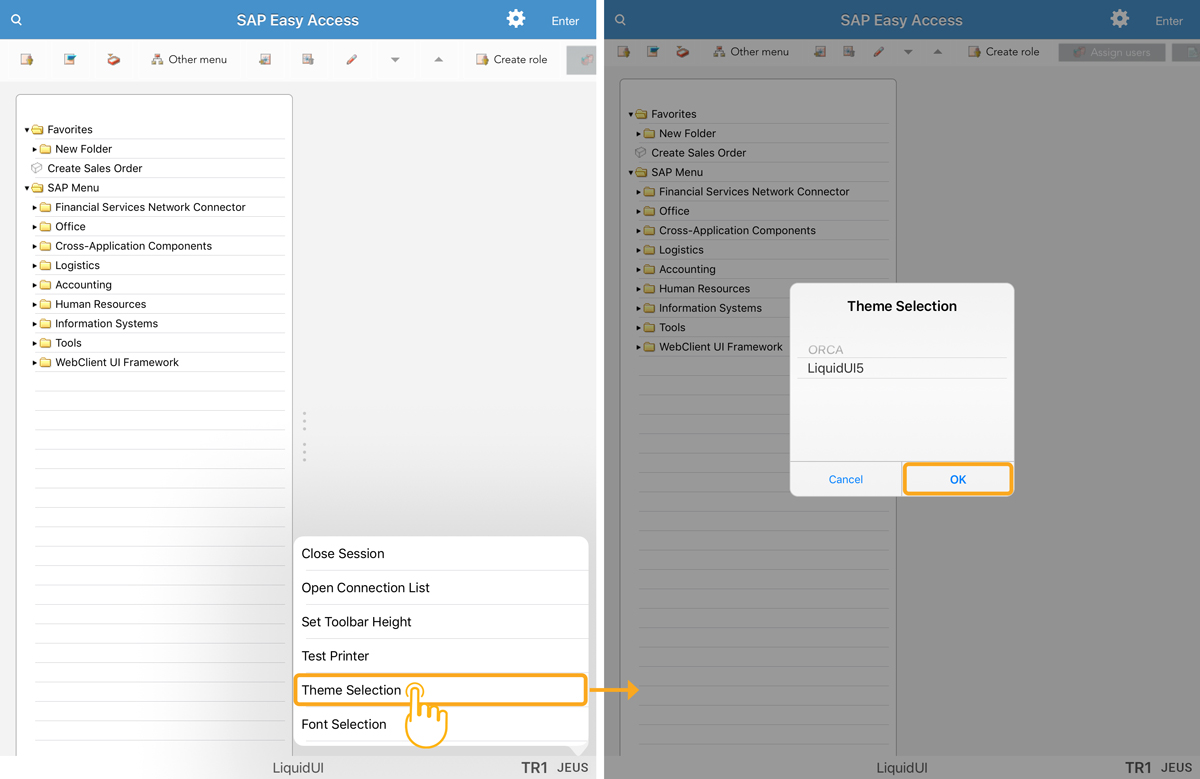
- Then, you can see the transaction screen with the chosen theme selection.
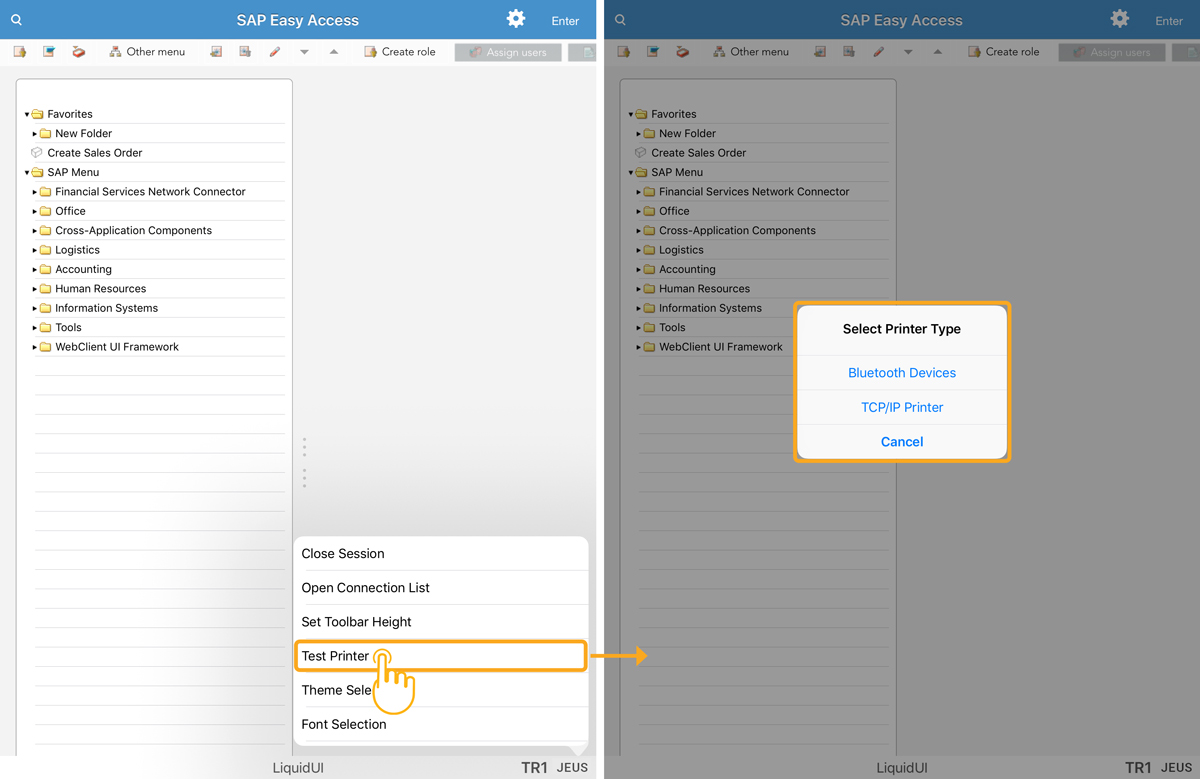
- Test Printer
This option lets you select the printer type, where you can choose Bluetooth devices and TCP/IP printers, as shown in the image below. It configures the printer to enable printing from the app.
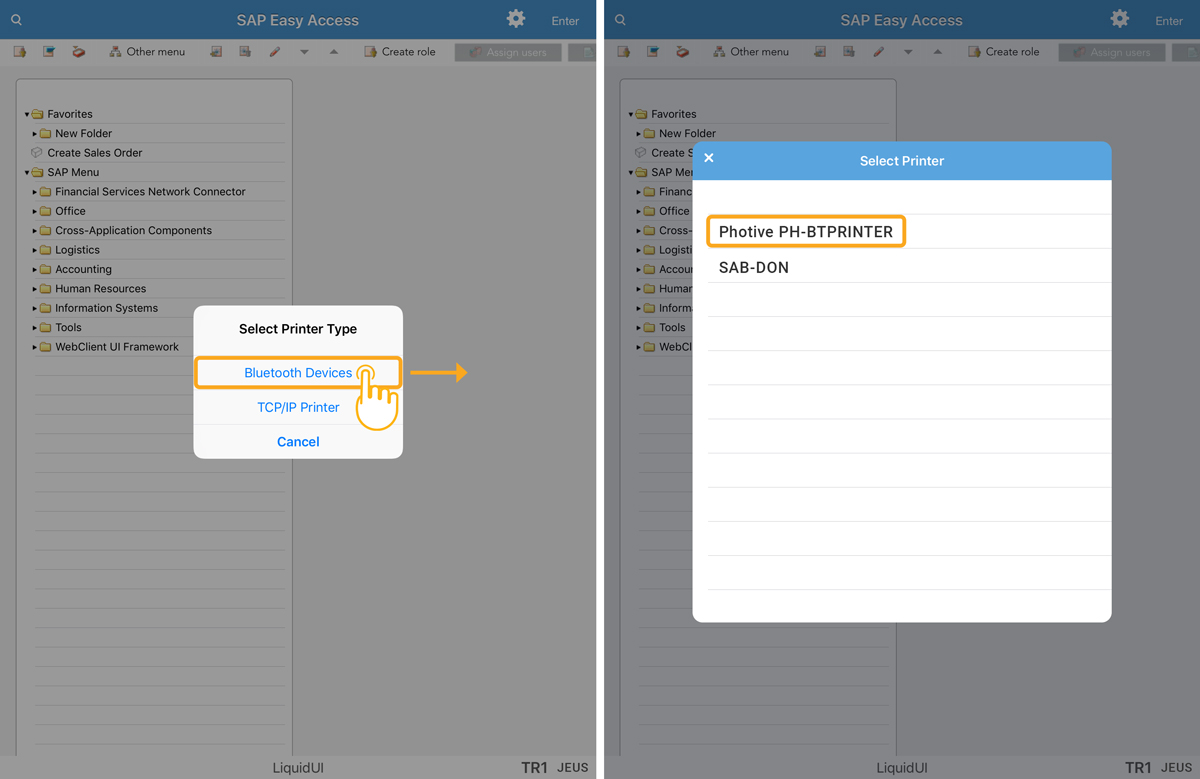
- Select Bluetooth Devices, and you will see all the available paired Bluetooth printers. Choose your printer.
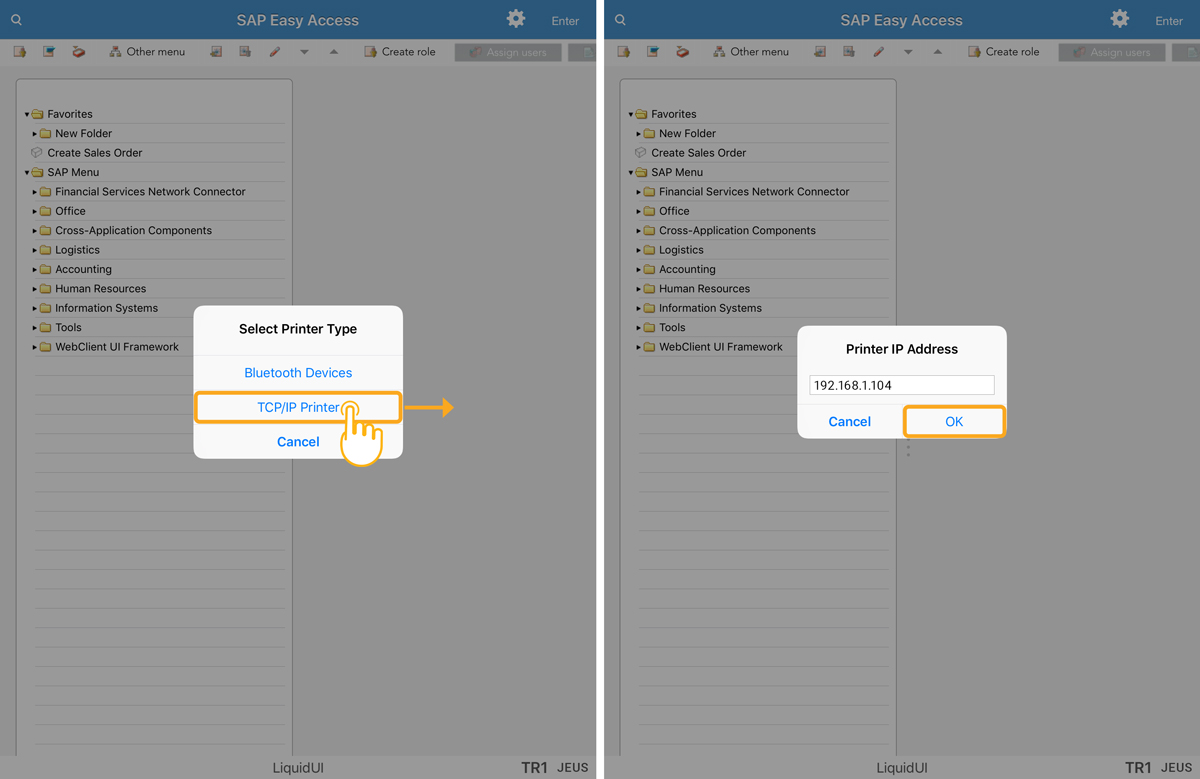
- Select TCP/IP Printer, and then a popup appears to enter the printer's IP address, as shown below. Enter your IP address and click OK.
- Select Bluetooth Devices, and you will see all the available paired Bluetooth printers. Choose your printer.
- Set Toolbar Height
This option allows you to increase and decrease the height of the toolbar. Select the desired height and click OK.
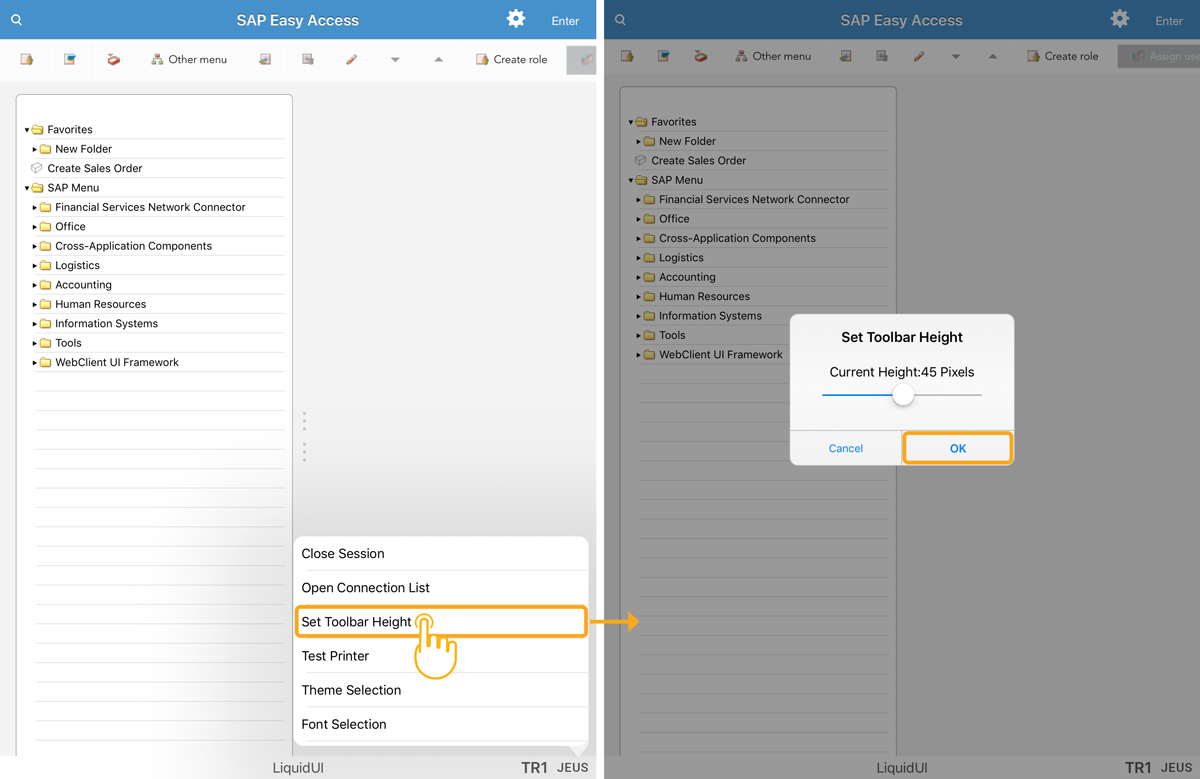
- Then, you can see the transaction screen with the chosen toolbar height.

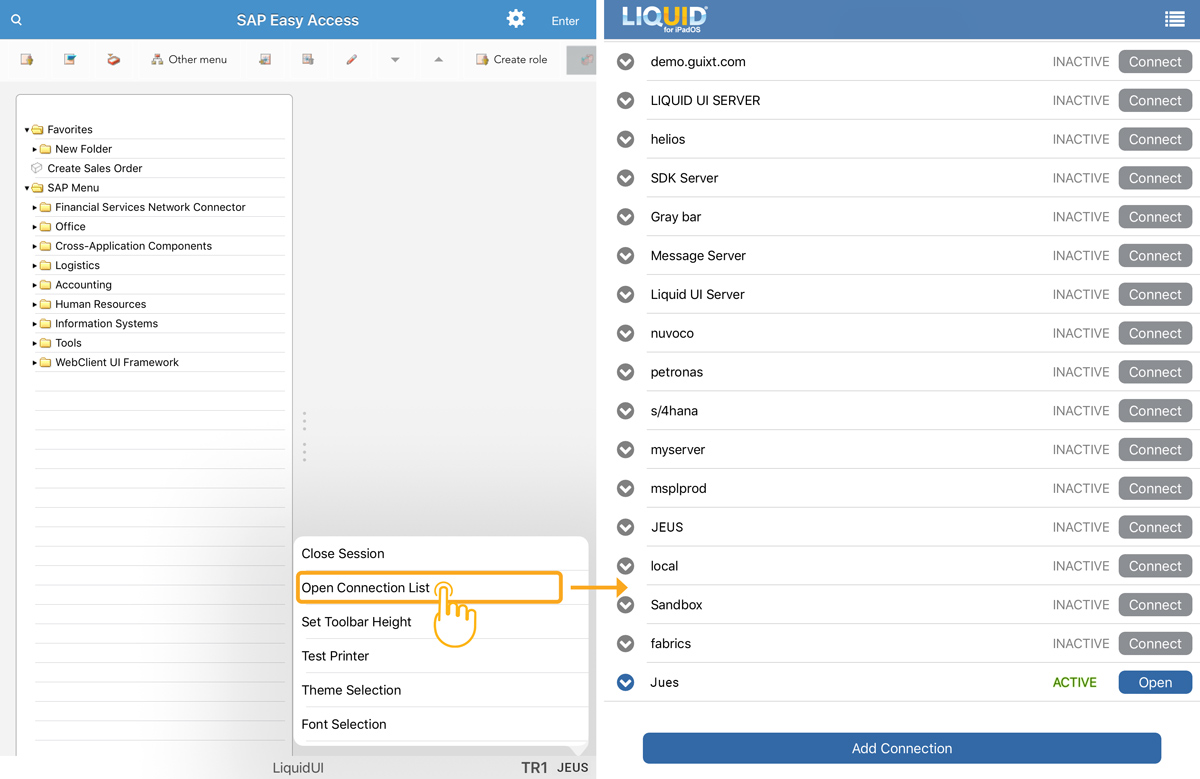
- Open Connection List
This option lets you view your existing Server Connections list.
- Close Session
This option lets you close the functionality of the SAP screen. Click on Close Session, and then a popup appears asking for confirmation. Click Yes to continue.
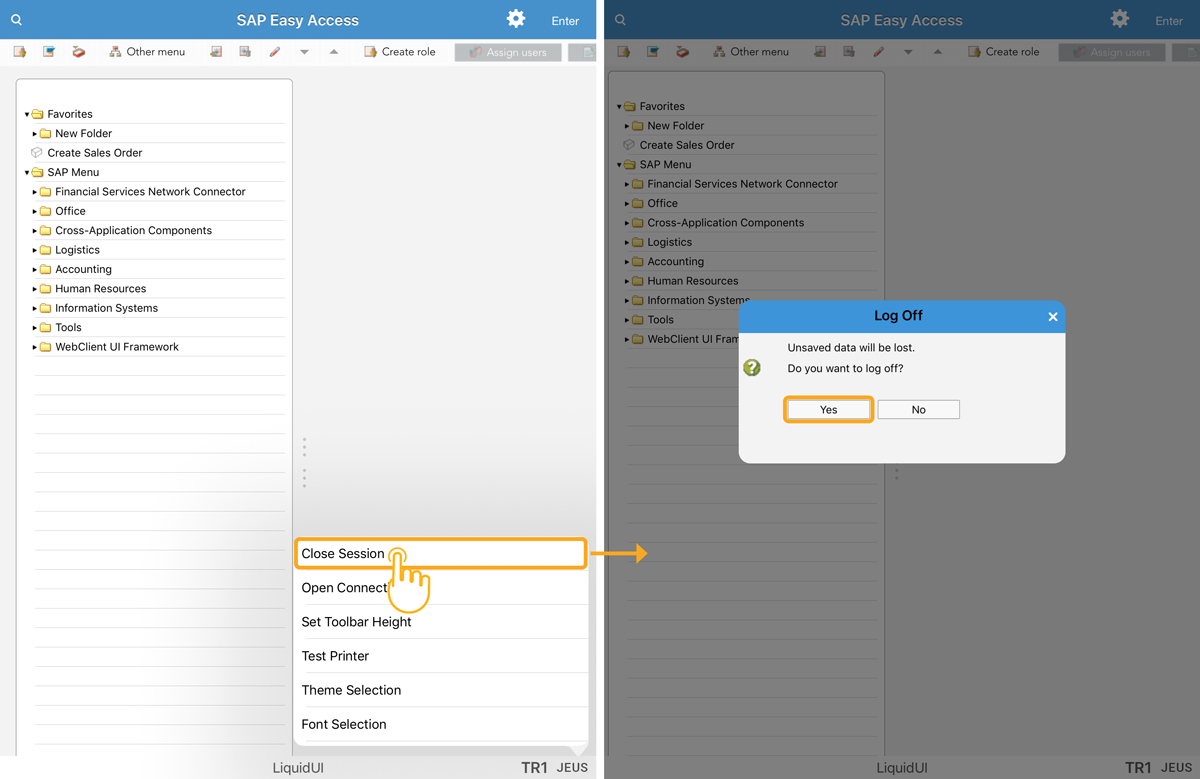
- Then, you will be navigated to the Server Connections screen, as shown in the image below.