In this scenario, you will learn how to delete or add new screen elements to customize the create sales order screen. You will also understand how easy to create a sales order after combining various screens. Follow steps to customize create sales order screen:
- Navigate to VA01 screen and activate the Liquid UI Inplace Edit.
- You can select all the required fields to delete.
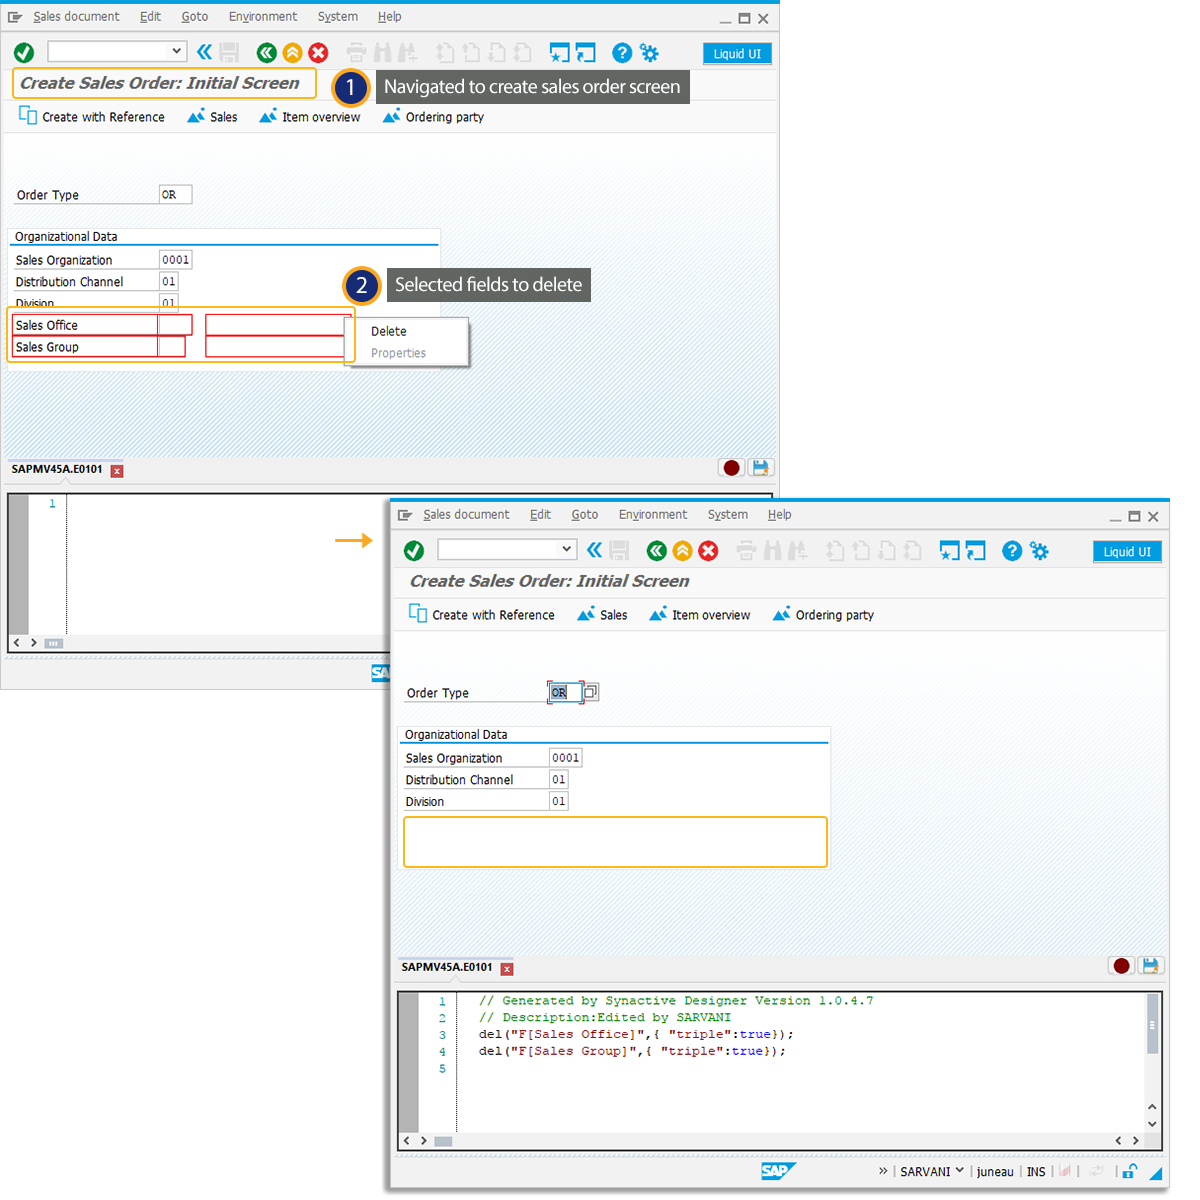
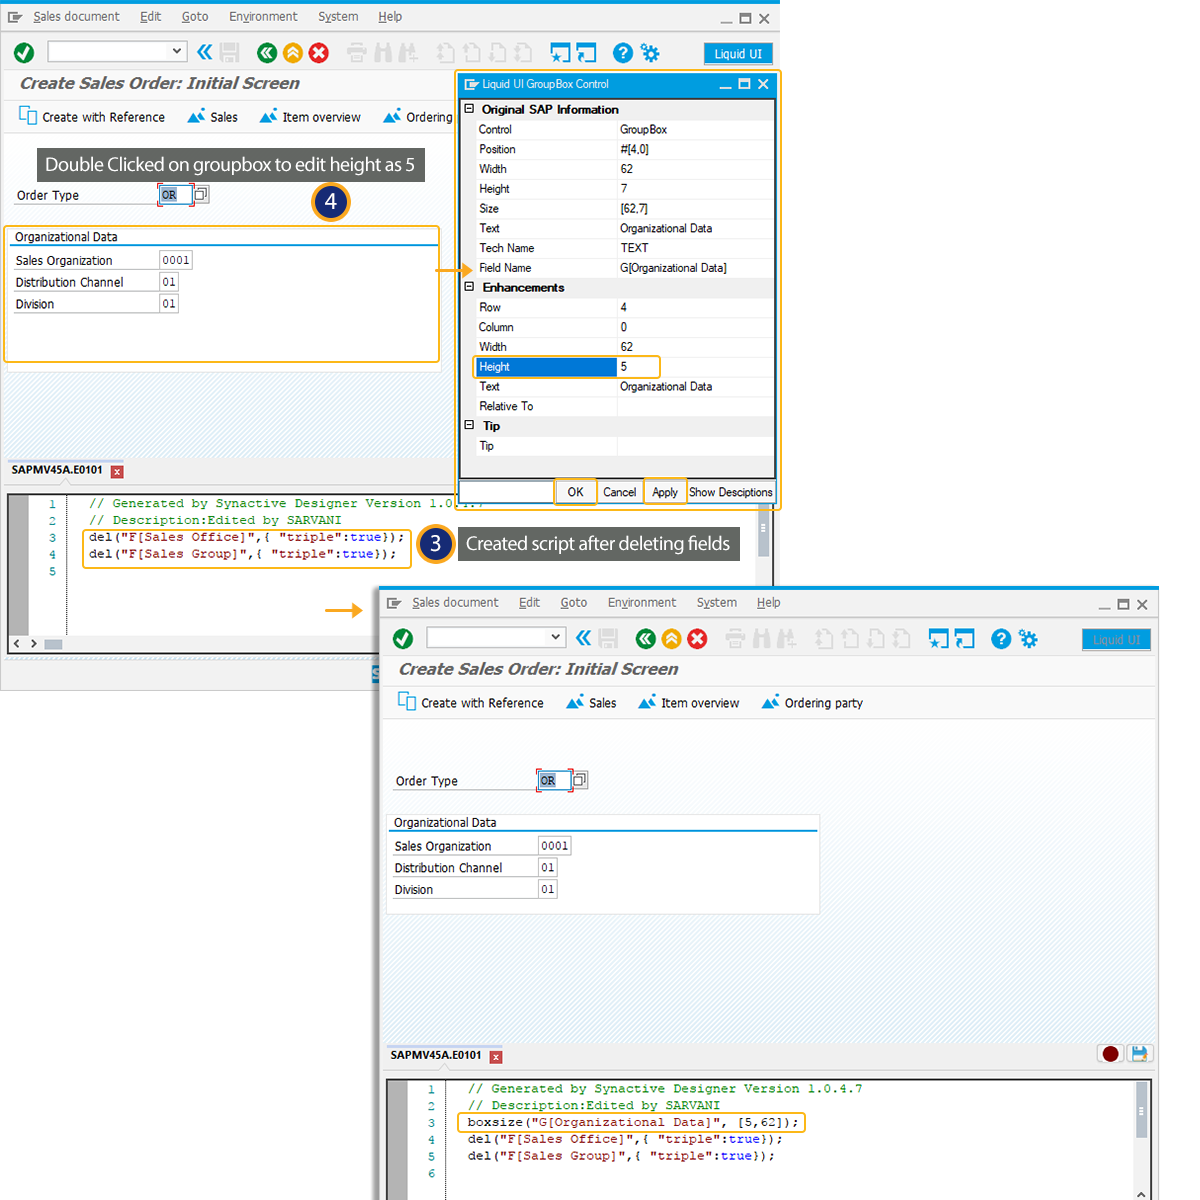
- You can view the script generated after deleting the unnecessary screen elements.
- Double Click on the Organizational Data groupbox to edit its properties in the property window.
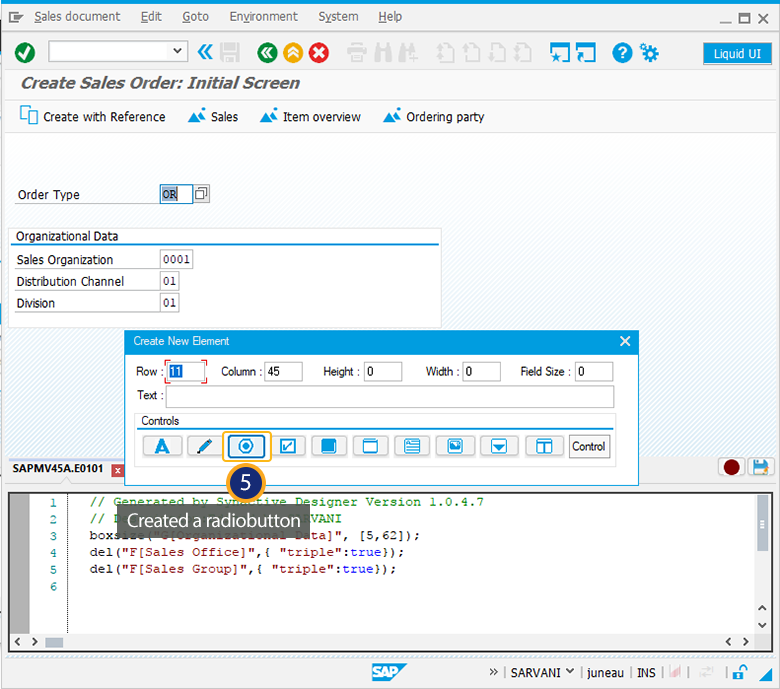
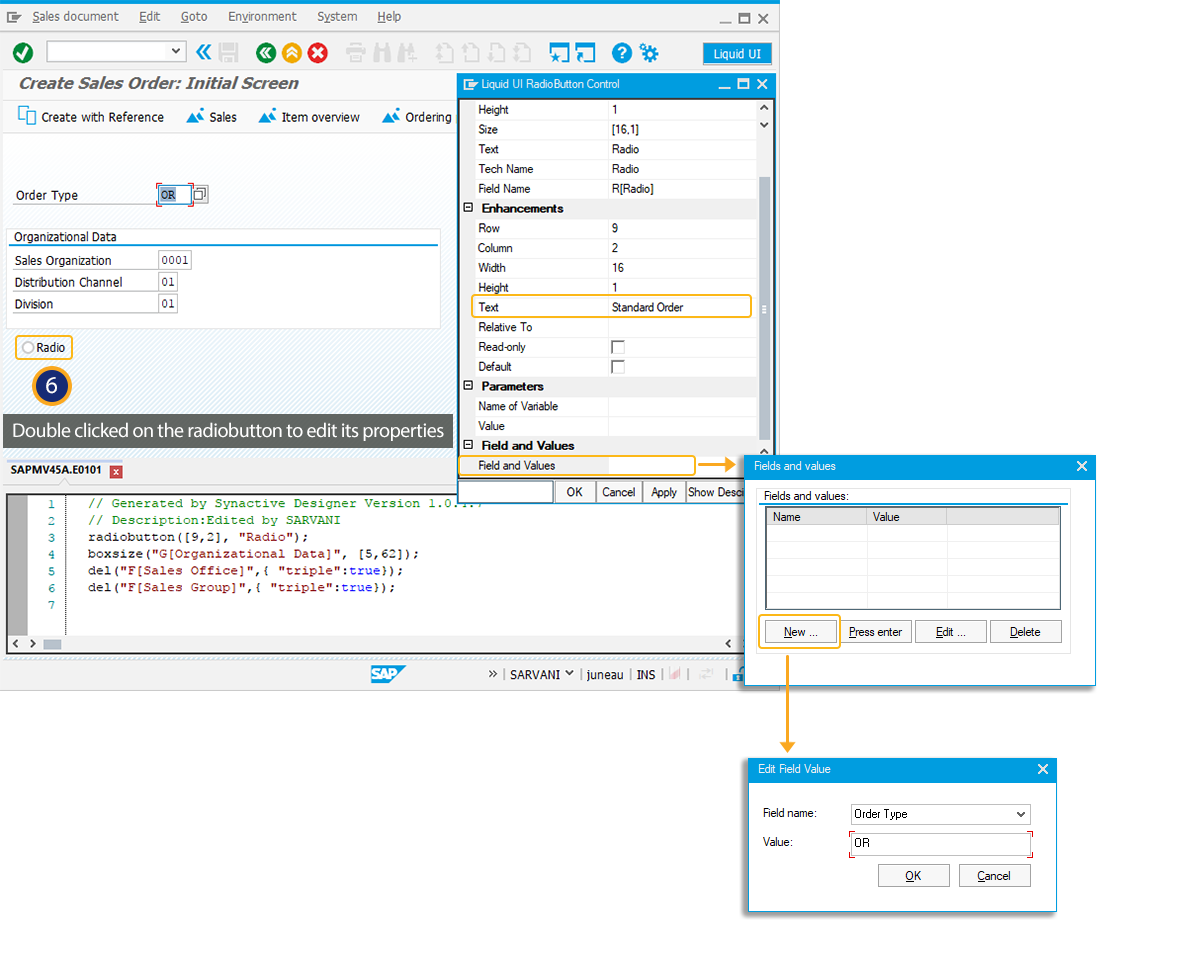
- Right Click on the SAP screen to create a radiobutton(Standard Order). You can drag the radiobutton to the required position on the screen.
- Double Click on the radiobutton to edit its properties in the property window. You can change the text, add fields and values as shown below:
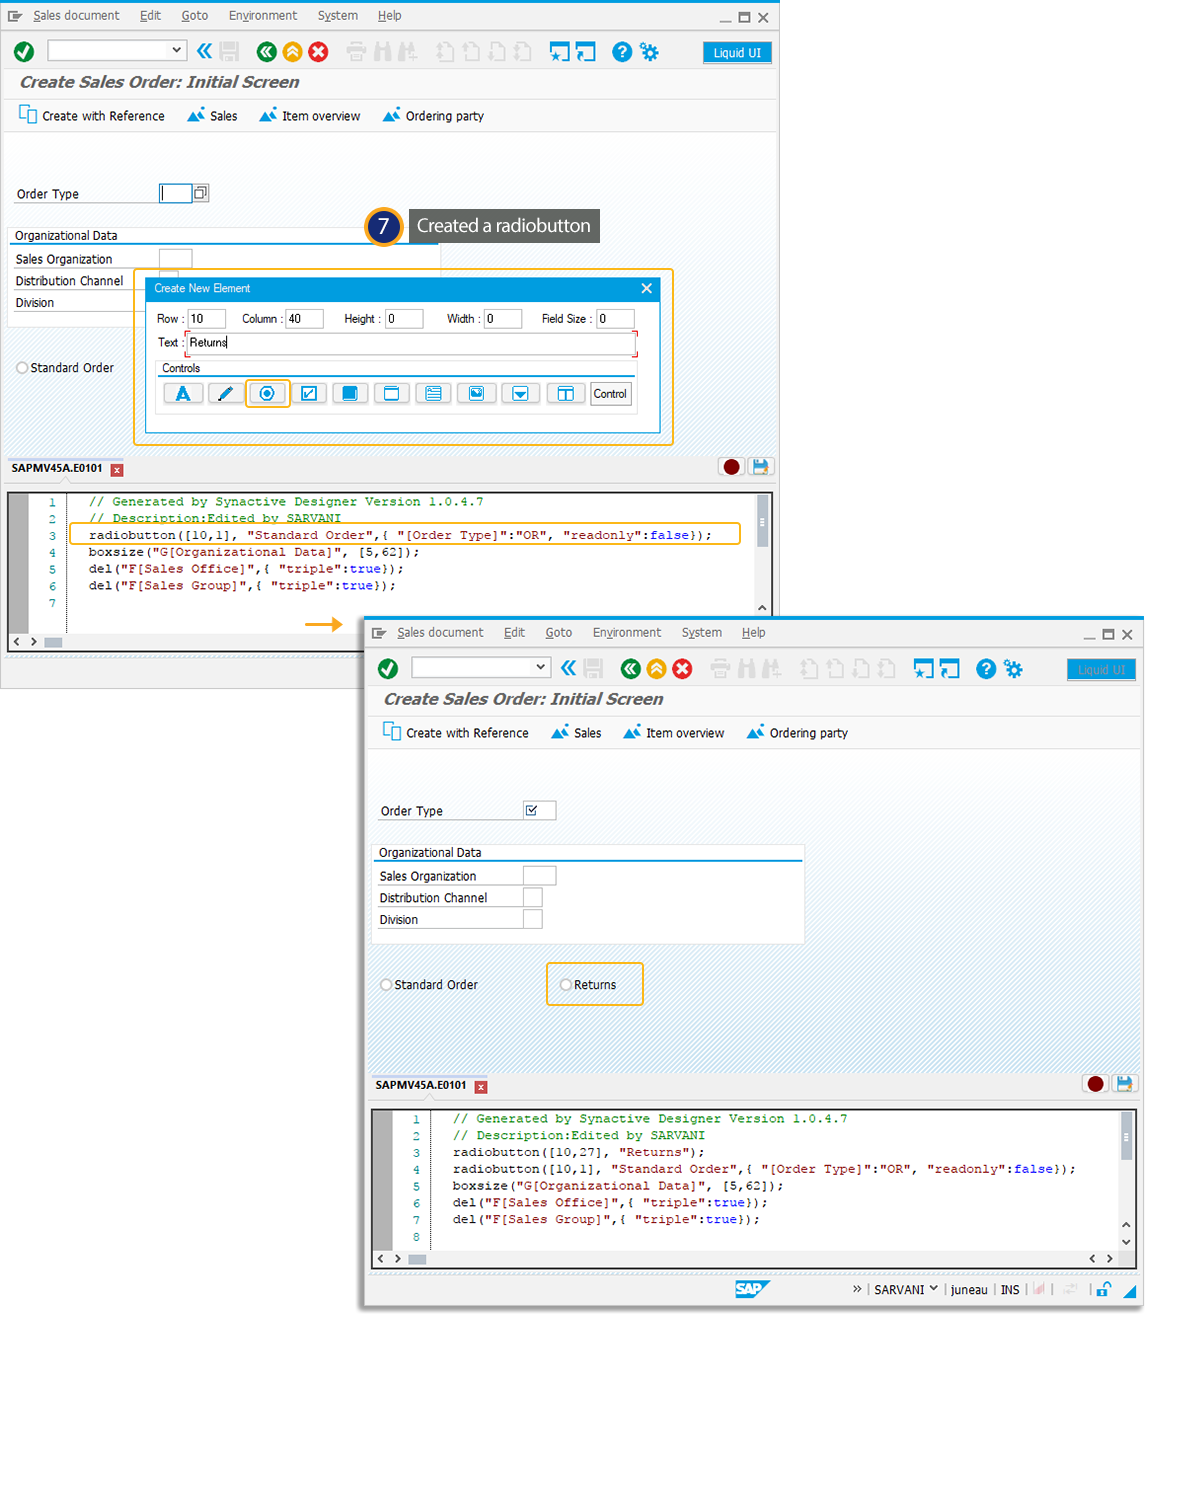
- Right Click on the SAP screen to create another radiobutton(Returns). You can drag the radiobutton to the required position on the screen.
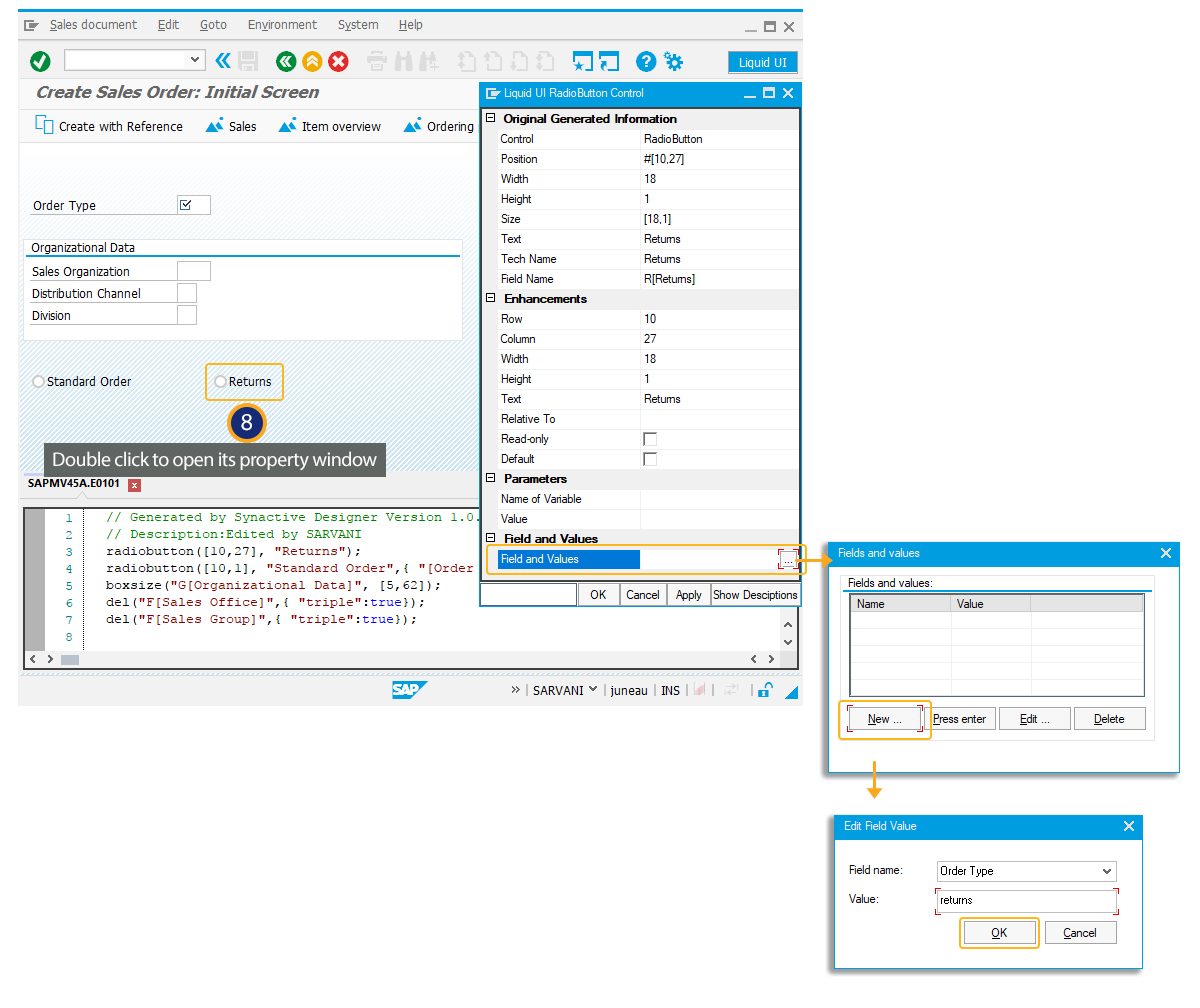
- Double Click on the radiobutton to edit its properties in the property window. You can change the text, add fields and values as shown below:
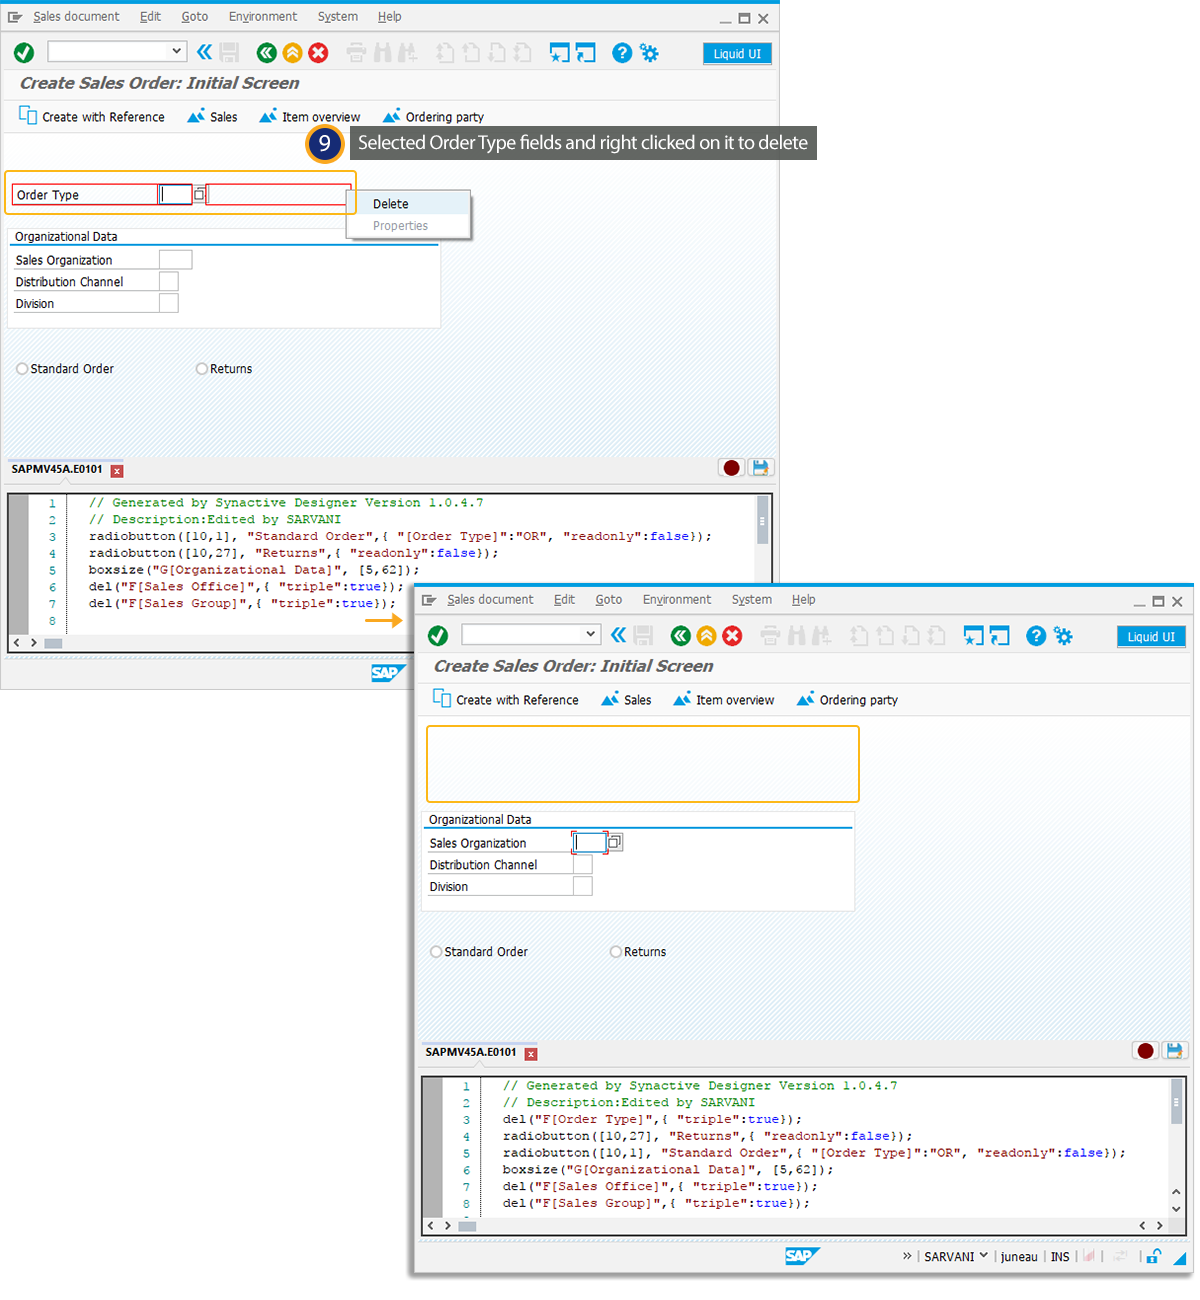
- Select the Order Type fields and delete them as shown below:
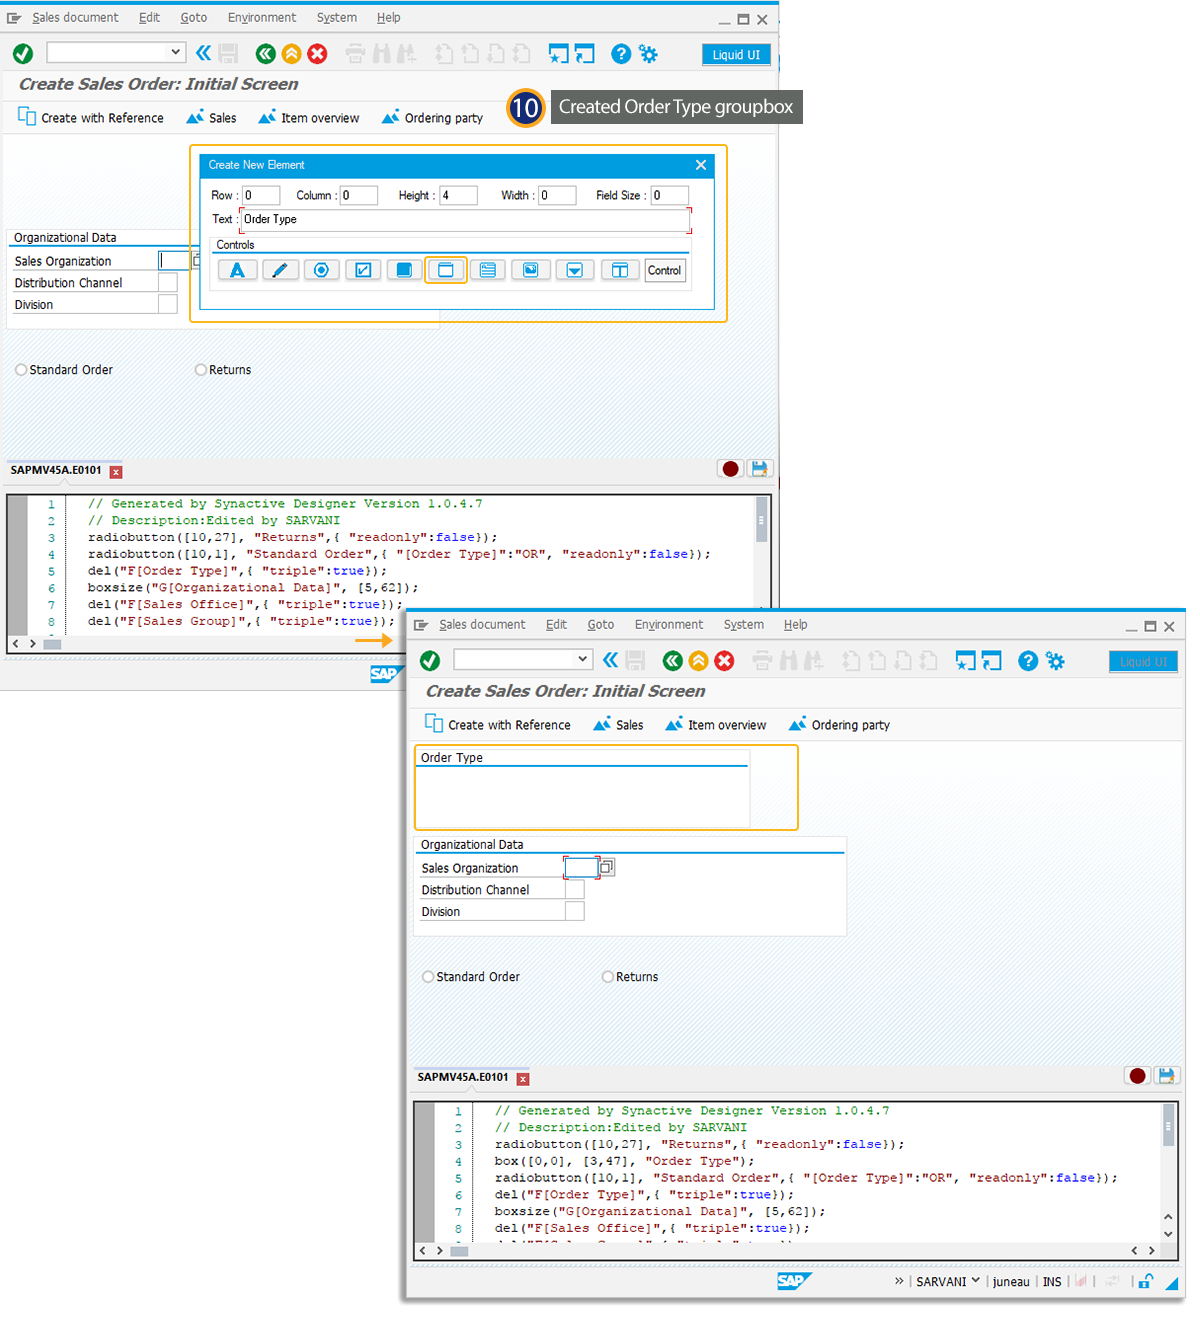
- Right Click on the SAP screen to create a groupbox. You can view the groupbox named as Order Type as shown below:
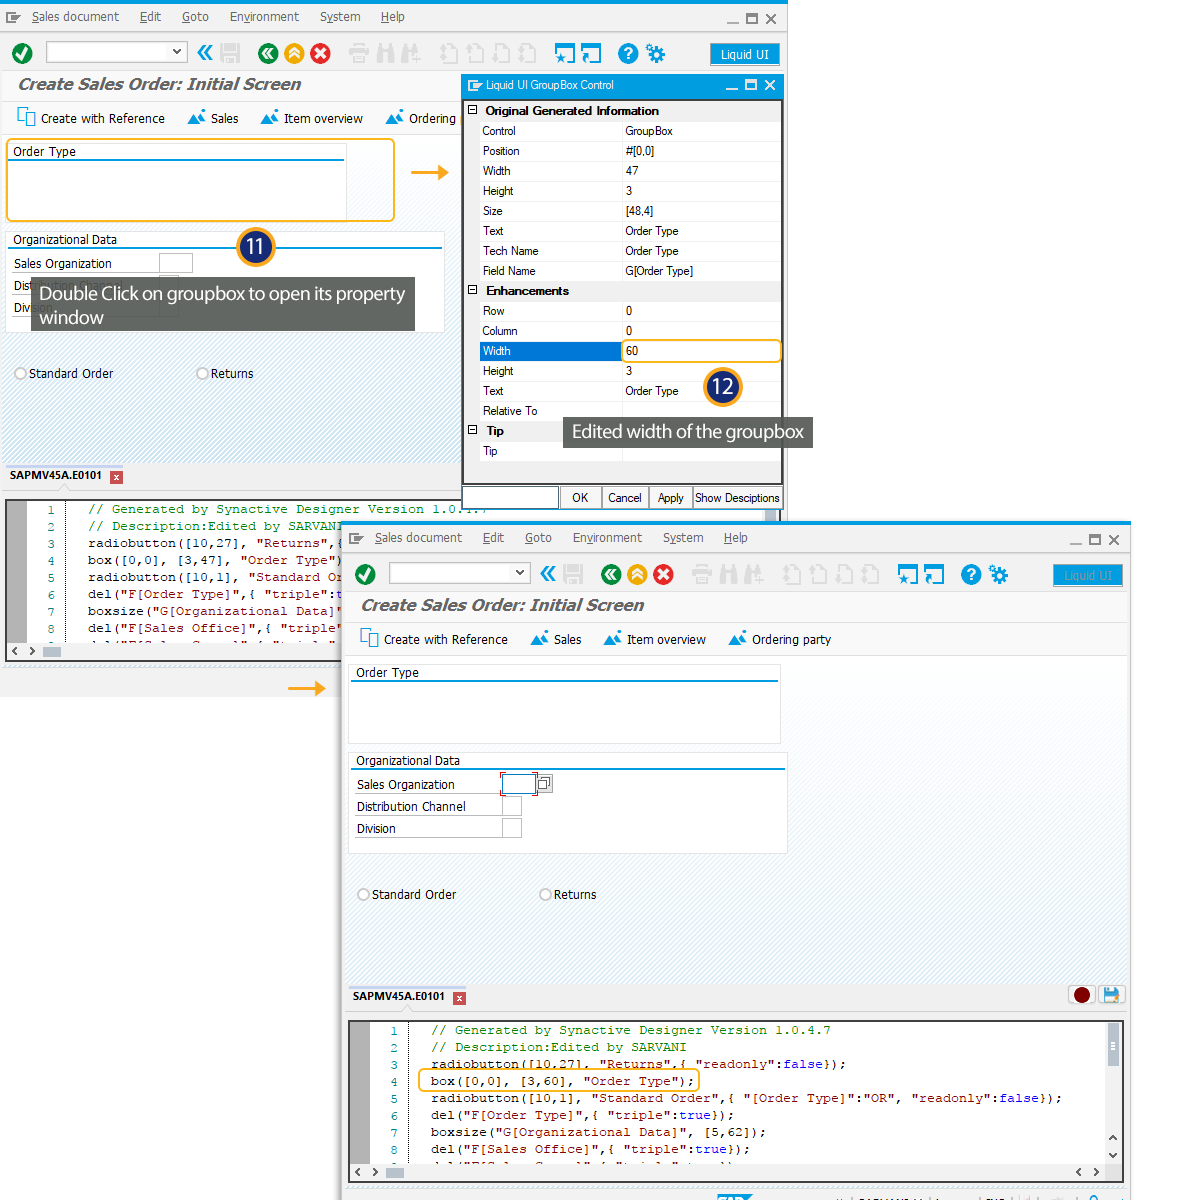
- Double Click on the groupbox to edit its properties in the property window.
- You can also edit the width of the groupbox as shown below.
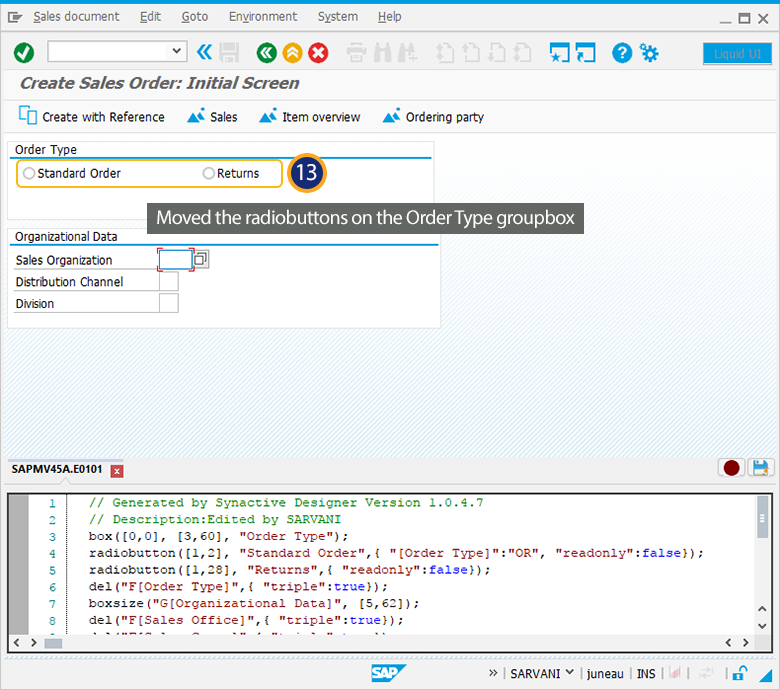
- Select the radiobuttons and move them to the Order Type groupbox as shown below.
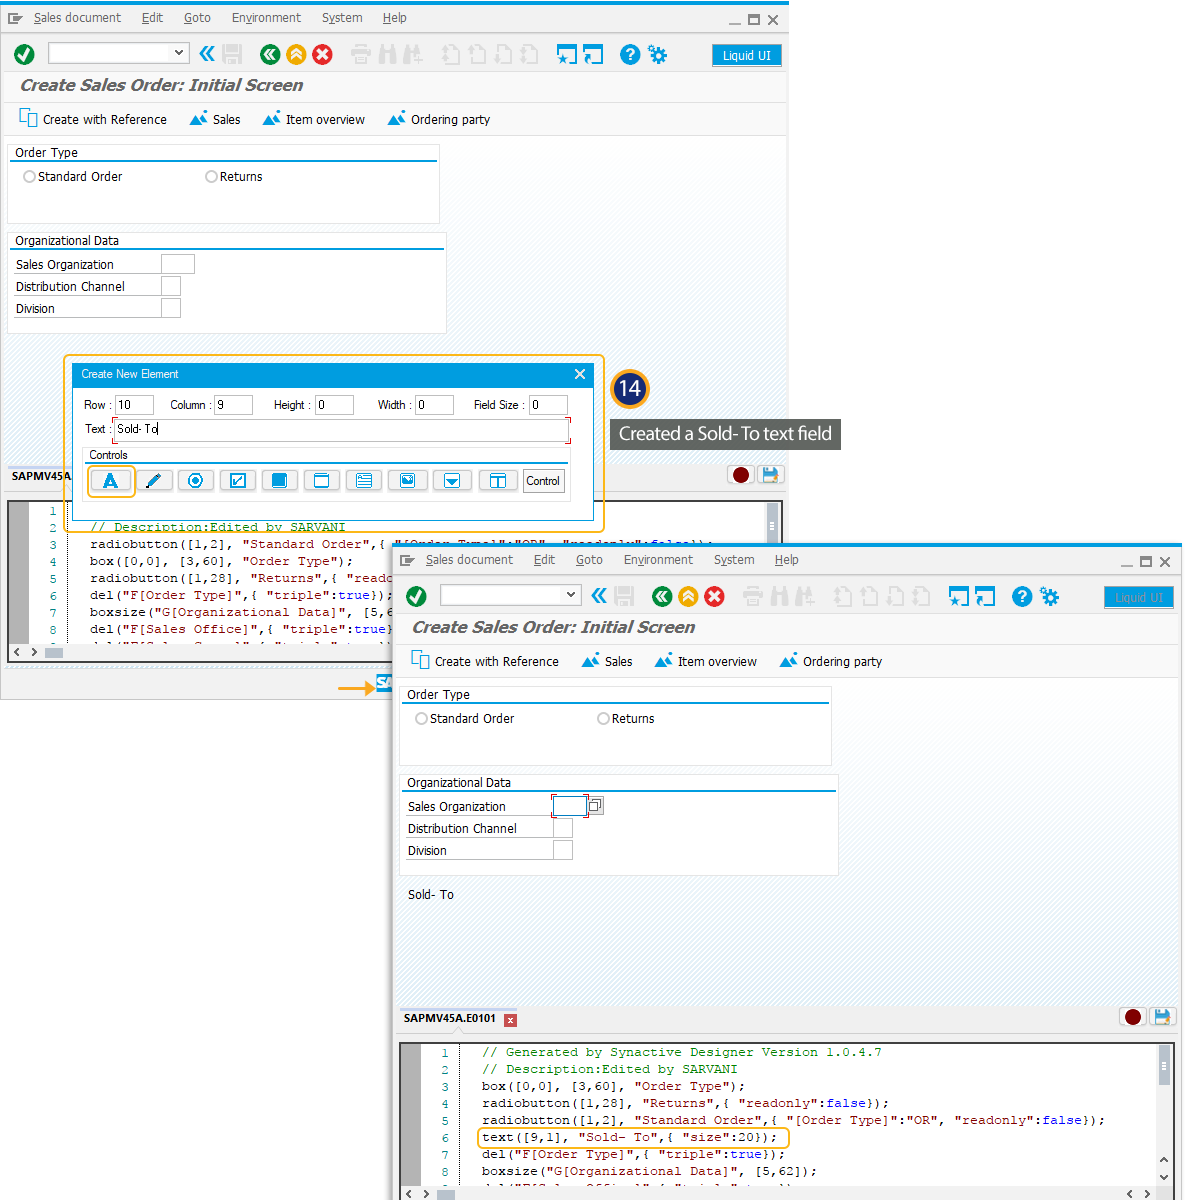
- Right Click on the SAP screen to select the text button in the Create New Element window to create a Sold-To Text field.
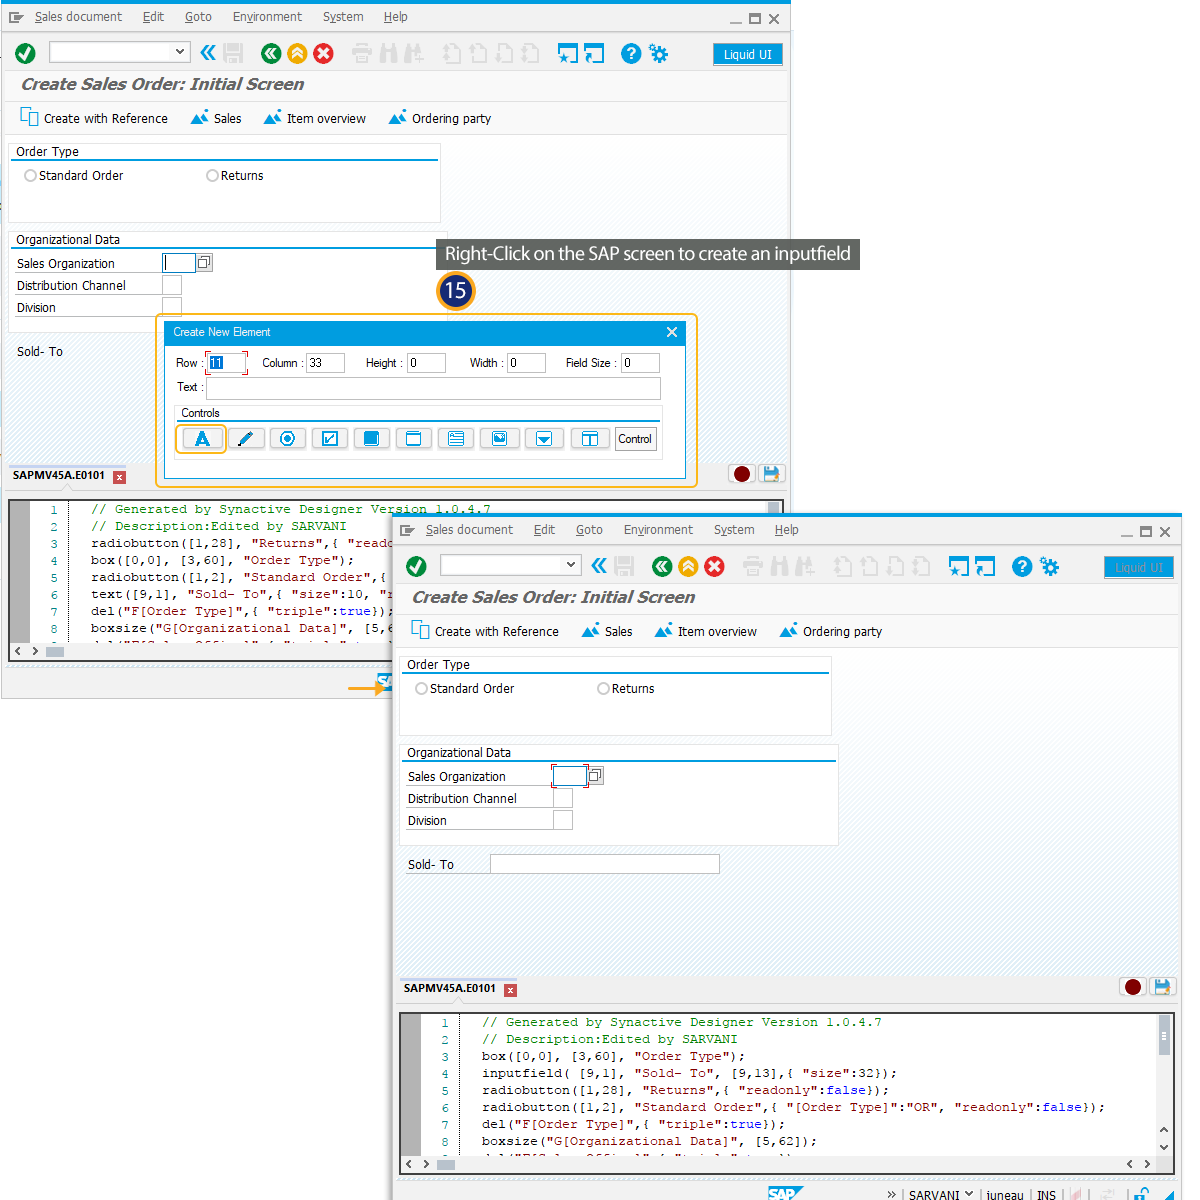
- Similarly, Right Click on the SAP screen to select the inputfield button to create an inputfield and drag the inputfield to place it parallel to the Sold-To text field.
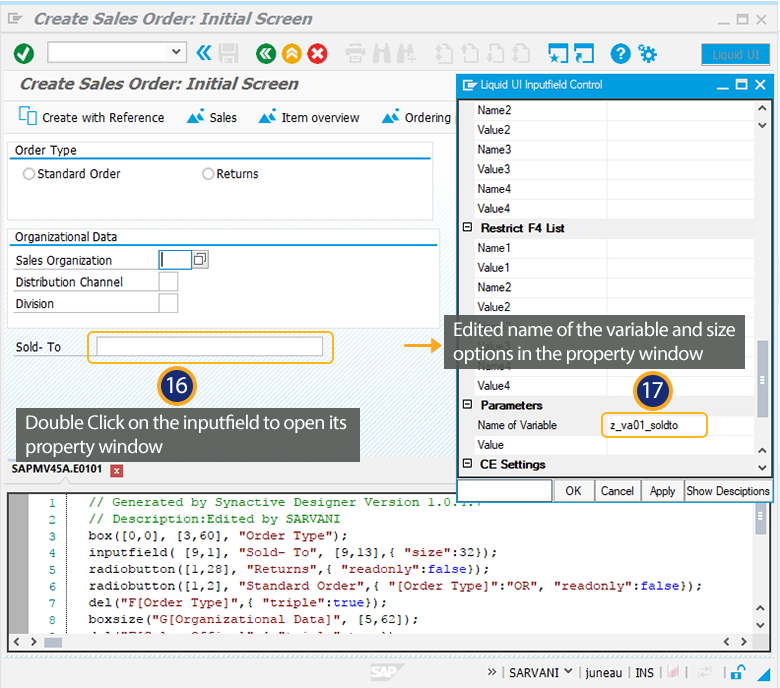
- Double Click on the inputfield and scroll down the property window
- You can edit the Name of the variable and size of the field as shown below:
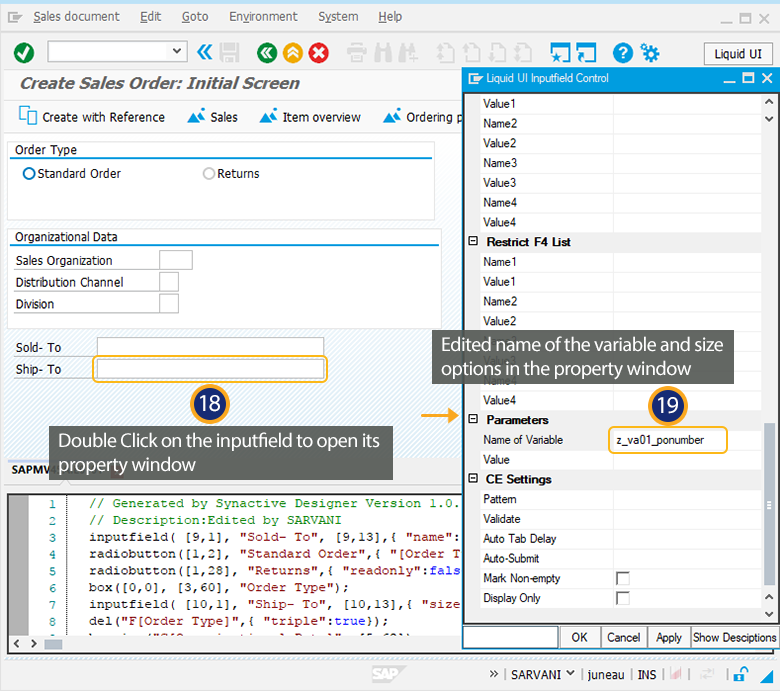
- Right Click on the SAP screen to create a Ship-To Text and its inputfield. Double-click the inputfield to edit its properties in the property window.
- You can edit the Name of the variable and size options in the property window.
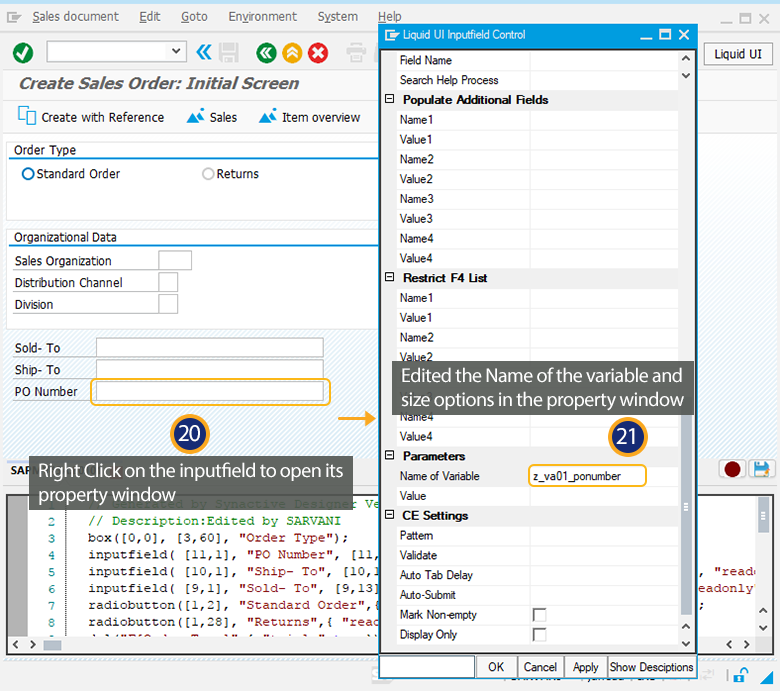
- Similarly, you can create a PO Number text field and its inputfield. You can double-click the inputfield to edit its properties as shown below:
- You can view editing Name of the variable in the property window as shown below:
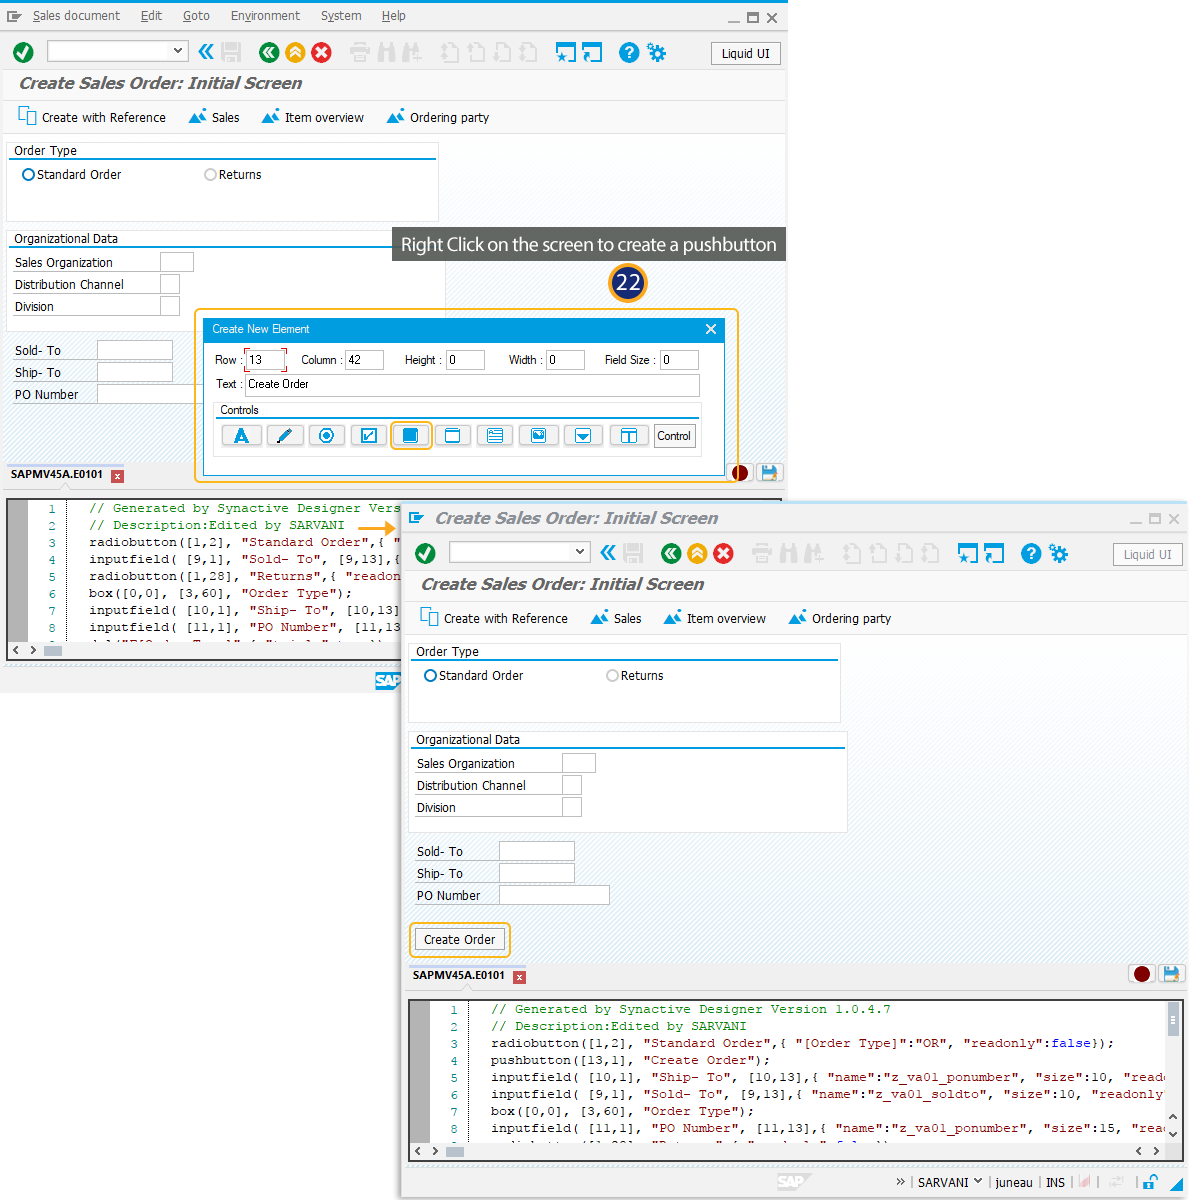
- Right Click on the SAP screen to create a pushbutton.
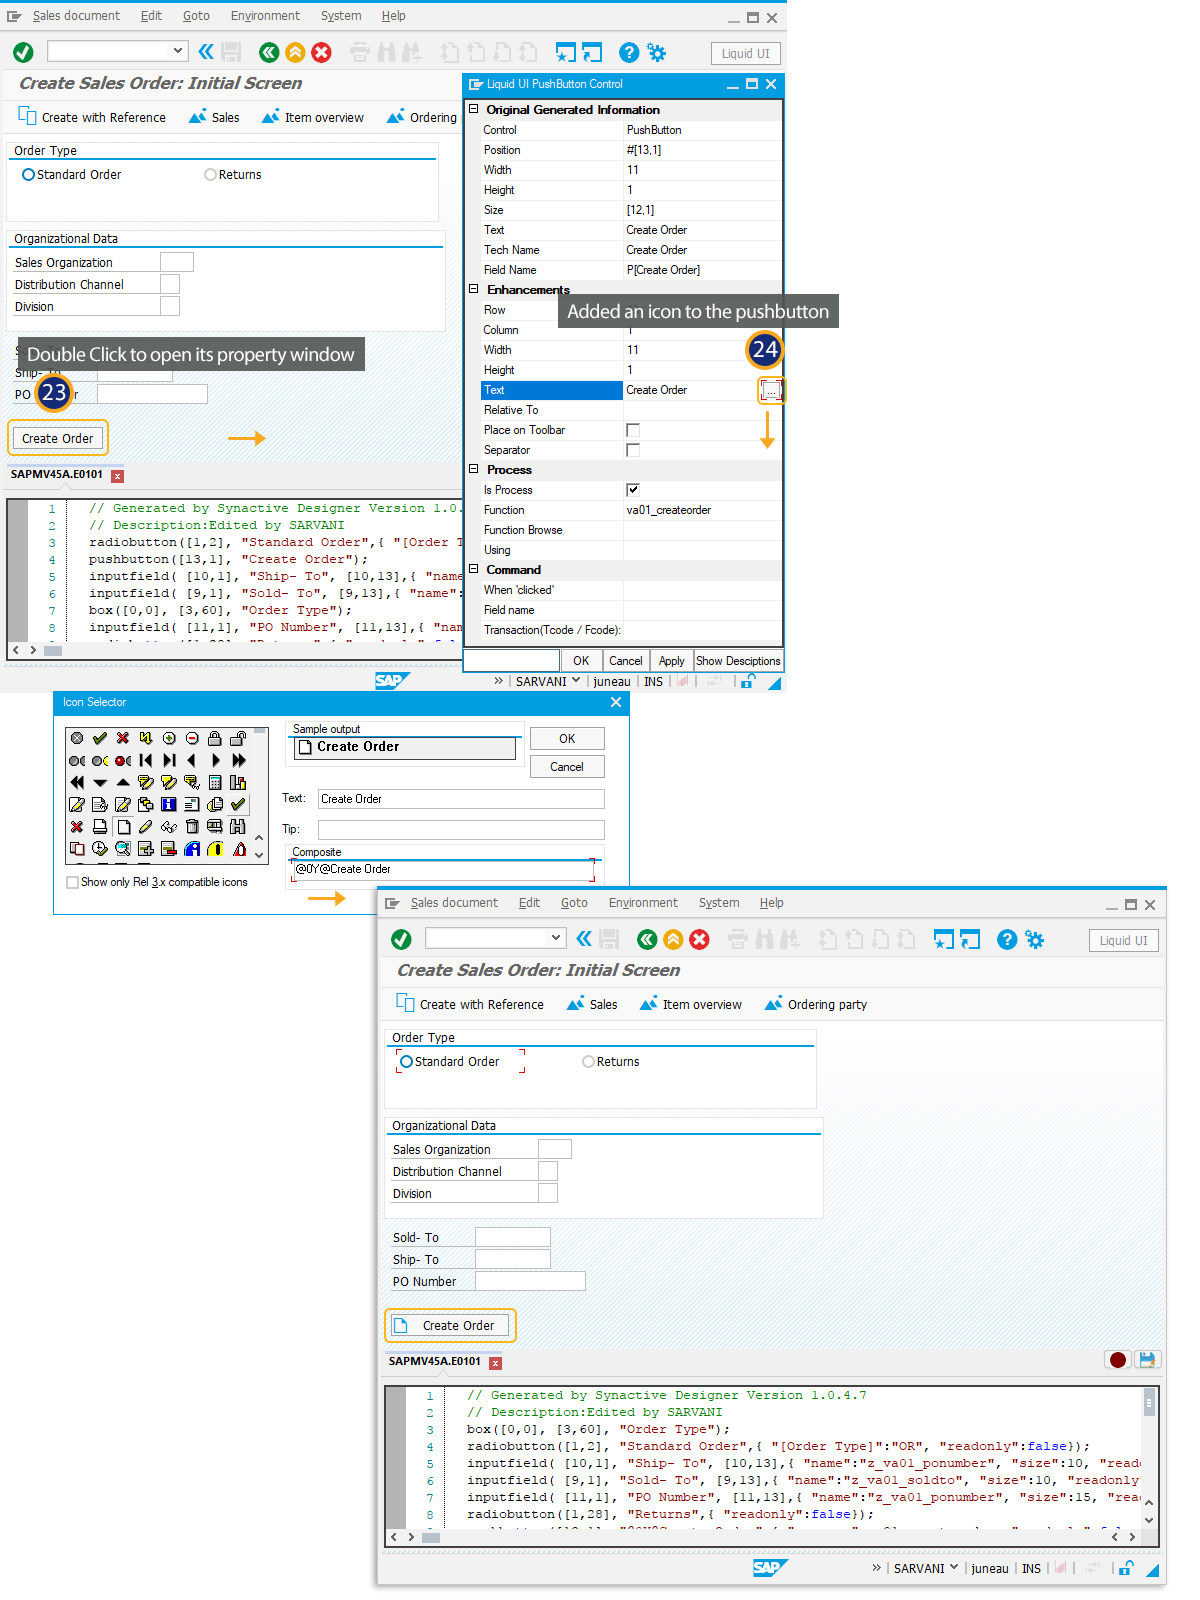
- Double Click on the pushbutton to open its property window.
- You can view editing text option and adding the icon for the pushbutton as shown below:
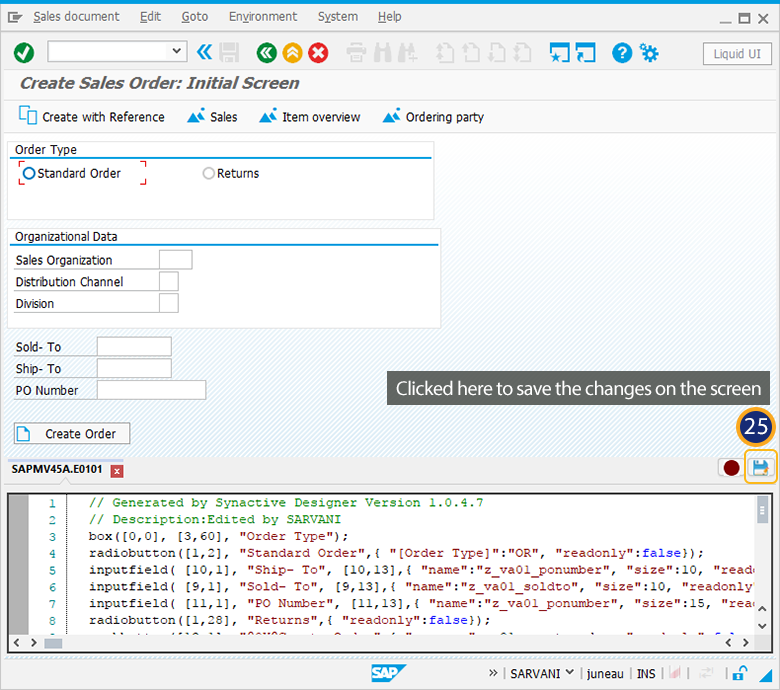
- Click on the Save button to save the changes done on the Create Sales Order screen. Thus, you can customize the sales order screen easily with simple clicks and edits.