Prerequisites
- Products: Liquid UI WS, Liquid UI Server or Local DLL, Client Software
- Commands: inputfield(), pushbutton(), set(), box(), gettableattribute()
Purpose
In this article, you will learn how to retrieve and display sales order data on the Display Sales Order: Initial Screen from its Overview screen. To retrieve data from the input fields and table. We'll walk you through the following steps.
- Delete unnecessary screen elements on the SAP screen using del()
- Add a pushbutton to reset values
- Add a group box to place the sales order data
- Add input fields to place the sales order data
- Create a group box with variable coordinates to change the boxsize
- Add a function to clear field values
- Perform enter to execute a function
- Add a function to retrieve and display values
User Interface
//Create this file inside your script folder for customizing Display Sales Order screen SAPMV45A.E0102.sjs
//Now, let's start adding the Liquid UI script to the above file and save it.
Customization
- Logon to SAP. Navigate to the Display Sales Order: Initial Screen (VA03) and delete the Search Criteria group box using the del command, as shown below.
//Deletes Search Criteria group box
del("G[Search Criteria]");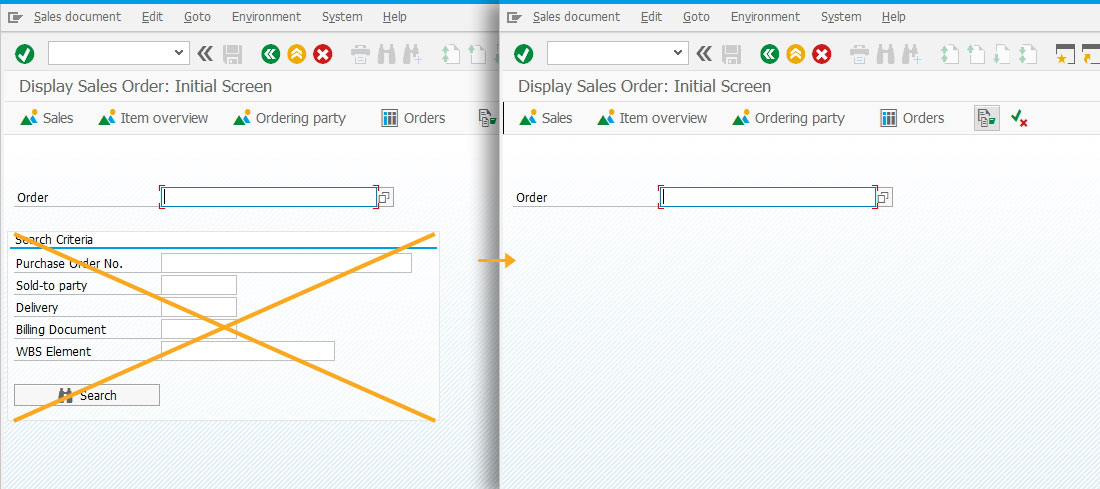
- Add a toolbar pushbutton with title as Reset to execute clearValues function on click.
//Creates a toolbar pushbutton with label Reset
pushbutton([TOOLBAR], "Reset", "?", {"process":clearValues});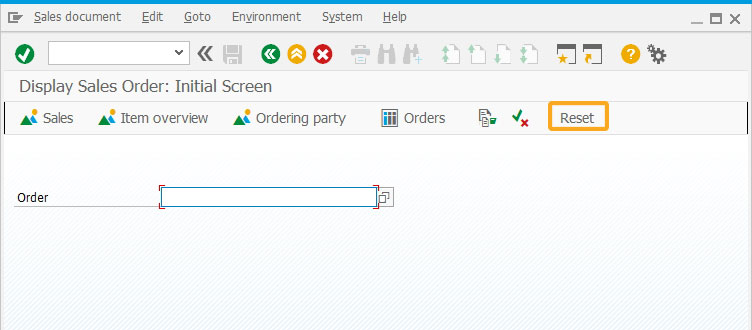
- Add a group box with title as Sales Order Data, as shown below:
//Creates a Sales Order Data groupbox using the row and column coordinates
box([4,0], [10,40], "Sales Order Data");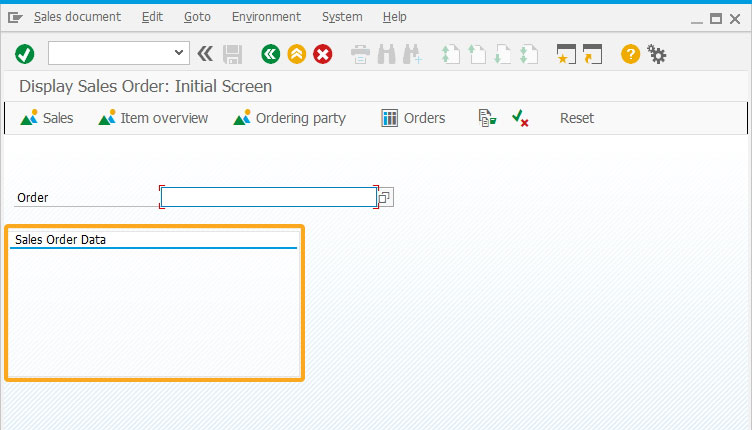
- Add five non-editable input fields with labels as Standard Order, Sold-to Party, Ship-to Party, PO Number, and PO date to display the values of the Sales Order data group box, as shown below.
// Creates five non-editable input fields
inputfield([5,2],"Standard Order",[5,17], {"size":10, "readonly":true, "name":"z_va03_standard_order"});
inputfield([6,2],"Sold-to Party",[6,17], {"size":10, "readonly":true, "name":"z_va03_sold_to"});
inputfield([7,2],"Ship-to Party",[7,17], {"size":10, "readonly":true, "name":"z_va03_ship_to"});
inputfield([8,2],"PO Number",[8,17], {"size":22, "readonly":true, "name":"z_va03_po_number", "maxlength":35});
inputfield([9,2],"PO date", [9,17], {"size":10, "readonly":true, "name":"z_va03_po_date"});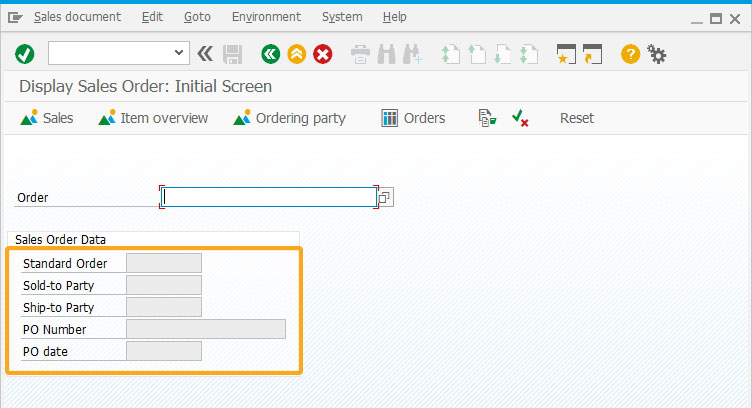
- Now, initialize a variable and create a group box with variable coordinates to change the size based on the All items table data.
// Initialize z_item_toal
if(!z_item_toal){
  z_item_toal = 0;
}
// Use z_item_toal to dynamically create the box size and run the for loop
box([4,42], [6+z_item_toal,90], "All items");
for(i=1; i<z_item_toal; i++){
inputfield([5+i,44], {"nolabel":true, "readonly":true, "size":6, "name":"z_va03_item_&V[i]"});
inputfield([5+i,52], {"nolabel":true, "readonly":true, "size":18, "name":"z_va03_desc_&V[i]"});
inputfield([5+i,72], {"nolabel":true, "readonly":true, "size":15, "name":"z_va03_mat_&V[i]"});
}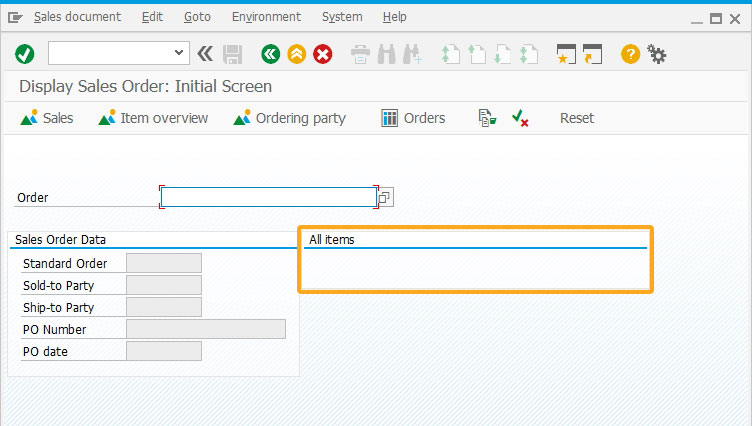
- Add a function to clear all the data in the input fields and group box.
//This function clears all variables we use, triggered on the pushbutton "Reset" function clearValues(){ set("V[z*]", ""); } - OnUIEvents command triggers the function va03_execute on performing Enter.
onUIEvents['Enter']={"process":va03_execute};
- Add a function titled function va03_execute to display the sales order data from the Display Sales Order: Overview screen to Initial Screen using table scroll logic, as defined below:
// This function will go to the next screen, grab the data and come back to the initial Sales Order screen
function va03_execute(){
// Use an onmessage to capture any error the user may enter
  onmessage
  if(_message.substring(0,2)=="E:"){
  message(_message);
  enter("?");
  goto FUNC_END;
  }
  else{
  enter();
  // In case there is a warning message

  }
  onscreen 'SAPMV45A.4001'
  // Grab the Sales Order Data
  set("V[z_va03_standard_order]","&F[Standard Order]");
  set("V[z_va03_sold_to]","&F[Sold-to party]");
  set("V[z_va03_ship_to]","&F[Ship-to party]");
  set("V[z_va03_po_number]","&F[PO Number]");

			set("V[z_va03_po_date]","&F[PO date]");

         // Table Scroll begins here
         absrow = 1;
         relrow = 1;
         z_item_toal = 0;

         // Fetch the table attributes
         gettableattribute("T[All items]", {"firstvisiblerow":"FVisRow", "lastvisiblerow":"LVisRow", "lastrow":"LastRow"});
new_screen:;
         // Scroll to the absolute row
         enter("/ScrollToLine=&V[absrow]", {"table":"T[All items]"});

      onscreen 'SAPMV45A.4001'
         // Refetch table attributes, in case they might of changed
         gettableattribute("T[All items]", {"firstvisiblerow":"FVisRow", "lastvisiblerow":"LVisRow", "lastrow":"LastRow"});
         // Reset the relevant row
         relrow = 1; // reset the relative row with a new screen
new_row:;
         if(absrow>LVisRow){
            // end of the screen?
            goto new_screen;
         }
         if(absrow>LastRow){
            // end of the table?
            goto end_of_table;
         }

         // Grab the values we want from the row
         set("V[z_va03_item_&V[absrow]]","&cell[All items,Item,&V[relrow]]");
         set("V[z_va03_desc_&V[absrow]]","&cell[All items,Description,&V[relrow]]");
         set("V[z_va03_mat_&V[absrow]]","&cell[All items,Material,&V[relrow]]");

         // Increment out counters
         z_item_toal++;
         absrow++;
         relrow++;
         goto new_row;

end_of_table:;
         // Scroll back to the top of the table
         enter("/ScrollToLine=1", {"table":"T[All items]"});

      onscreen 'SAPMV45A.4001'
         // Go back to the initial screen
         enter("/3");
FUNC_END:;
}
SAP Process
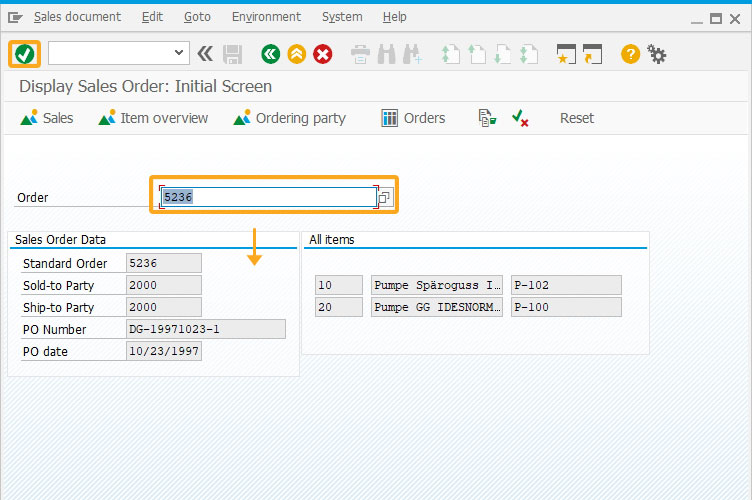
- Enter an order number in the Order input field and click Continue to view the sales order details in the respective input fields, as shown below.
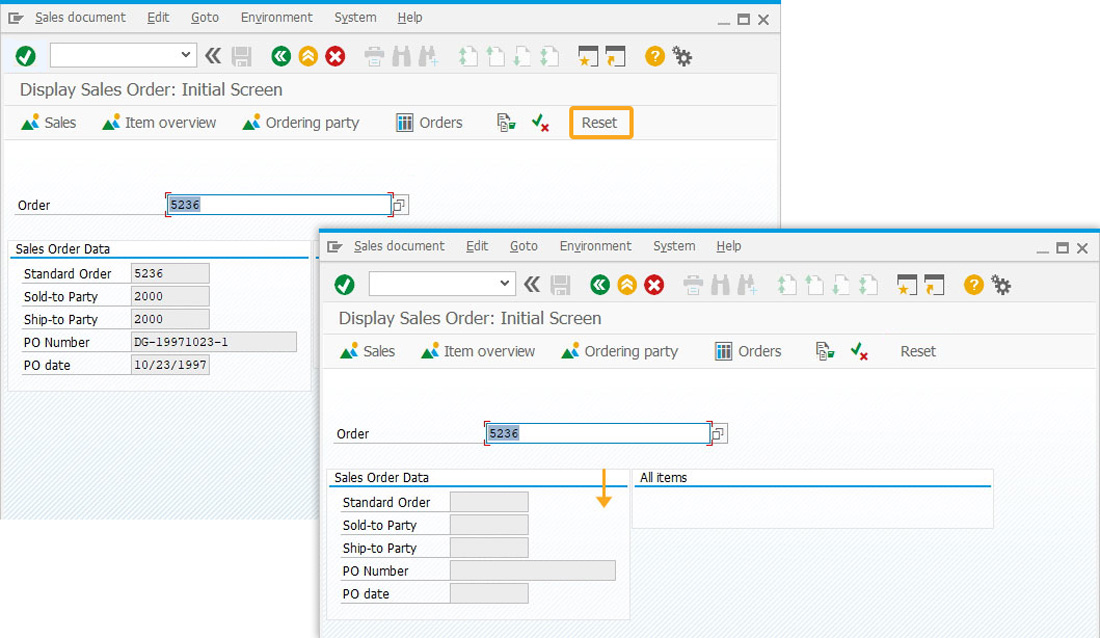
- Click the Reset toolbar pushbutton to clear all the displayed sales order details, as shown below.
Next Steps

Add a new column into an SAP table
Learn how to add a column with field values in the SAP table.
Learn how to add a column with field values in the SAP table.
10 min.
This article is part of the Liquid UI Variables tutorial.


