Prerequisites
- Products: Liquid UI WS, Liquid UI Server, Client Software
- Commands: del(), pushbutton(), box(), _transaction
Purpose
Learn how to create a launchpad to navigate to various Purchase Order and Purchase Requisition screens and customize them as per requirements. We will walk you through the following steps.
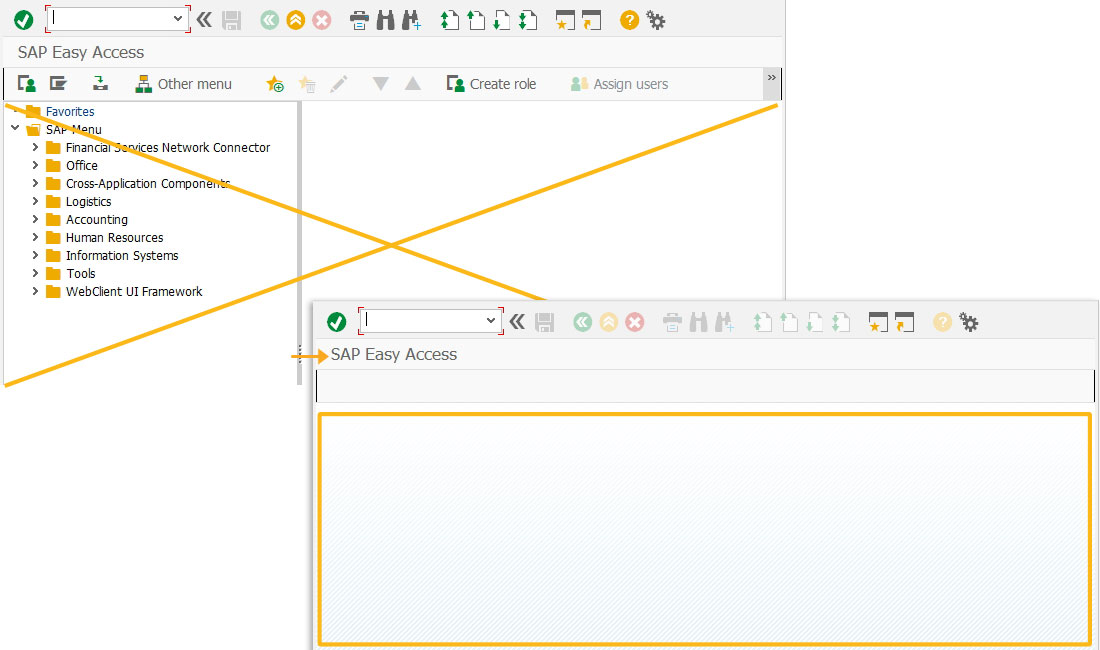
- Delete an Activex container on the SAP screen using del()
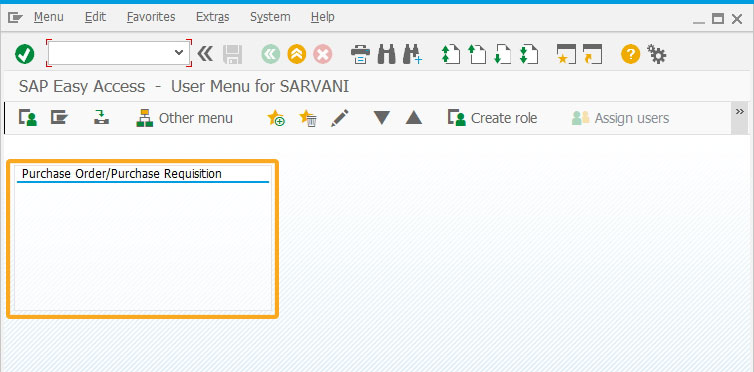
- Add a group box
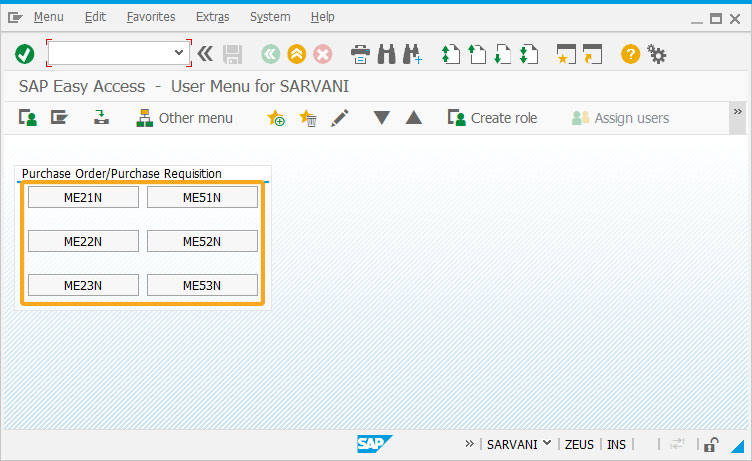
- Add six pushbuttons to navigate to various purchase order screens
- Add conditionalized script for the purchase order screens
User Interface
//Create these files inside your script folder for customizing the SAP Easy Access and Purchase Order and Requisition screens: SAPLSMTR_NAVIGATION.E0100.sjs and SAPLMEGUI.E0014.sjs
//Now, let's add the Liquid UI script to SAPLSMTR_NAVIGATION.E0100.sjsfile for customizing the SAP Easy Access screen and save it.
SAP Customization
- Delete an Activex container on the SAP Easy Access screen.
//Deletes an image container
del('X[IMAGE_CONTAINER]');
- Add a group box named Purchase Order/Purchase Requisition to place the pushbuttons.
//Creates a groupbox to place the pushbuttons to navigate to the purchase order screens
box([1,1],[7,36], "Purchase Order/Purchase Requisition");
- Add six pushbuttons with labels ME21N, ME22N, ME23N, ME51N, ME52N, and ME53N to navigate through various Purchase Order and Requisition screens, as shown below.
//Creates pushbuttons that navigates you to Purchase Order screens
pushbutton([2,3], "ME21N", '/nME21N', {'size':[1,15]});
pushbutton([4,3], "ME22N", '/nME22N', {'size':[1,15]});
pushbutton([6,3], "ME23N", '/nME23N', {'size':[1,15]});
pushbutton([2,20], "ME51N", '/nME51N', {'size':[1,15]});
pushbutton([4,20], "ME52N", '/nME52N', {'size':[1,15]});
pushbutton([6,20], "ME53N", '/nME53N', {'size':[1,15]});
- Add the following script to SAPLMEGUI.E0014.sjs and save it.
//  User Interface
if(   _transaction == 'ME21N' || _transaction == 'ME22N' || _transaction == 'ME23N' ||
   _transaction == 'ME51N' || _transaction == 'ME52N' || _transaction == 'ME53N' ) {

   // Differentiate between Purchase Order(PO) and Purchase Requisition(PR) screens
   if(<'F[Doc. date]'>.isValid) {                                 // PO Transaction
      if(!<'F[Doc. date]'>.isprotected) {                     // Create PO Transaction
            // Create PO Interface Code goes here
            title(_title + ' - Liquid UI Screen');
            del('P[Personal Setting]');   // Toolbar Pushbutton
            del('F[Vendor]');
      } else {
 // Change or Display PO Transaction
         if(<'P[Check]'>.isValid) {
// Change PO Transaction
            // Change PO Interface Code goes here
			title(_title + ' - Liquid UI Screen');
         } else {                                    // Display PO Transaction
            // Display PO Interface Code goes here
			title(_title + ' - Liquid UI Screen');
         }
      }
   } else {
            title(_title + ' - Liquid UI Screen');
			// PR Transaction
   }
}
SAP Process
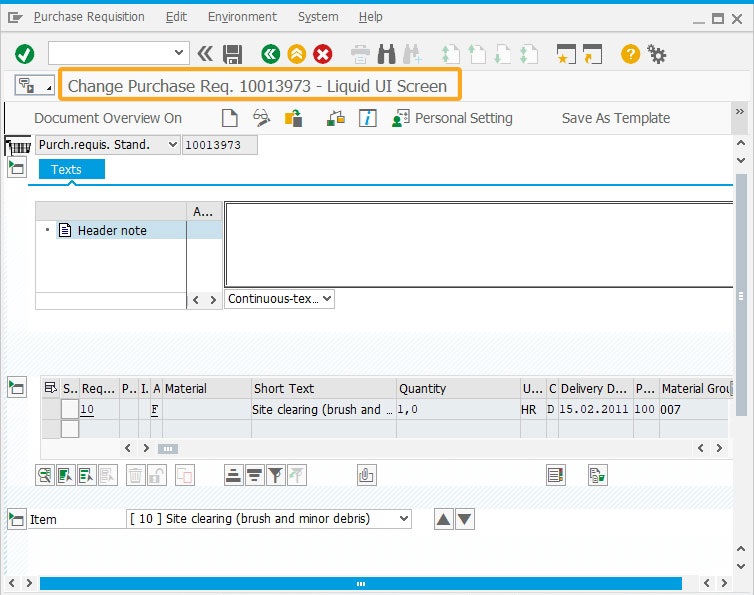
- Refresh the SAP Easy Access screen and click on any one of the pushbuttons created to see the change in the screen title.
Next Steps

Scenario 1 - Creating a Material or a Sales Order
Learn how to create a material and create a sales order from a single screen
Learn how to create a material and create a sales order from a single screen
10 min.
This article is part of the Screens combination/aggregation


