Prerequisites
- Products: Liquid UI WS, Liquid UI Server or Local DLL, Client Software
- Commands: pushbutton(), set(), onscreen(), enter(), box()
Purpose
Learn how to create a launchpad on an SAP screen to navigate to various transactions and show how to create a material with a single click. To explain this, we’ll walk you through the following steps.
- Delete an Activex container on the SAP screen using del()
- Add a group box to create a launchpad
- Add four pushbuttons with various functionalities defined
- Add functionality to create a material
- Add functionality to assign values to create a sales order
//Create this file inside your script folder for customizing the SAP Easy Access screen: SAPLSMTR_NAVIGATION.E0100.sjs
//Now, let's add the Liquid UI script to the above file and save it.
- Delete an Activex container on the SAP Easy Access screen using the del command.
//Deletes an image container
del('X[IMAGE_CONTAINER]');
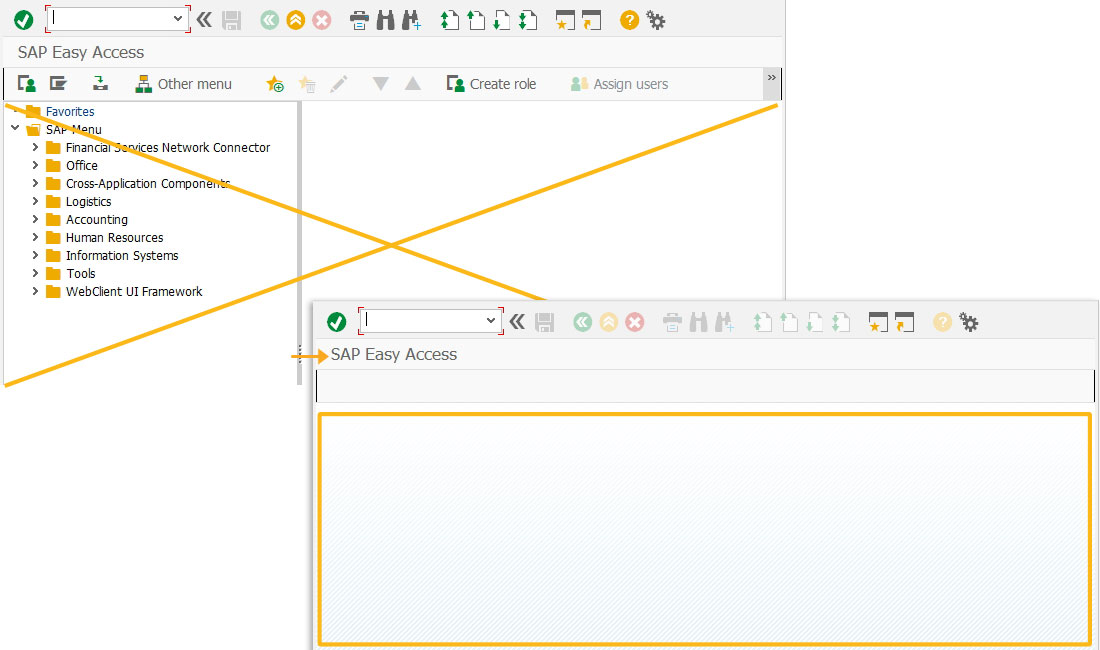
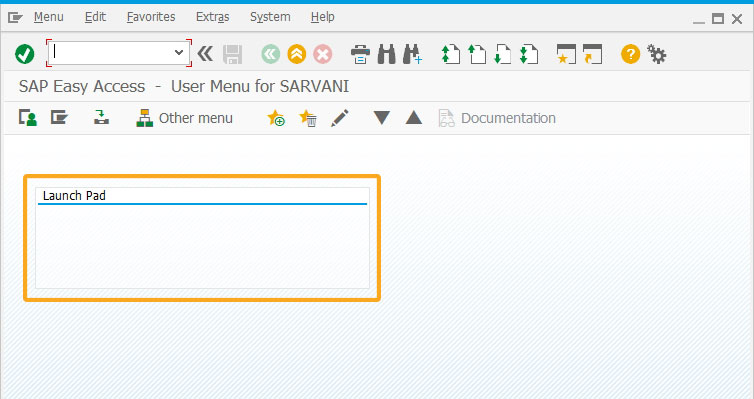
- Add a group box to create a launchpad.
//Creates a groupbox with Launch Pad as title
box([2,4],[6,50], "Launch Pad");
- Add four pushbuttons at various places with different functionalities defined, as shown below.
// Creates a toolbar pushbutton that runs a process with parameters to defined create a material pushbutton( [TOOLBAR], "Create Material",{"process":createMat, "using":{ "v1":"BEARINGS", "v2":"C", "v3":"FERT" }});
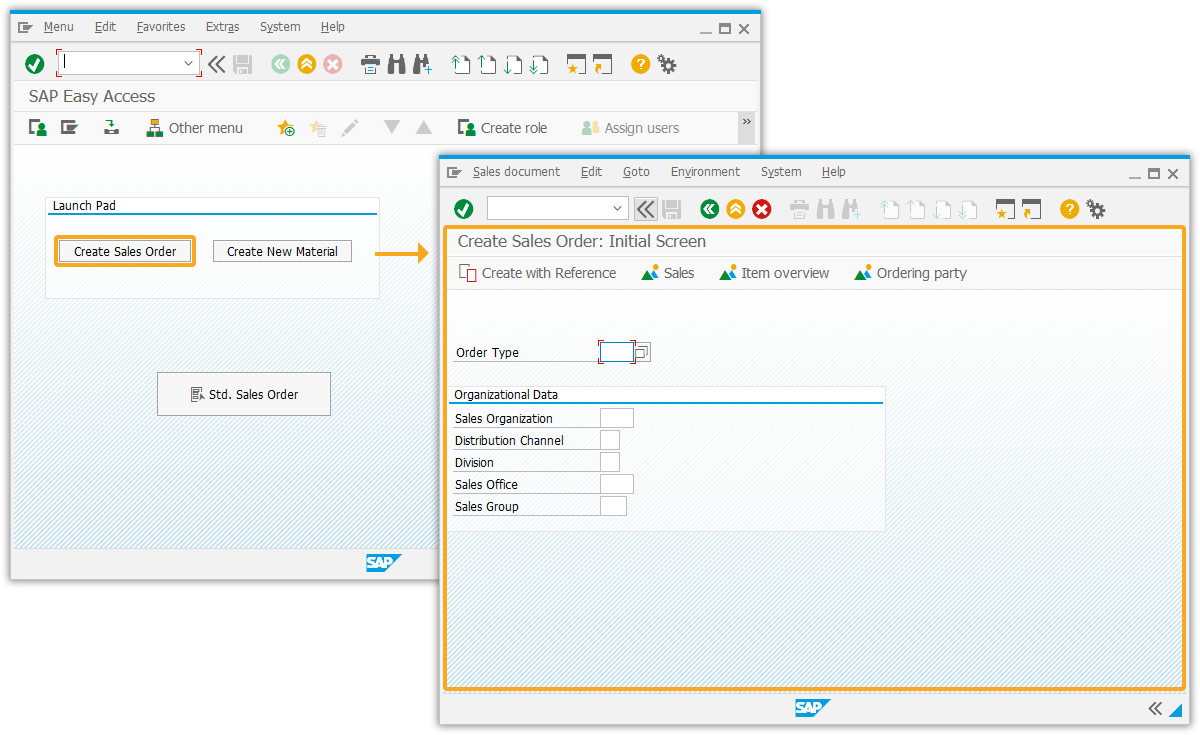
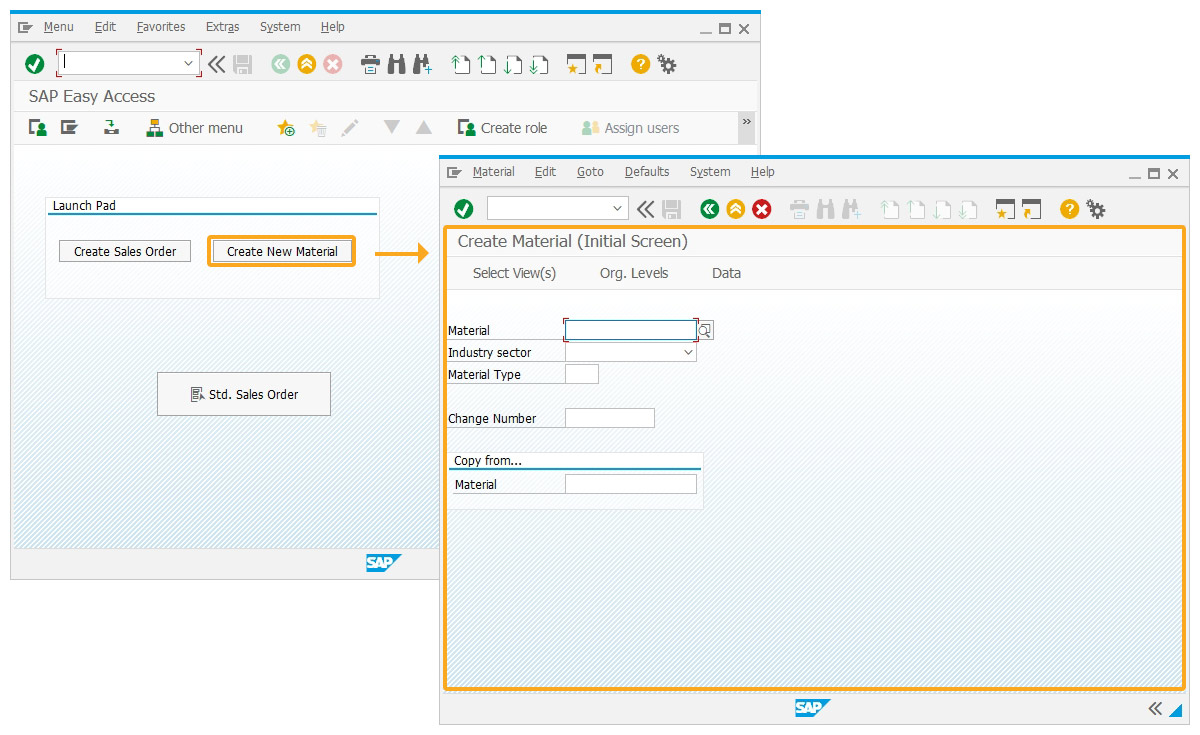
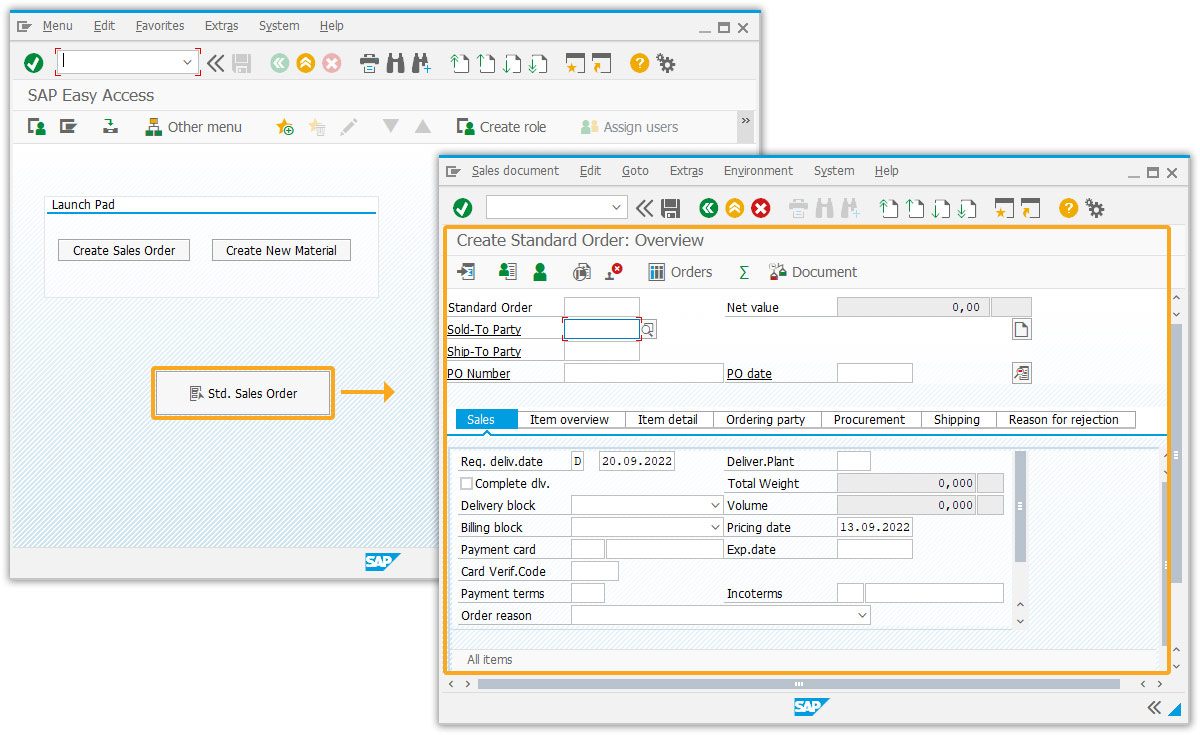
// Creates a pushbutton on the groupbox and navigates to va01 screen onclick pushbutton([4,6], "Create Sales Order", "/nva01"); // Creates a pushbutton on the groupbox and navigates to mm01 screen onclick pushbutton([4,28], "Create New Material", "/nmm01"); // Creates a pushbutton that executes a function with series of steps defined pushbutton([10,20], "@4D\\QCreate a Std. Sales Order@Std. Sales Order",{"process":va01_process,"size":[2,24]});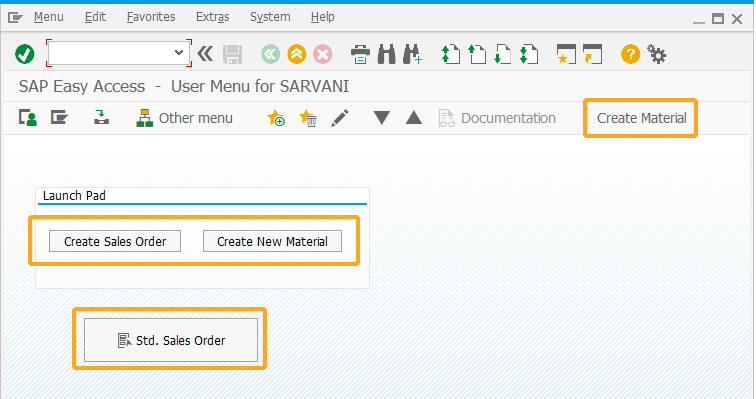
- Add a function titled createMat with pre-defined steps to assign values to the fields to Create Material.
//Create a function titled createMat to assign the values to the Create Material fields.
function createMat(param){ onscreen 'SAPLSMTR_NAVIGATION.0101' enter('/nmm01'); // Create Material (Initial Screen) onscreen 'SAPLMGMM.0060'
set('F[Material]', param.v1); set('F[Industry sector]',param.v2); set('F[Material Type]',param.v3); enter('/5'); onscreen 'SAPLMGMM.0070' set('cell[TABLE,0,1]','X'); set('cell[TABLE,0,4]','X'); set('cell[TABLE,0,6]','X'); set('cell[TABLE,0,12]','X'); set('cell[TABLE,0,13]','X'); set('cell[TABLE,0,14]','X'); enter('/6'); onscreen 'SAPLMGMM.0080' set('F[Plant]','1000'); set('F[Stor. Location]', '0001'); enter(); onscreen 'SAPLMGMM.4004' set('F[Base Unit of Measure]','TO'); set('F[Division]', '09'); set('#[2,32]', 'Finished Product'); set('F[Material Group]', '0001'); enter('/11'); } - Add a function labeled va01_process to navigate to the Sales Order screen and assign values to the required fields automatically.
//Creates a function to assign the values for fields automatically
function va01_process(){ onscreen 'SAPLSMTR_NAVIGATION.0100' enter('/nva01'); onscreen 'SAPMV45A.0101' set('F[Order Type]','or'); enter(); } - Click Create Material toolbar pushbutton to create a material with the pre-defined values to the required field values, as shown below.
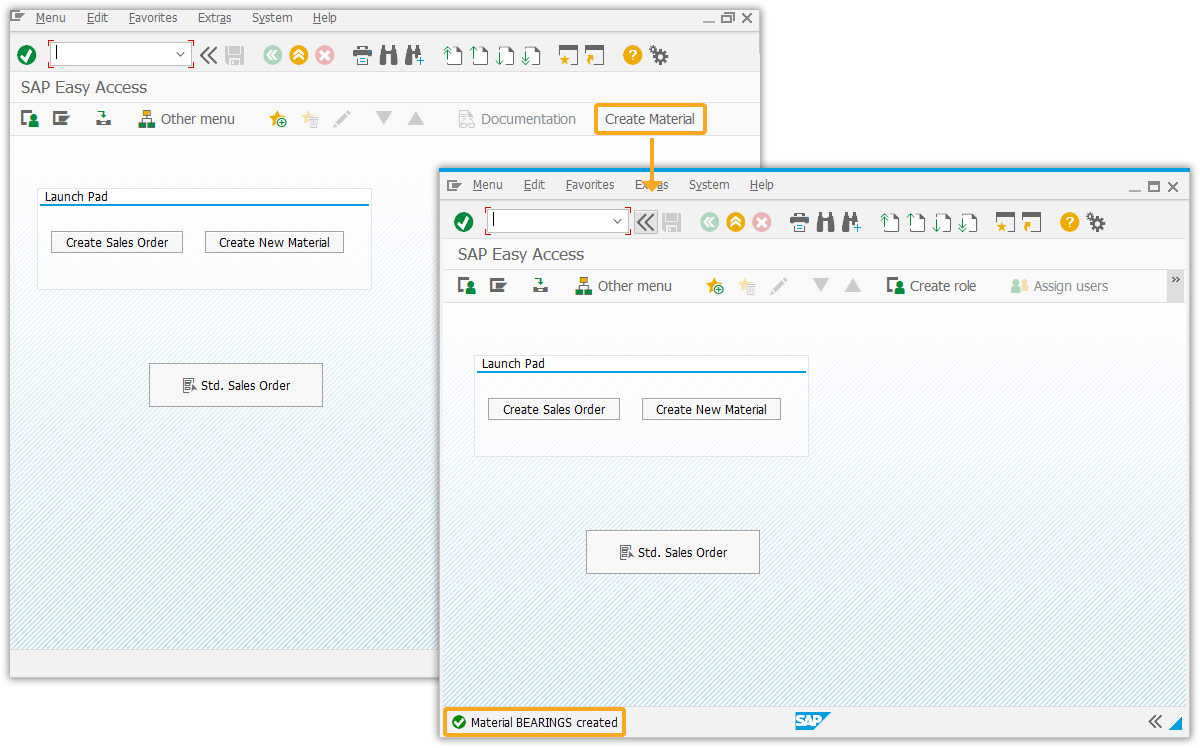
- Click the Create Sales Order pushbutton to navigate to the Create Sales Order screen, as shown below.
- Click Create New Material pushbutton to navigate to create material screen.
- Click Create Std Order pushbutton to add values to the required fields on the create a sales order screen.
Next Steps

This article is part of the Screens combination/aggregation


