Prerequisites
- Products: Liquid UI WS, Liquid UI Server or Local DLL, Client Software
- Commands: pushbutton(), inputfield(), load(), set(), message(), clearscreen()
Purpose
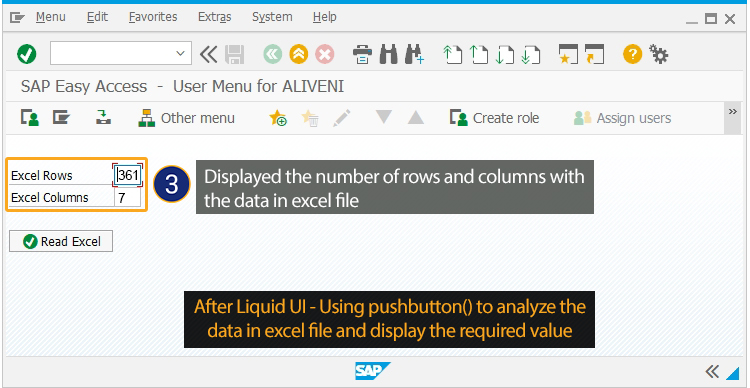
In this article, you will learn how to determine the data rows and columns from the user-selected Excel file and display the value in the respective input field.
To determine the data rows and columns from the selected file, follow the sequence.
- load wsoffice.dll file.
- Add input fields and push buttons.
- Add a function to determine and display the data from rows and columns.
User Interface
//Create this file inside your script folder for customizing the SAP Easy Access screen: SAPLSMTR_NAVIGATION.E0100.sjs
//Now, let's start adding the Liquid UI script to the above file and save it.
- Load the wsoffice
Firstly, place the wsoffice file inside your script folder. Now, call the wsoffice.dll file using the load() command in the ESESSION.sjs file.
load('wsoffice'); // Need to load this file to display File Selection pop-up - Clear the screen using clearscreen()
//clear the SAP Easy Access screen
clearscreen();
- Add two input fields “Excel Rows” and “Excel Columns” to get the data from the excel sheet.
//create two input fields “Excel Rows" and “Excel Columns”
inputfield([1,0], "Excel Rows", [1,15], {"size":3, "name":"z_mm01_rows"});
inputfield([2,0], "Excel Columns", [2,15],{"size":3, "name":"z_mm01_cols"});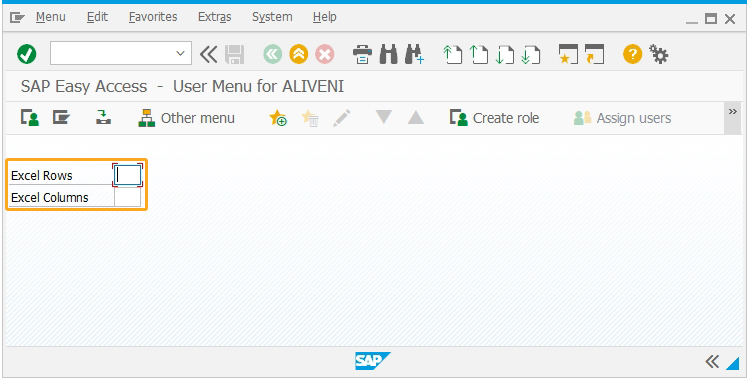
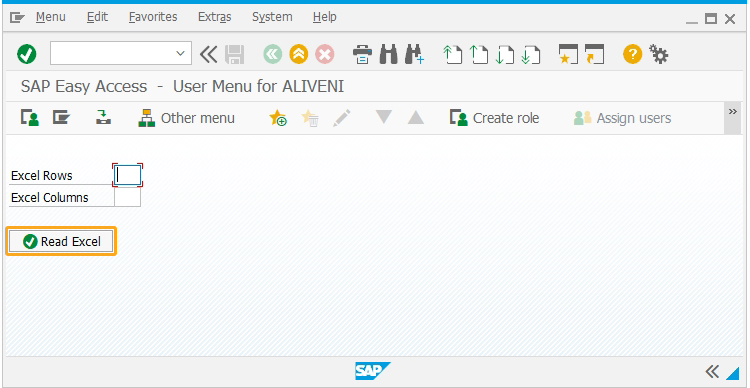
- Add a pushbutton "Read Excel" to execute the process excelRowColumnCount on click.
//create a pushbutton "Read Excel"
pushbutton([4,0],"@0V@Read Excel", "?", {"process":excelRowColumnCount});
- Add a function to remove blank space and validate the blank or null value of the variable.
// Remove blank spaces
String.prototype.trim=function(){return this.replace(/^\s+|\s+$/g,'');}

// To validate if the variable holds blank or null value
function isBlank(jvar){
    if(typeof jvar == 'string') {
        jvar = jvar.trim();
    }
    return(jvar == 'undefined' || jvar == null || jvar == "" || jvar == void 0);
}

// Function to Show File Open Dialog
function selectFileDialog(szPrompt){
    if(szPrompt==void 0)
        szPrompt = 'Select Excel File';
    var dialog = new ActiveXObject('MsComDlg.CommonDialog');
    // dialog.Filter='All Files(*.*)|*.*';
    dialog.Filter='(*.xl*)|*.xl*';  // BD
    dialog.MaxFileSize=32767;
    //dialog.AllowMultiSelect = true;
    dialog.DialogTitle=szPrompt;
    dialog.Flags=0x200|0x80000|0x800|0x4|0x200000
    dialog.ShowOpen();
    //var ret = dialog.FileTitle;
    var ret = dialog.FileName;
    dialog = void 0;
    return ret;
}
- Add a function to show File Open Dialog.
// Function to Show File Open Dialog
function selectFileDialog(szPrompt){
    if(szPrompt==void 0)
        szPrompt = 'Select Excel File';
    var dialog = new ActiveXObject('MsComDlg.CommonDialog');
    // dialog.Filter='All Files(*.*)|*.*';
    dialog.Filter='(*.xl*)|*.xl*';  // BD
    dialog.MaxFileSize=32767;
    //dialog.AllowMultiSelect = true;
    dialog.DialogTitle=szPrompt;
    dialog.Flags=0x200|0x80000|0x800|0x4|0x200000
    dialog.ShowOpen();
    //var ret = dialog.FileTitle;
    var ret = dialog.FileName;
    dialog = void 0;
    return ret;
}
- Add a function to open Excel File from the File Selection Dialog.
// Function to open Excel File From The File Selection Dialog
function openExcel(filename) {
    if(excelObj == void 0)
        excelObj = new ActiveXObject('Excel.Application');
    excelBook = excelObj.Workbooks.Open(filename);
    excelObj.Visible = true;
    excelObj.ScreenUpdating = true;
} - Add code to identify the total number of columns and rows with data in the selected excel spreadsheet.
// Determine Total Number of Columns with Data in Excel SpreadSheet
function determineNoOfDataColumns(excelActiveSheet, nColumnHeadingRow) {
    var excelColumnCount = excelActiveSheet.Columns.Count;
    for(var i = 1; i<excelColumnCount;i++) {
        if (excelActiveSheet.Cells(nColumnHeadingRow, i).Value == undefined || typeof(excelActiveSheet.Cells(nColumnHeadingRow, i).Value) == 'undefined') {
            break;
        }
    }
    return i;
}

// Determine Total Number of Rows with Data in Excel SpreadSheet
function determineNoOfDataRows(excelActiveSheet, nTotalDataColumns, nStartDataRow) {
    var excelRowCount = excelActiveSheet.Rows.Count;
    for(var i = nStartDataRow; i<excelRowCount;i++) {
        lastRowFound = false;
        for(var j = 2; j<nTotalDataColumns;j++) {
            if (excelActiveSheet.Cells(i, j).Value == undefined || typeof(excelActiveSheet.Cells(i, j).Value) == 'undefined') {
                lastRowFound = true;;
            } else {
                lastRowFound = false;
                break;
            }
        }
        if(lastRowFound == true) {
            // Last Row with Data + 1;
            break;
        }
    }
    return i;
}
- Add a function to set the values of rows and columns in input fields.
// Function to determine rows and columns
function excelRowColumnCount(){
    OPEN_EXCEL_FILE:;
    if(excelObj == void 0) {
        excelFileName = selectFileDialog('Select Excel File');
        if(excelFileName.length) {
            openExcel(excelFileName);
            excelSheet = excelBook.ActiveSheet;
        } else {
            message('E: No Excel File Selected');
            return;                // If Problem opening selected excel file, stop the process
        }
    } else {                    // Excel is already open (Manually Opened or Re-run for Error Processing)
        try {
            excelSheet = excelBook.ActiveSheet;
            // Check to see if we can read cell value, if not then Re-Open Excel File
            var cellCheckValue = excelSheet.Cells(1, 2).Value;
        }
        catch(err) {
            delete excelObj;
            goto OPEN_EXCEL_FILE;
        }
    }

    totalDataColumns = determineNoOfDataColumns(excelSheet,1);
    totalDataRows = determineNoOfDataRows(excelSheet,totalDataColumns,1);
    totalDataColumns = totalDataColumns-1;
    totalDataRows = totalDataRows-1;
    set('V[z_mm01_cols]','&V[totalDataColumns]');
    set('V[z_mm01_rows]','&V[totalDataRows]');
}
SAP Process
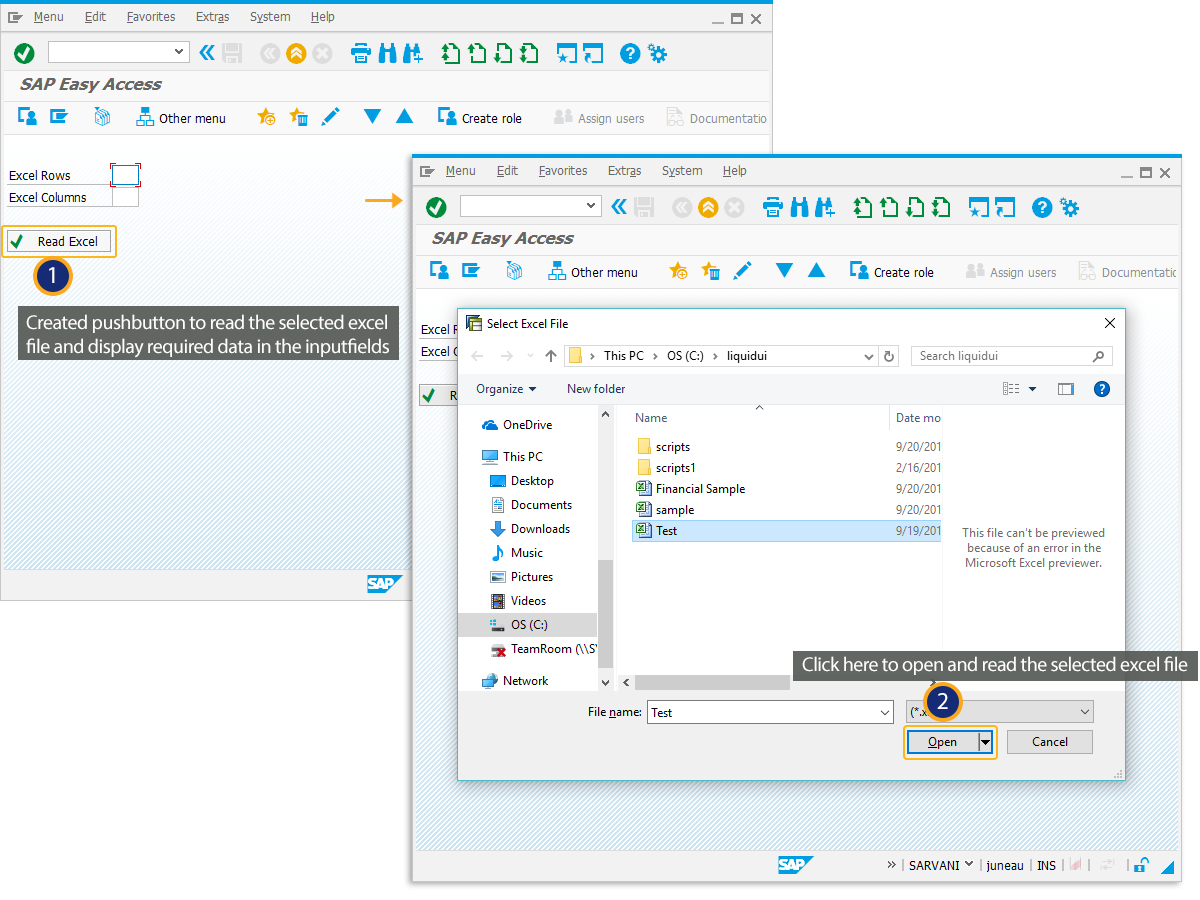
- Logon to SAP. On SAP Easy Access, you can see “Excel Rows”, “Excel Columns” input fields, and “Read Excel” push button. Clicking on the Read Excel push button displays a pop-up to select an excel file. Select the file and click on the open button option, as shown below.
- After identifying the rows and columns, the data from the selected file will be displayed in the input fields, as shown below.