Beginning with the version 3.5.535.0 release, Liquid UI Server supports new feature to install Liquid UI Server as a service with a custom service name.
Note:
- You can run 32bit and 64bit servers on the same machine to handle GuiXT and Liquid UI connections separately (GuiXT instance only works via 32bit server).
- You can run two 64bit server services on the same machine to handle different loads from Liquid UI server to different SAP system.
Installation
Follow the below process to install Liquid UI Server as a service with a custom service name:
-
Execute Liquid UI Server installer (guixtWSServerSetup.exe) and choose a different folder to complete installation.

-
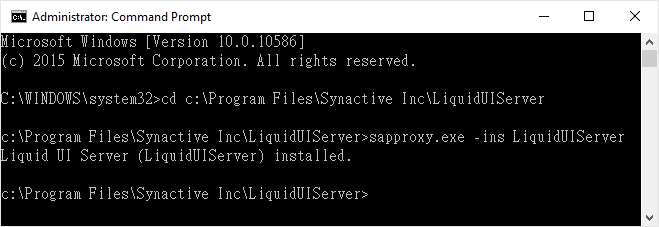
Open Command Prompt as an administrator, switch directory to the specific folder.

-
Execute command “sapproxy.exe -ins ” to install service. You will get a message as server installed on successful installation.Note: Where <servicename> is a single name, like “LIQUIDUIServer” or “LIQUIDQ1”
-
Open Services, you should find the installed Liquid UI Server service with a new service name in the list.

Steps to Remove
-
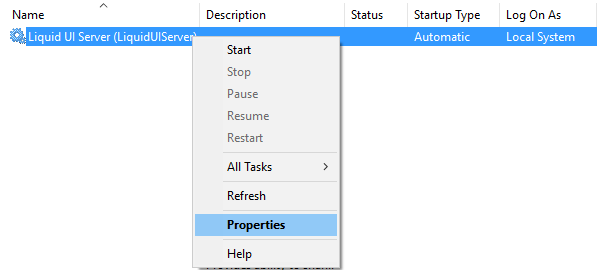
Open Services, find the Liquid UI Server service and stop it.

-
Select the service and right click on it. Select "Properties" option.
-
In the properties window, copy the service name.

-
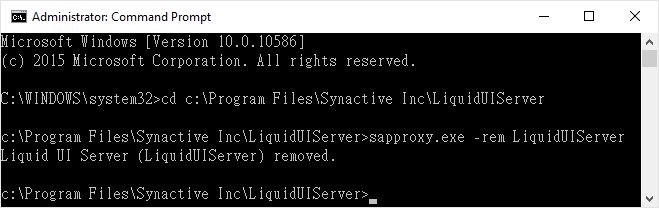
Open Command Prompt as an administrator and switch directory to the specific folder.
-
Execute the command "sapproxy.exe -rem " to remove the service.