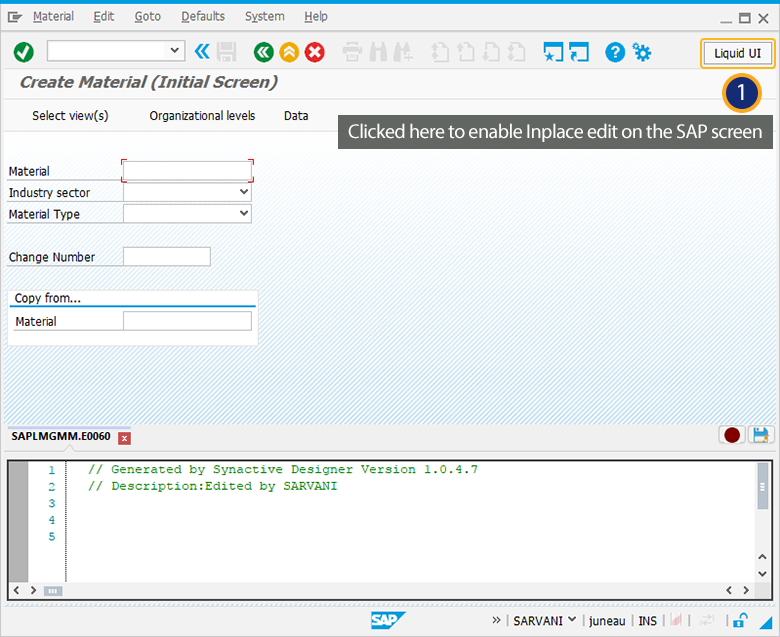
In this scenario, you will learn how to record the user actions to create the script for combining various screens required to create a material. You will also understand how easy to create a material after combining various screens in to a single screen. Follow below steps to customize create material process:
- Navigate to MM01 screen and Activate Inplace edit.
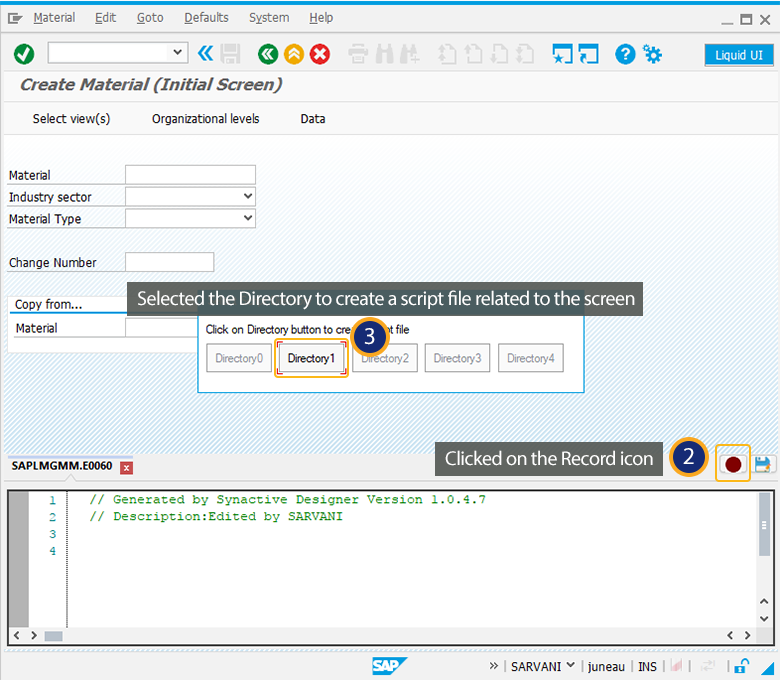
- Click on the Record icon to Start Recording from the Liquid UI menu.
- Then a Directory window appears to choose the directory path to save the generated script file after recording.
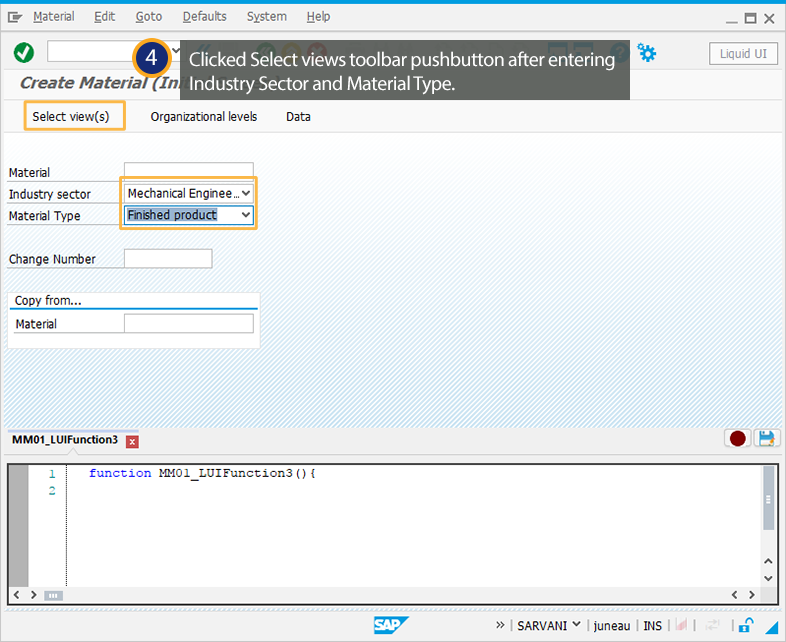
- In the SAP screen, select Industry sector and Material Type as shown below and Click on Select view(s) toolbar pushbutton.
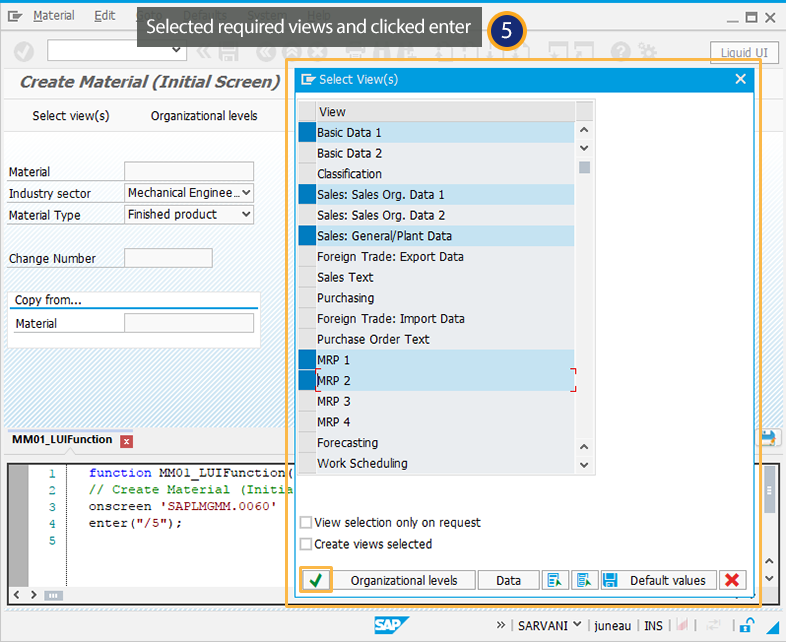
- Select the required views from the pop-up window to create a material as per your requirement.
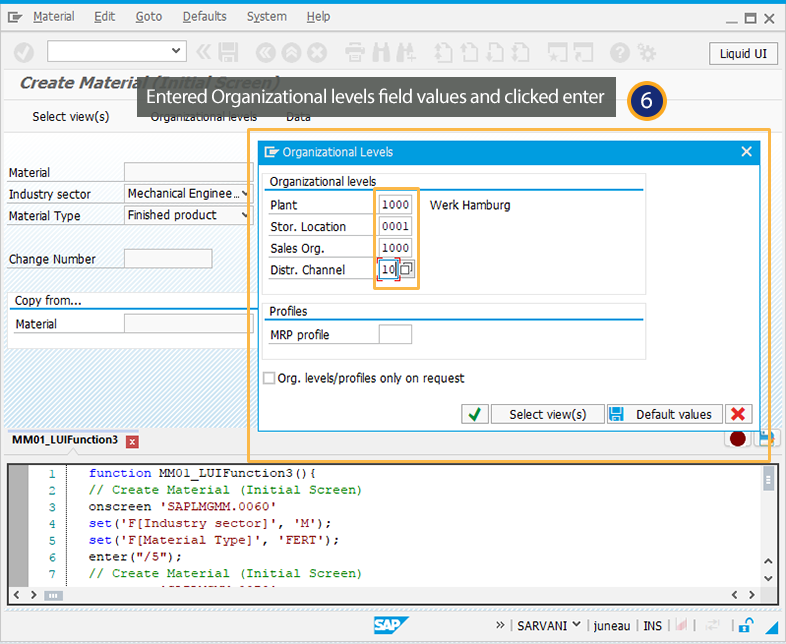
- Then a popup window is opened to enter the required Organizational data in the fields.
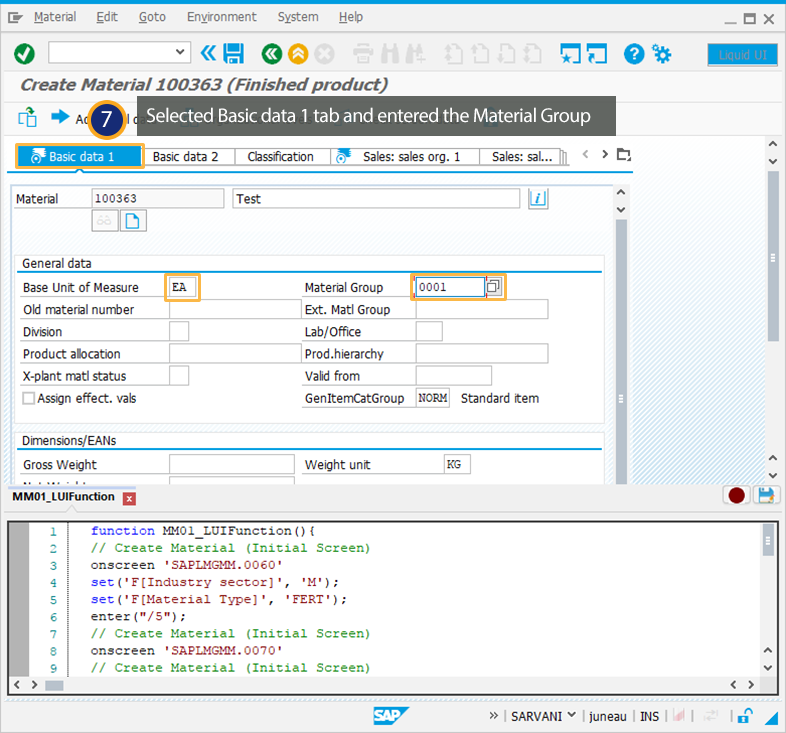
- Under Basic data1 tab, enter the required fields and click enter.
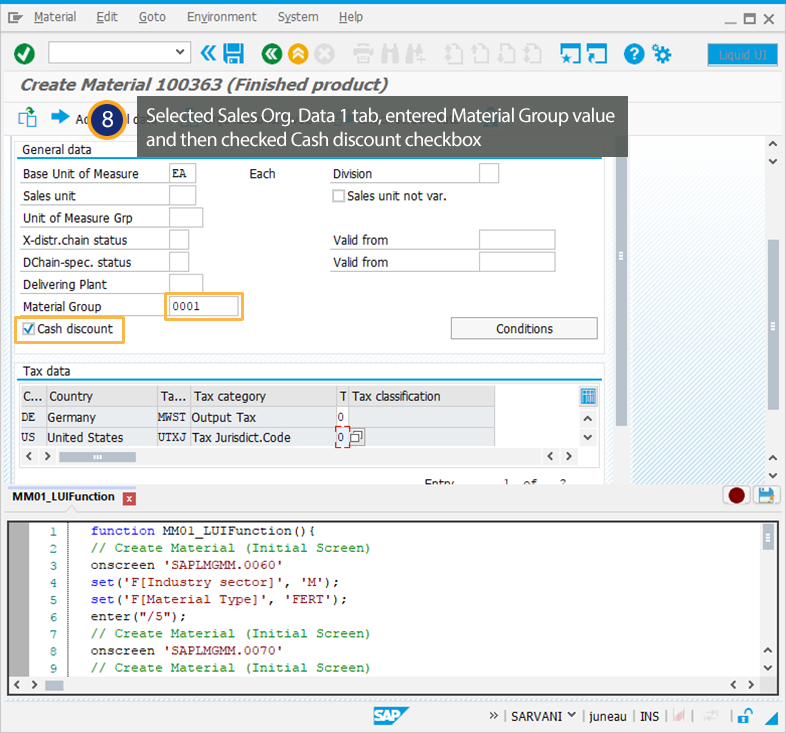
- Under the Sales Org. Data1 tab, enter T column values and click enter.
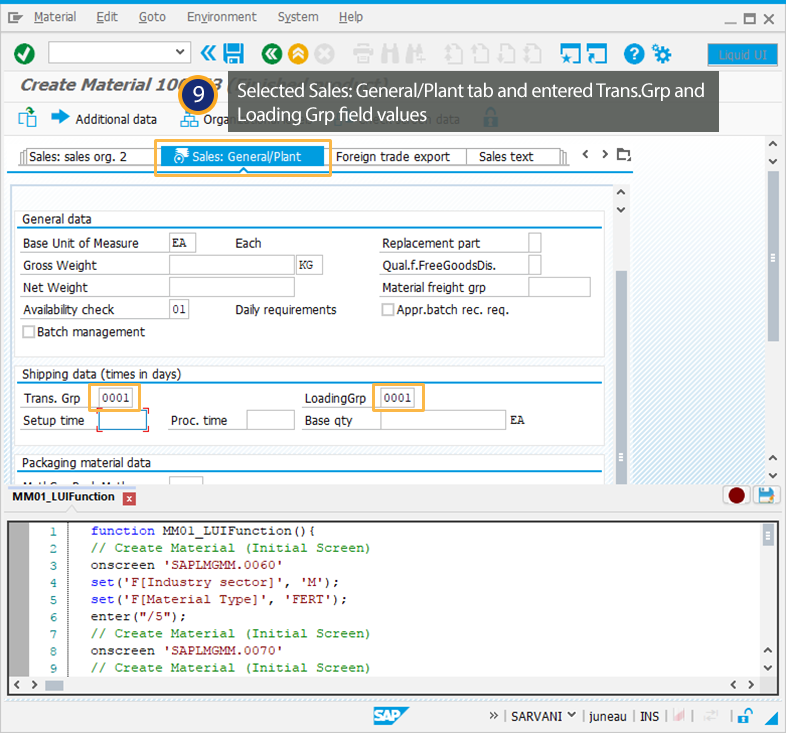
- Under Sales General/Plant Data tab, enter the Trans. Grp and Loading Grp values and click enter.
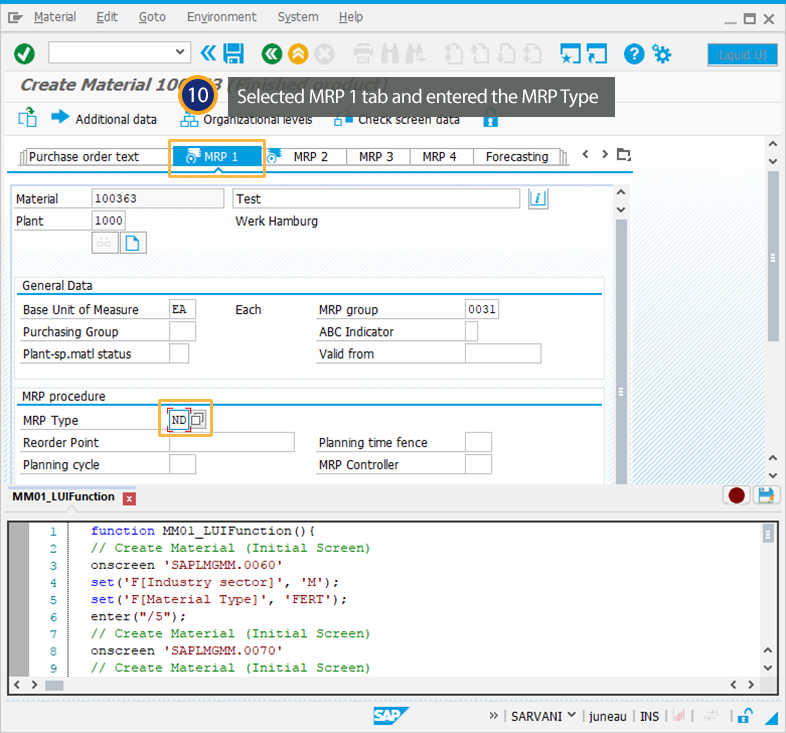
- Under MRP1 tab, enter MRP Type as ND and click enter.
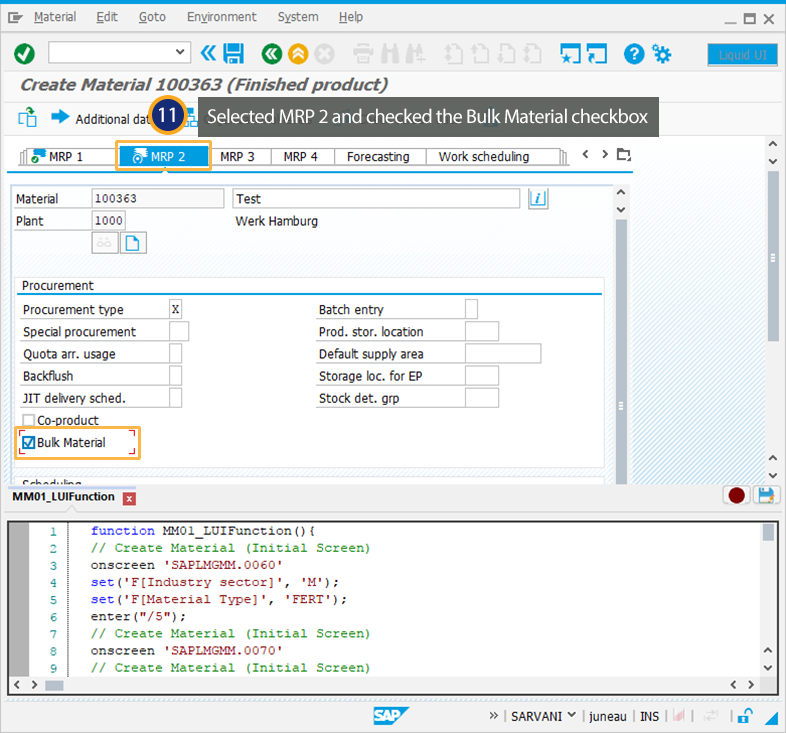
- Under MRP2 tab, check bulk material field and click enter.
- Under Accounting1 tab, enter values for the Valuation class, Standard price fields and click enter.

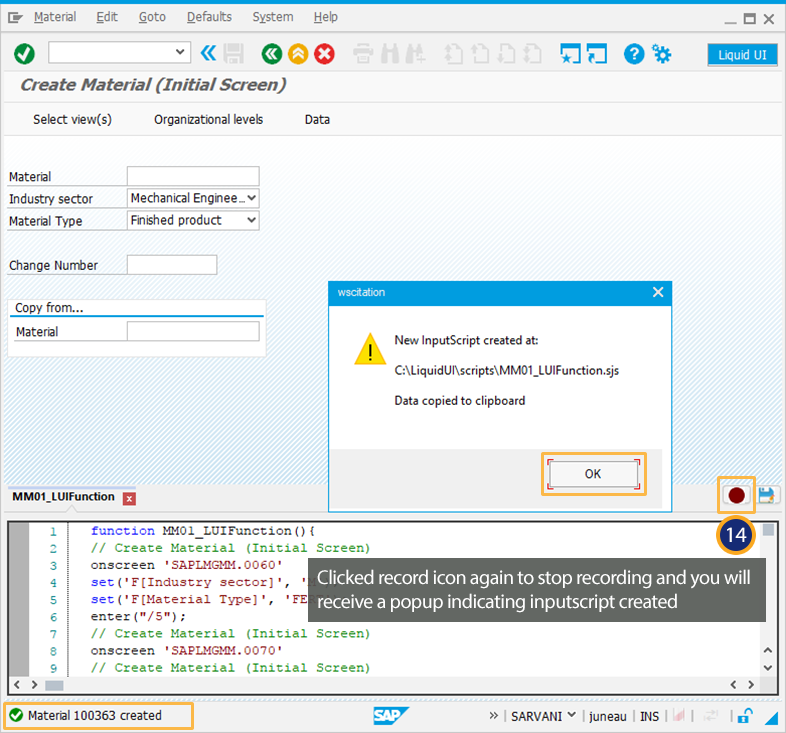
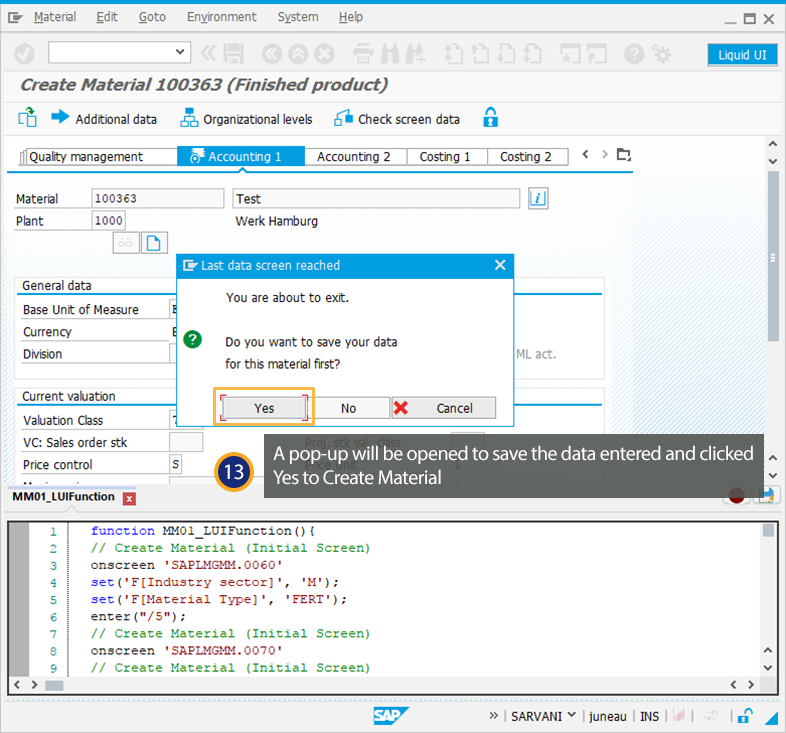
- Click Yes to save your material data and then a success message appears in the status bar as Material 100363 created.
- Click on the Record icon to save the InputScript generated after recording the user actions.