Purpose
With Liquid UI RPA for SAP, you can automate your SAP tasks to – login to SAP, navigate to transaction screens, and create master data, or execute reports or determine subsequent actions based on predefined logic. Automating transactions inside your SAP ERP system can help you to execute slow, manually dependent, and error-prone tasks without any user interactions. This can generate significant cost and time savings.
Liquid UI for iOS supports two types of SAP automation.
Automation via URL
With a single click on URL, you can directly navigate to the required transaction, or you can also process a transaction like Create Sales Order/Create Material. This SAP automation process eliminates entering the transactional details to execute the process, thereby increasing productivity as a result of time saved and reduces the potential for errors from rekeying data.
The URL will open the Liquid UI app and pass the required information like SAP connection details, login credentials, commands, field values, etc. to SAP to execute the predefined SAP process automatically. Based on your SAP process requirements, you can change the tcode, field values, and more in the URL.
Example
In this scenario, we will show you how to navigate to the Display Sales Order screen automatically by just clicking on the URL on your iOS device.
- Open the below URL link in a web browser on your Liquid UI for iOS devices. You can use the following URL parameters described while creating an automated URL.
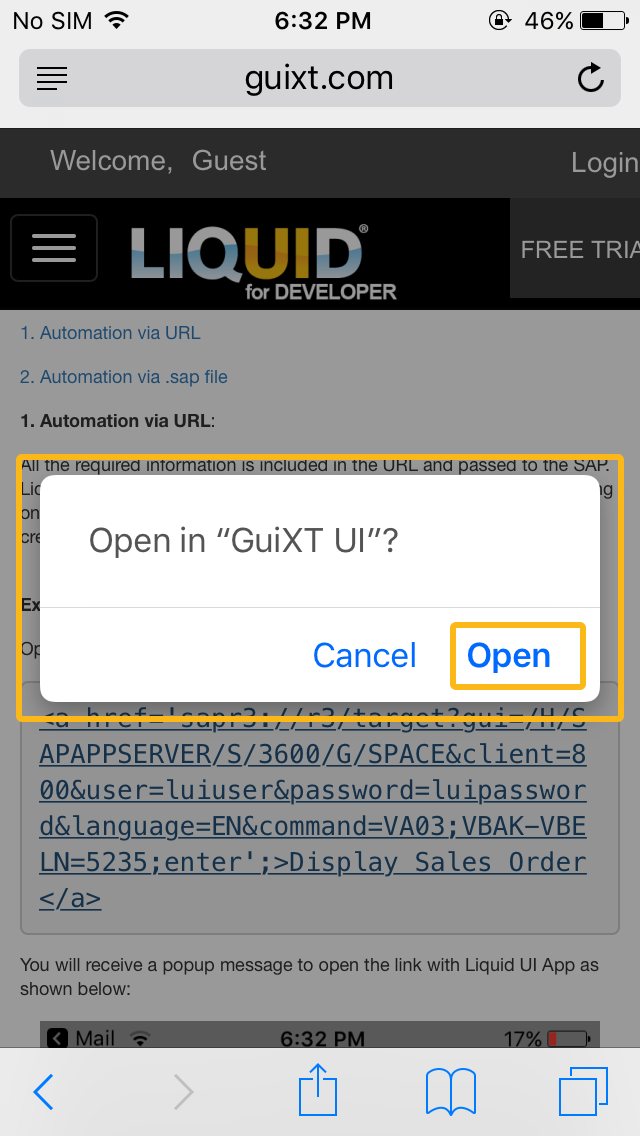
URL Parameters Liquid UI Connection Parameters sapr3:// Tell the browser to open the URL through the Liquid UI app //r3/target?gui Specify the target server you want to connect with /H/Servername Application Server Configuration /M/Servername Message Server Configuration /S/3224 Sapproxy Port Configuration 24 System Number, which is drawn from the last two digits of the proxy port number Client 800 - Liquid UI Client number User SAP username Password SAP password Language EN - English Command It can be a transaction, report, or system command - You will receive a popup message to open the link with the Liquid UI App. Click Open to open Liquid UI App, as shown below:
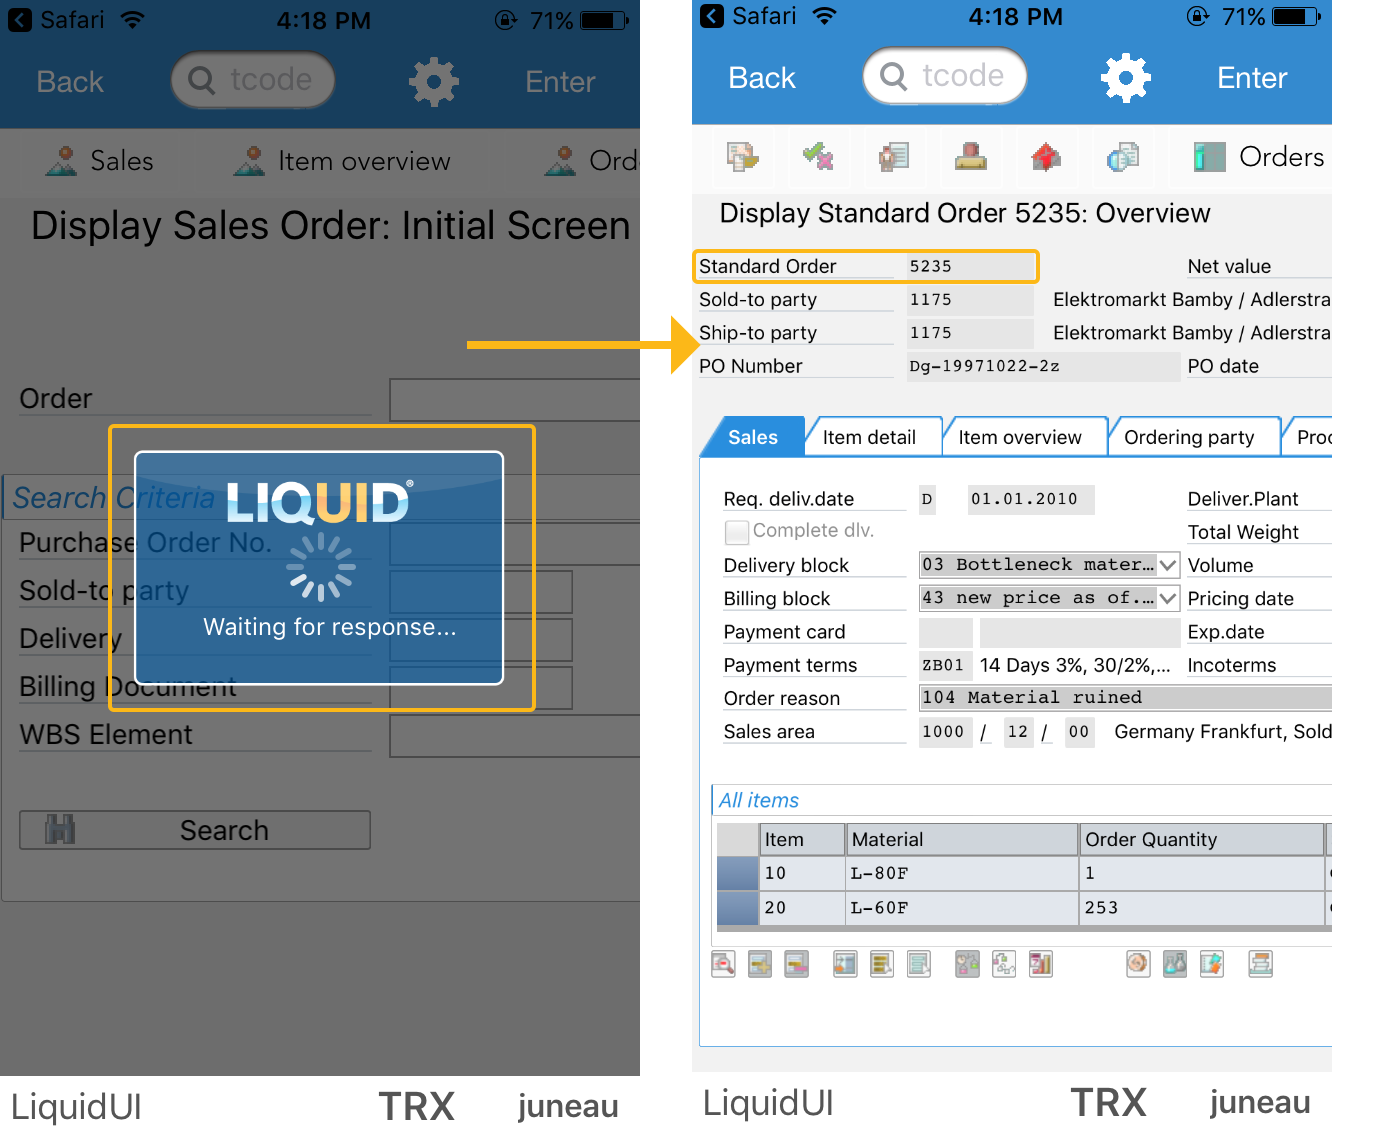
- Then, you will be navigated to the specified SAP transaction and enters the values in the required fields to execute the SAP process specified in the URL.

Note: The Liquid UI App will only get connected to the SAP if the connection parameters in the URL match with the connection list in Liquid UI App.
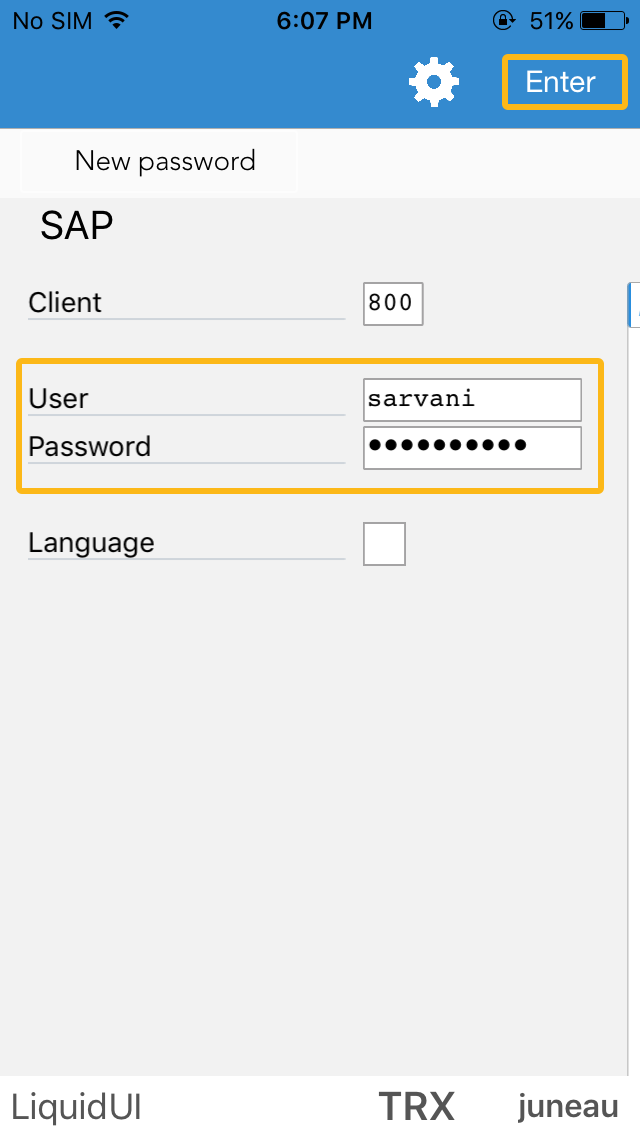
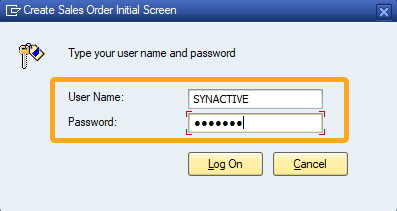
- If auto-logon is turned off or URL contains incorrect login credentials, then the log-on screen will be visible to the user for further user action as shown below:
URL EXAMPLES
Message Server:
<a href='sapr3://r3/target?gui=/M/SAPAPPSERVER/S/3600/G/SPACE&client=800&user=luiuser&password=luipassword&language=EN&command=VA03;VBAK-AUART=AE;>Connect to SAP Message Server</a>
Application Server:
<a href='sapr3://r3/target?gui=/H/SAPAPPSERVER/S/3200&client=800&user=luiuser&password=luipassword&language=EN&command=VA03;VBAK-VBELN=5235;RV45S-KUNNR=1460;enter'>Connect to SAP Application Server</a>
Automation via .sap file:
Using SAP shortcut files, you can directly navigate to the required transaction or execute an SAP process. For instance, an SAP shortcut file will eliminate entering the SAP details and navigating through menus to access the SAP screen each time when you are working on the same SAP transaction screen.
To generate the SAP shortcut file, you need to enter the SAP server connection details, login credentials, and the transaction code or command to execute in your SAP GUI. You can create as many SAP shortcut files as required and can be done in two ways using the SAP GUI.
- Creating an SAP shortcut file from Desktop
- Creating an SAP shortcut file from a specific SAP transaction screen
Creating an SAP shortcut file from Desktop
-
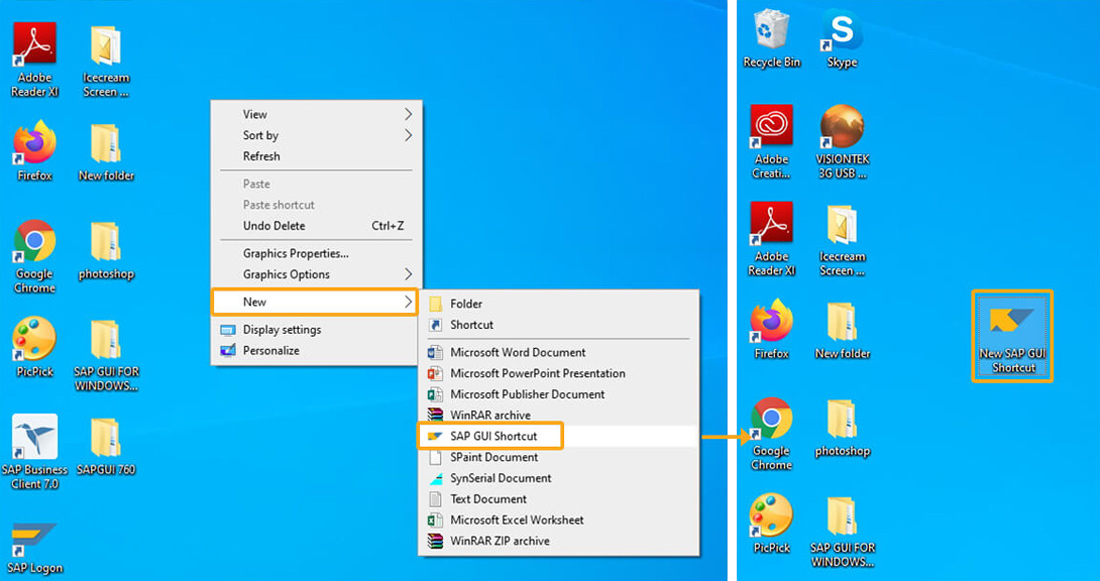
In this walkthrough, we will be navigating to the VA01 transaction, automatically without any manual entry. To begin, place the cursor on the desktop and perform right-click. Then choose New → SAP GUI Shortcut.
-
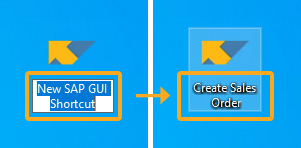
Click on the SAP shortcut file to rename. Enter the desired name for the file.
-
To define the .sap shortcut file, place the cursor on the shortcut icon, and do a right-click. Select Edit from the context menu.

-
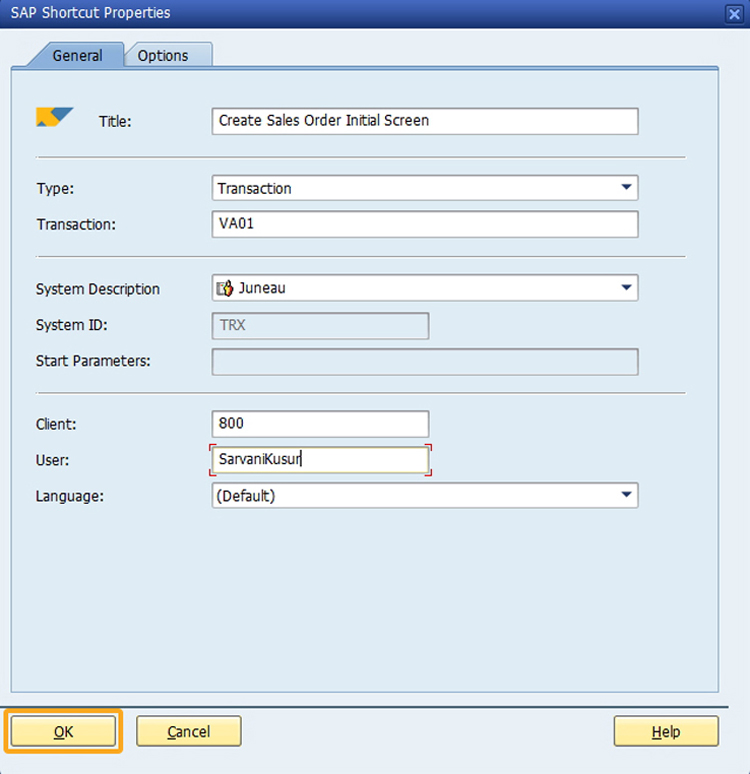
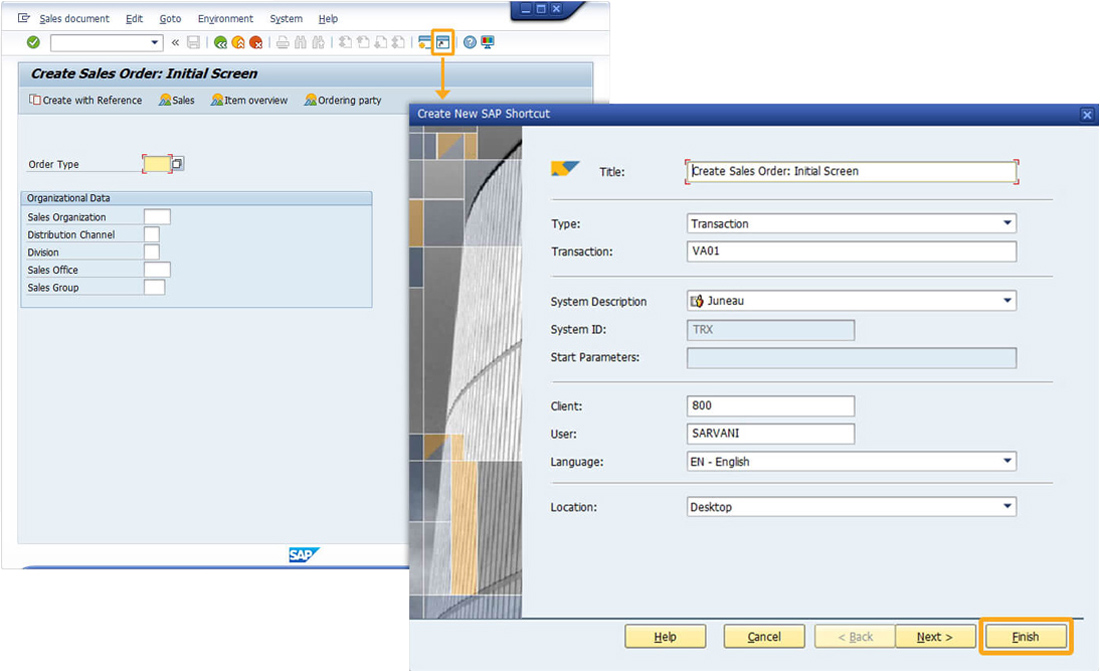
You will see the SAP shortcut properties window of the Create Sales Order shortcut file. After entering values in all the required fields, click OK.
-
The SAP Shortcut file property window has the following details:
Title Enter the shortcut title Type Specify the type of transaction. The type can be a transaction, report, or system command Transaction/Command/report Enter the appropriate transaction, report, or system command System Description Enter the name of your desired SAP system. You can even select from the drop-down list System ID Enter the system id of the SAP system Start Parameters Enter the SAP GUI parameters Client Enter your SAP client number User Enter your user name. By default, it takes the windows user name Password If the field is enabled, you can specify a password. By default, it is deactivated for security reasons. Language Select your preferred language. -
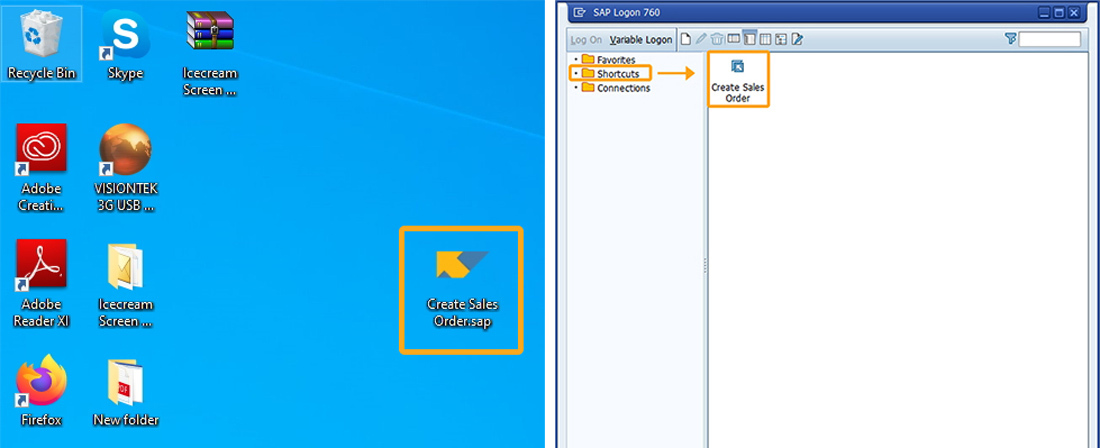
You will see the .sap shortcut file created on the desktop.

-
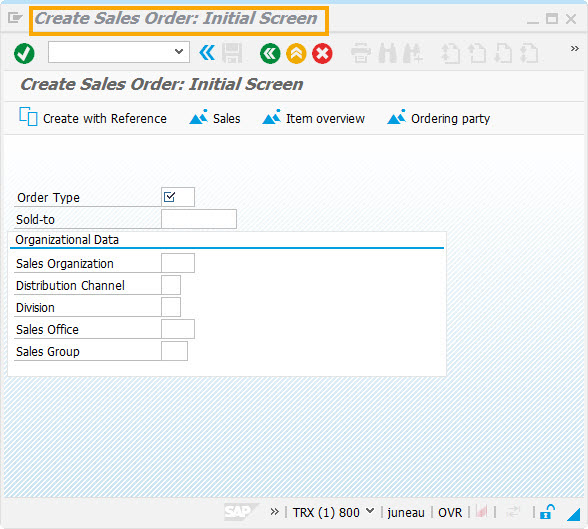
Double-click on .sap shortcut icon to navigate to the VA01 transaction in SAP.
Note: You need to add SAP login credentials in your .sap file to navigate to the required transaction automatically.
- During the execution of *.sap file, if you could not logon to SAP then you will be prompted with a window to enter SAP login credentials as follows:
- Similarly, you can navigate to any transaction with a single click by creating a .sap file.
Creating an SAP shortcut from a specific SAP transaction
- Go to the desired transaction, click on “Generates a Shortcut” icon. Then, a Create New SAP Shortcut window is displayed, here you can edit the transaction name and SAP server connection details. Click Finish to create a new shortcut file.
- The shortcut appears as an icon on your SAP Logon screen as well as on your Desktop as shown below:
Launch a connection through SAP shortcut file on iOS
In this scenario, you will learn how to edit an SAP shortcut file, create the three different types of SAP shortcut files, and launch a connection using an SAP shortcut file on your iOS device.
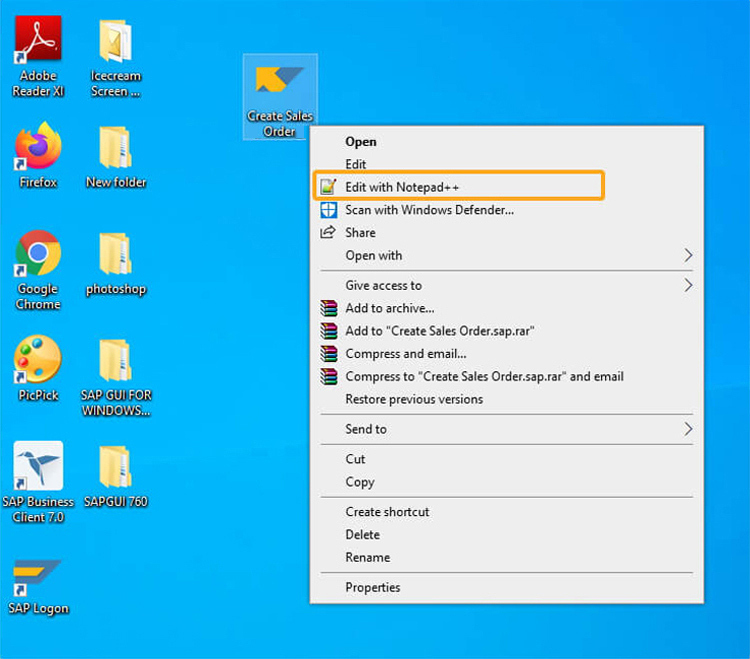
- Go to the desktop. Right-click on the Create Sales Order.sap shortcut file and select "Edit with Notepad++" to edit the shortcut file details in Notepad.
- In Notepad++, you can edit SAP connection details in the shortcut file that will allow you to connect your Liquid UI for iOS App to the R/3 server to launch a connection to your SAP server. Here, you can also add SAP login credentials and SSO details for enhanced security. In this regard, .sap files are divided into three types, where type 1 SAP shortcut file includes SSO details, type 2 SAP shortcut file includes encrypted SAP password, and type 3 SAP shortcut file includes unencrypted SAP password. Liquid UI for iOS supports all the following three types of SAP shortcut files, as shown below:
// Create Sales Order.sap (Type 1: MYSAPSSO )[System] Name=TR1 Client=800 GuiParm=/H/ZEUS.GUIXT.COM/S/3200 [User] Name=Sarvani at="MYSAPSSO2=AjExMDAgAAxwb3J0YWw6dW1hbsaeIABNiYXNpY2F1dGhlbnRpY2F0aW9uAQAFVU1BTkcCAAMwMDADAANOVzcEAAwyMDE5MDkxMTE5MTkFAAQAAAAICgAFVU1BTkf/AQUwggEBBgkqhkiG9w0BBwKggfMwgfACAQExCzAJBgUrDgMCGgUAMAsGCSqGSIb3DQEHATGB0DCBzQIBATAiMB0xDDAKBgNVBAMpjA05XNzENMAsGA1UECxMESjJFRQIBADAJBgUrDgMCGgUAoF0wGAYJKoZIhvcNAQkDMQsGCSqGSIb3DQEHATAcBgkqhkiG9w0BCQUxDxcNMTkwOTExMTkxOTA4WjAjBgkqhkiG9w0BCQQxFgQUeojOYAubG7V/PQADRbFBdKrfKHcwCQYHKoZIzjgEAwQvMC0CFQDAHylOAXrvYeiQADHqfDvhZHYJUQIUWxI4HYm5ZausUcnYCWlBfDQ1cMQ=" Language=EN [Function] Command=VA01 Type=Transaction [Configuration] Workplace=true
// Create Sales Order.sap (Type 2: SAP unencrypted password)[System] Name=TKR Description=Juneau Client=899 GuiParm=/H/ZEUS.GUIXT.COM/S/3200 [User] Name=Sarvani Password=LiquidUI Language=EN [Function] Title=Create Sales Order Initial Screen Command=VA01 [Configuration] WorkDir=C:\Users\Sarvani\Documents\SAP\SAP GUI [Options] Reuse=1
// Create Sales Order.sap (Type 3: SAP encrypted password)[System] Name=TKR Description=Juneau Client=899 GuiParm=/H/ZEUS.GUIXT.COM/S/3200 [User] Name=Sarvani Password= PW_14E8625D89A37557FC793D Language=EN [Function] Title=Create Sales Order Initial Screen Command=VA01
[Configuration] WorkDir=C:\Users\Sarvani\Documents\SAP\SAP GUI [Options] Reuse=1 - To use the SAP shortcut files on your iOS device, transfer the files from your Desktop to your Liquid UI for iOS devices using either a USB cable or WIFI.
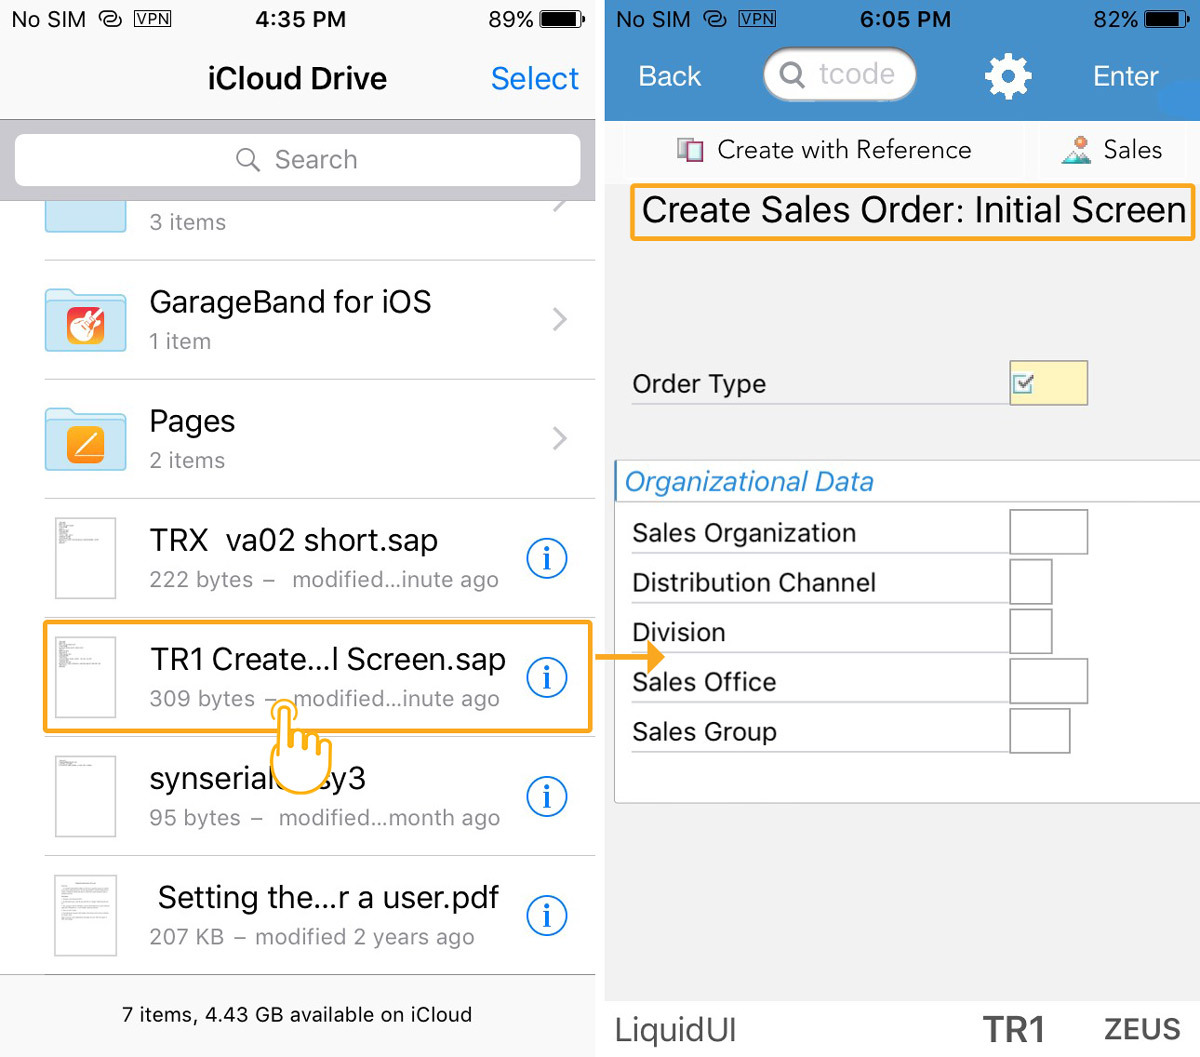
- After transferring the SAP shortcut file to your iOS device as shown below, click the SAP shortcut file (TRX Create Sales Order.sap) in the Downloads folder. If the SAP shortcut file contains SAP login credentials, then you will be able to open the Liquid UI for iOS App and navigate to the required SAP transaction automatically.