Prerequisites
- Products: Liquid UI WS, Liquid UI Server or Local DLL, Client Software
- Commands: pushbutton(), set(), del(), onscreen(), inputfield(), load(), onUIEvents()
Purpose
In this article, you will learn how to read data from a grid screen based on user selection and display the System status, Total Qty, and Delivered Qty values in the respective input fields. To demonstrate this, we'll guide you through the following steps:
- Add grid_functions.sjs file in your scripts folder
- Add SAPLCOISOUTPUT.E0100.sjs file in your scripts folder
- Add SAPLCOKO1.E0115.sjs file in your scripts folder
- Add SAPLSMTR_NAVIGATION.E0100.sjs file in your scripts folder
- Enter the Plant value to display the selected grid row data
User Interface
//Create the file grid_functions.sjs inside your script folder for customizing the SAP Easy Access screen.
//Now, let's start adding the Liquid UI script to the above file and save it.
Customization
- Add a function to navigate through the COOIS transaction (Production Order Information System screen), assign the Plant value to the desired required field, and execute.
// Function to take user input and land on grid screen in COOIS transaction
function gridExample(){
   var z_coois_msg = '';

   onscreen 'SAPLSMTR_NAVIGATION.0100'
      enter('/ncoois');

   onscreen 'PPIO_ENTRY.1000'
      set('F[S_WERKS-LOW]','&V[z_coois_plant]');          // Production plant
      enter('/8');

   onscreen 'SAPMSDYP.0010'
      set('V[z_coois_msg]','&F[MESSTXT1]');
      enter();

   onscreen 'PPIO_ENTRY.1000'
      if(z_coois_msg){
         message('E:'+z_coois_msg);
         enter('/n');
         goto FUNC_END;
      }
      enter('?');
   FUNC_END:;
}
- Add a function to set a flag on the Grid Display screen to avoid an infinite loop on auto-enter.
// Function to set a flag on the Grid Display screen to avoid an infinite loop on auto-enter
function executeGridSelection(){
   set('V[z_coois_selection]','X');
}
- Add a function to read the grid screen data, assign required values to the variables, and then navigate to the new session using /n transaction (SAP Easy Access screen).
// Function to read information from Grid Details screen based on user selection on Grid Display
function readGridDetails(){
   onscreen 'SAPLCOKO1.0115'
      set('V[z_coois_status]','&F[CAUFVD-STTXT]');                 // Status
      set('V[z_coois_totalqty]','&F[CAUFVD-GAMNG]');             // Total Qty
      set('V[z_coois_delivqty]','&F[CAUFVD-GWEMG]');            // Deliv. Qty
      enter('/n');
}
SAPLCOISOUTPUT.E0100.sjs
//Create the file SAPLCOISOUTPUT.E0100.sjs inside your script folder for customizing the SAP Easy Access screen:
//Now, let's start adding the Liquid UI script to the above file and save it.
- Use OnUIEvents() to execute the executeGridSelection function by clicking the display button.
// Grid Display Screen
onUIEvents['/19'] = executeGridSelection();
- Add a condition to check whether the transaction is COOIS and the grid data row is selected.
// Grid Display Screen
if(_transaction == 'COOIS' && z_coois_selection =='X'){
	set('V[z_coois_getselection]','X');
}
SAPLCOKO1.E0115.sjs
//Create the file SAPLCOKO1.E0115.sjs inside your script folder for customizing the SAP Easy Access screen:
//Now, let's start adding the Liquid UI script to the above file and save it.
- Add a condition to check whether the grid data row is selected and run the readGridDetails function.
//Adds a condition to execute readGridDetails
if(z_coois_getselection == 'X'){
   set('V[z_coois_getselection]','');
   enter('/0',{"process":readGridDetails});
}
//Create the file SAPLSMTR_NAVIGATION.E0100.sjs inside your script folder for customizing the SAP Easy Access screen:
//Now, let's start adding the Liquid UI script to the above file and save it.
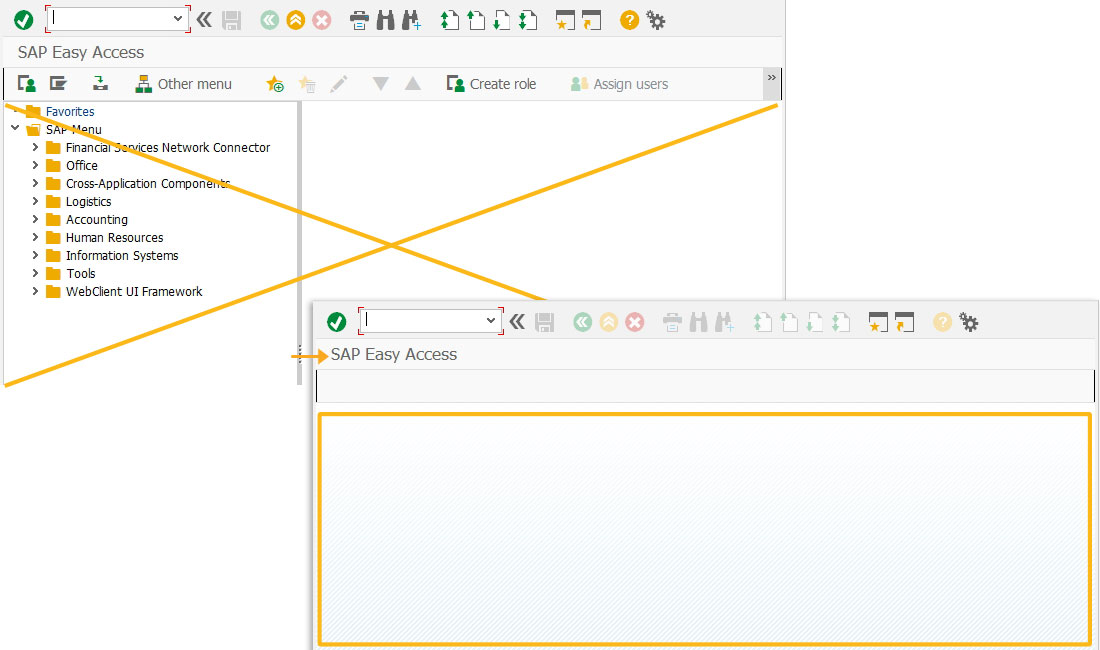
- Logon to SAP and delete the image container on it using the del command, as shown below.
//Deletes the image container on the SAP Easy Access screen
del("X[IMAGE_CONTAINER]");
- Use load() command to add grid_functions.sjs file, which allows you to access the functions included in the file.
//Loads an sjs file specified in this command
load('grid_functions.sjs');
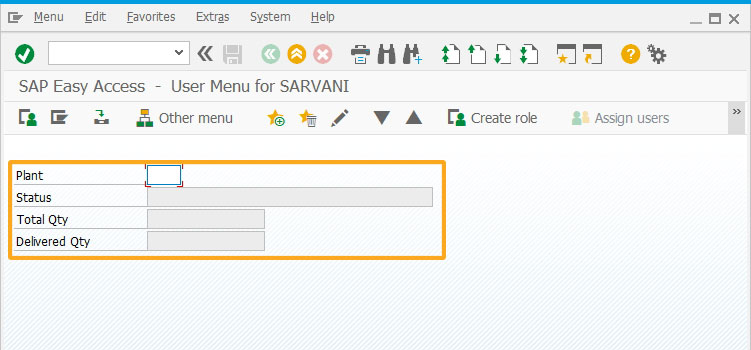
- Add four input fields to add a Plant value and display its Status, Total Qty, and Delivered Qty.
//Creates four inputfield  with the label Plant, technical name as z_coois_plant
inputfield( [1,1], "Plant", [1,20], {"name":"z_coois_plant", "size":4});
//Creates a non-editable input field with the label Status and technical name z_coois_status.
inputfield( [2,1], "Status", [2,20], {"name":"z_coois_status", "readonly":true, "size":40});
//Creates a non-editable input field with the label Total Qty and technical name as z_coois_totalqty.
inputfield( [3,1], "Total Qty", [3,20],{ "name":"z_coois_totalqty", "readonly":true, "size":16});
//Creates a non-editable input field with the label Delivered Qty and technical name as z_coois_delivqty.
inputfield( [4,1], "Delivered Qty", [4,20],{"name":"z_coois_delivqty", "readonly":true, "size":16});
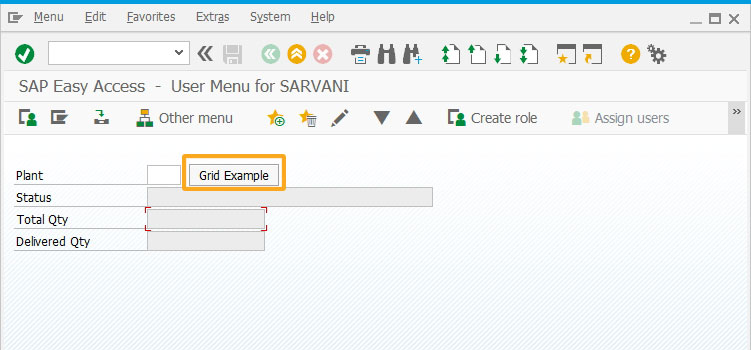
- Add a push button with the label Grid Example to execute the process on click, as shown below.
//Creates a push button to run gridExample process
pushbutton( [1,26], "Grid Example", {"process":gridExample});
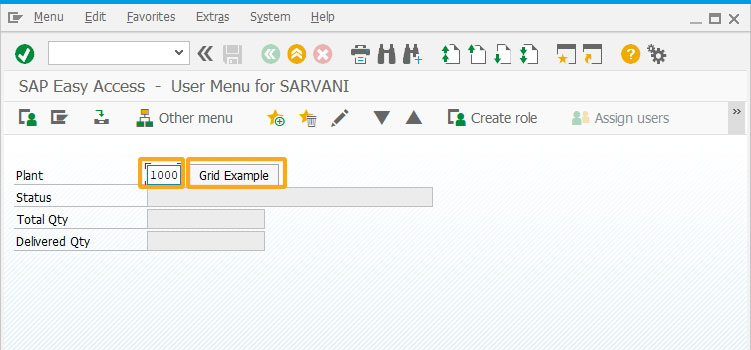
SAP Process
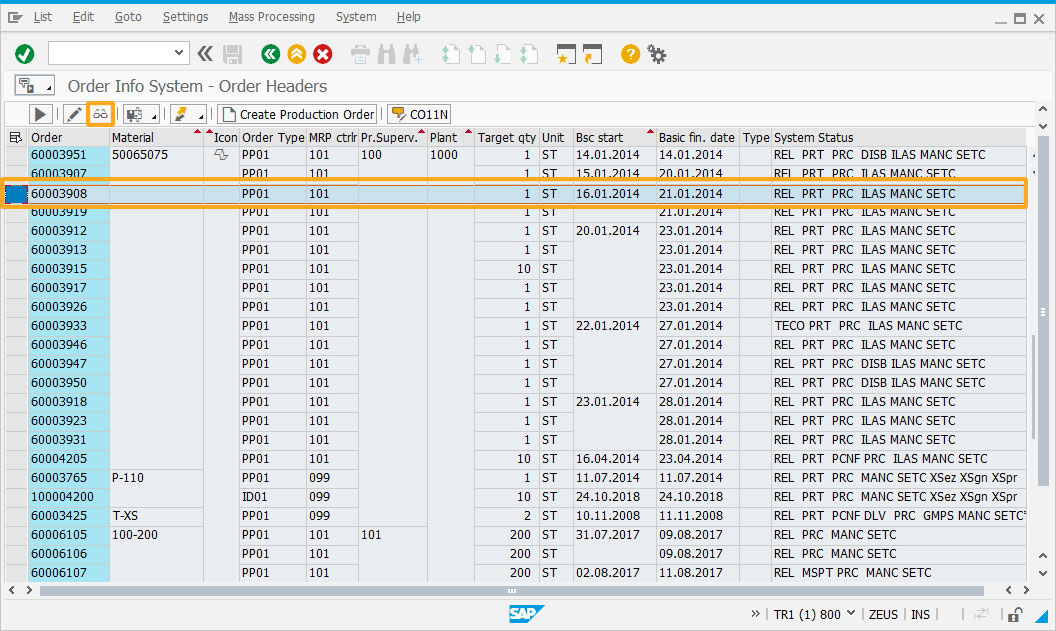
- Enter the Plant value in the input field and click on the Grid Example pushbutton. Then you will be navigated to the Grid screen, as shown in the image below.
- Now, select the required grid row data and click on the Display button on the screen to retrieve the selected row's Status, Total Qty, and Delivered Qty values.
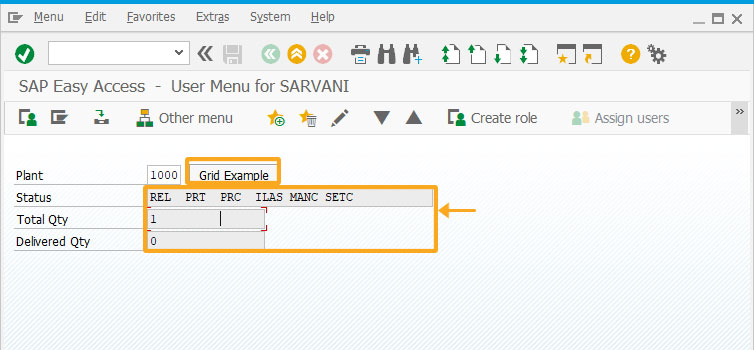
- Navigated to the SAP Easy Access screen and you can see the values retrieved from the grid screen are displayed in the fields created, as shown below.
Next Steps

Learn how to perform an accurate mathematical calculation with various decimal formats in SAP.
10 min.
This article is part of the Javascript functions tutorial.


