Prerequisites
- Products: Liquid UI WS, Liquid UI Server or Local DLL, Client Software
- Commands: del(), pushbutton(), gettableattribute(), column(), set(), enter()
Purpose:
Learn how to assign column values of a custom table to an existing SAP table. In this example, we will create a Liquid UI table on an SAP Easy Access screen and assign its value to an existing All items table in the VA02 transaction. To demonstrate this, we will walk you through the following steps.
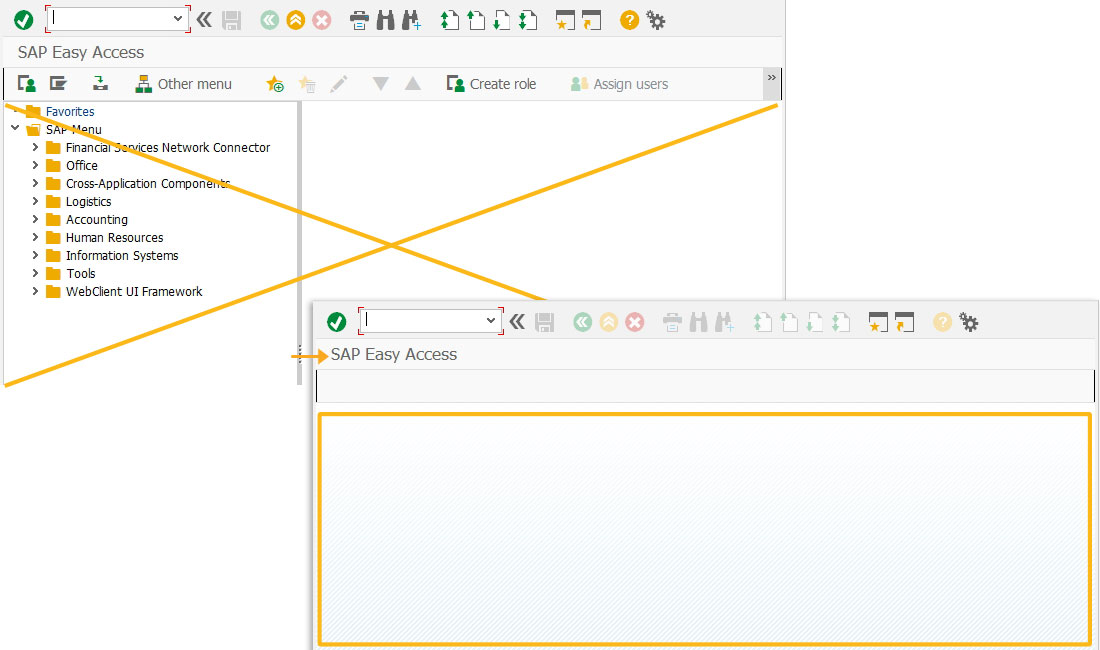
- Delete the image container from the SAP Easy Access screen using the del command.
- Add a pushbutton to execute a process when clicked
- Add a Liquid UI Table
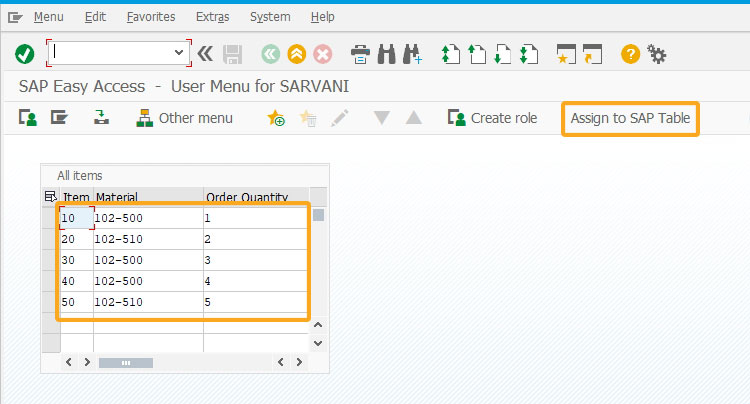
- Enter values in the Liquid UI table columns
- Adding functionality to assign Liquid UI table values into the SAP table
User Interface
//Create this file inside your script folder for customizing the SAP Easy Access screen: SAPLSMTR_NAVIGATION.E0100.sjs
//Now, let's start adding the Liquid UI script to the above file and save it.
Customization
- Logon to SAP, and delete the image container using the del command on the SAP Easy Access screen.
// Deletes an IMAGE_CONTAINER on the screen
del("X[IMAGE_CONTAINER]");
- Add a toolbar pushbutton on the SAP Easy Access screen with the label Assign to SAP Table to execute the z_AssigntoSAPTable process on click.
//Creates a pushbutton on toolbar with 'Assign to SAP Table' as title and executes 'z_AssigntoSAPTable' process on click.
pushbutton([TOOLBAR],"Assign to SAP Table","?",{"process":z_AssigntoSAPTable,"size":[2,23]});

- Add a table with three columns namely Item, Material, and Order Quantity.
//creates a table with three columns and 10 rows
table([1,5],[10,45],{"name":"va01_AllItems","title":"All items", "rows":10, "rowselection":true,"columnselection":true});
column('Item',{"table":"va01_AllItems","size":4,"name":"z_va01_item","position":1});
column('Material',{"table":"va01_AllItems","size":15,"name":"z_va01_material","position":2});
column('Order Quantity',{"table":"va01_AllItems","size":15,"name":"z_va01_Orderquantity","position":3});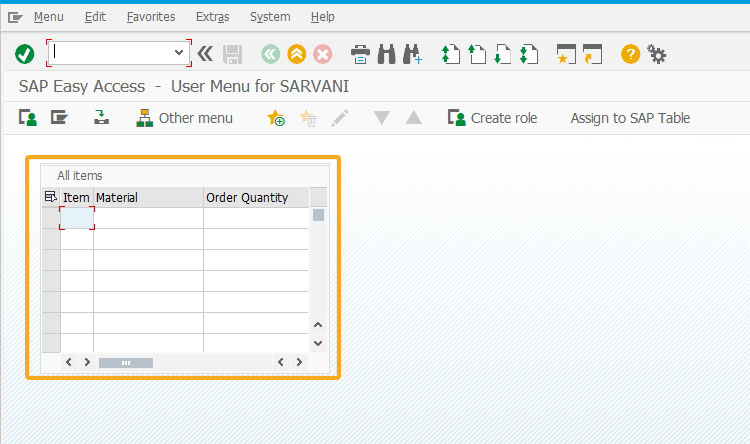
- Enter valid input data in the Liquid UI columns to assign them into the SAP table.
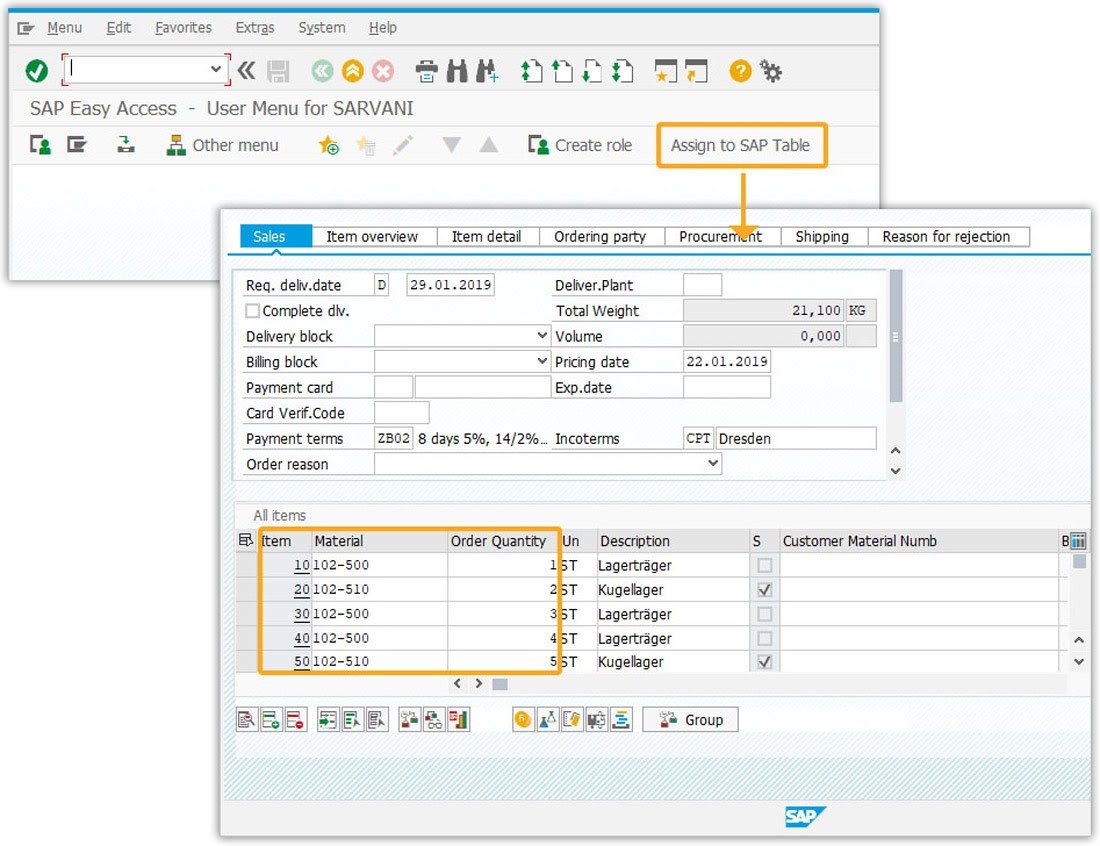
- With the following added functionality, you can see values from the Liquid UI table are assigned to the All items SAP table in the Change Sales Order Overview screen.
//function to assign values to All Items table
function z_AssigntoSAPTable()
{
	i = 0;
//declaring variables and arrays
 temp_items=[];
 temp_material=[];
 temp_quantity=[];
 // code to fetch data from Liquid table to arrays
 STARTLABEL:
 z_temp1 = va01_AllItems.z_va01_item;
 z_temp2 = va01_AllItems.z_va01_material;
 z_temp3 = va01_AllItems.z_va01_Orderquantity;

 if(isBlank(z_temp1) && isBlank(z_temp2) &&
 isBlank(z_temp3)){
 goto ENDLOOP;
  }
   temp_items.push(z_temp1);
   temp_material.push(z_temp2);
   temp_quantity.push(z_temp3);
   i=i+1;
   goto STARTLABEL;
   ENDLOOP:
   enter('/nva01');

 // Create Sales Order screen
onscreen 'SAPMV45A.0101'
  set('F[Order Type]', 'OR');
  enter();

 // Create Standard Order: Overview
 onscreen 'SAPMV45A.4001'
 set('F[Sold-to party]', '1460');
 enter();

 // Logic to assign array values to All item table
 onscreen 'SAPMV45A.4001'
 gettableattribute("T[All items]", {"lastvisiblerow":"LVisRow"})

 // gets lastvisible row
   var z=1;
   for(j=0;j<LVisRow;j++)
 {
// assign values to visible rows in table
  z_item_temp = temp_items[j];
  z_item_material = temp_material[j];
  z_item_quantity = temp_quantity[j];
  set("cell[All items,Item,&V[z]]" , "&V[z_item_temp]");
  set("cell[All items,Material,&V[z]]" , "&V[z_item_material]");
  set("cell[All items,Order Quantity,&V[z]]" , "&V[z_item_quantity]");
  z=z+1;
  }
  // on enter cursor moves to next row in table
   START:
  enter();
  // logic assign values to rows after scrolling table using enter()
  onscreen 'SAPMV45A.4001'
  z_item_temp= temp_items[j];
  z_item_material = temp_material[j];
  z_item_quantity = temp_quantity[j];
  set("cell[All items,Item,&V[LVisRow]]" , "&V[z_item_temp]");
  set("cell[All items,Material,&V[LVisRow]]" , "&V[z_item_material]");
  set("cell[All items,Order Quantity,&V[LVisRow]]" ,  "&V[z_item_quantity]");
  j=j+1;
  if(j<=i){
  // loops until all liquid ui table values are assigned to sap table
    goto START;
  }
    enter();
}

// Function prototype to trim blank characters from a string
String.prototype.trim = function () {
   return this.replace(/^\s+|\s+$/g, "");
}

// Function to return trimmed string
function getString(strInput) {
   return (typeof(strInput) == 'undefined' || strInput == 'undefined') ? "" : strInput.toString().trim();
}

// Function to check for blank string
// Specifically used to determine if input exist in the edit field
function isBlank(strInput) {
   var strVal = getString(strInput);
   var blank = strVal == "";
   return blank;
}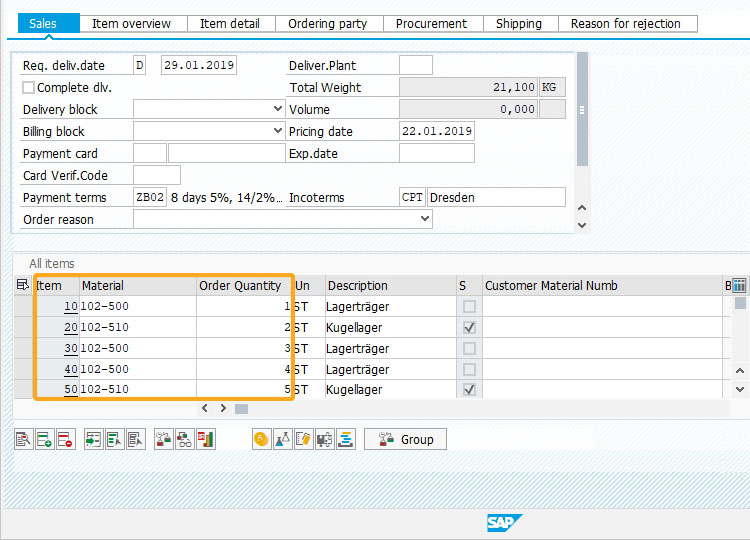
SAP Process
- Refresh the SAP screen and click on the Assign to SAP Table toolbar pushbutton. Then, the process z_AssigntoSAPTable will get executed and will assign the values to the All Items table in the VA02 screen, as shown below.

Liquid UI: Table manipulation
Learn how to make the column non-editable and perform operations like changing the width, position, and name of the SAP table columns.
Learn how to make the column non-editable and perform operations like changing the width, position, and name of the SAP table columns.
10 min.
This article is part of the Take a deep dive into the SAP table and Liquid UI table tutorial.


