Prerequisites
- Products: Liquid UI WS, Liquid UI Server or Local DLL, Client Software
- Commands: column(), table(), pushbutton()
Purpose
In this scenario, you will learn how to clear the values of one or more columns of an SAP table using the push buttons created. We will walk you through the following steps.
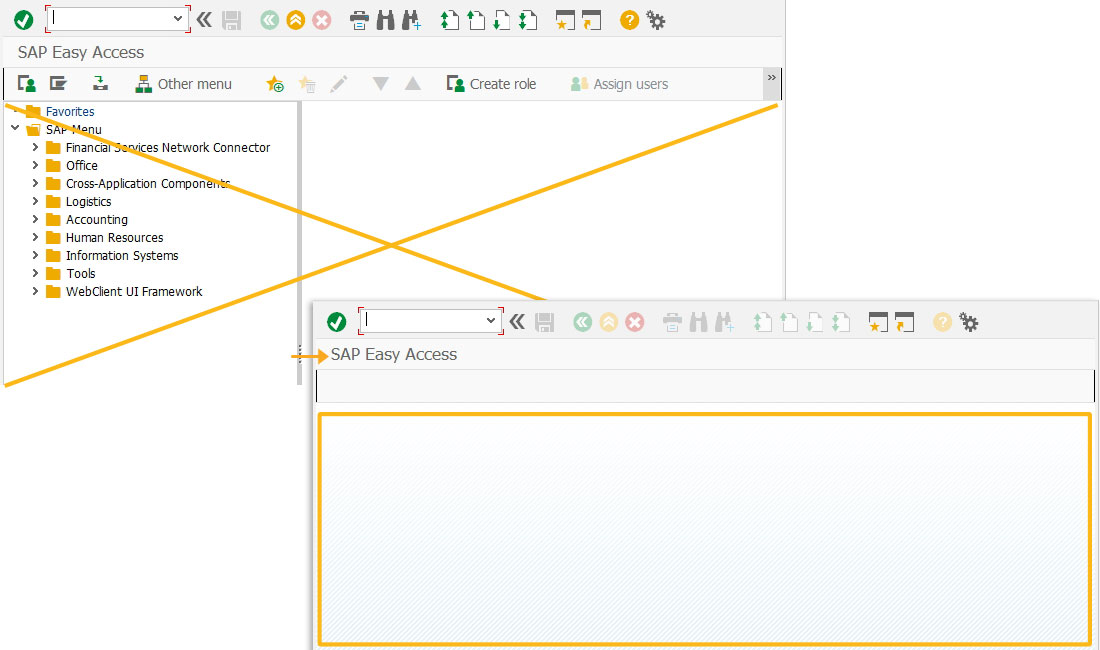
- Delete the image container from the SAP screen using the del command.
- Add a table with three columns
- Add three push buttons to execute the assigned processes
- Add a function to retrieve values to the columns
- Add a function to clear all table values
- Add a function to clear description column values
//Create this file inside your script folder for customizing the SAP Easy Access screen: SAPLSMTR_NAVIGATION.E0100.sjs
//Now, let's start adding the Liquid UI script to the above file and save it.
- Logon to the SAP and delete the image container on the SAP Easy Access screen.
//Deletes an image container
del("X[IMAGE_CONTAINER]");
- Add a table with two columns namely Material and Description with sizes of 15 and 30 respectively.
//Creates a table with Material Info as title, technical name as mat1_table, and number of rows as 20
table([1,1],[20,50],{"name":"matl_table","title":"Material Info","rows":20});

//Creates a column with Material as title, at the first position, size as 15 and is defined as noneditable
column('Material',{"table":"matl_table","name":"z_matl","position":1,"size":15,"readonly":true});

//Creates a column with Description as title, at the second position, size as 30 and is defined as noneditable
column('Description',{"table":"matl_table","name":"z_matl_desc","position":2,"size":30,"readonly":true});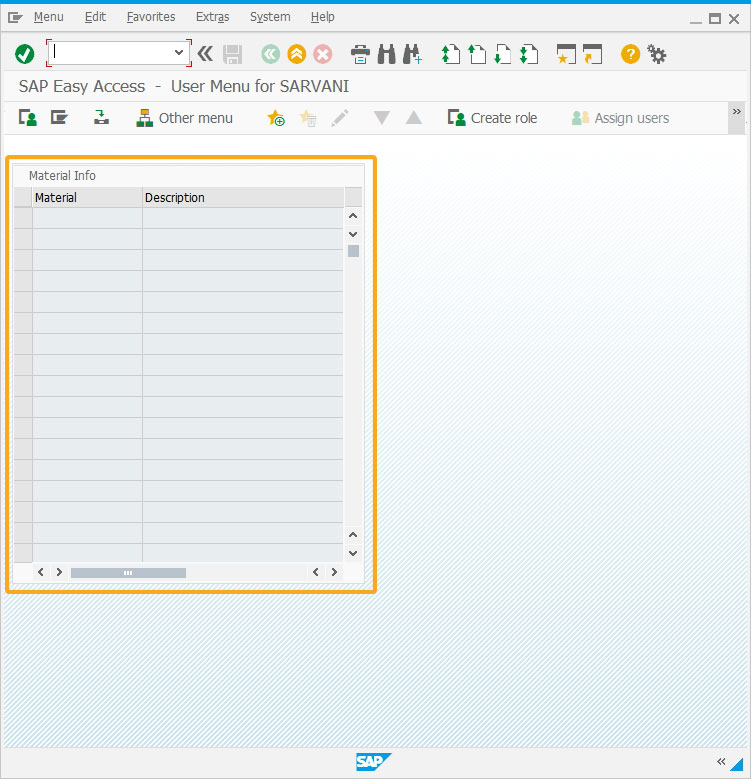
- Add three push buttons namely Retrieve Material Descriptions, Clear Descriptions, and Clear Table. On click, these push buttons will execute the processes showMatlData, clearTableDesc, and clearTable respectively.
//Creates a pushbutton with Retrieve Material Descriptions as title and executes a process to display values into the table.
pushbutton([21,1],"@01@Retrieve Material Descriptions",{"process":showMatlData});
// Creates a pushbutton with Clear Descriptions as title and executes a process to clear description values
pushbutton([23,1],"@01@Clear Descriptions",{"process":clearTableDesc});
//Creates a pushbutton with Clear Table as title and executes a process to clear all the column values
pushbutton([25,1],"@01@Clear Table",{"process":clearTable});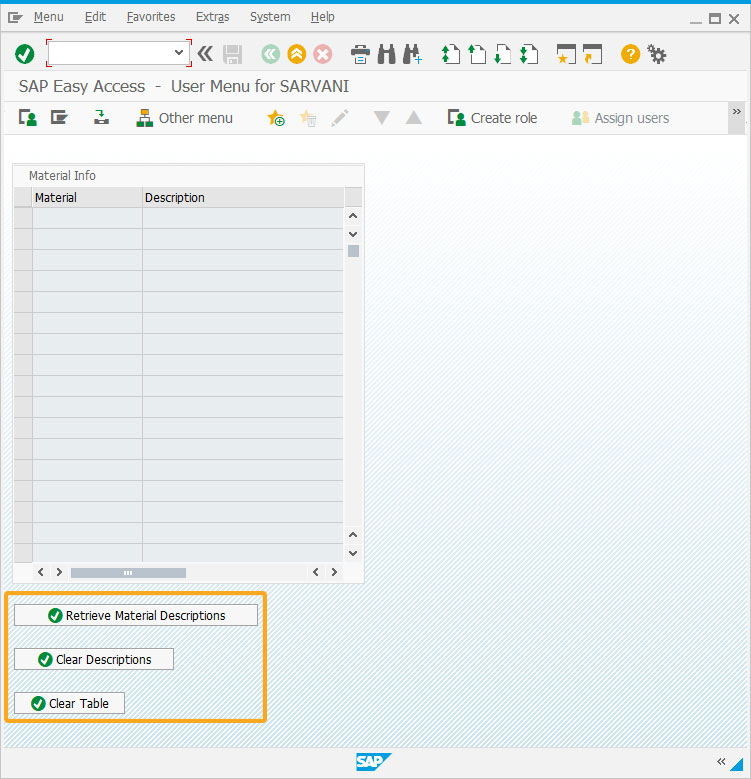
- Click on the Retrieve Material Descriptions push button to execute the showMatlData function that assigns values to the table columns.
// Function to display Material/s on the Liquid UI table
function showMatlData()
{
    // Sample Materials and Descriptions
    var matDataArr = [];
    for(i=1;i<=20;i++){
        matDataArr.push({key:'23'+i+'4'+i+'',value:''+i+'PINCONNECTOR'});
    }
    // Populating table with Material numbers
    for(i=0;i<matDataArr.length;i++)
{
        matl_table.z_matl[i] = matDataArr[i].key;
        matl_table.z_matl_desc[i] = matDataArr[i].value;
    }
}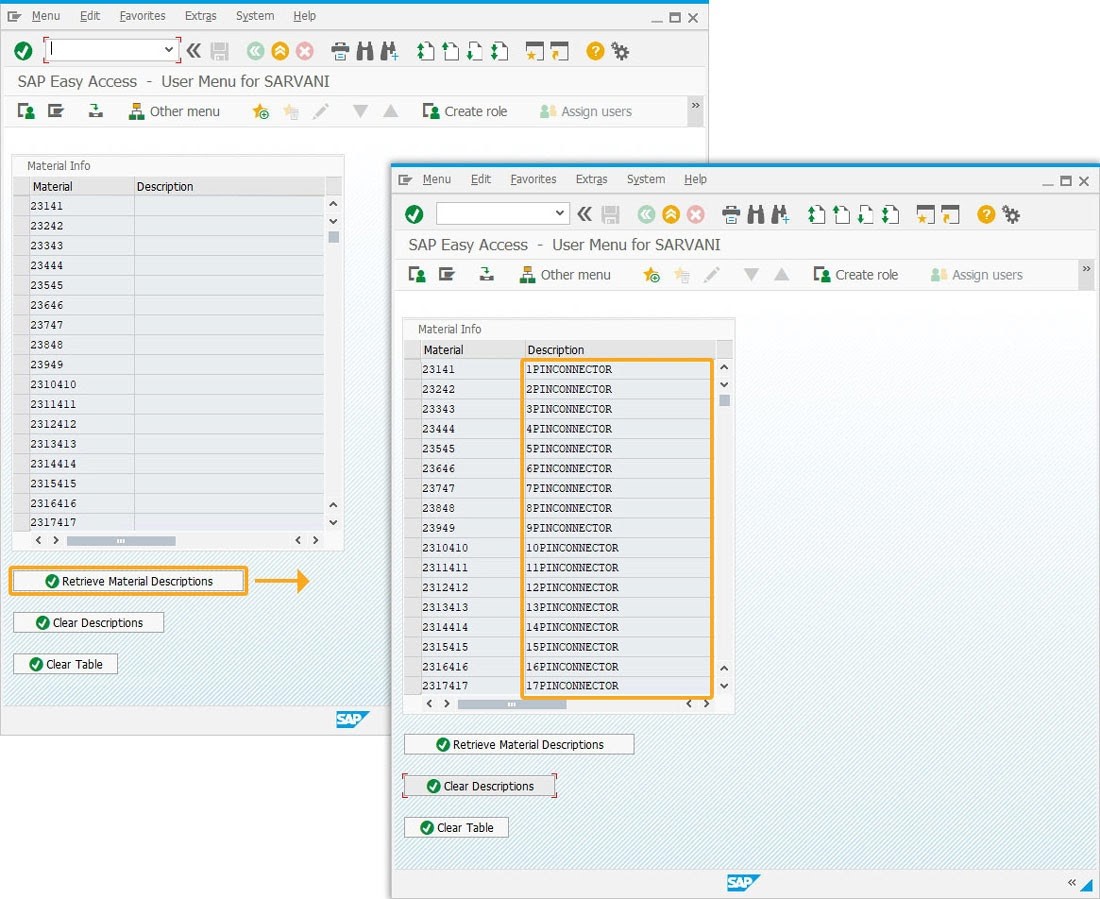
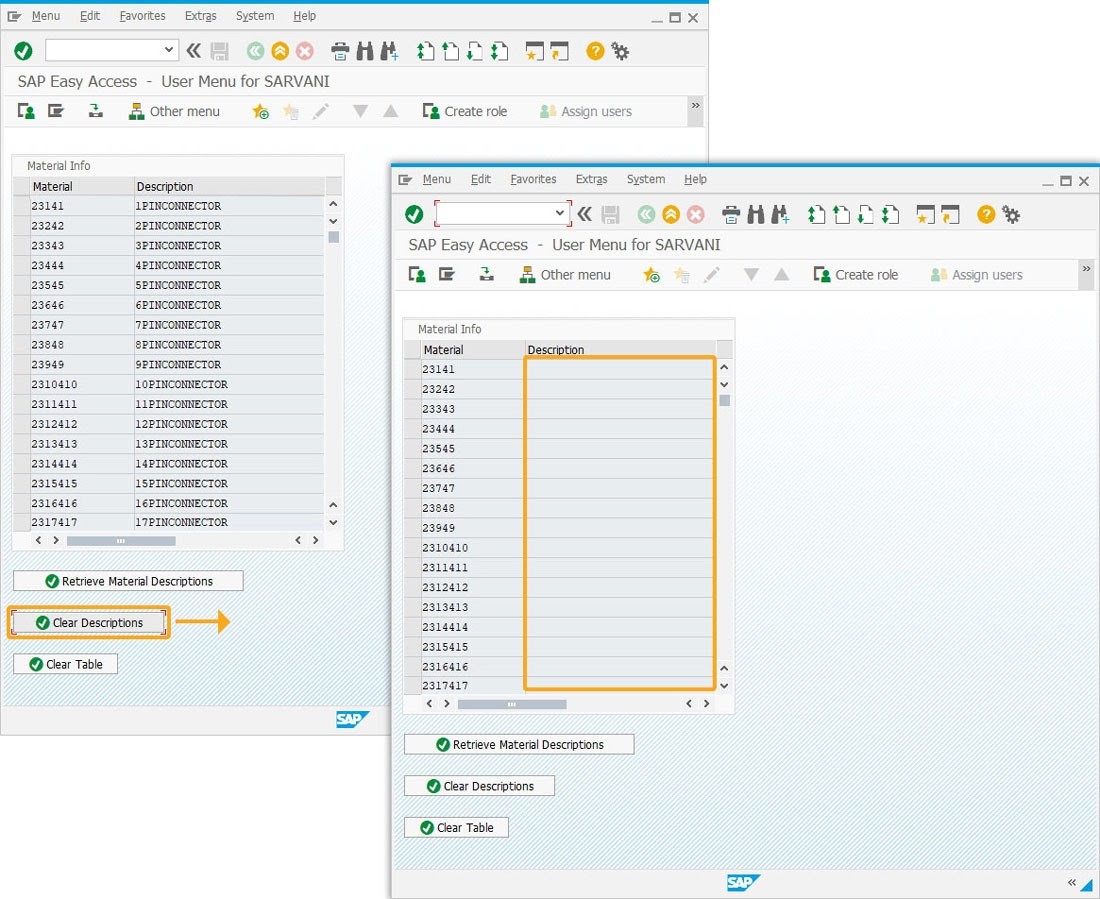
- Click the Clear Descriptions push button to execute the clearTableDesc function to remove the values under the Description column.
// Function to only clear the Description column
function clearTableDesc(){
    if(typeof matl_table =='object'){
        clear_values(matl_table,["z_matl_desc"],20);
    }
}
// Function to clear the Liquid UI table based on parameters
function clear_values(tablename,columnArray,rows){
    for (var loop=0;loop<rows;loop++){
        for (var col=0;col<columnArray.length;col++){
            tablename[columnArray[col]][loop] = "";
        }
    }
}
- Click the Clear Table push button to execute the clearTable following function to remove all the column values.
// Function to clear all columns
function clearTable(){
    if(typeof matl_table =='object')
{
        clear_values(matl_table, ["z_matl","z_matl_desc"],20);
    }
}
Next Steps

Display of pushbuttons relative to the table
Learn how to place pushbuttons relative to an SAP table.
Learn how to place pushbuttons relative to an SAP table.
10 min.
This article is part of the 4.0 Take a deep dive into the SAP table and Liquid UI table


