Prerequisites
- Products: Liquid UI WS, Liquid UI Server or Local DLL, Client Software
- Commands: pushbutton(), set(), onscreen(), inputfield(), setcursor(), enter()
Purpose
Learn how to use the setcursor command to place the cursor into the input field, a table cell, or a position on the list of your choice. In this article, we will demonstrate the usage of the setcursor command in different scenarios.
Scenario 1: Set cursor on Liquid UI fields
To set the cursor into a Liquid UI field, you must use the field name. Currently, coordinates are not supported for this command.
User Interface
//Create this file inside your script folder for customizing the SAP Easy Access screen: SAPLSMTR_NAVIGATION.E0100.sjs
//Now, let's add the Liquid UI script to the above file and save it.
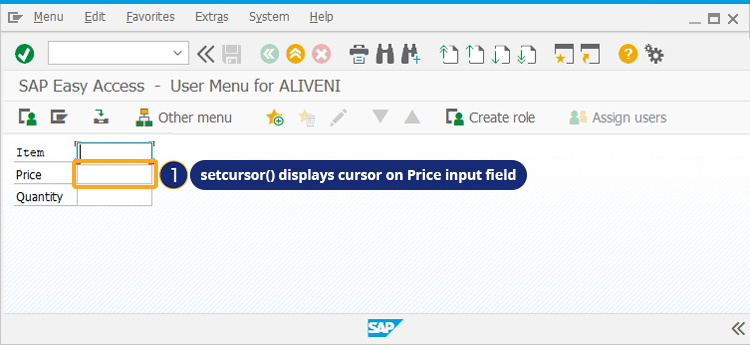
- Add three input fields labeled Item, Price, and Quantity, and set the cursor on the price field using the setcursor command.
//Creates three input fields
inputfield([0,1],"Item",[0,10],{"name":"z_test1","size":10});
inputfield([1,1],"Price",[1,10],{"name":"z_test2","size":10});
inputfield([2,1],"Quantity",[2,10],{"name":"z_test3","size":10});
//Sets the cursor on the Price input field
setcursor("F[Price]"):

- Now, logon to SAP. On the SAP Easy Access screen, you can see that the cursor is set on the Price input field, as shown in the following image.
Scenario 2: Set cursor on list screen
To place the cursor at a predetermined spot in the list screen. In this example, we will set the cursor into a list screen on the ME5A screen.
User Interface
//Create this file inside your script folder for customizing the List Display of Purchase Requisitions screen RM06BL00.E0120.sjs.
//Now, let's add the Liquid UI script to the above file and save it.
- Logon to SAP and navigate to the ME5A screen. Press the F8 key to display a listscreen. Enter the following command and save it.
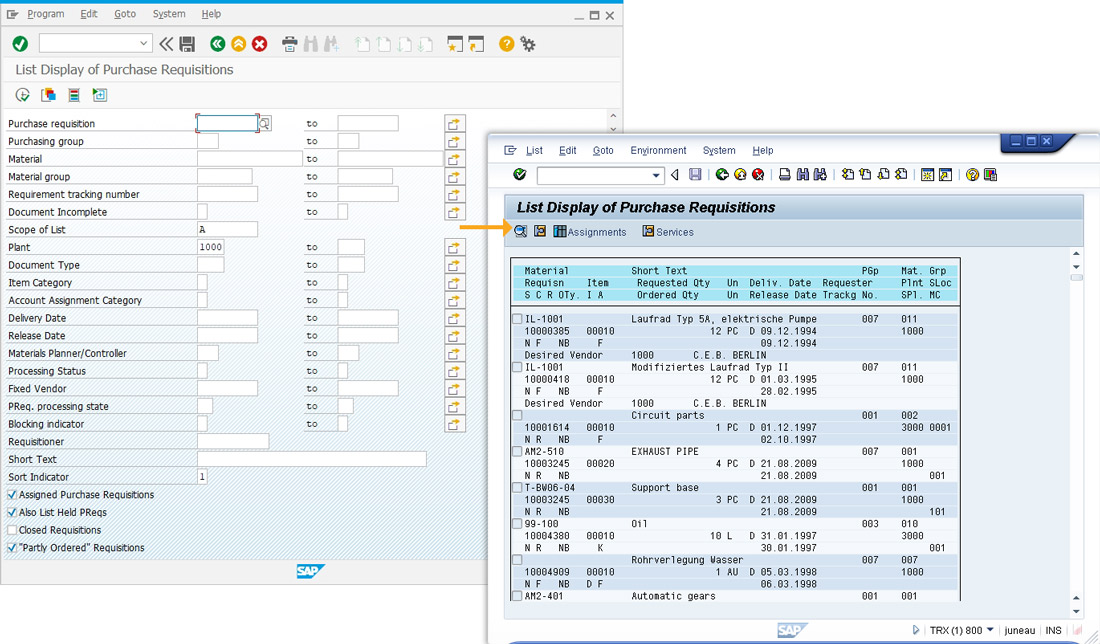
- Now, refresh the SAP screen. You can see that cursor is positioned at the mentioned coordinates, as shown below.
//Sets the cursor on the specified coordinates
setcursor([2,11]);
Scenario 3: Set cursor on table cells
To position the cursor in a specific table cell.
User Interface
//Create this file inside your script folder for customizing the Create Sales Order: Initial Screen.SAPMV45A.E0101.sjs
//Now, let's add the Liquid UI script to the above file and save it.
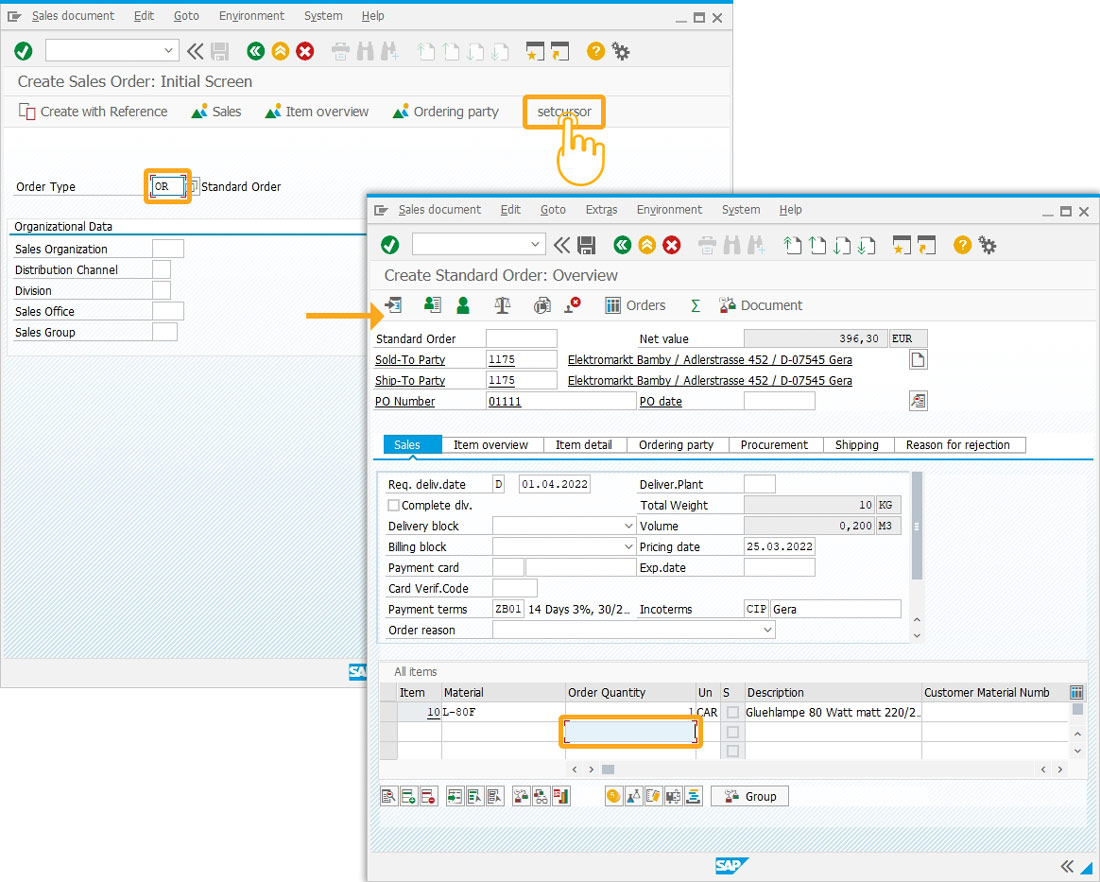
- Add a toolbar pushbutton “Setcursor” to process the setcursor().
//Creates toolbar pushbutton Setcursor
pushbutton([TOOLBAR],"setcursor",{"process":z_setcursor});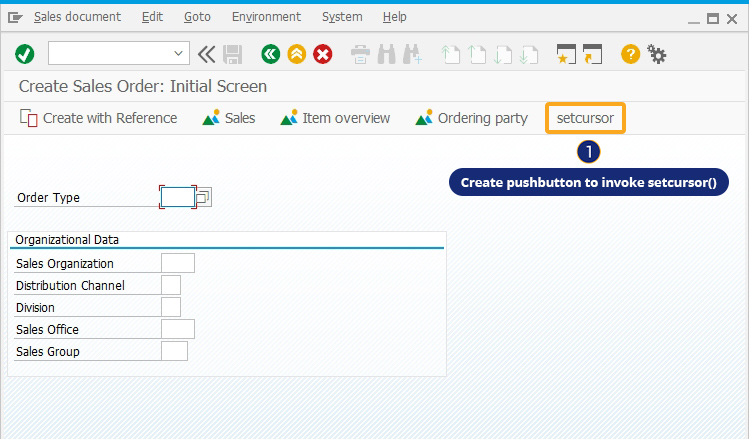
- Create a function that inserts values into input fields and places the cursor in the desired table cell.
//Adds a function to set values
function z_setcursor(){
  // Create Sales Order: Initial Screen
  onscreen 'SAPMV45A.0101'
  set('F[Order Type]','or');
  set('F[Sales Organization]','1000');
  set('F[Distribution Channel]','10');
  set('F[Division','00');
  enter();
  // Create Standard Order: Overview
  onscreen 'SAPMV45A.4001'
  set('F[Sold-to party]','1175');
  set('F[Ship-to party]','1175');
  set('F[PO Number]','01111');
  set('cell[All items,Material,1]','L-80f');
  set('cell[All items,Order Quantity,1]','1');
  //setcursor('cell[All items,Order Quantity,2]');
  enter();
  //Create Standard Order: Overview
  onscreen 'SAPMSDYP.0010'
  enter();
  //Create Standard Order: Overview
  onscreen 'SAPMV45A.4001'
  setcursor('cell[All items,Order Quantity,2]');
  //enter();
}
SAP Process
- Logon to SAP and navigate to VA01 transaction. Click on the “setcursor” toolbar push button to navigate to the Create sales order: Overview Screen, where the cursor is positioned in the second row of the Order Quantity column, as shown below.