Prerequisites
- Products: Liquid UI WS, Liquid UI Server or Local DLL, Client Software
- Commands: inputfield(), pushbutton(), set(), onscreen(), enter(), copytext()
Purpose
This article explains the process of copying text to other screen elements by utilizing the copytext() command.
Here we’ll be using the Create PM Notification screen as an example for creating a notification. This notification allows you to input and preserve notification particulars, which will subsequently be displayed on the PM notification screen. We’ll walk you through the following steps:
- Create a notification to copy the notification details.
- View and update the notification.
Create Notification
User Interface
//Inside your script folder, create the file SAPLIQS0.E0100.sjs to incorporate functionality for customizing the Create PM Notification: Initial Screen.
//Now, let's add the Liquid UI script to the above file and save it.
Customization
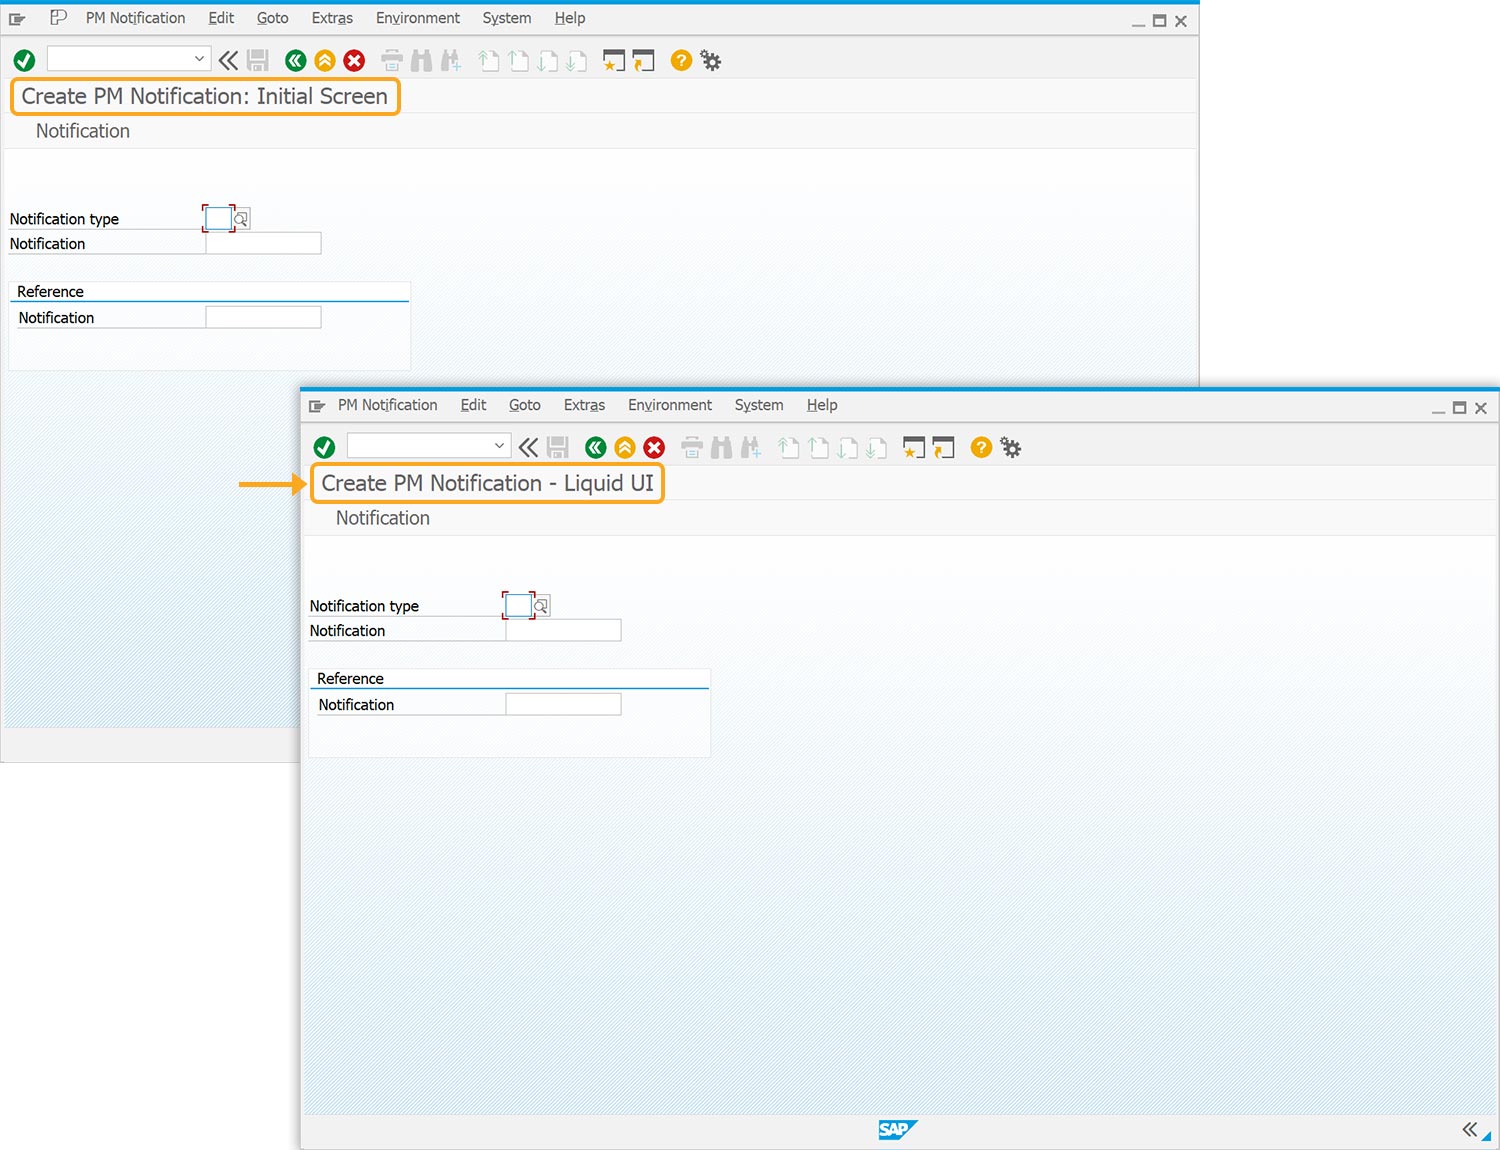
- Change the title of the screen to Create PM Notification - Liquid UI.
//Changes the title to "Create PM Notification - Liquid UI"
title("Create PM Notification - Liquid UI");
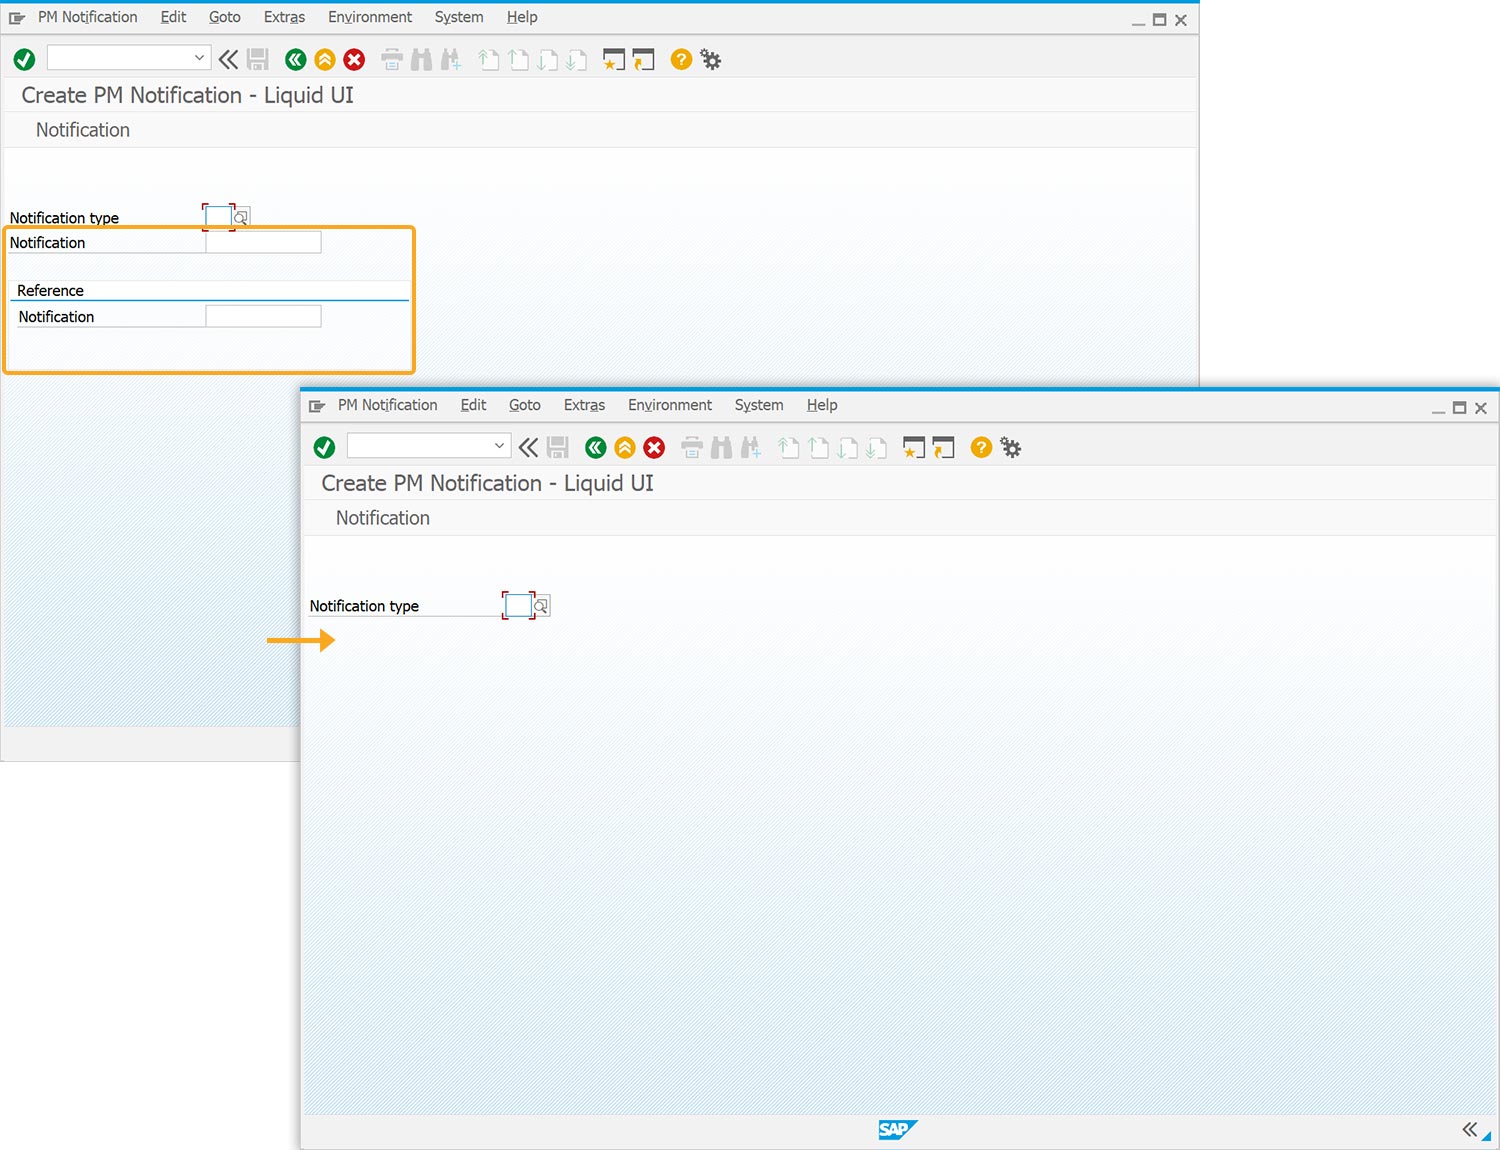
- Delete the Notification input field and Reference group box.
//Deletes Notification input field and Reference group box
del("F[Notification]");
del("G[Reference]");
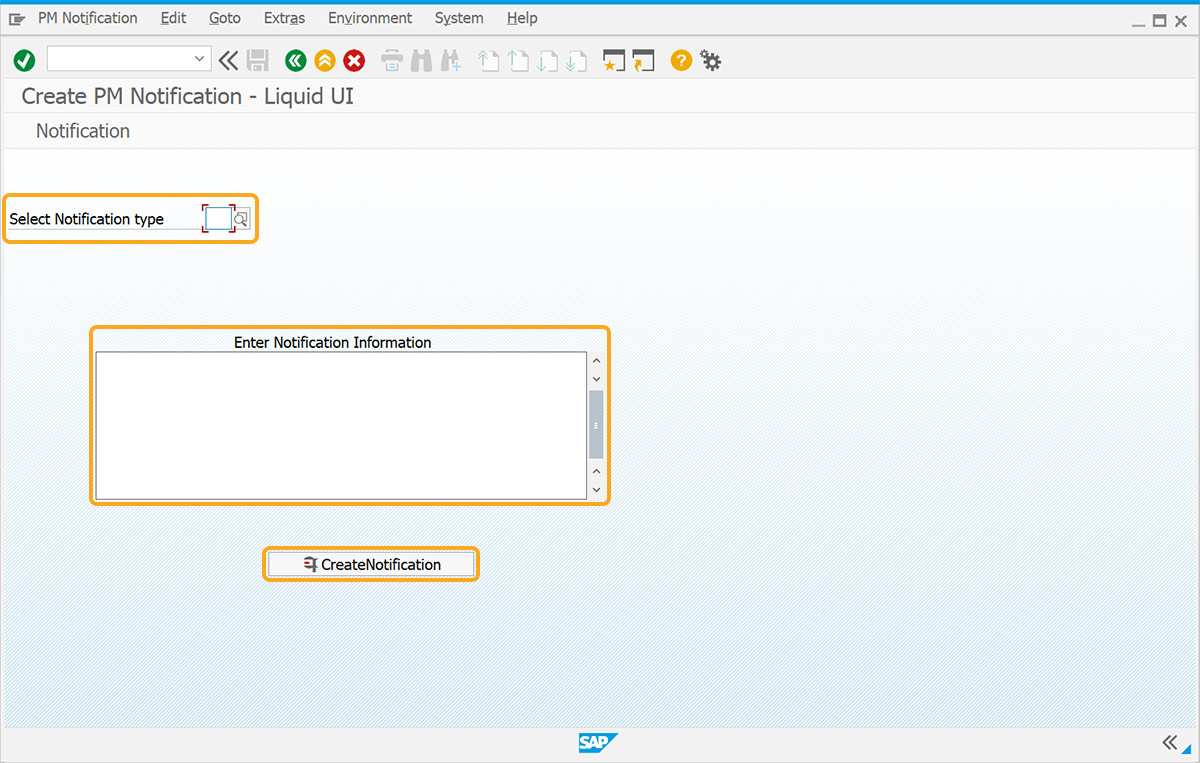
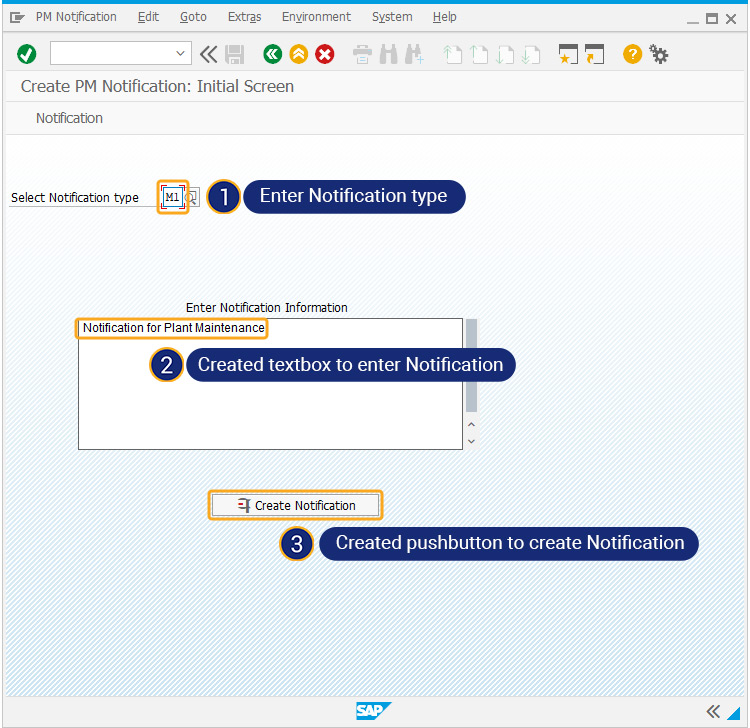
- Add an input field, push button, and textbox on the screen, as shown below.
set("z_iw21_textbox1","");
if(_transaction=="IW21") {
  set("z_iw21_textbox1","");
//Changes screen element name and adds text box
text("F[Notification type]", "Select Notification type",{ "intensified":true, "text":true});
text([7,25], "Enter Notification Information",{ "size":30});
textbox([8,10], [14,66],{ "name":"z_iw21_textbox1", "enter text":true, "textfont":"Arial", "left":true, "textheight":"15", "textweight":"5"});
//Creates a push button with the label Create Notification.
pushbutton([16,29],"@12@CreateNotification",{"process":iw21_create_noti});
}
- Add a function to copy the notification to the next screen.
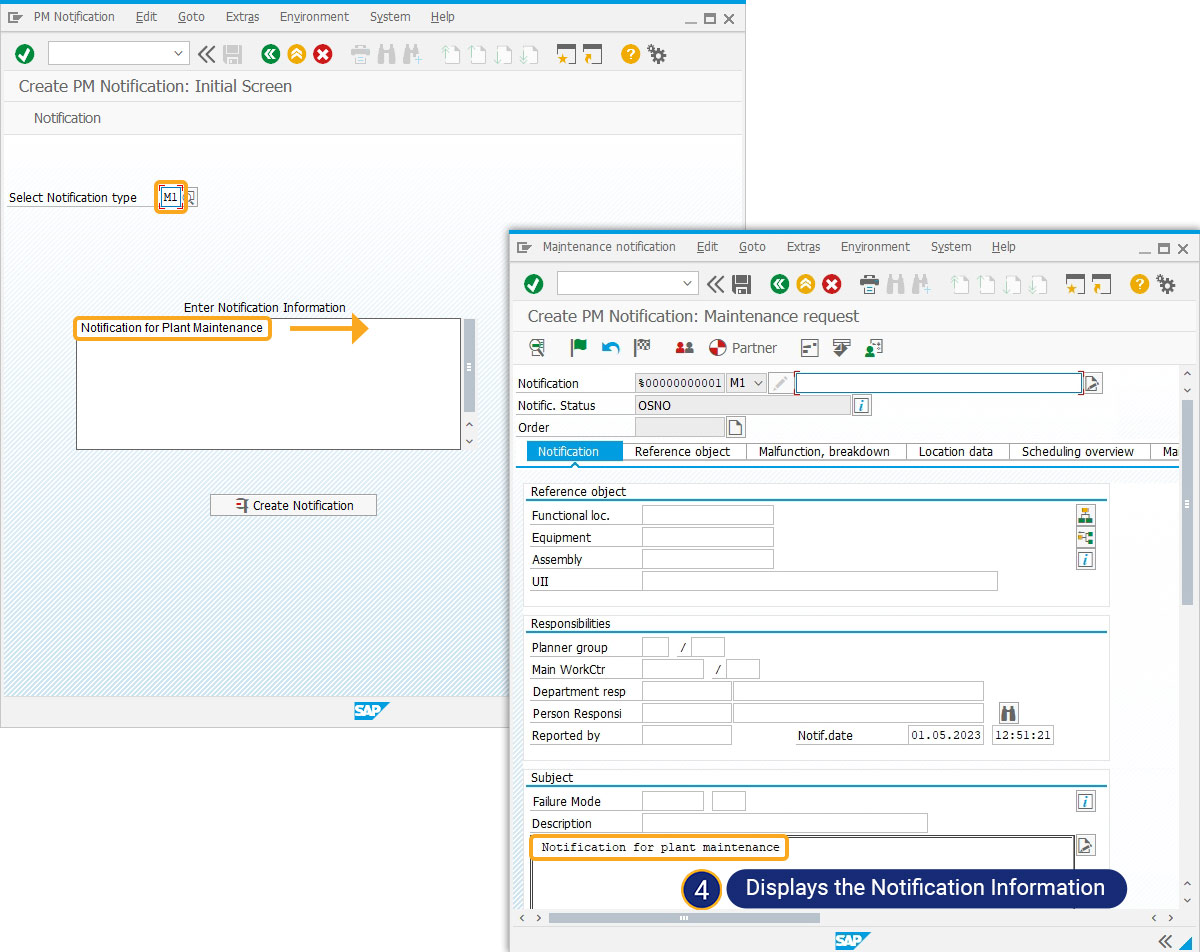
//Function to copy the notification entered in the text box to the next screen
function iw21_create_noti(){
// Create PM Notification: Maintenance request
onscreen 'SAPLIQS0.7200'
copytext({"fromtext":"z_iw21_textbox1","toscreen":"X[TEXT]","append":true});
enter();
}
SAP Process
- Refresh IW21 screen. Now enter the values for Select Notification type and particulars to create notification input fields, as shown below. Then, click on Create Notification button to proceed.
- You can see the notification details in the Description textbox on the Create PM Notification: Maintenance Request screen, as shown below.
View and Update Notification
User Interface
//Create this file inside your script folder for customizing the Create PM Notification: Initial Screen, SAPLIQS0.E7200.sjs
//Now, let's add the Liquid UI script to the above file and save it.
- Add an input field, textbox, and push buttons using the following script.
if(_transaction == 	"IW22")
{
//Adds an input field lable “Text”
inputfield( [4,0], "Text", [4,22],{ "size":16});

//Adds a text “View/Update Notification”
text([8,10],"View/Update Notification",{"size":24});

//Adds a textbox
textbox([9,5],[15,45],{"name":"z_iw21_textbox2","enter text{":true,"textfont":"Arial","left":true,"textheight":"15","textweight":"5"});
text([5,25],"&V[z_iw21_textbox2]",{"size":38,"appendline":true});

//Creates two push buttons labeled “view Notification” and “Updated Notification”.
pushbutton([5,0],"@12@View Notification",{"process":iw22_view_noti});
pushbutton([16,15],"@12@Update Notification",{"process":iw22_update_noti});
  }
- Add a function to view and update the notification.
 //Adds a function to view the notification in the Text input field function
 iw22_view_noti()
{
//Create PM Notification: Maintenance request
onscreen 'SAPLIQS0.7200'
copytext({"totext":"z_iw21_textbox2", "fromscreen":"X[TEXT]", "delimiter":"-", "appendline":true}); enter("/3");
}
//Adds a function to update the notification
function iw22_update_noti()
{
 set("F[z_iw21_textbox1]","&V[z_iw21_textbox2]");
//Create PM Notification: Maintenance request
onscreen 'SAPLIQS0.7200' copytext({"fromtext":"z_iw21_textbox2","toscreen":"X[TEXT]","appendline":true}); enter("/3"); }
SAP Process
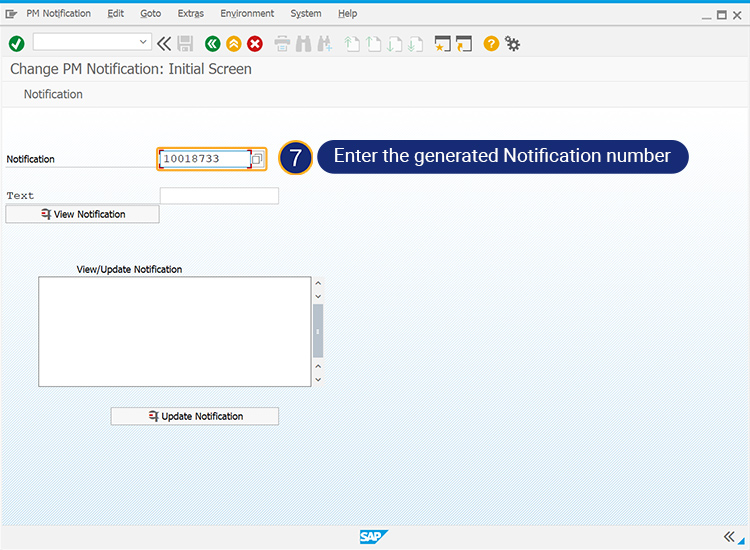
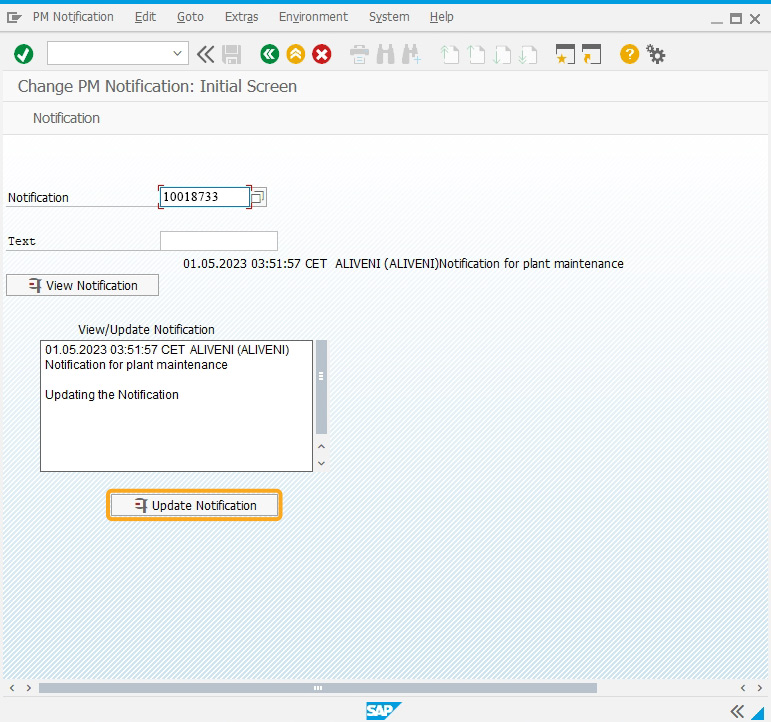
- Navigate to the IW22 screen and enter the generated Notification number in the Notification input field.
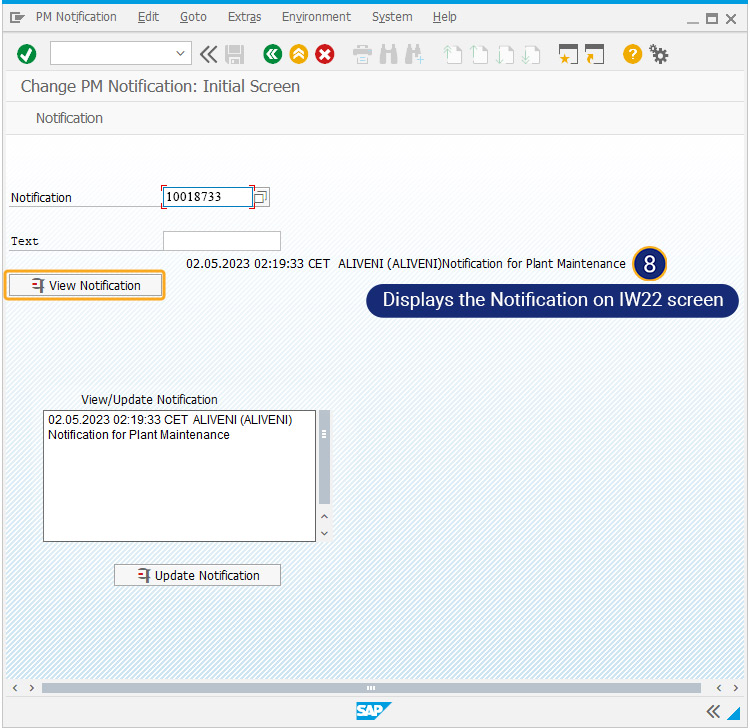
- To view the details of the previous notification, click View Notification. Subsequently, the notification information is displayed beneath the text input field, as shown below.
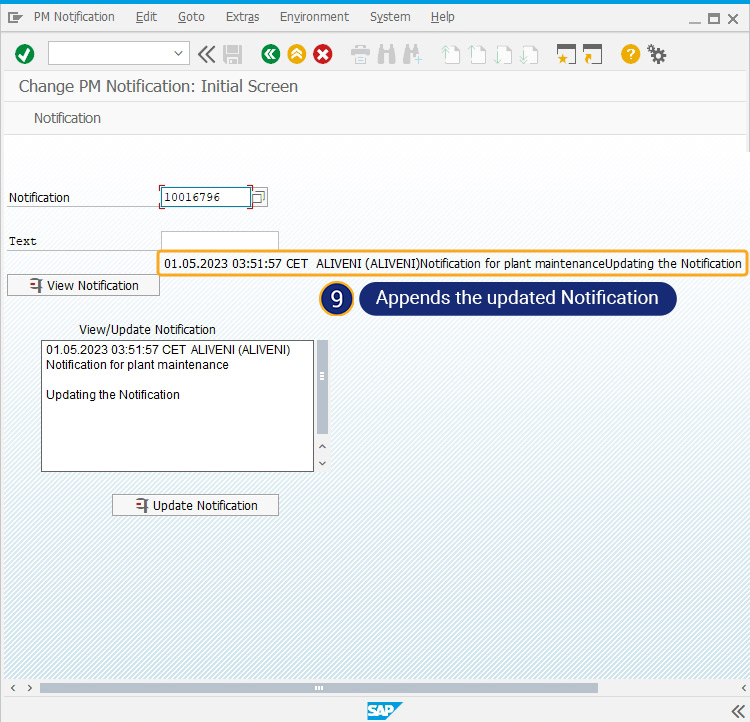
- To update notification details, enter the details in the notification box and click Update Notification. Then, notification details get appended to the previous notification, as shown below.
- To view the updated notification as text on the create notification screen, navigate to iw22. Click View Notification, and then you can see the updated notification is appended to the existing notification, as shown below.