Prerequisites
- Products: Liquid UI WS, Liquid UI Server or Local DLL, Client Software
- Commands: pushbutton(), del(), title(), pos(), table(), column()
Purpose
Learn how to display the required sales order data in the Change Sales Order: Initial Screen that is retrieved from the All items table of its Overview screen. We will walk you through the following steps.
- Add a toolbar pushbutton to execute a process when clicked
- Delete the group box from the SAP screen using the del command
- Add a comment
- Add the required number of input fields
- Add a function to retrieve the All Items table values and assign them to input fields created on the Change Sales Order Initial screen
User Interface
//Create this file inside your script folder for adding functionality to the Change Sales Order Initial screen (VA02): SAPMV45A.E0102.sjs
//Now, let's start adding the Liquid UI script to the above file and save it.
Customization
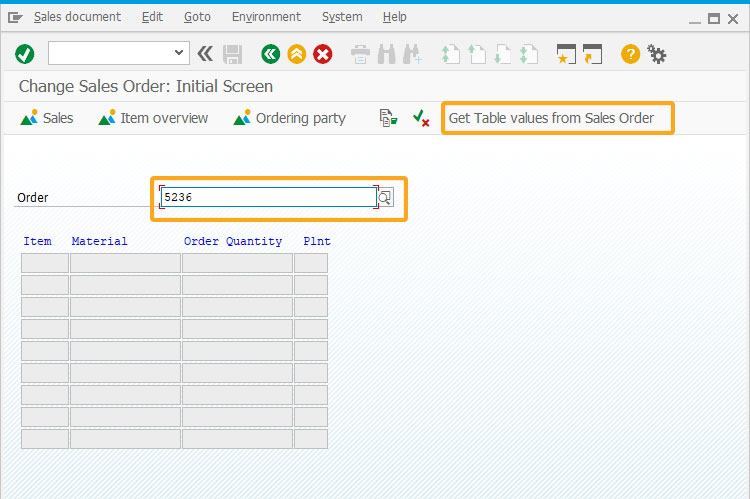
- Add a toolbar pushbutton with the label Get Table values from Sales Order, as shown below.
//Creates a pushbutton on toolbar with a title as "Get Table values from Sales Order" and executes a process on click and refresh the transaction
pushbutton([TOOLBAR], "Get Table values from Sales Order", "?", {"process":va02Get5235TableValue});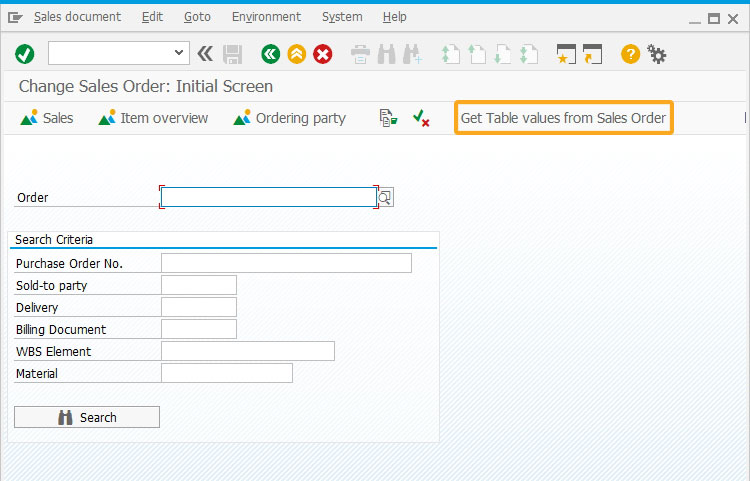
- Delete the Search Criteria group box with all the elements using the del command, as shown in the image below.
//Deleted Search Criteria groupbox with all the elements in it
del("G[Search Criteria]");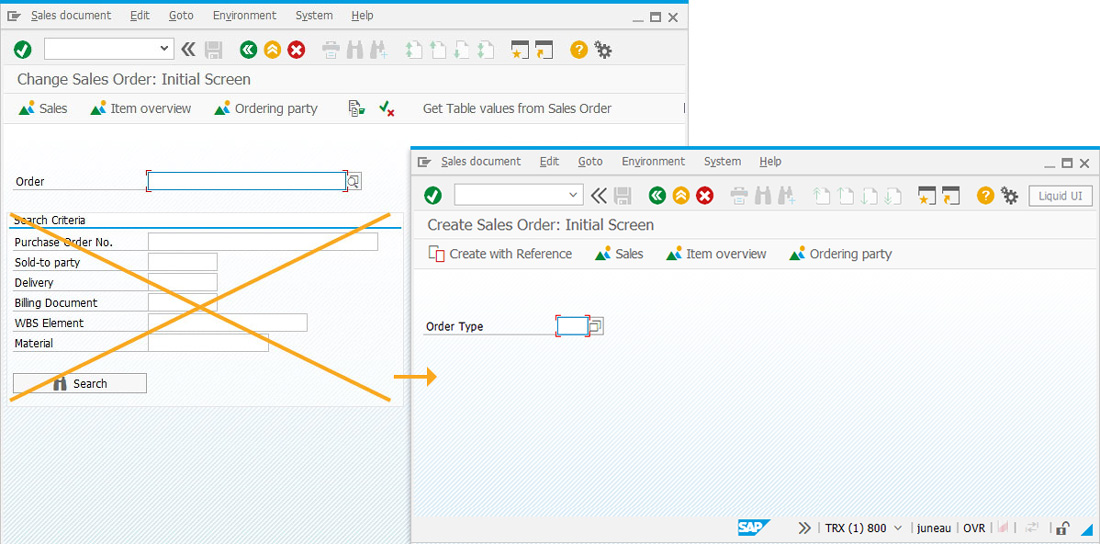
- Add a comment as Item Material Order Quantity Plnt to display as heading in blue.
//Creates a comment with text in blue color
comment([4,2], "Item   Material   Order Quantity   Plnt");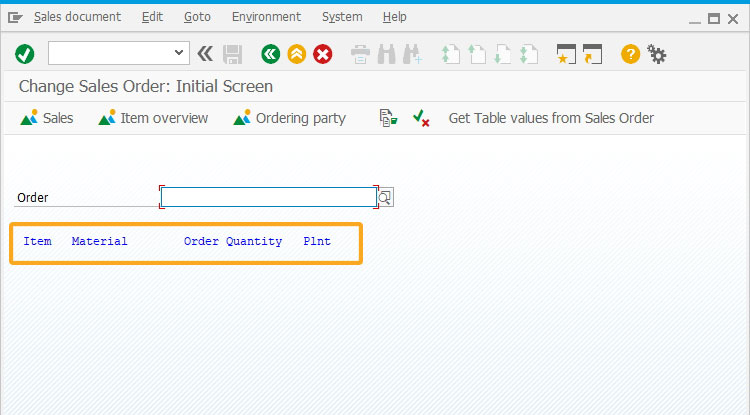
- Add a series of ten input fields below the comment line shown on the screen.
//for loop to add 10 input fields in 4 columns
for(var i=1; i<10; i++){
	inputfield([4+i,2], {"name":"z_va02_item&V[i]", "size":6, "readonly":true, "nolabel":true});
	inputfield([4+i,9], {"name":"z_va02_mat&V[i]", "size":15, "readonly":true, "nolabel":true});
	inputfield([4+i,25], {"name":"z_va02_qty&V[i]", "size":15, "readonly":true, "nolabel":true});
	inputfield([4+i,41], {"name":"z_va02_plnt&V[i]", "size":4, "readonly":true, "nolabel":true});
}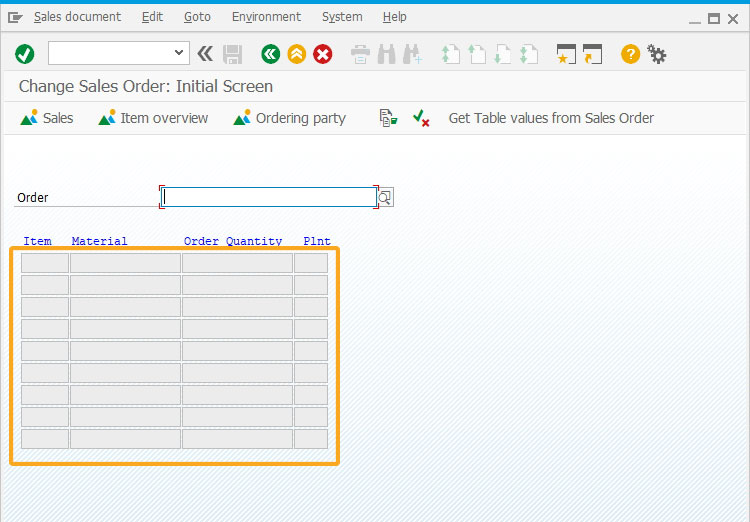
- Enter the Order number and click Get Table values from Sales Order toolbar push button.
- Create a function va02Get5235TableValue to retrieve values from the All items table of the Change Sales Order Overview screen and place them in the input fields created on the Change Sales Order Initial screen.
//Creates a function to display sales order table data from Overview screen to initial screen and assign them in input fields
function va02Get5235TableValue(){
//Validates the screen name and continues to execute the script
	onscreen "SAPMV45A.0102"
		//set("F[Order]", "&V[z_va02_order]");
		enter();
	onscreen "SAPMSDYP.0010"
		enter();
	onscreen "SAPMV45A.4001"
		var absrow = 1;
		var relrow = 1;
NEW_SCREEN:;
		enter("/scrolltoline=&V[absrow]", {"table":"T[All items]"});
	onscreen "SAPMV45A.4001"
		relrow = 1;
//Retrieves table attributes to retrieve values from the SAP table
		gettableattribute("T[All items]", {"firstvisiblerow":"FVisRow", "lastvisiblerow":"LVisRow", "lastrow":"LRow"});
NEW_ROW:;
		if(absrow > LVisRow){
			goto NEW_SCREEN;
		}
		if(absrow > LRow){
			goto END_OF_TABLE_SCROLL;
		}
		set("V[z_va02_item&V[absrow]]", "&cell[All items,Item,&V[relrow]]");
		set("V[z_va02_mat&V[absrow]]", "&cell[All items,Material,&V[relrow]]");
		set("V[z_va02_qty&V[absrow]]", "&cell[All items,Order Quantity,&V[relrow]]");
		set("V[z_va02_plnt&V[absrow]]", "&cell[All items,Plnt,&V[relrow]]");
		relrow++;
		absrow++;
		goto NEW_ROW;
END_OF_TABLE_SCROLL:;
		enter("/nva02");
}
SAP Process
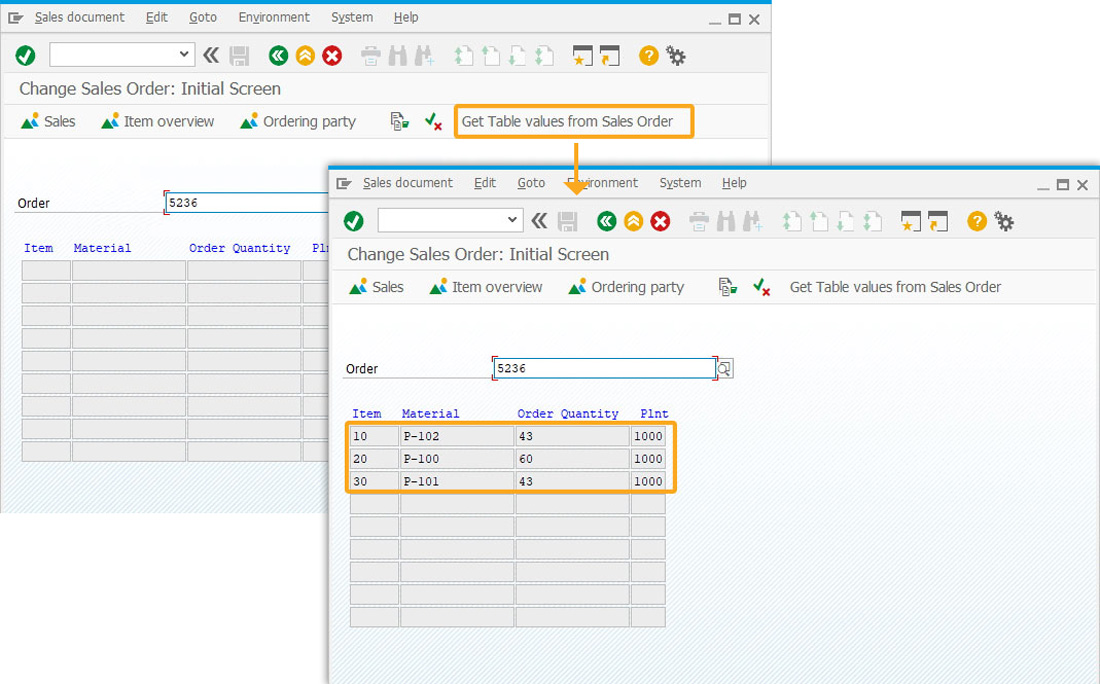
- Refresh the SAP screen. Click the Get Table values from Sales Order toolbar push button to retrieve the values from the All Items table of the Change Sales Order Overview screen. Then, place them in the input fields created on the Change Sales Order Initial screen, as shown below.
Next Steps

Assign values into SAP table from Liquid UI table
Learn how to assign values into an SAP table using a function
Learn how to assign values into an SAP table using a function
10 min.
This article is part of the Take a deep dive into the SAP table and Liquid UI table tutorial.


