Prerequisites
- Products: Liquid UI WS, Liquid UI Server or Local DLL, Client Software
- Commands: del(), inputfield(), pushbutton(), set()
Purpose
In this article, you will learn how to remove all the empty rows in a list and move the populated rows in order. We’ll guide you through the following steps.
- Delete unnecessary elements on the SAP screen using the del command
- Add a toolbar push button to update the rows
- Add a function to remove blank spaces between the rows
- Add a function to check whether the variables hold a blank or null value
User Interface
//Create the file SAPLSMTR_NAVIGATION.E0100.sjs inside your script folder for customizing the SAP Easy Access screen.
//Now, let's start adding the Liquid UI script to the above file and save it.
- Add a function to remove the blank spaces between the rows.
//The function is called to remove blank spaces
String.prototype.trim=function(){return this.replace(/^\s+|\s+$/g,'');} - Add a function to check whether the variable holds a blank or null value.
//The function is called to validate if the variable holds a blank or null value
function isBlank(jvar){
    if(typeof jvar == 'string') {
        jvar = jvar.trim();
    }
    return(jvar == 'undefined' || jvar == null || jvar == "" || jvar == void 0);
}

//Move the next available item in the list to the blank row
function updateRows(){
    for(var i=1;i<z_endrow;i++){
        set('V[z_temp_mat]','&V[z_material_&V[i]]');
        set('V[z_temp_qty]','&V[z_quantity_&V[i]]');
        z_temp_mat = z_temp_mat.trim();
        z_temp_qty = z_temp_qty.trim();

        // Make Material required if Quantity is entered
        if((isBlank(z_temp_mat)) && (!isBlank(z_temp_qty))){
            return("E: Please enter Material for Item: "+i);
        }

        // Make Quantity required if Material is entered
        if((!isBlank(z_temp_mat)) && (isBlank(z_temp_qty))){
            return("E: Please enter Quantity for Item: "+i);
        }

        if((isBlank(z_temp_mat)) && (isBlank(z_temp_qty))){
            for(var j=i+1; j<z_endrow; j++){
                set("V[z_temp_next_mat]", "&V[z_material_&V[j]]");
                set(V[z_temp_next_quan]", "&V[z_quantity_&V[j]]");
                z_temp_next_mat = z_temp_next_mat.trim();
                z_temp_next_quan = z_temp_next_quan.trim();

                if(!isBlank(z_temp_next_mat) && !isBlank(z_temp_next_quan)){
                    //Copy the available item to blank row
                    set("V[z_material_&V[i]]","&V[z_temp_next_mat]");
                    set("V[z_quantity_&V[i]]","&V[z_temp_next_quan]");

                    //Set the location to be blank
                    set("V[z_material_&V[j]]", " ");
                    set("V[z_quantity_&V[j]]", " ");
                    break;
                }
            }
        }
    }
}
Customization
- Logon to SAP and delete the image container and other unnecessary elements on the SAP screen using the del command, as shown below.
//Deletes the image container
del('X[IMAGE_CONTAINER]');

// Deletes unnecessary screen elements on SAP Easy Access screen
del('P[User menu]');
del('P[SAP menu]');
del('P[SAP Business Workplace]');
del('P[Display role menu]');
del('P[Add to Favorites]');
del('P[Delete Favorites]');
del('P[Change Favorites]');
del('P[Move Favorites down]');
del('P[Move Favorites up]');
del('P[Create role]');
del('P[Assign users]');
del('P[Documentation]');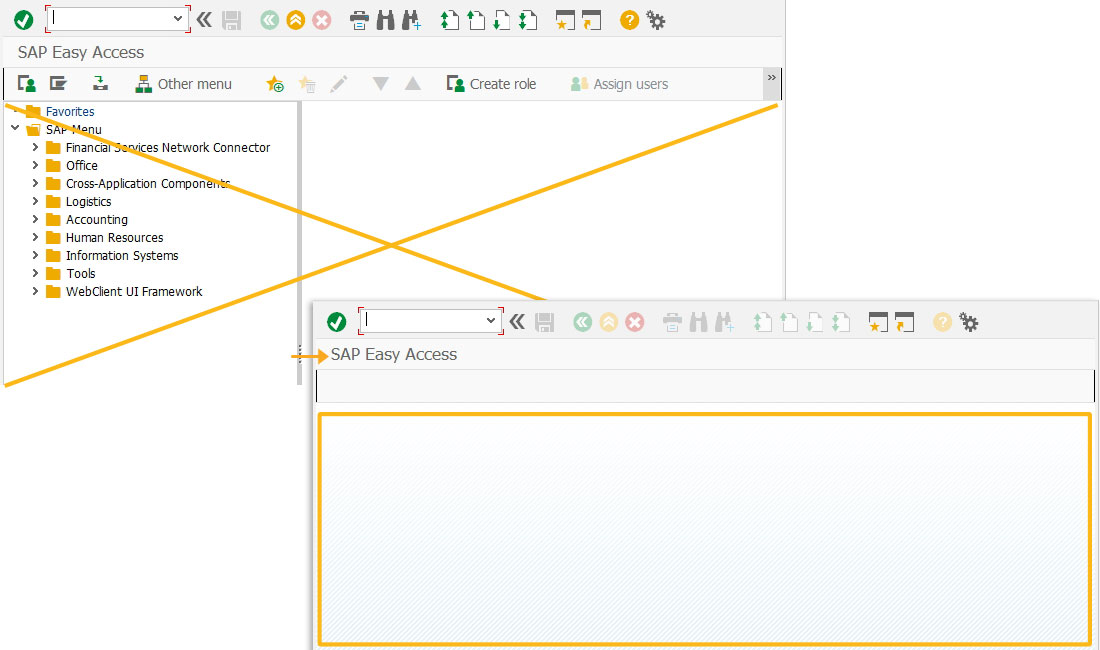
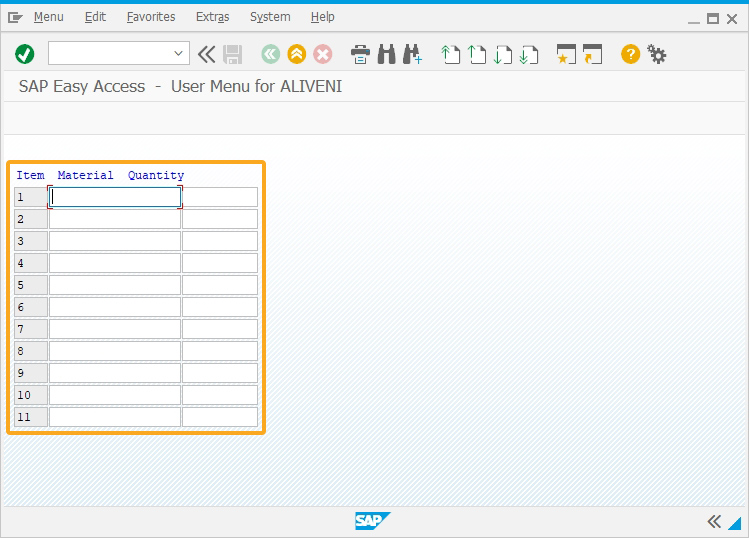
- Add 11 rows with the comment "Item Material Quantity" along with input fields, as shown below.
//Adds a comment Item material Quantity
comment([1,1],"Item  Material  Quantity");

//Creates 11 rows on UI
z_endrow = 12;
for(item_counter=1; item_counter<z_endrow; item_counter++){               inputfield([item_counter+1,1],{"name":"z_item_&V[item_counter]", "size":4, "readonly":"true", "alignright":"true", "nolabel":"true"});
    inputfield([item_counter+1,6],{"name":"z_material_&V[item_counter]","size":18,"nolabel":"true"});
    inputfield([item_counter+1,25],{"name":"z_quantity_&V[item_counter]","size":10,"nolabel":"true"});
    set("V[z_item_&V[item_counter]]",item_counter);
}
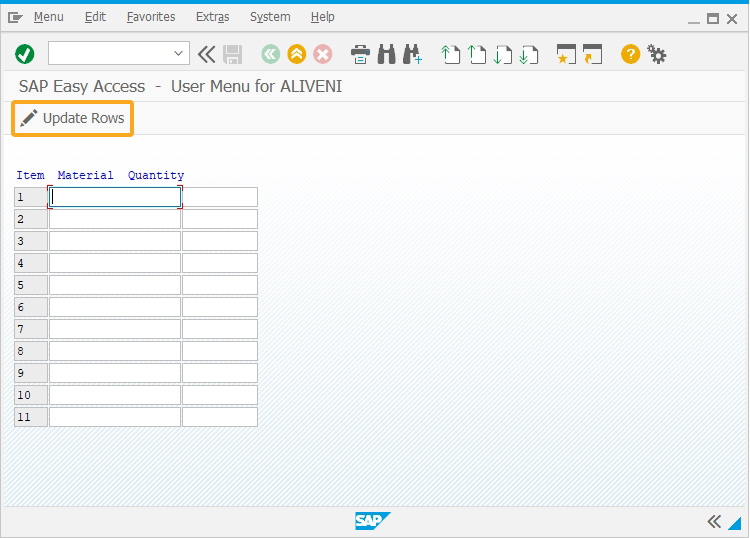
- Add a toolbar pushbutton Update Rows with an icon that rearranges the table values on click.
//Creates a toolbar push button "Update Rows"
 pushbutton([TOOLBAR],"@0Z@Update Rows",'?',{"process":updateRows});
SAP Process
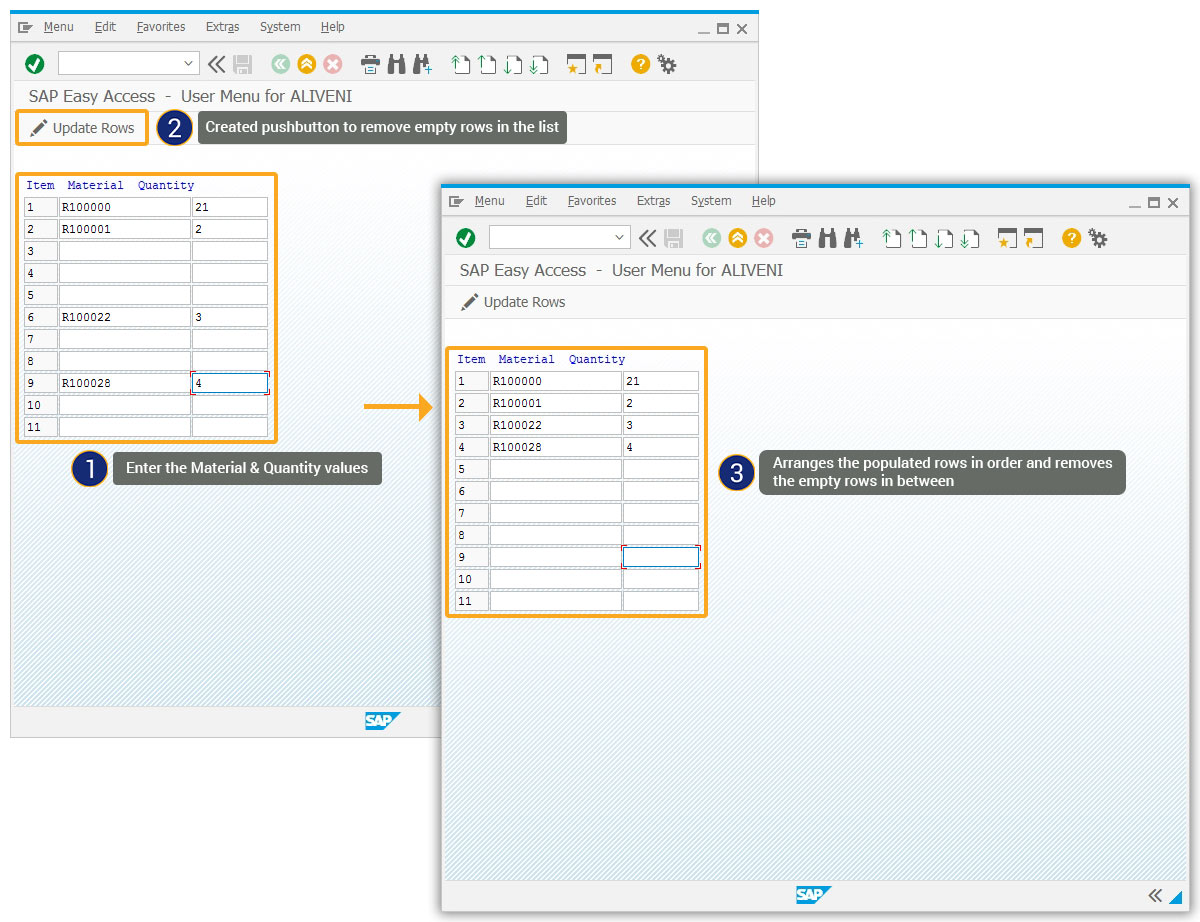
- Now, refresh the SAP screen, and you will see the pushbutton labeled Update Rows and a customized table. Enter the values for the fields under the columns Material and Quantity randomly, and then click on the ‘Update Rows’ toolbar push button. After updating the rows, you can see the empty rows are removed and populated rows are arranged in an order, as shown in the image below.