Prerequisites
- Products: Liquid UI WS, Liquid UI Server or Local DLL, Client Software
- Commands: boxsize(), del(), pos()
Purpose
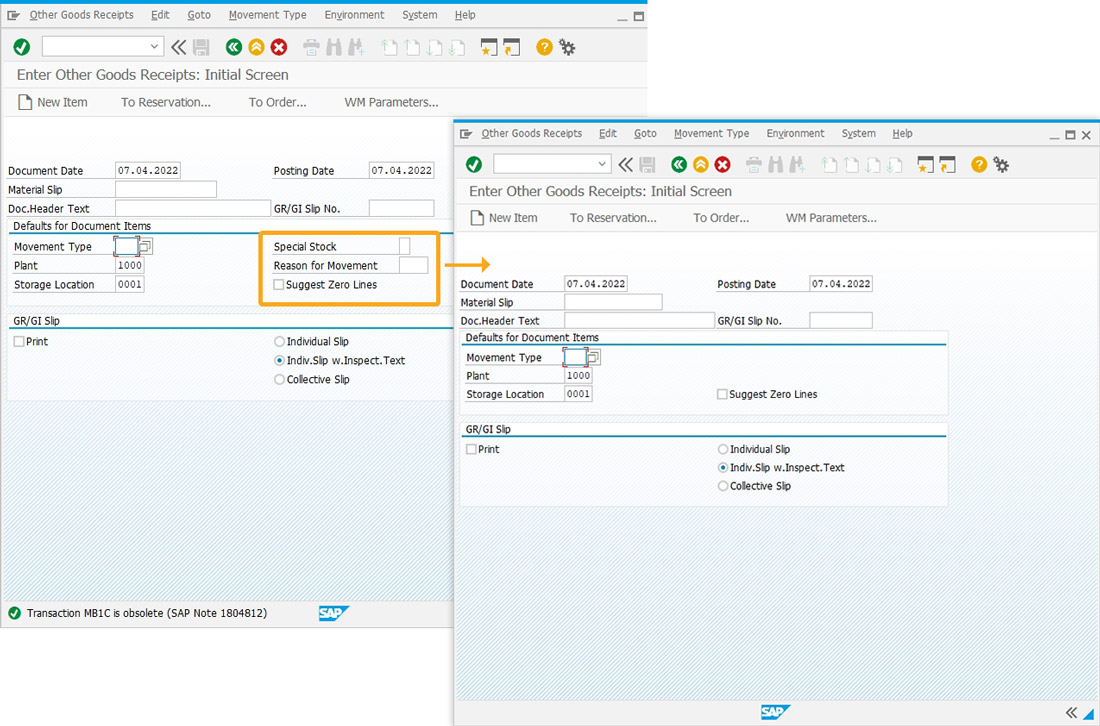
Learn how to use the boxsize command to resize the dimensions of a group box on an SAP screen. In this example, we will demonstrate how to resize the dimensions of a group box in the MB1C transaction while deleting the Reason for Movement and Special Stock fields. We’ll walk you through the following steps.
- Delete the unnecessary input fields
- Resize the groupsize
- Change the position of fields on the screen
User Interface
//Create this file inside your script folder for customizing the Enter Other Goods Receipt: Initial screen: SAPMM07M.E0400.sjs
//Now, let's start adding the Liquid UI script to the above file and save it.
- Delete the Reason for Movement and Special Stock input fields using the del().
//Deletes Special Stock and Reason for Movement fields
del("F[Special Stock]");
del("F[Reason for Movement]");
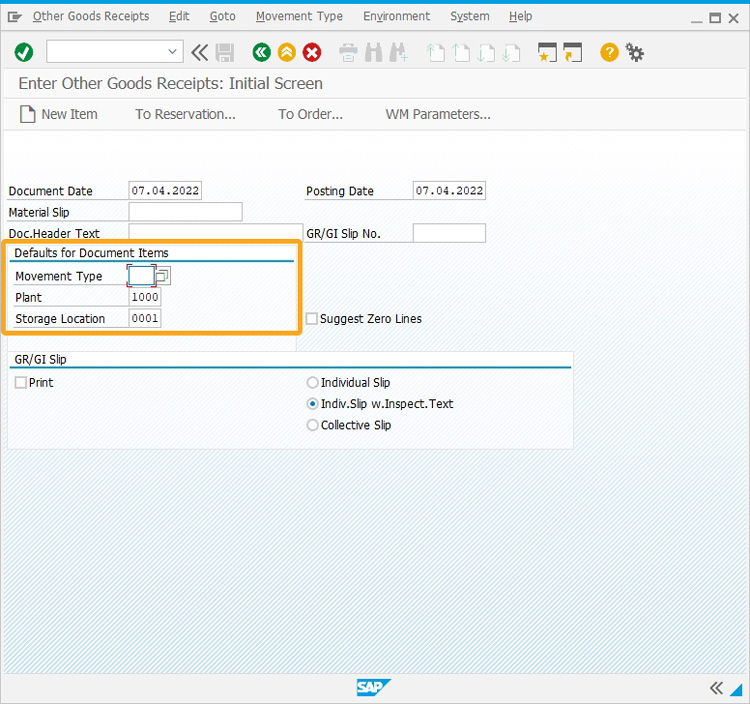
- Using boxsize(), resize the Defaults for Document Items group box.
//Resizes the group box.
boxsize("G[Defaults for Document Items]",[6,42]);
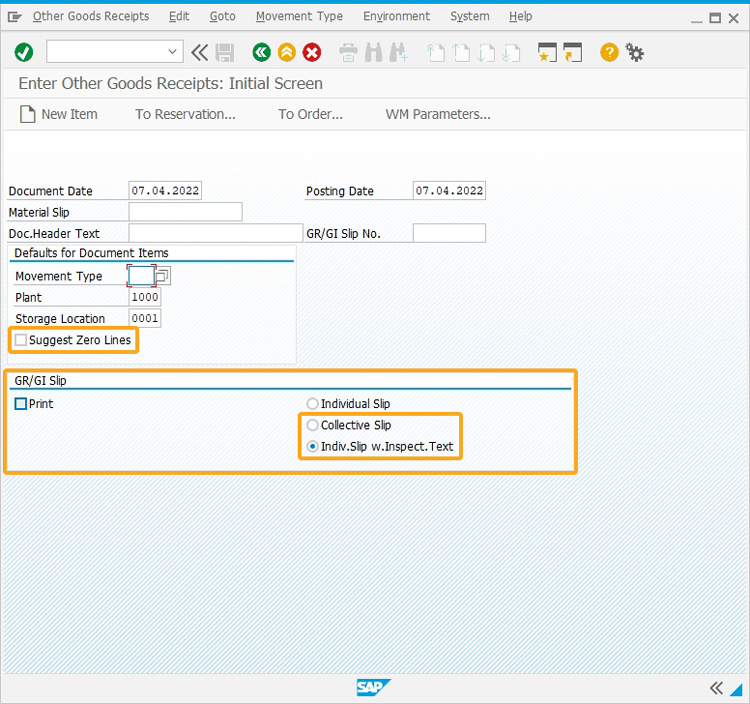
- Change the position of the following fields, using the pos(),.
//Changes the position of the following on the SAP screen.
pos("C[Suggest Zero Lines]",[9,1]);
pos("R[Indiv.Slip w.Inspect.Text]",[14,44]);
pos("G[GR/GI Slip]",[11,0],{"box":true});
pos("R[Individual Slip]",[12,44]);
SAP Process
- Now, navigate to the MB1C transaction, as per the code, you can see that specified fields are eliminated and the group box is resized accordingly, as shown below.


