This section will cover the installation process for Liquid UI Offline. Topics covered are as follows:
- Licenses
- Install Process
Licenses
There are two possible target platforms for an Offline installation - a Mobile device or a laptop. Regardless of the target platform, however, it is necessary to obtain the requisite licenses for Offline. In the case of a laptop, only a license for Offline Server is necessary. This license file is installed into the same directory as the Offline files reside. Typically this directory will be C:\Offline.
For a Mobile device, two license files are required - Offline Server and Mobile. These files, once obtained, are then copied into the same directory as the other Offline files. Typically, this directory will be C:\Offline.
Offline requires a license in order to operate. If you need to request a new license, you can do that directly from within the License Manager. To request a new license, please email info@guixt.com.
Install Process
The install process itself will differ depending on the target platform. Please select the target platform from the following list:
- Laptop Installation
- Mobile Installation
Laptop Installation
There are two steps included in this section:
- Installation
- Starting Offline Server
Installation
To install Liquid UI Offline on a laptop, please do the following:
- Update the Liquid UI aka GuiXT Server files (guixt.exe, guixt.dll) to the latest version. These can be obtained from Synactive.
- Create an Offline directory. A typical path is C:\Offline.
- Copy all Offline files for laptop of desktop into the new Offline directory. These files should be obtained from Synactive. The mandatory files are as follows:
- SynR3App.exe: The application executable for the Offline client.
- webscript.dll: Contains the Javascript parser to translate SAP screens for Mobile devices.
- SynR3.js (Do not modify this file): The configurations and generic functions used in Offline.
- GuiXTMobile.sy3: Contains the license key and other configurations related to the client.
- SynR3.xml: Contains profile settings for the client.
- Ensure that all files listed above are in the SynScript folder, which should be located in the Offline directory. If a SynScript folder does not already exist, please create one. If using Offline with a desktop system, create a batch file named RunSynR3.bat with the following code: SynR3App.exe -console.
- The Offline server should now start and display a message similar to the following: DEVICE IS DOCKED.
- Configure the Liquid UI Server to execute the upload and download scripts. These are explained in more detail in the Liquid UI Server section.
- Run the Liquid UI Server when it is necessary to synchronize data with the SAP ERP system. Liquid UI Server must be running before any scripts are synchronized, but it is not necessary for Server to be running in order to use Offline on the laptop or Mobile device.
- Each transaction needs to be a separate Javascript file. These files are stored in the SynScript folder we previously created in Step 4 above.
Starting Offline Server
Once the Offline Server is installed on the laptop, it is necessary to start it. To start the Offline server, please do the following:
- Double-click on the batch file RunSynR3.bat that we previously created.
- Open the logon pad and create a connection to the SAP ERP system.
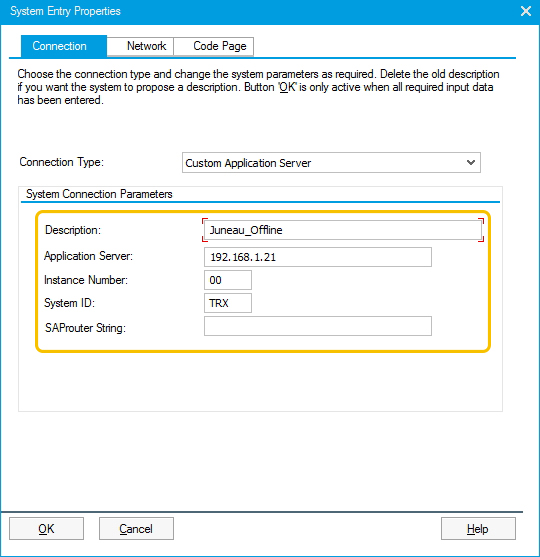
- Specify the Server address as '192.168.1.0' (this is the local IP address of the system) and set the System Number as '00'.
- Open the C:\Offline\SynScript\config.js file and find the following line: SR3SetLogonInformation("server", "client", "username", "password", "language");
- Change the 'server', 'client', 'username', 'password' and 'language' parameters to match those for the target system. The 'server' parameter will be for the Liquid UI Server, not the SAP application server.
Mobile Installation
There are four topics included in the Installation section:
- Installation
- Using ActiveSync
- Using a Storage Card
- Starting Offline Server
Installation
To install Liquid UI Offline on a Mobile device, please do the following:
- Update the Liquid UI Server files (guixt.exe, guixt.dll) to the latest version. These can be obtained from Synactive.
- Create an Offline directory on the desktop or laptop. A typical path is C:\MobileOffline. The application can be installed anywhere, but all associated files must be stored in the same directory as the Offline application, so Synactive recommends creating a dedicated folder.
- Copy all Offline files for the Mobile device, including the license file, into the new MobileOffline directory. These files should be obtained from Synactive. The mandatory files are as follows:
- GuiXTMobile.exe
- GuiXTMobile.sy3
- SynR3.dll
- SynR3.exe
- SynR3.js (Do not modify this file): Contains the configurations and generic functions used in Offline.
- SynR3.xml
- webscript.dll: Contains the Javascript parser to translate SAP screens for Mobile devices.
- Copy all the files listed above to the Mobile device. Ensure that all files are placed in the SynScript folder, which should be located in the Offline directory. If a SynScript folder does not already exist, please create one.
- If the user is employing an emulator, ensure that the C:\GuiXT directory is shared and that the emulator is synchronized with ActiveSync.
- Each transaction needs to be a separate Javascript file. These files are stored in the SynScript folder we previously created in Step 4 above.
- Configure the Liquid UI Server to execute the upload and download scripts. These are explained in more detail in the Liquid UI Server section.
- Run the Liquid UI Server when it is necessary to synchronize data with the SAP ERP system. Liquid UI Server must be running before any scripts are synchronized, but it is not necessary for Server to be running in order to use Offline on the laptop or Mobile device.
- Run the GuiXTMobile.exe from the device. Offline should start and display a message similar to the following: DEVICE IS DOCKED.
Using ActiveSync
Files are transferred from the desktop or laptop to the Mobile device using Microsoft ActiveSync. To install the requisite files, please do the following. We will use the PPC03UpCab.CAB file as an example:
- Connect the device to a computer with ActiveSync installed.
- Download the requisite files (eg. PPC03UpCab.CAB).
- Launch Windows Explorer and browse to the connected device. Then copy the CAB file to the device.
- Launch the PPC03UpCab.CAB file.
- Select Device and click Install. If Windows Mobile asks if you wish to install to a storage card, decline - Liquid UI Mobile cannot run from a storage card.
- The install will complete. When it finishes, click OK to exit the Installer.
- Copy the license file to the \Program Files\Synactive\GuiXTMobile directory on the device.
Using a Storage Card
While Liquid UI Mobile cannot run from a storage card, it can be installed from such a card. TO install Liquid UI Mobile from a storage card, please do the following:
- Connect the storage card to the computer.
- Copy the file (eg. PPC03UpCab.CAB) to the storage card.
- Transfer the storage card to the device.
- Use the File Explorer on the device to navigate to the storage card.
- Launch the PPC03UpCab.CAB file and follow the screen prompts to complete the installation. As in the ActiveSync install, if Windows Mobile asks if you wish to install to a storage card, decline - Liquid UI Mobile cannot run from a storage card.
- Copy the license file to the \Program Files\Synactive\GuiXTMobile directory on the device.
Starting Offline Server
Once the Offline Server is installed, it is necessary to start it. To start the Offline server from the Mobile device, please do the following:
- Launch Liquid UI Mobile for a mobile application.
- Create a connection to the SAP ERP system.
- Specify the Server address as '127.0.0.1' (this is the local IP address of the system) and set the System Number as '0'. If the user wishes, an auto logon can be configured by creating a profile for this entry. Profiles are created under the 'Profile Management' entry. If no auto-logon is configured, then the logon parameters are drawn from the config.js file.


