Remote Function Call (RFC) is a standard SAP interface that is used for several functions and mainly to communicate between systems. RFC requires a valid username and password to log into the system, stored in the Liquid UI profile. In production systems, the default login user, SAPCPIC, is typically locked. Hence, we advise creating a dedicated Liquid UI RFC user with full privileges.

Note: You can use your Liquid UI login credentials for testing purposes.
Purpose
This documentation aims to illustrate how you can set up a trusted relationship between two ERP systems. At the Liquid UI scripts level, RFC first accesses the scripts stored at the web repository and then gets data from function modules. To demonstrate this process we are considering the Profiles: Initial screen as an example and we’ll guide you through the following steps:
- Navigate to the SU02 transaction screen
- Create a role in the Liquid UI Server
- Define the parameters of the role
- Specify the function group for function modules using existing Remote Enabled SAP Function Modules
- Assign the role of the RFC user
- Communicate between two ERP systems through RFC
Let’s dive into the process of creating a Role in Liquid UI.
Follow the below steps to create an RFC user using SU01 and SU02 transactions in SAP. Let’s proceed with an example that illustrates “how to create the necessary user rights for web repository access”. Consider two systems Liquid UI Server & SAP ERP systems, where Liquid UI Server is the source, and SAP ERP is the destination. Here, we are trying to get user details from a function module called BAPI.
Creating the RFC in Liquid UI Server (source)
- Navigate to the Profiles: Initial screen by entering SU02 in the tcode field, as shown below.
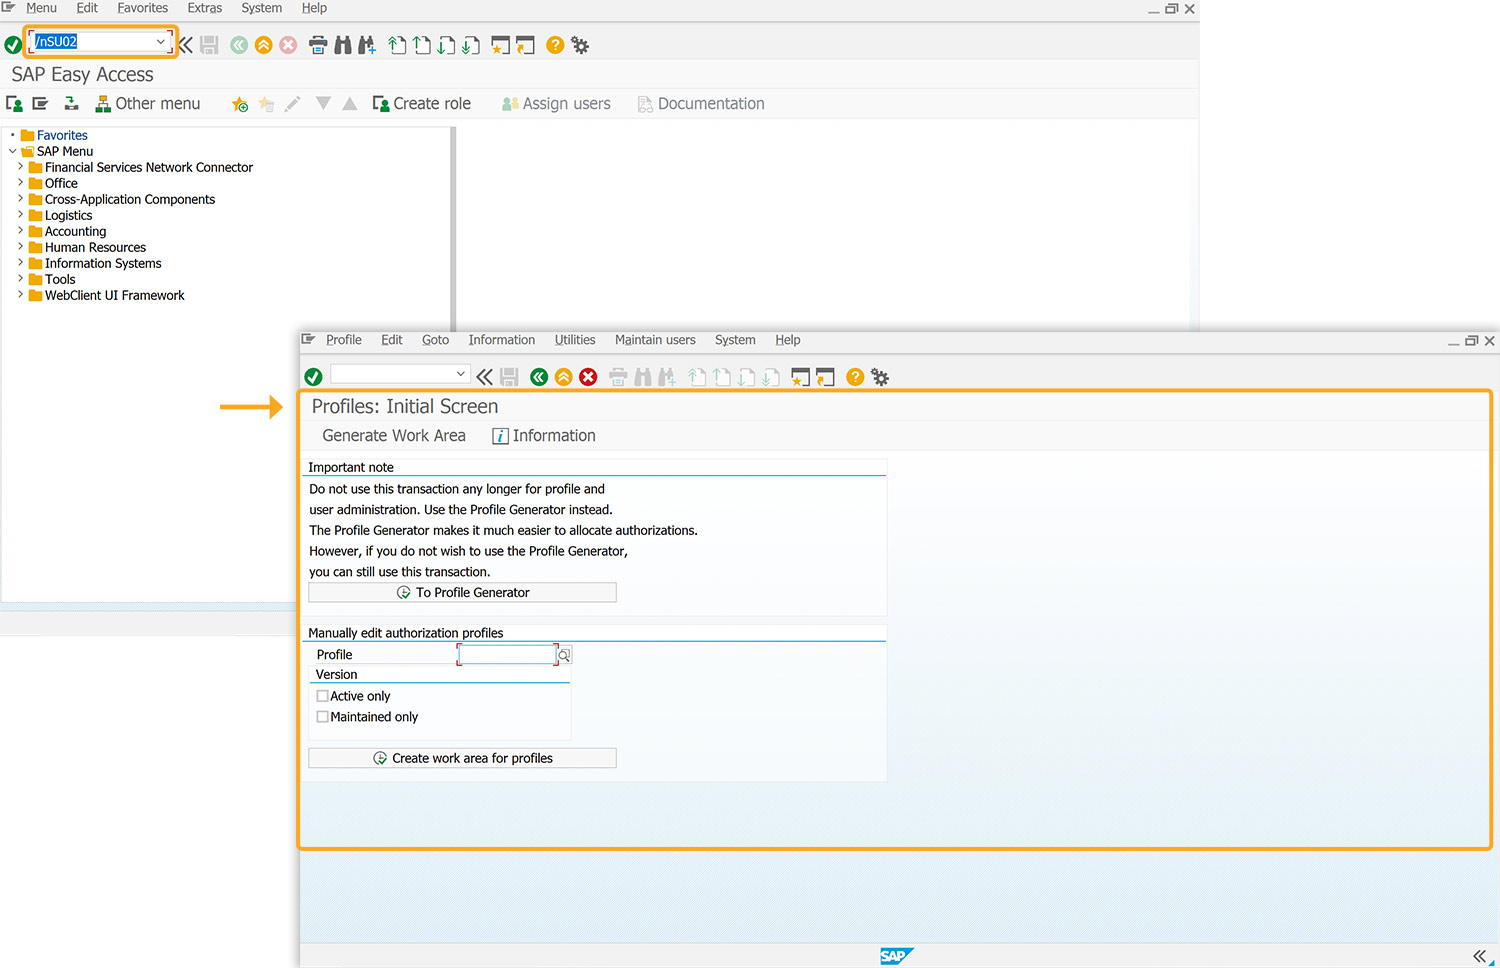
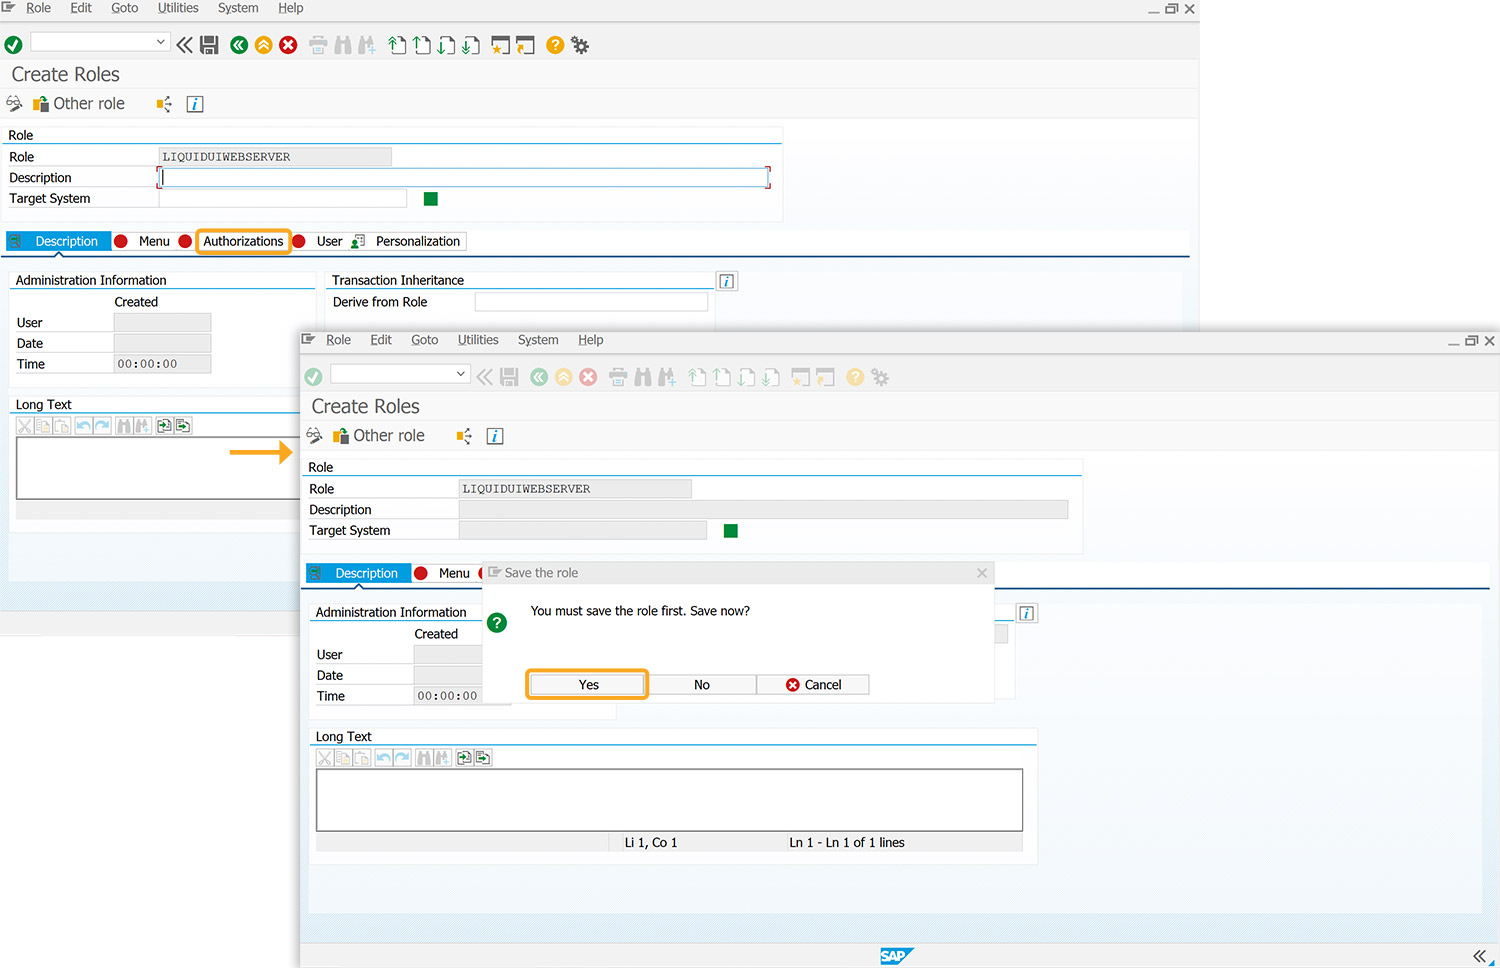
- Click on the To Profile Generator, which navigates to the Role Maintenance screen. Enter the role name, then click the Single Role push button, as depicted in the image below. Here, we have mentioned the role name as LIQUIDUIWEBSERVER.

- Click on the Authorizations tab. Then, the Save the role pop-up will appear click Yes to save the role.
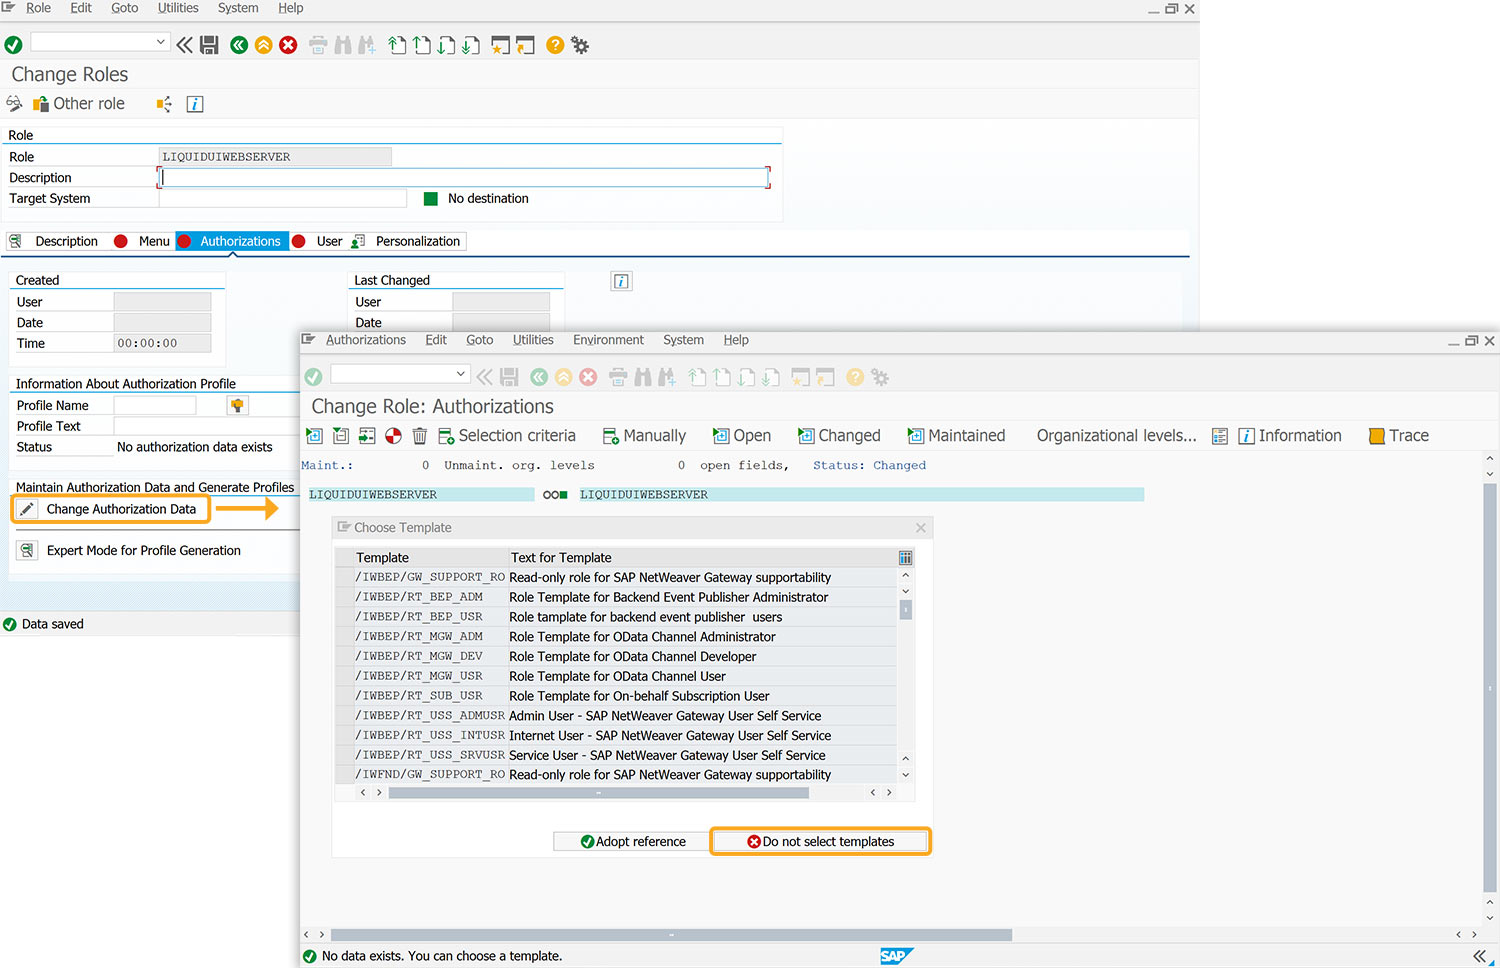
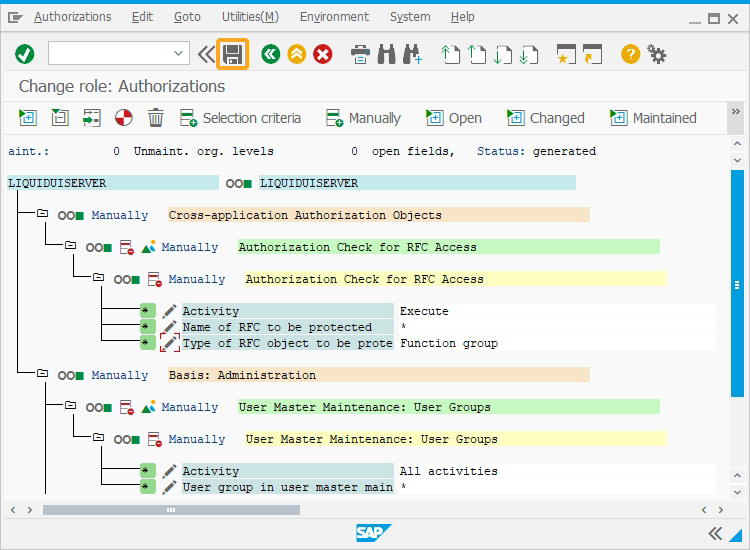
- On the screen that appears, click Change Authorization Data. Then, the Change Role: Authorizations screen will appear with a list of templates. Click Do not select templates, as shown below.
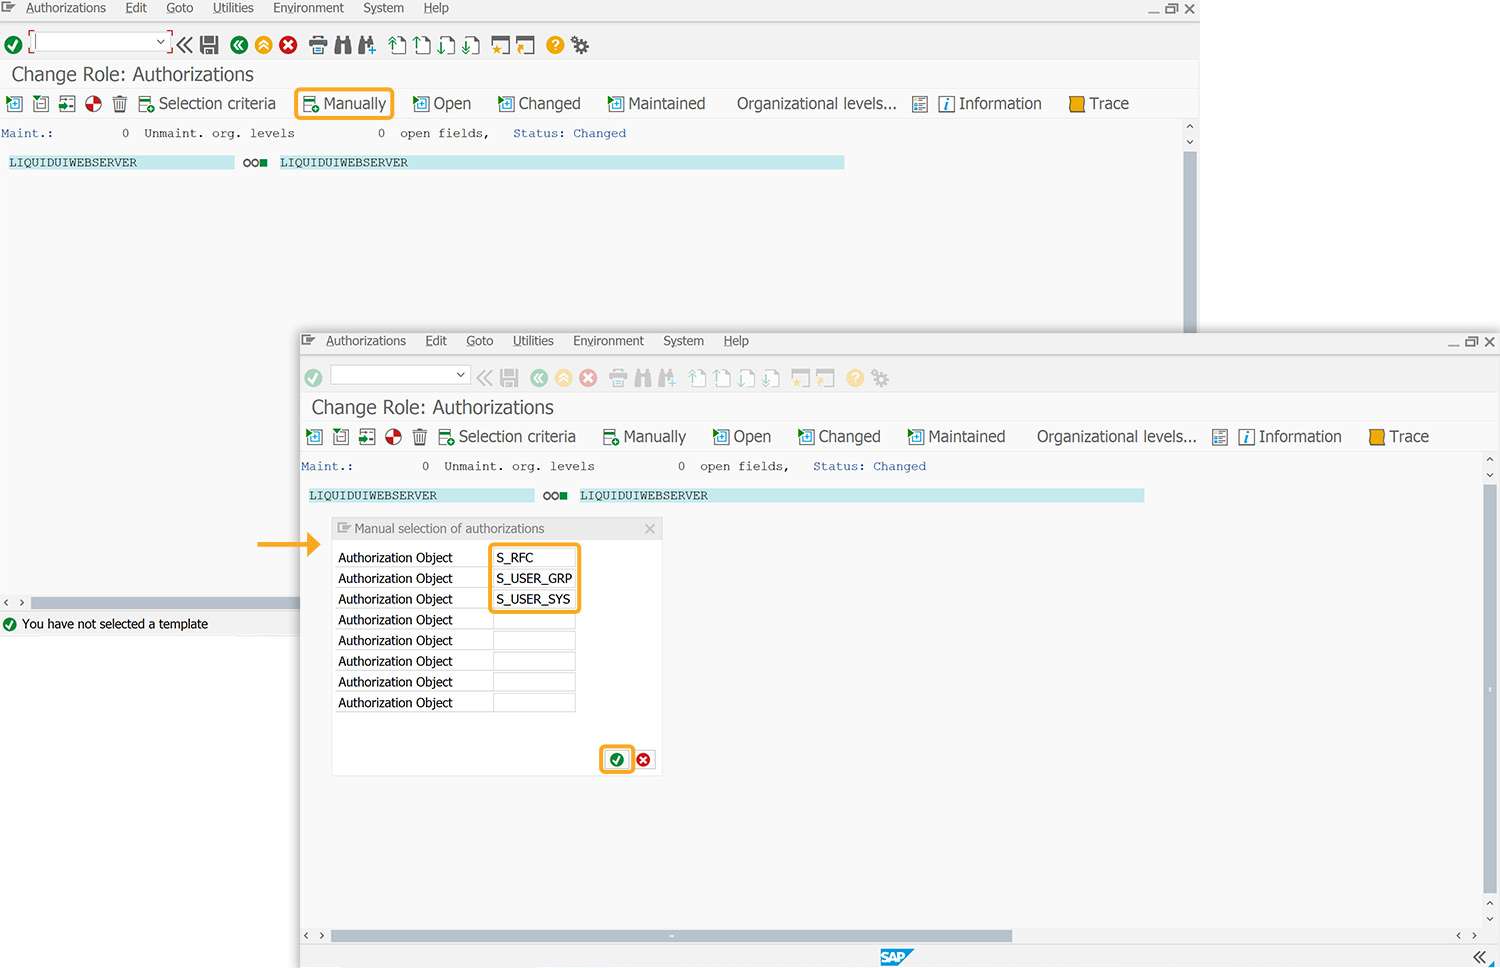
- Now, click the Manually icon in the menu bar. Then, the Manual selection of authorizations pop-up will appear. Enter authorization objects S_RFC, S_USER_GRP, and S_USER_SYS, and then click Enter.
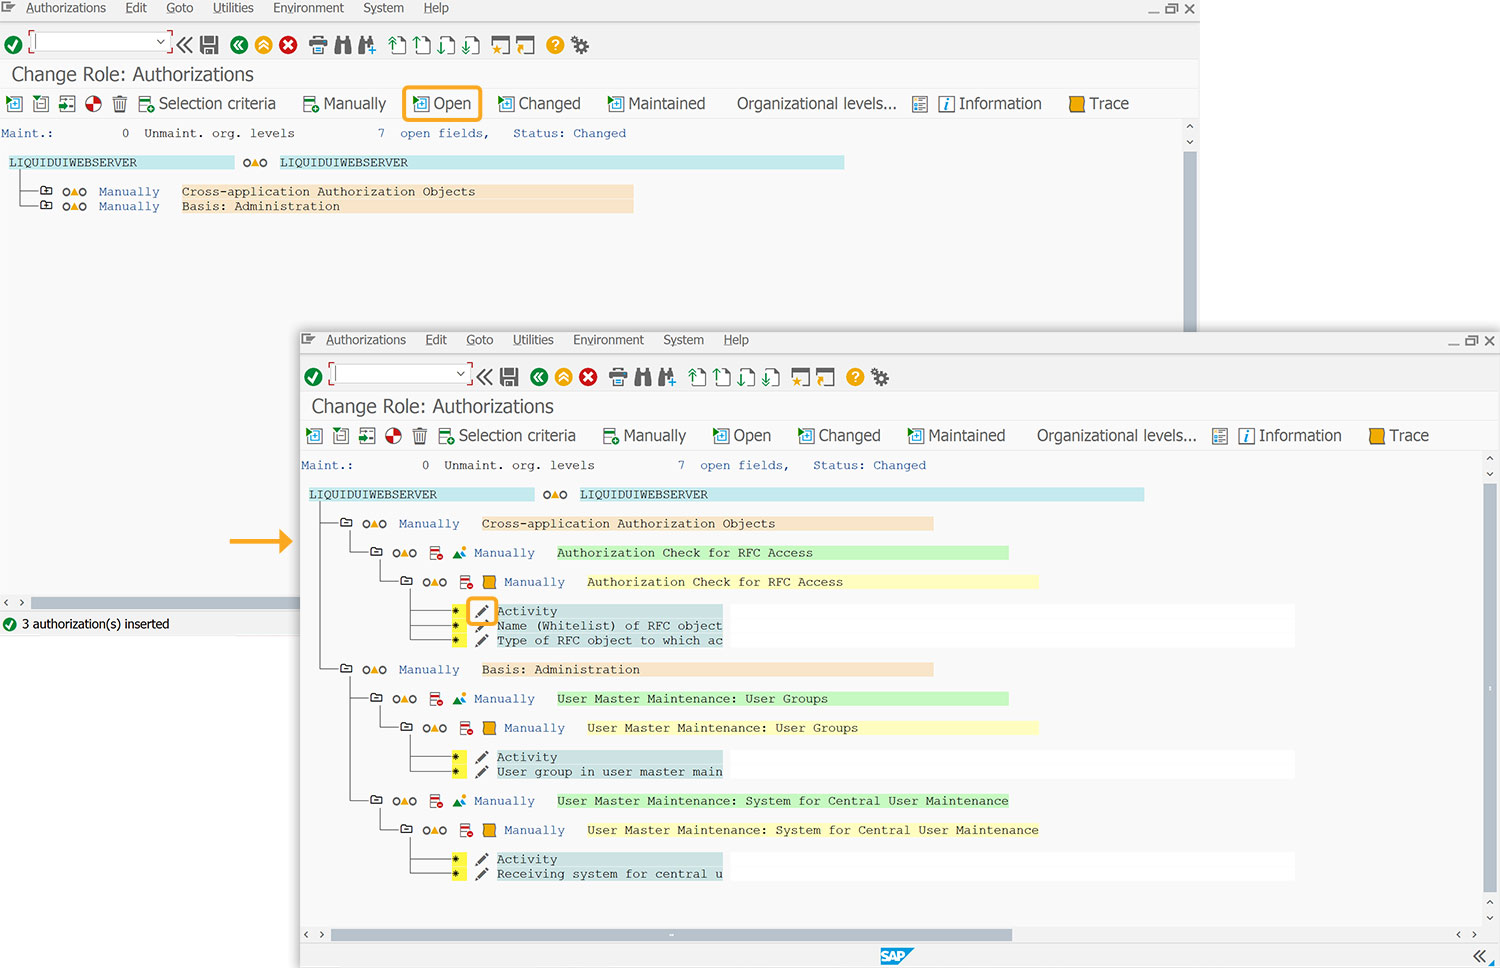
- On the appeared screen, click Open. Click on the change icon (highlighted), as shown in the following image.
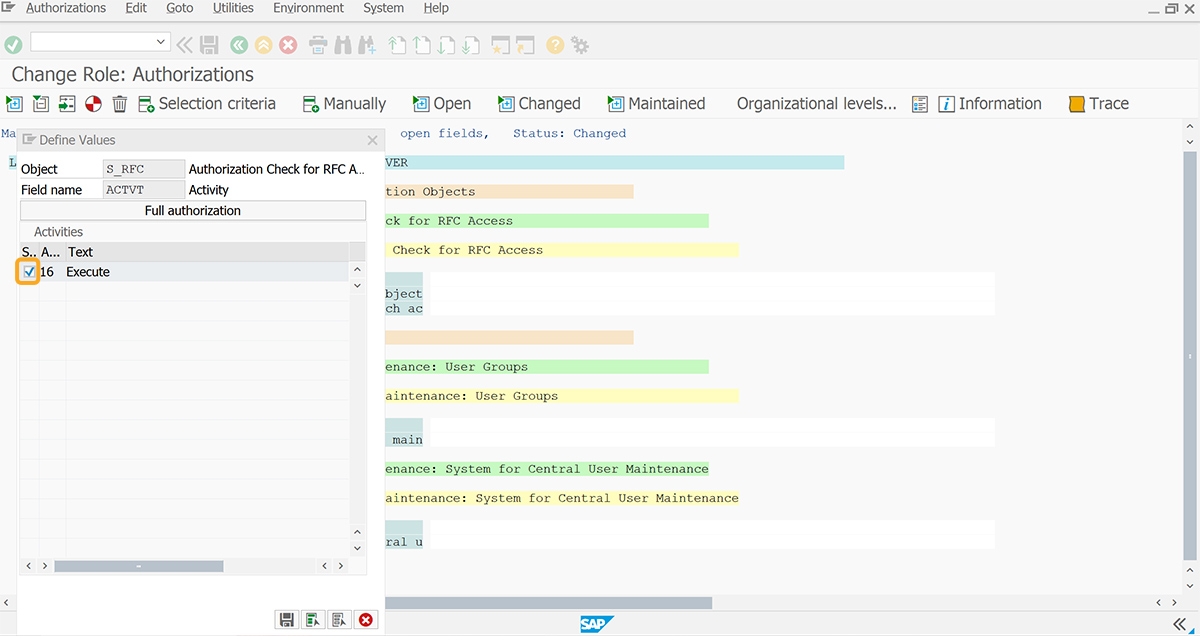
- On the appeared Define Values pop-up, select the checkbox and hit Enter.
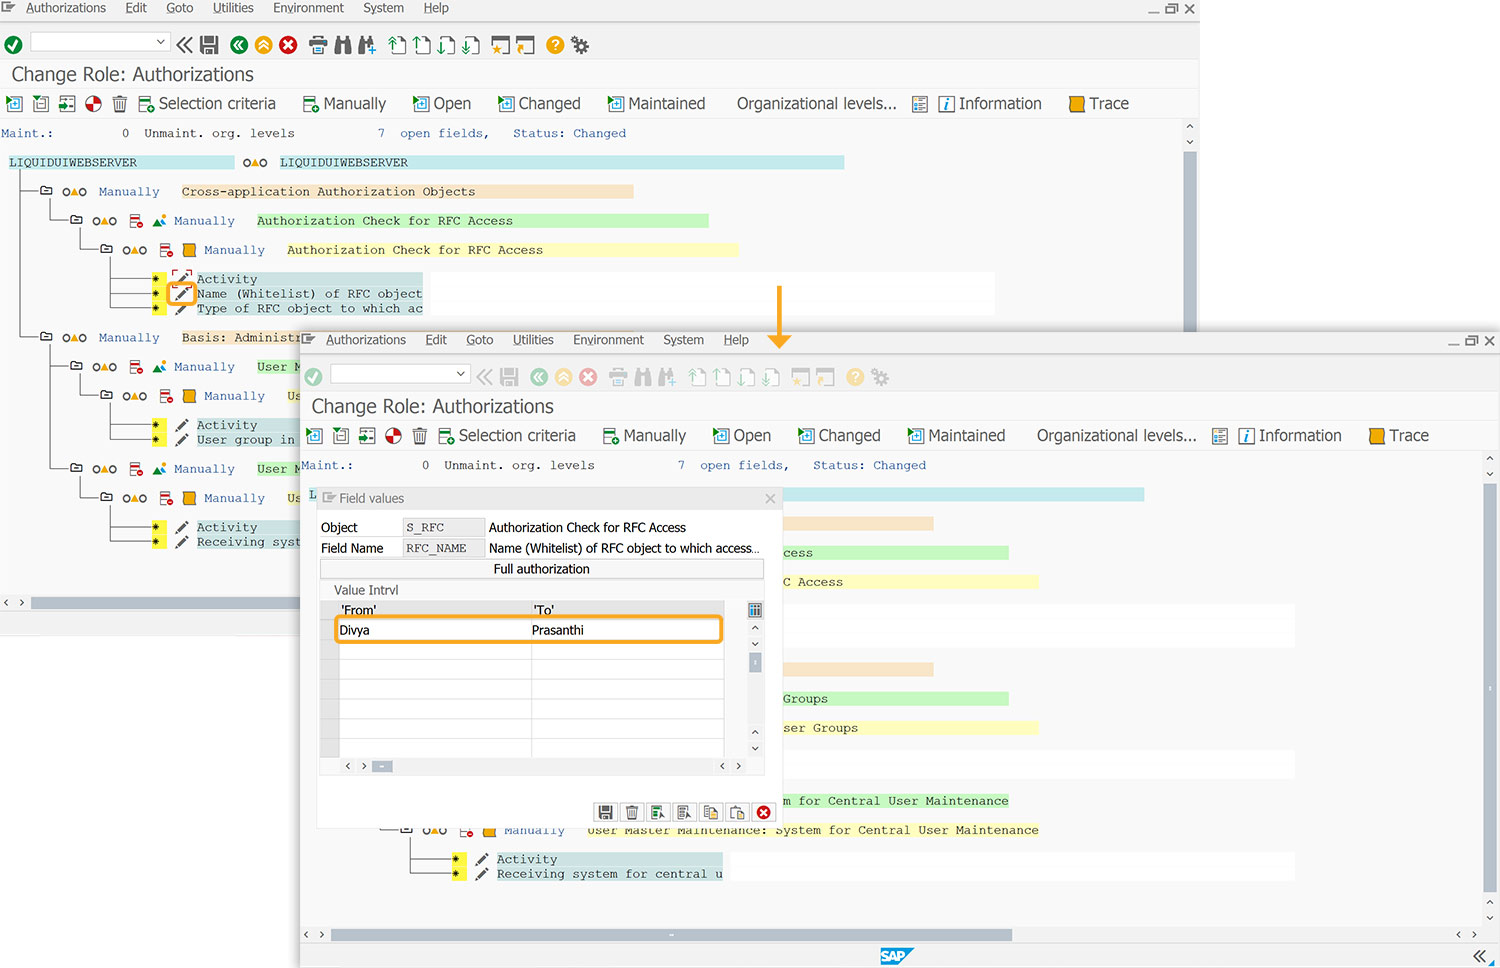
- Click on the Name (Whitelist) of the RFC object. Then, the Field values popup will appear. Enter the details, and hit Enter.
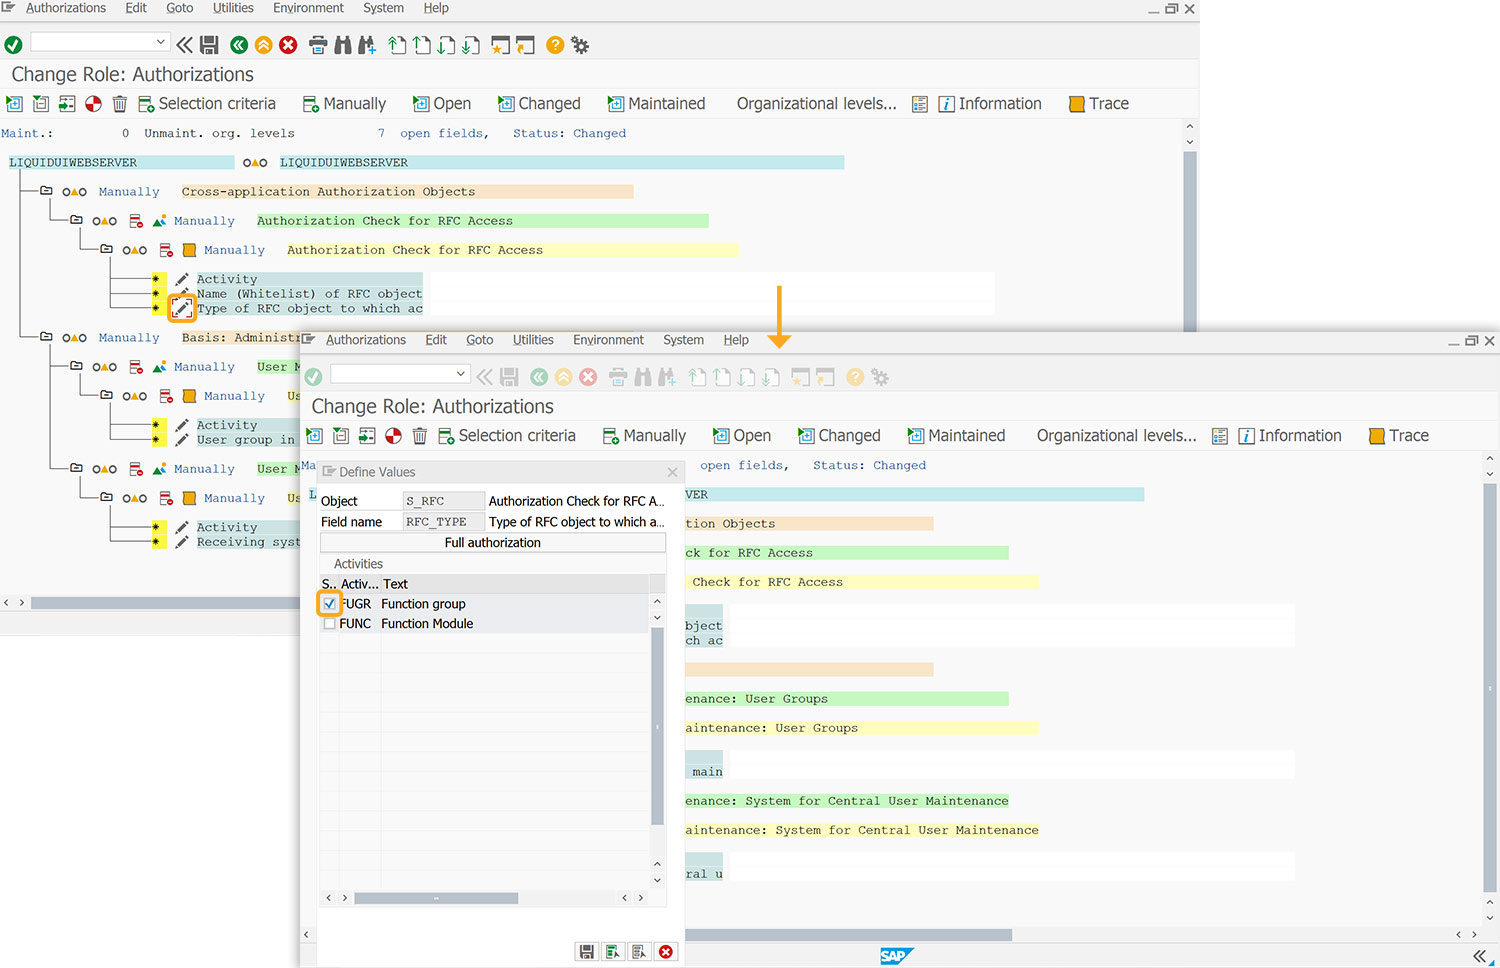
- Click on the Change icon (highlighted), as shown below. Then, the Define Values popup will appear. Mark the FUGR checkbox, and press Enter.
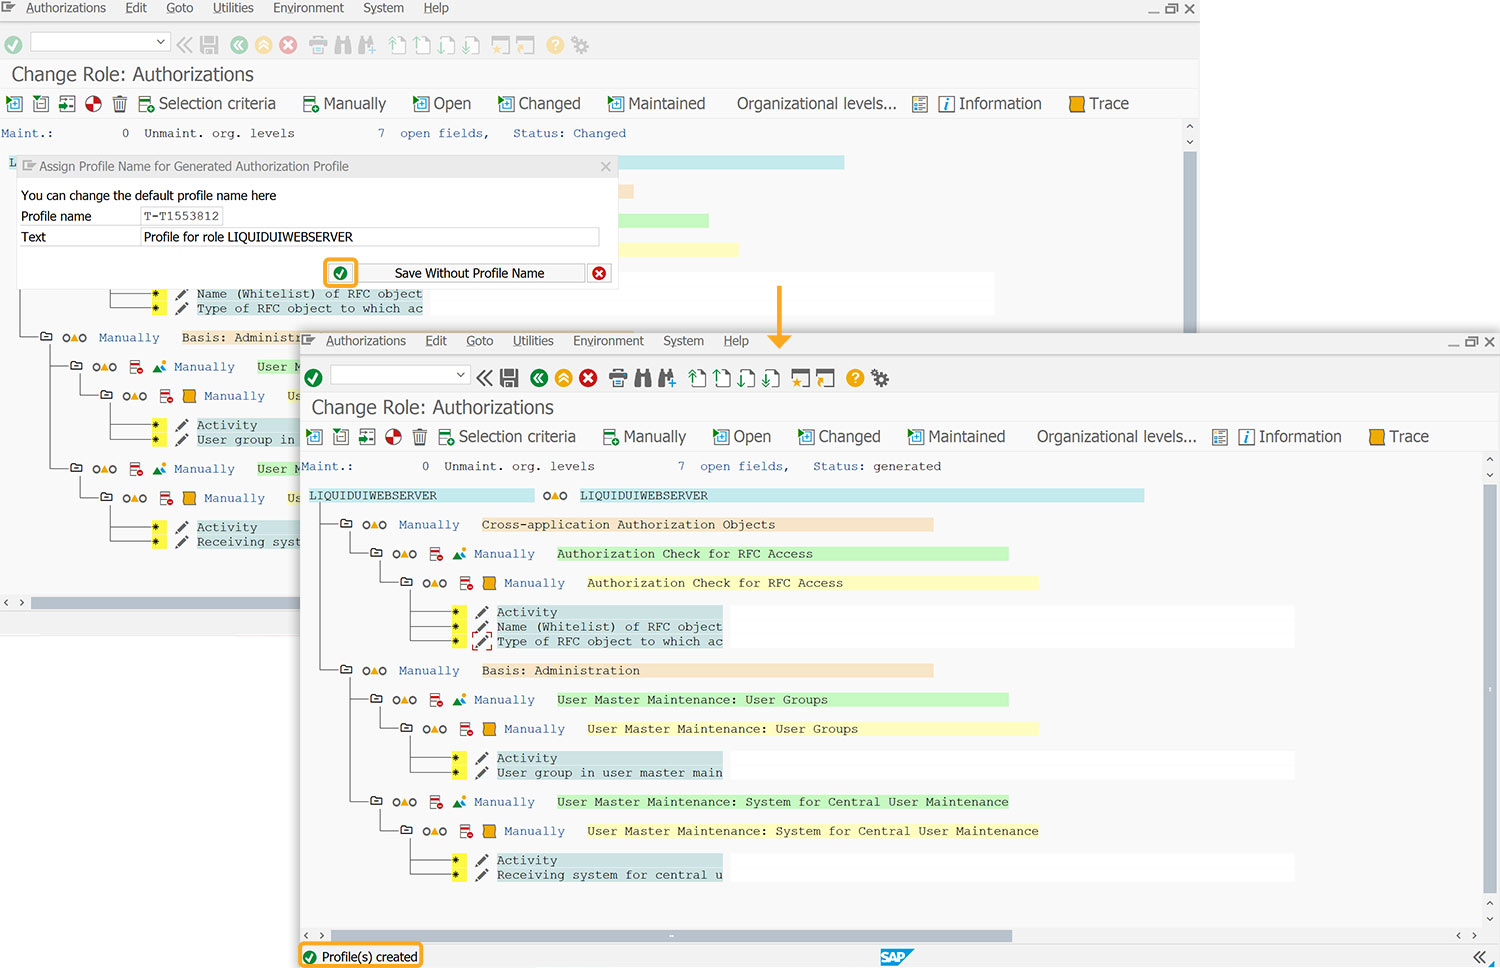
- Click the Generate button on the toolbar. Then the Generate profile popup will appear. Click Generate to proceed, as shown below.

- On the Assign Profile Name for Generated Authorization Profile popup, press Enter to continue. Then, you'll see the success message Profile(s) created at the bottom of the screen. With this, defining parameters is complete.
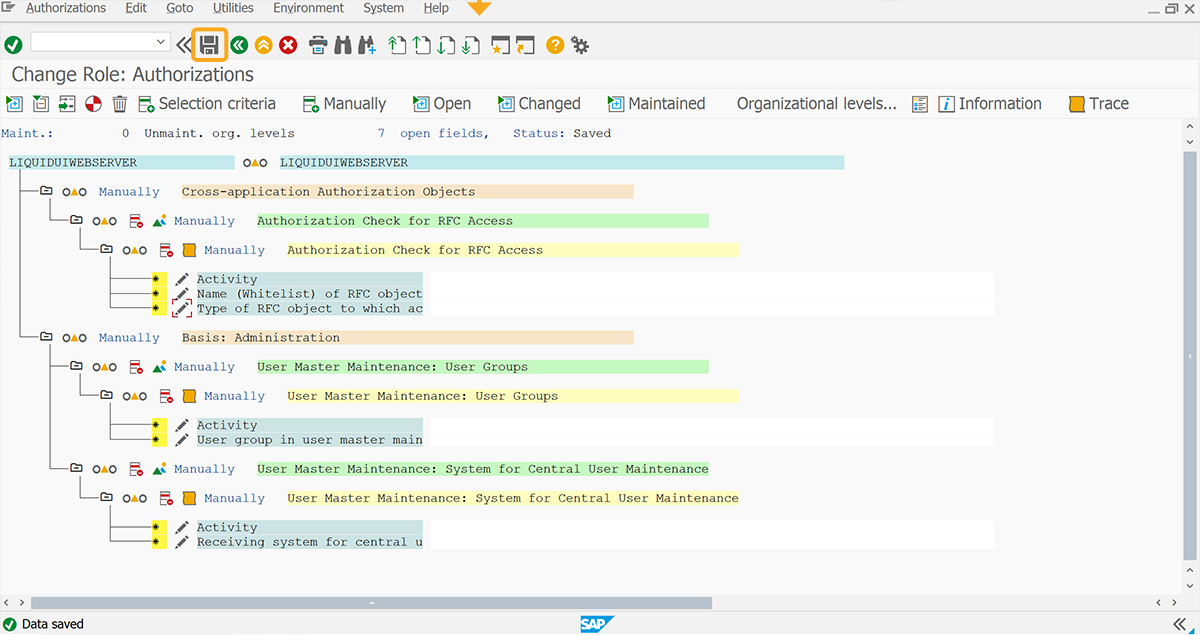
- Click Save on the appeared screen, as shown below.
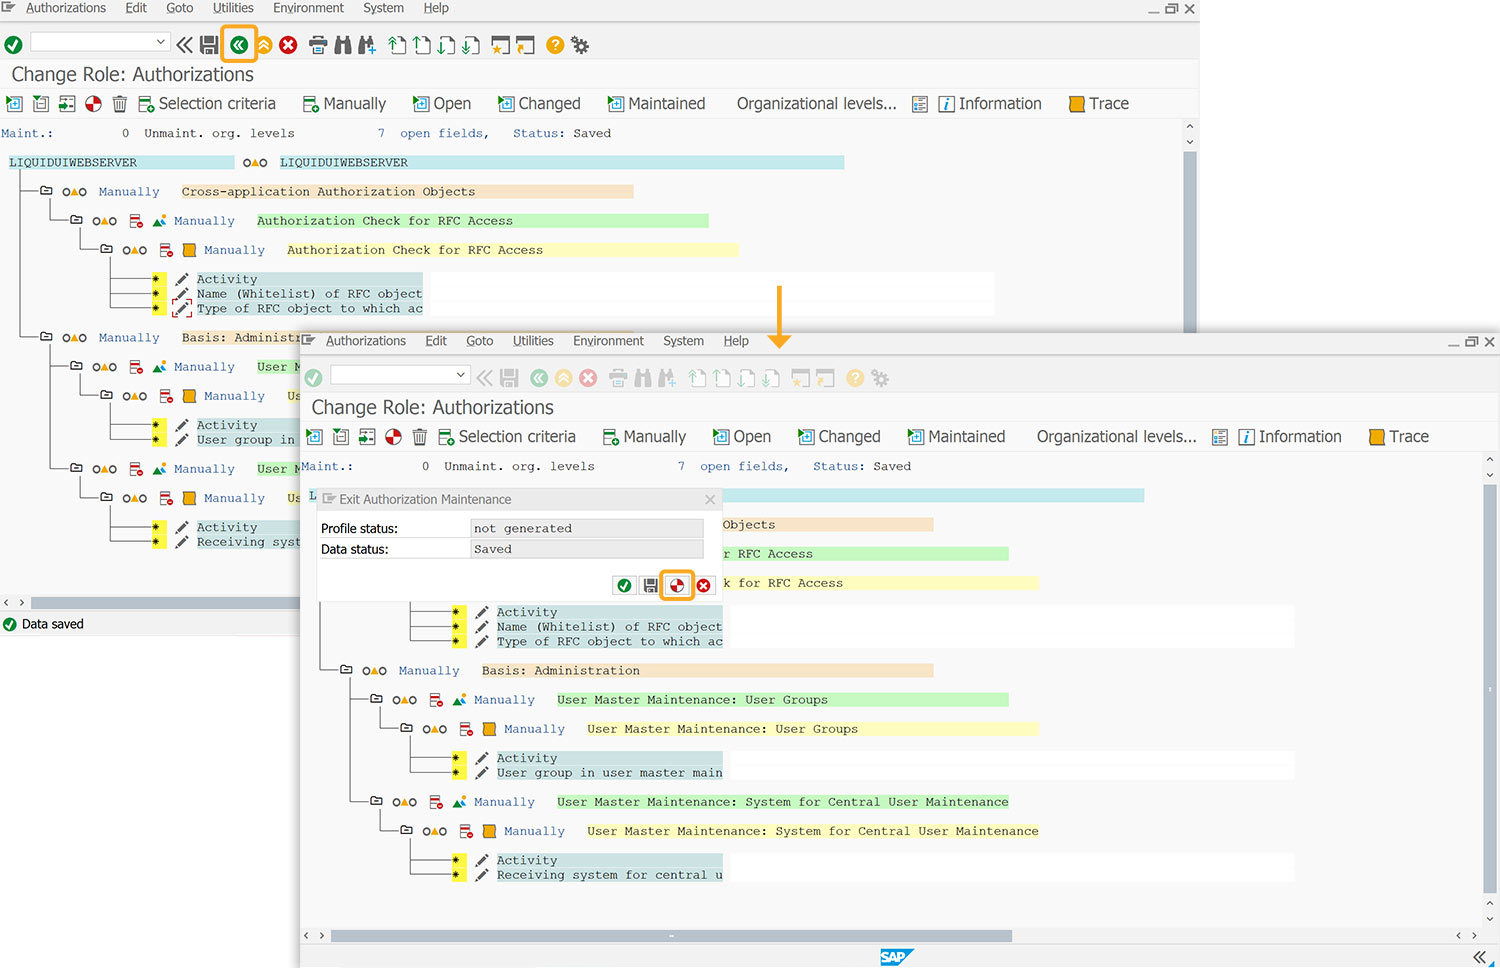
- Now, click the back button, and then the Exit Authorization Maintenance pop-up will appear click on the Generate icon.
- You will be navigated to the Change Roles screen, where you can see the Role name and message at the bottom of the screen as Profile(s) created.
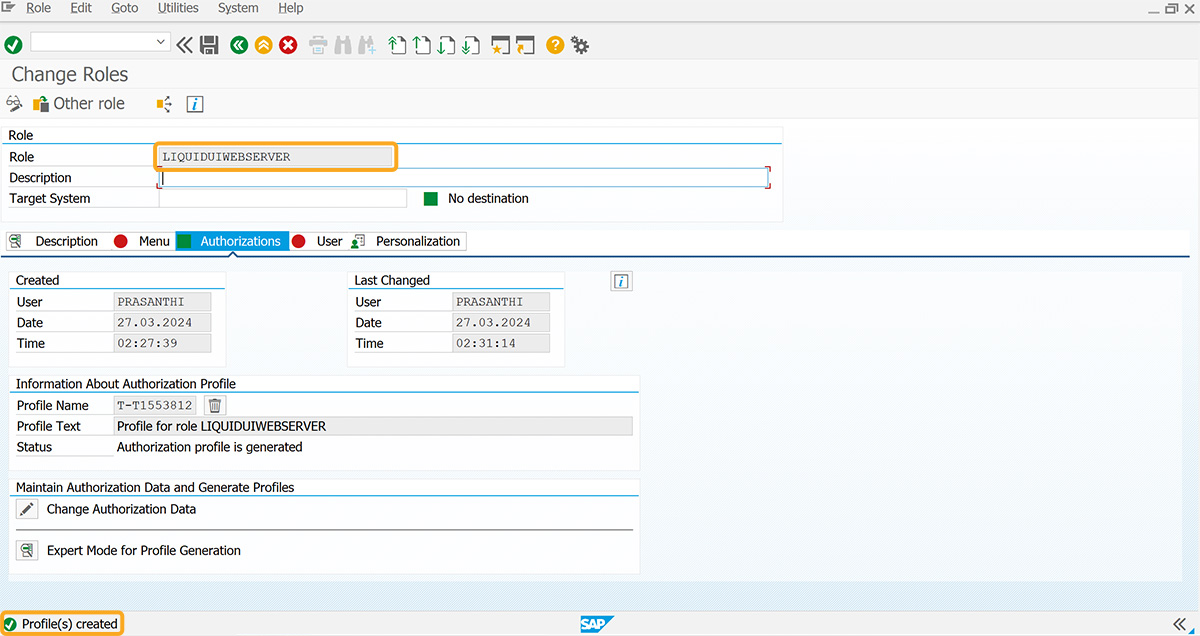
With this, profile creation comes to an end. Now, we have to assign this role (LiquidUISERVER) to the RFC user.
Assigning the Role of LIQUIDUISERVER to the RFCSource.
Follow the below steps to assign the role LIQUIDUIDSERVER to the user (RFCSource).
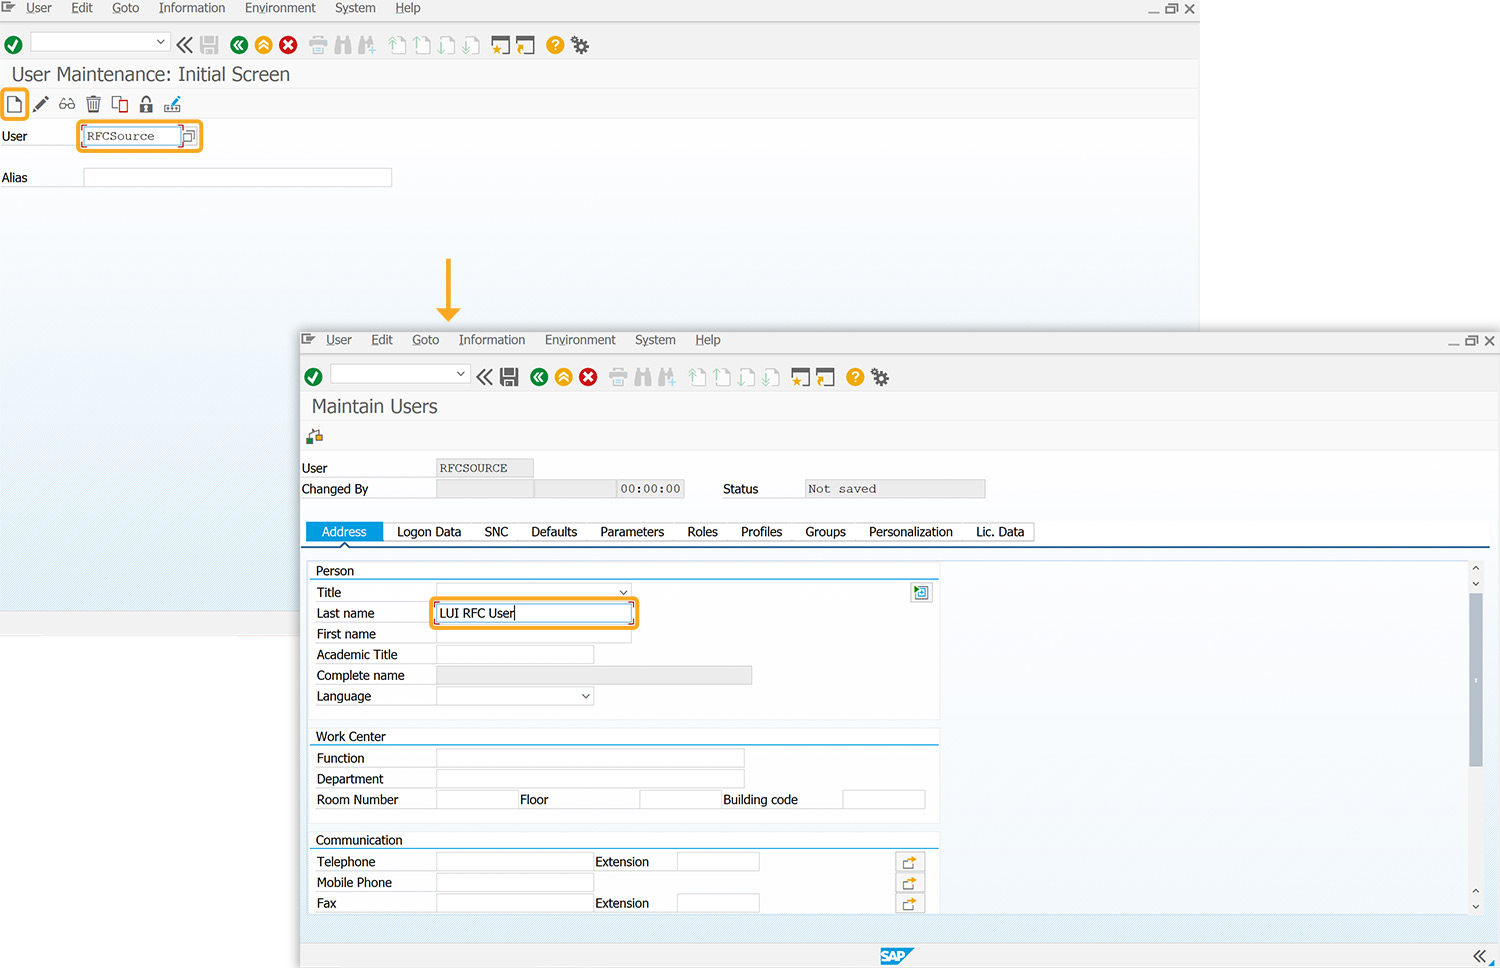
- Navigate to the SU01 transaction, and enter the user as RFCSource; click Create, and you will be navigated to the Maintenance Users screen, and enter the Last name as LUI RFC User.
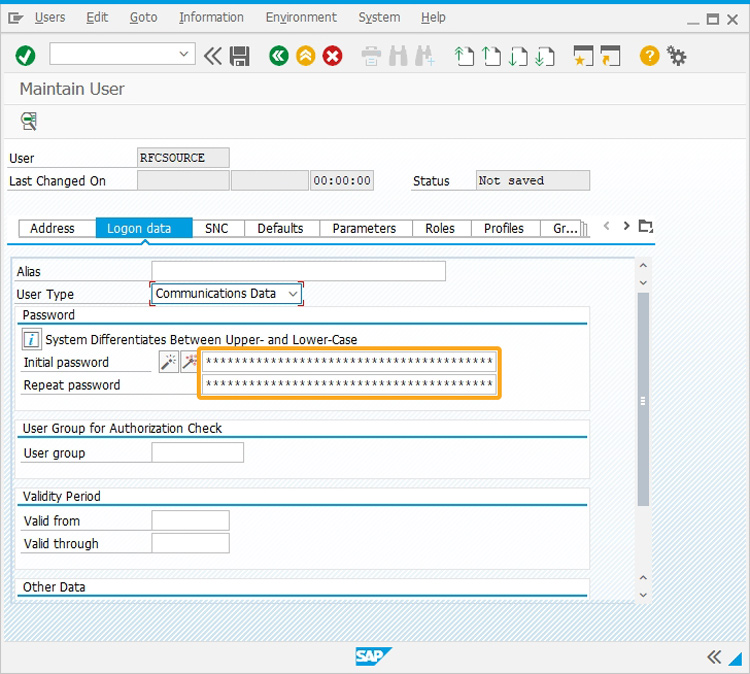
- Navigate to the Logon data tab, enter the password, and set the User Type as Communications Data.
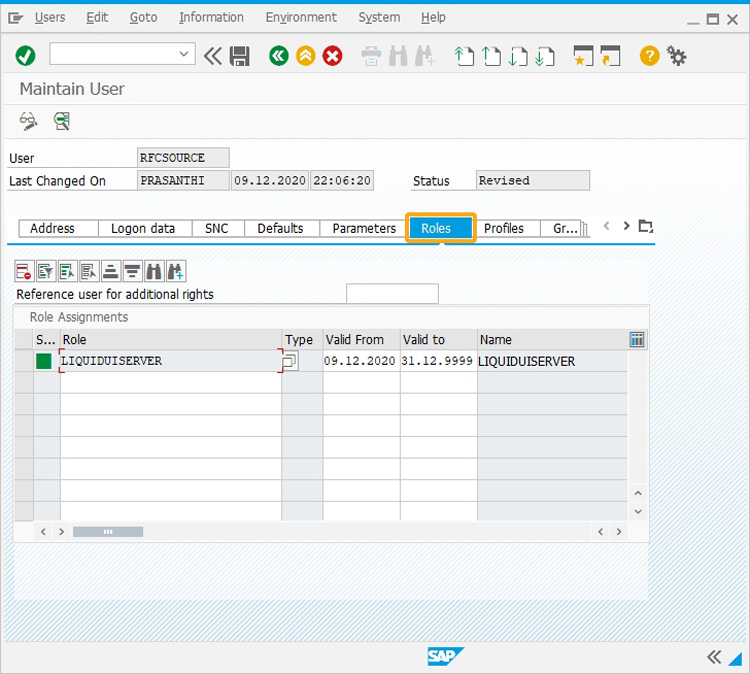
- In the appeared screen, click the Roles tab to add the role created.
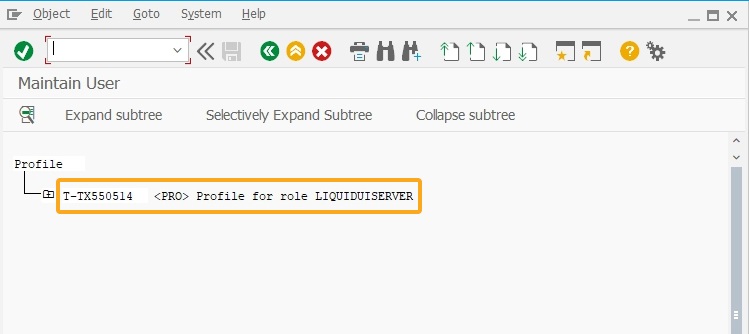
- Now, click the Profiles tab, as shown in the following image.
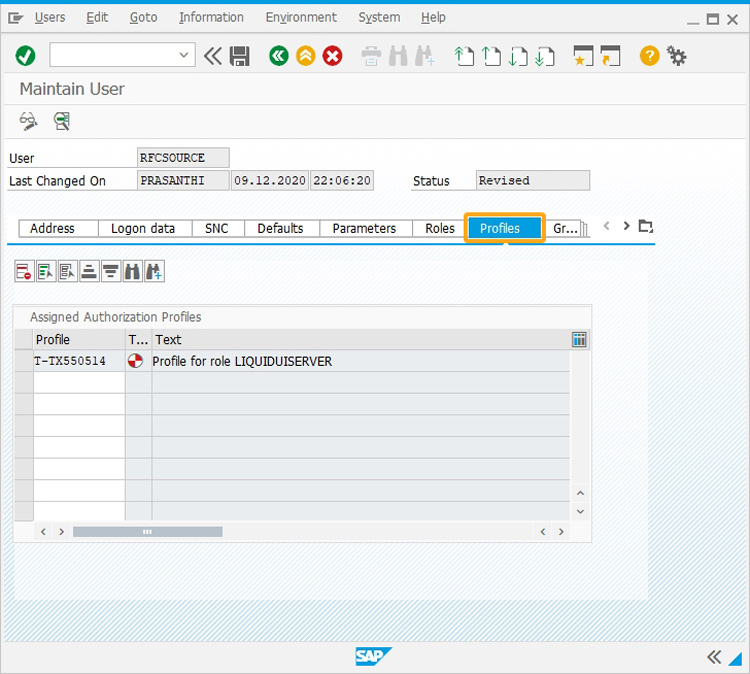
- Then, a window appears with the created profile LIQUIDUISERVER, as shown in the image below.
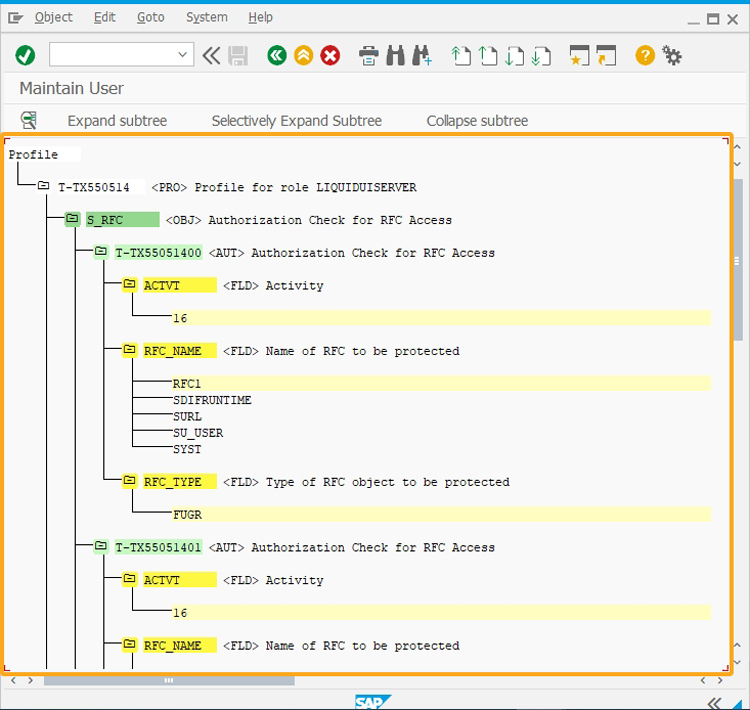
- Now, double-click on the created profile, and verify the authorizations.
- Click back, and then click Save.
- Hence, the role LIQUIDUISERVER is successfully assigned to the user RFCSource.