Prerequisites
- Products: Liquid UI WS, Liquid UI Server or Local DLL, Client Software
- Commands: del(), groupbox(), pushbutton()
Purpose
In this article, you will learn how to create a launch pad by generating the Liquid UI web scripts automatically while customizing the SAP screens using Liquid UI Designer. Please follow the steps outlined below:
- Log in to SAP and launch Liquid UI Designer
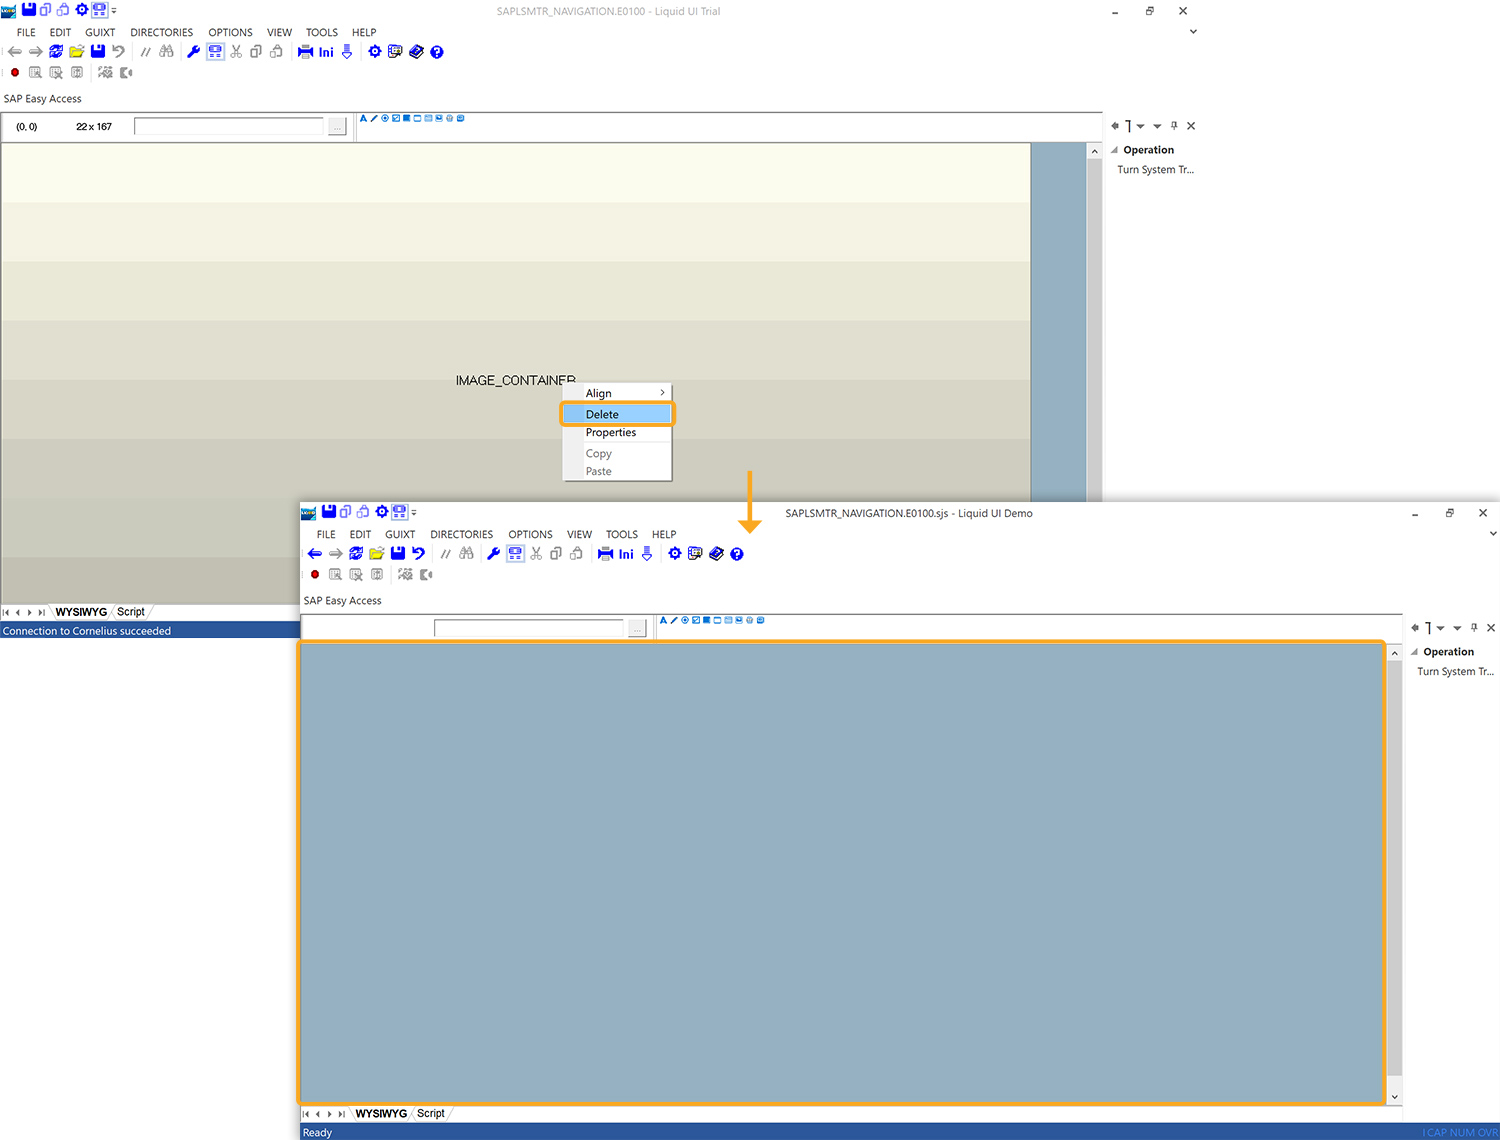
- Delete the image container on the screen
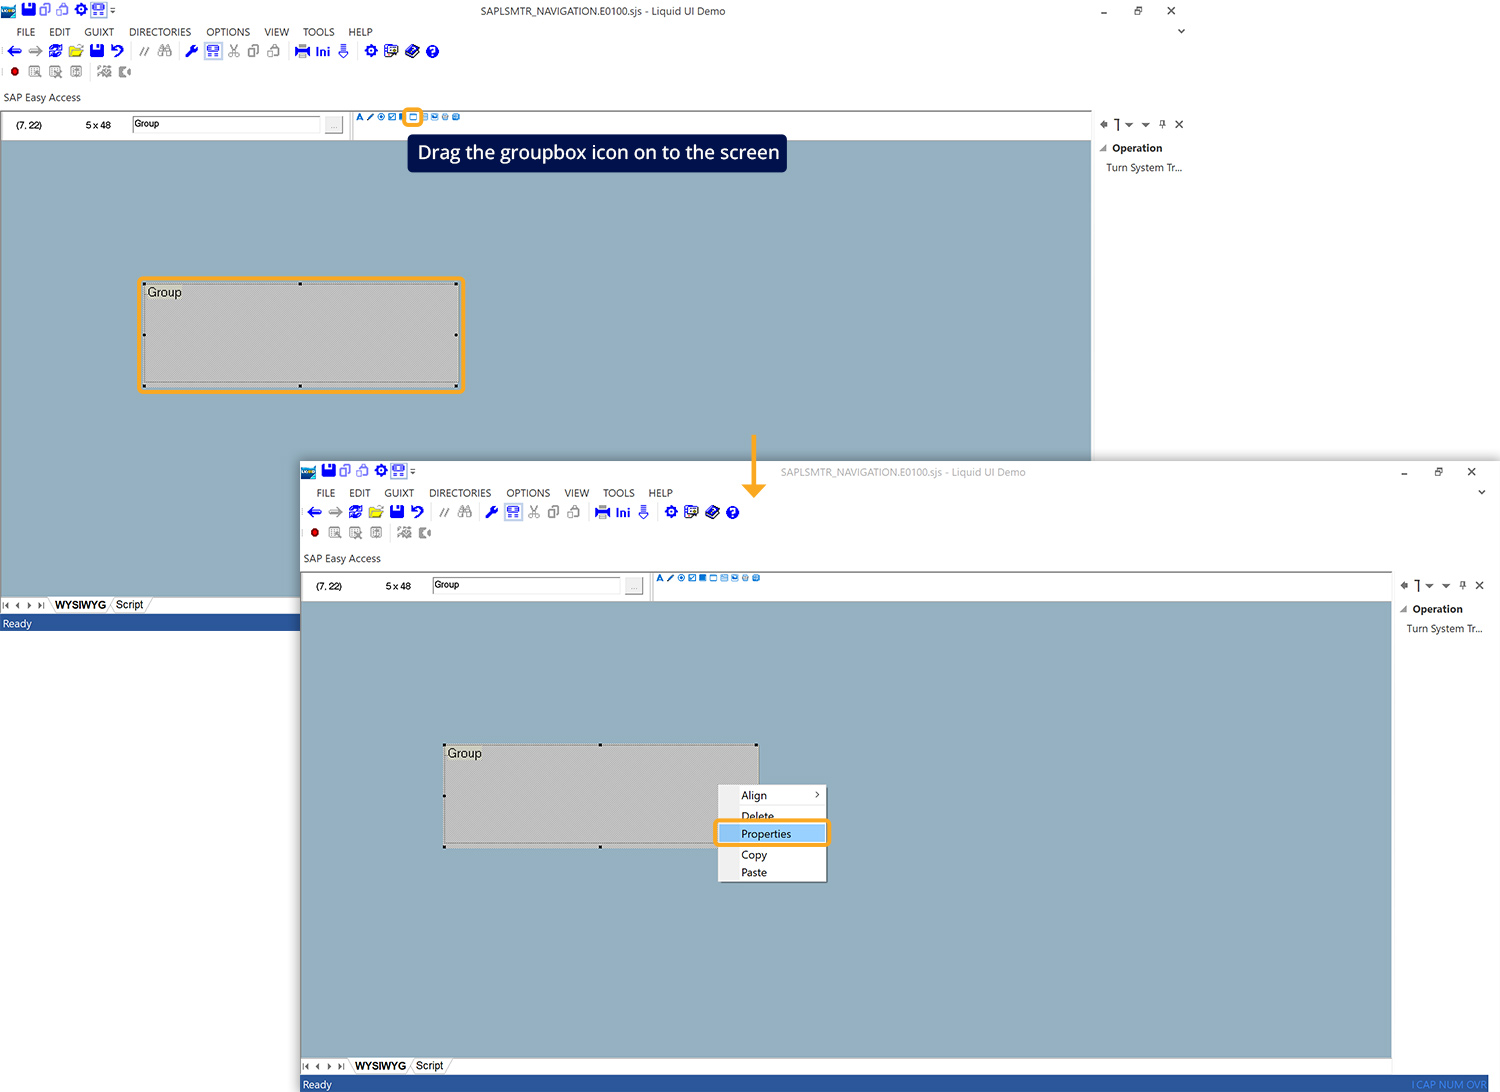
- Add a group box
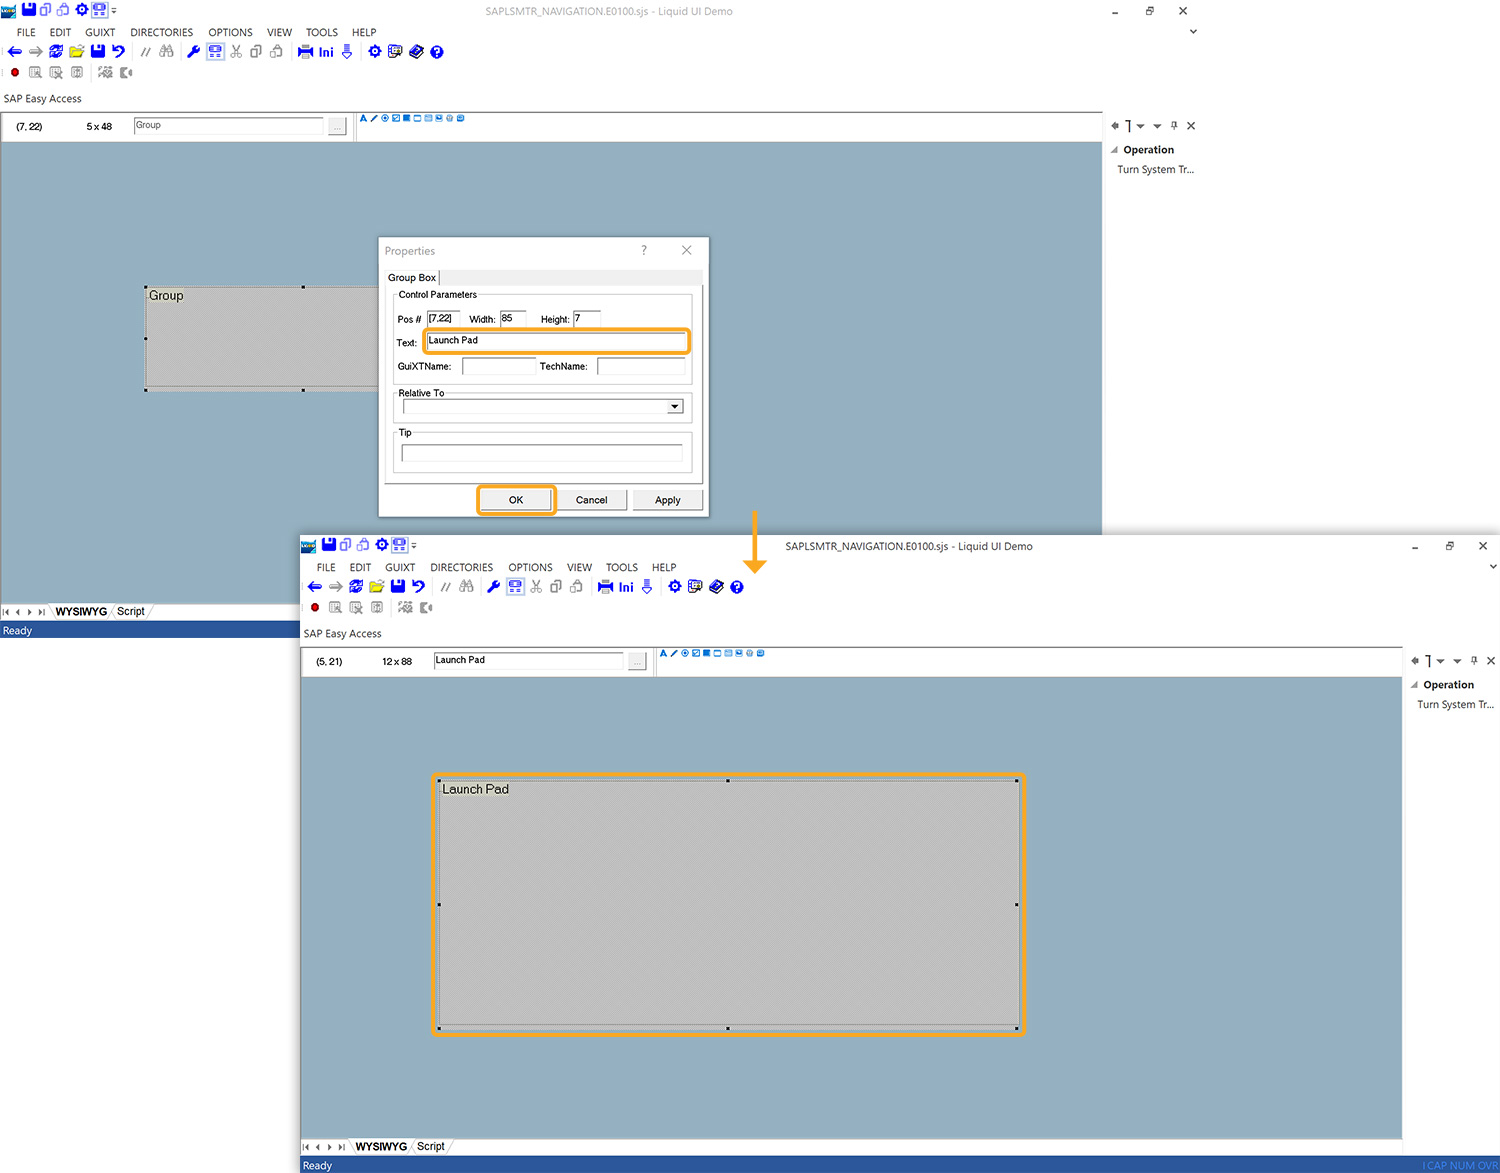
- Change the title of the group box
- Add a push button
- Change the title of the push button
- Enter the transaction code
Customization
Perform the following steps using Liquid UI Designer:
- To delete the image container on the Liquid UI Designer screen, right-click and select the Delete option, or press the “Delete” key on the keyboard.
- Add a Group Box by clicking on the group box icon and dragging it to your preferred location. Right-click on the group box, and select Properties where you can specify the title and choose the width and height, as shown below.
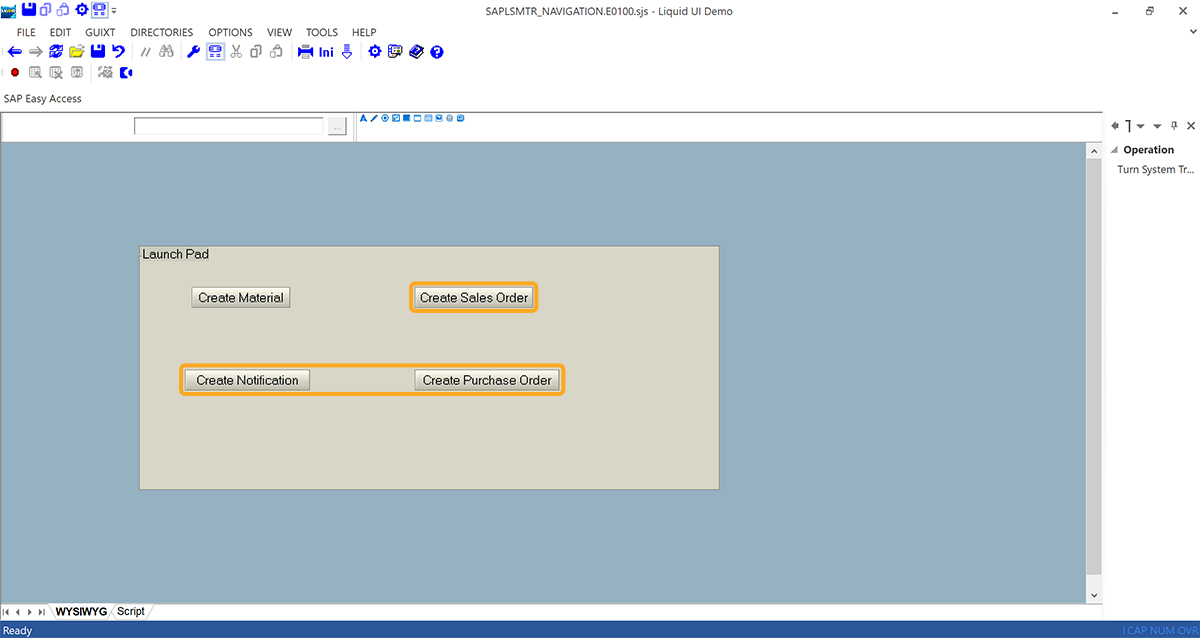
- Specify the text name(Launch Pad) of the Group Box, and click OK, as depicted in the image below.
- Add a push button by clicking on the push button icon and then dragging it to your preferred location. Right-click on the push button select Properties, specify the name(Create Material) of the push button, and click OK.

- Select the Command tab on the Properties window, specify the transaction name(/nmm01) and click OK, as shown below.
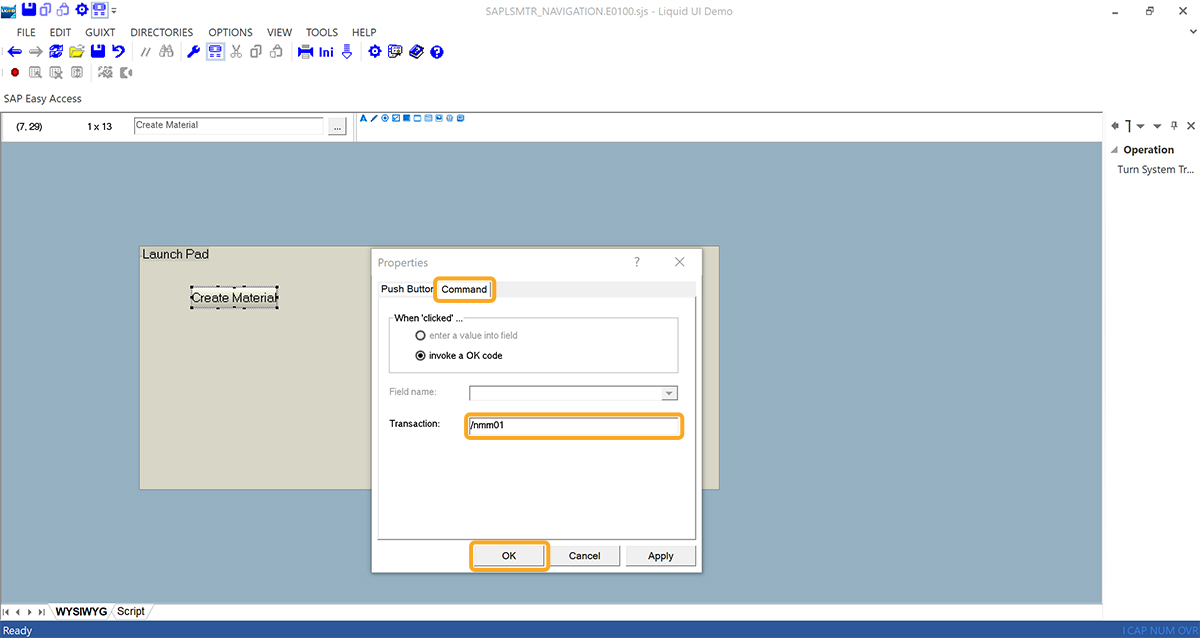
- Similarly, create three push buttons with labels Create Purchase Order, Create Sales Order, and Create Notification.
- Click on the Script tab for the WS script for creating a launch pad.