Liquid UI allows users to predefine various app attributes using the Liquid UI Access Management Portal (LAMP). Remote settings involve configuring and managing app settings on Android/iOS devices via LAMP. This article will guide you through the process of remotely configuring your app using LAMP.

Follow the below steps to configure your app remotely using LAMP.
- Log into LAMP and navigate to the Account Table containing the list of available accounts.
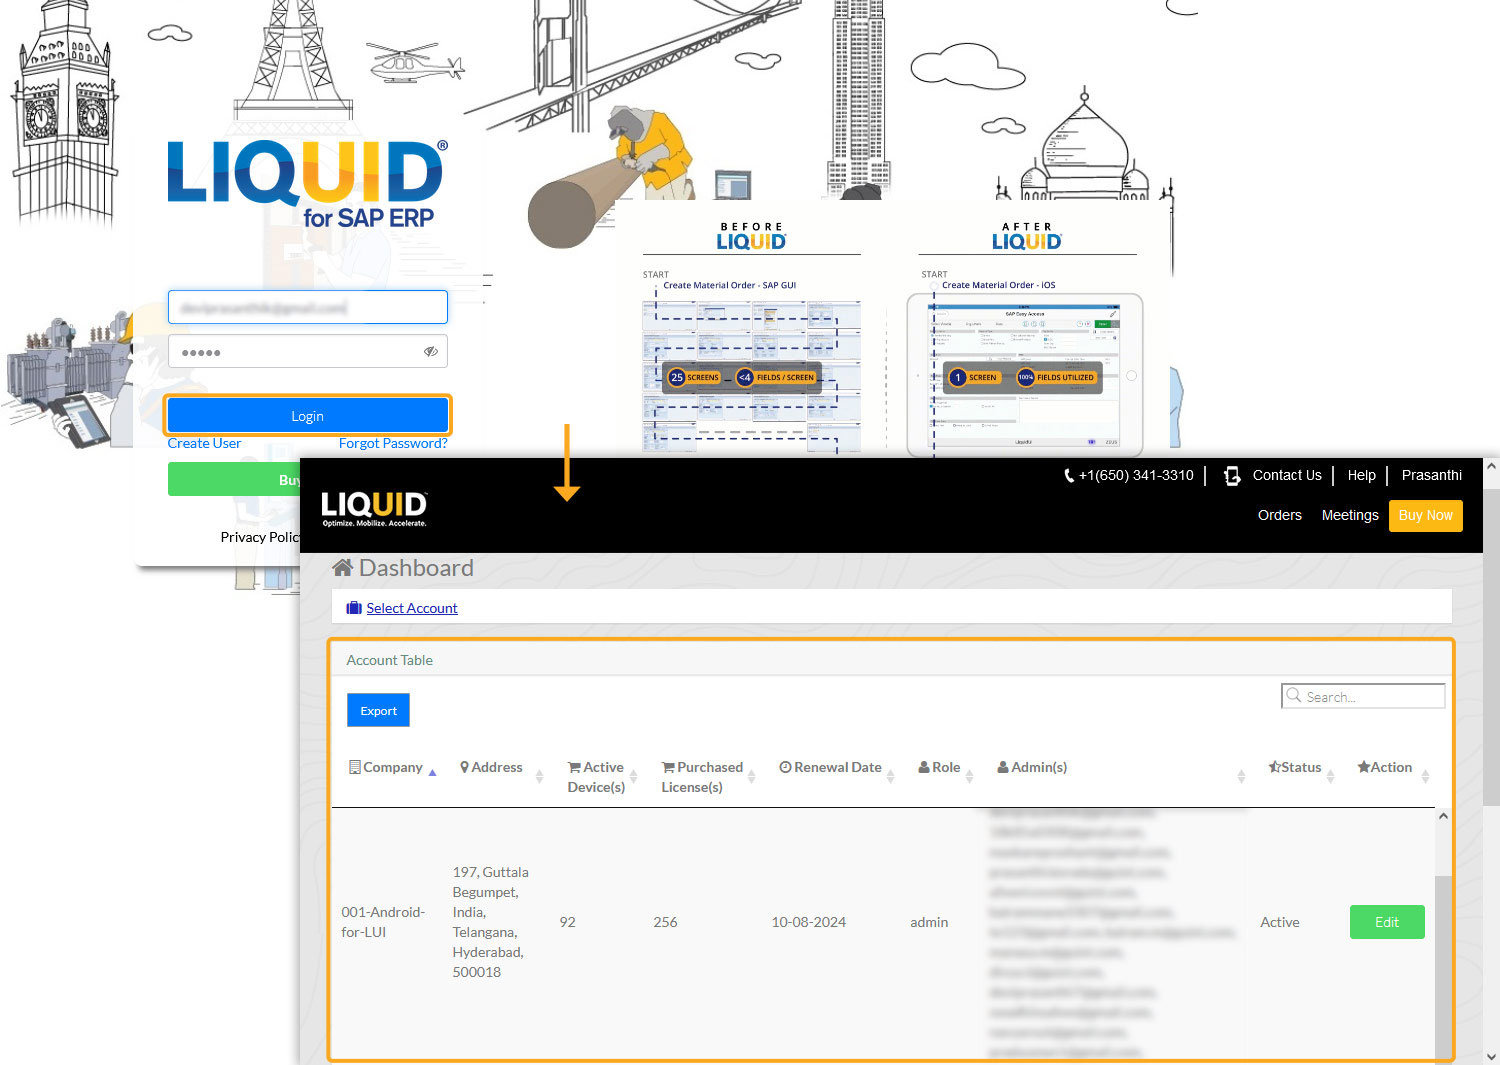
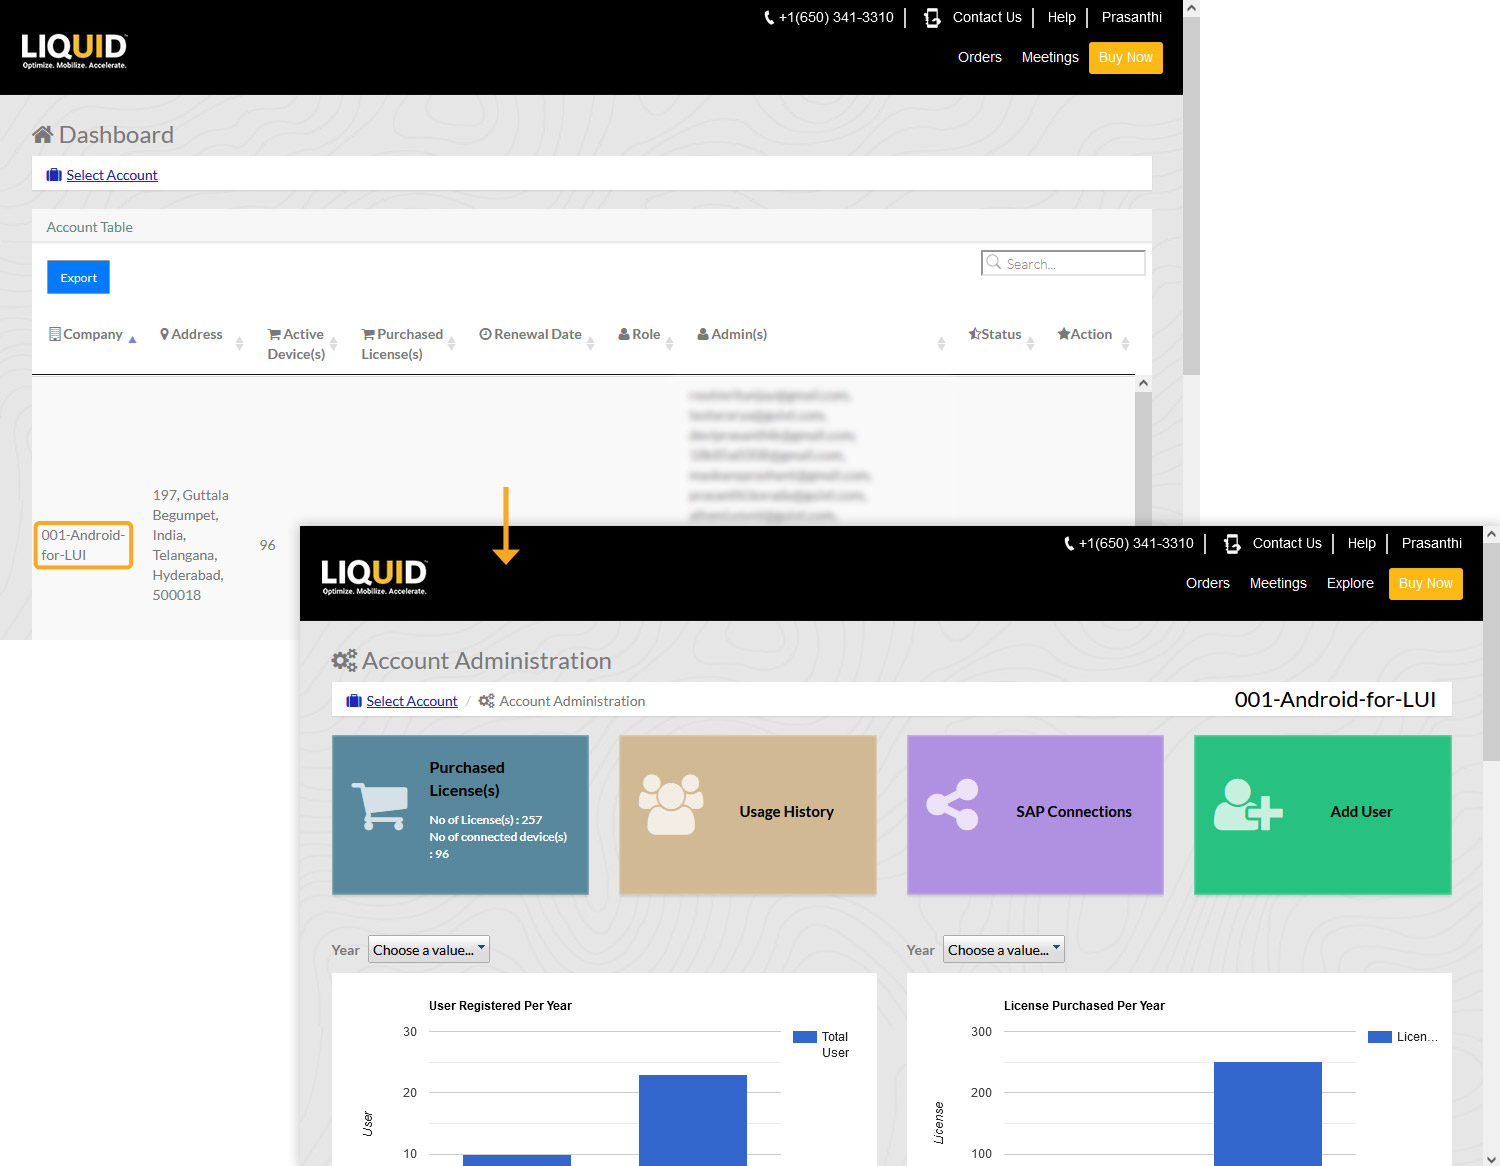
- Select your desired account from the table to proceed to the Account Administration screen, as shown below.
- Click on User Groups under the Explore menu. This will display the User Group table with all available user groups.Select any User Group to add remote settings. In this example, we will add remote settings to the Synactive user group. Now, click this action icon
to view the details of the user group.

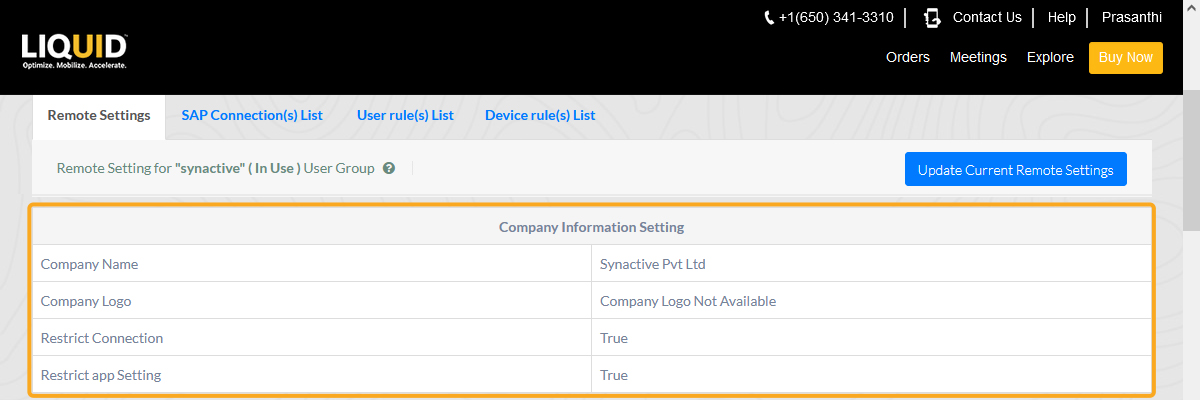
- A window will appear with four tabs: Remote Settings, SAP Connection(s) List, User rule(s) List, and Device rule(s) List, as shown below. Click on Remote Settings. You will be navigated to the Remote Setting for XXX User Group screen. In this case, for the Synactive User Group.
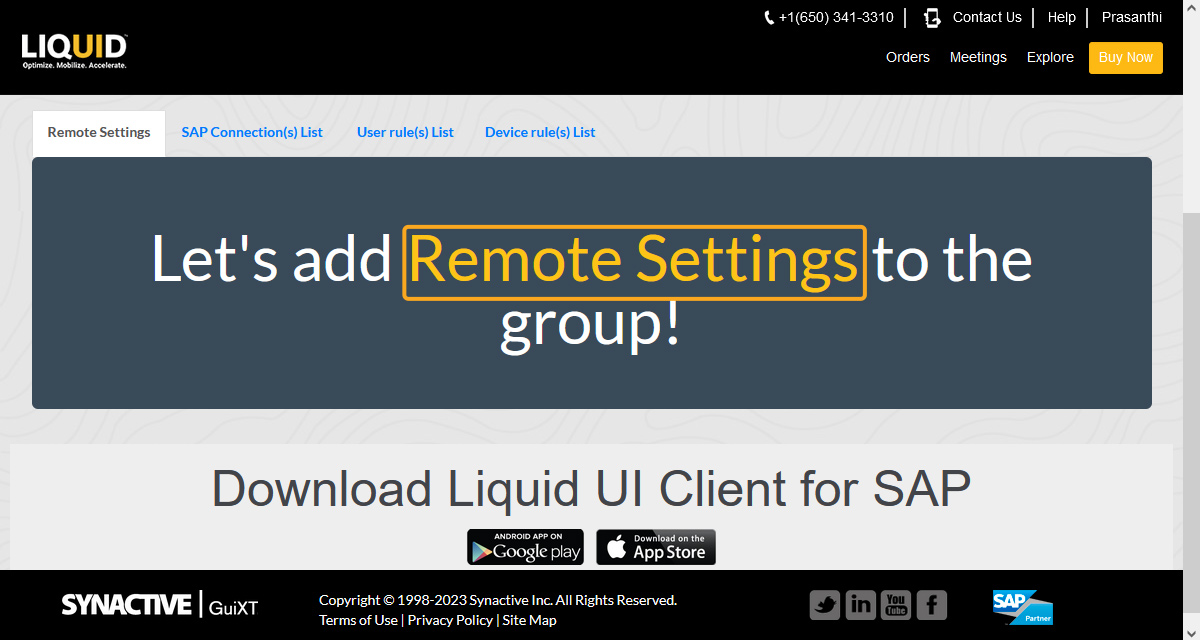
Here you can customize the following remote settings:
Company Information Setting – Here, you can customize the app using the following attributes:
- Company Name: Displays the company name to individual client devices.
- Company Logo: Displays your company logo on the top of SAP screens.
- Restrict Connection: Allows users to remotely manage connections.
- Restrict app Setting: Limits user access to essential day-to-day operations and hides the rest.
Text and System Message Settings – Here, you can control format settings:
- Font Size: Allows users to adjust text size for better readability and user experience.
- Font Color: Users can select their preferred text color. This option is available only for Android devices.
- Font Type: Allows users to select their preferred font type.
- Message Style: Users can customize SAP system messages (success, warning, and errors).
- Message Icon: Allows users to select SAP icons or Liquid UI icons for system messages.
- Dialog Box at Message: Users will receive dialog box notifications for messages. This is the default option, available only for iOS devices.

Control Settings – Here, you can control the layout of the app using the following:
- Table Layout: Customize the SAP table view with two options –
- SAP Layout - Displays column names in abbreviated form
- Readable Layout - Allows users to view full column names with wider table cells
- Grid Layout: Set your preferred SAP grid layout
- SAP Layout - Displays column names in abbreviated form
- Readable Layout - Allows users to view full column names with wider table cells
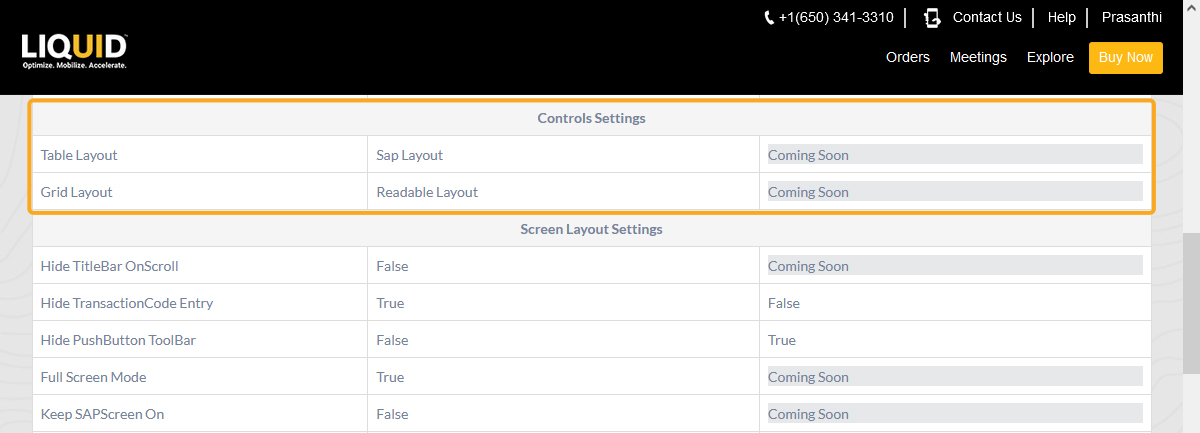
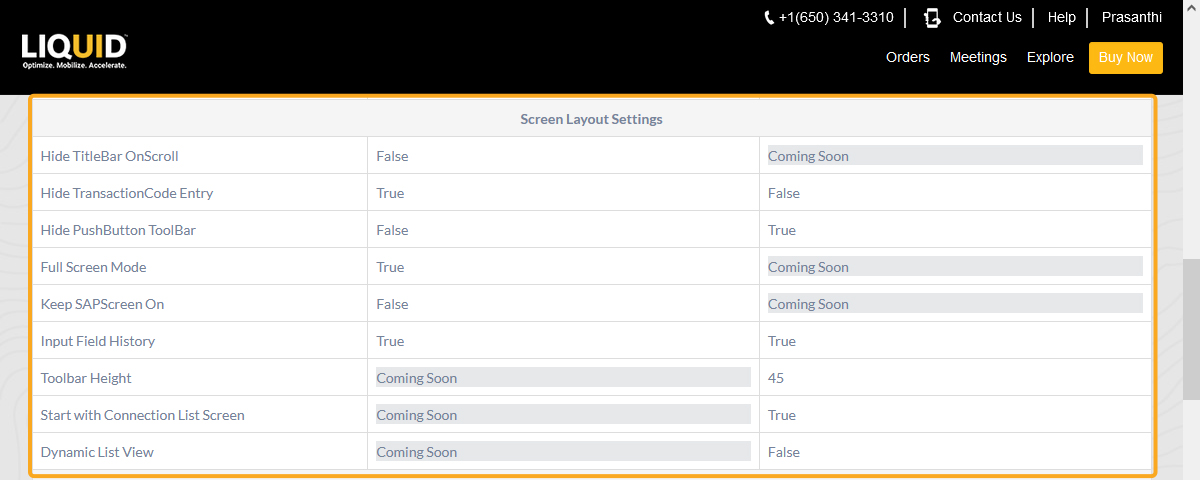
Screen Layout Settings: Here, you can modify the SAP screen layout:
- Hide TitleBar OnScroll: Hides SAP screen title bar while scrolling up.
- Hide TransactionCode Entry: Hides the transaction code field on the title bar.
- Hide PushButton ToolBar: Hides the toolbar push button on the SAP screen.
- Full Screen Mode: Hides the status bar and navigation bar on top and bottom on top of the screen.
- Keep SAPScreen On: Keeps device screen alive and prevents from locking during inactivity.
- Input Field History: Allows access to previously entered information in input fields.
- Toolbar Height: Adjust toolbar height for a better user experience. This option is available only for iOS devices.
- Start with Connection List Screen: Always opens the app with a connection list screen, allowing SAP system selection. This option is available only for iOS devices.
- Dynamic List View: Enables quick search for specific transactions or reports using the search box. This option is available only for iOS devices.
Keyboard Settings: Here, you can control the basic keyboard settings of the app using the following options.
- ShowKeyboardOnFocus: Enables keyboard focus.
- Show text on focus: Displays text when focused.
- Place cursor at the end of text: Positions cursor at text’s end.
- OnkeyPrimeListener(for attached scanner(s)): Allows scanning with inbuilt scanners.
- Process Command Keys for attached scanner(s): Allows scanning using keyboard commands.
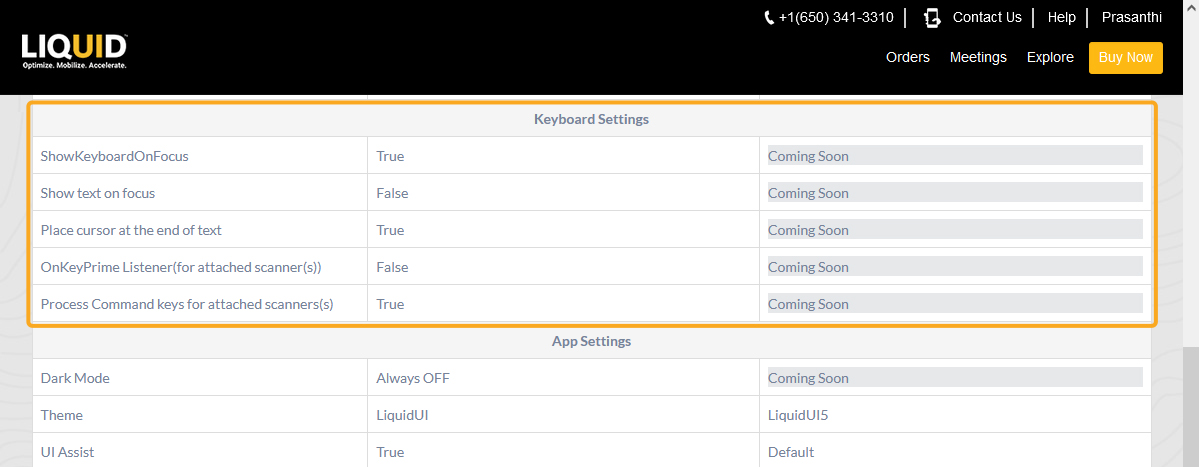
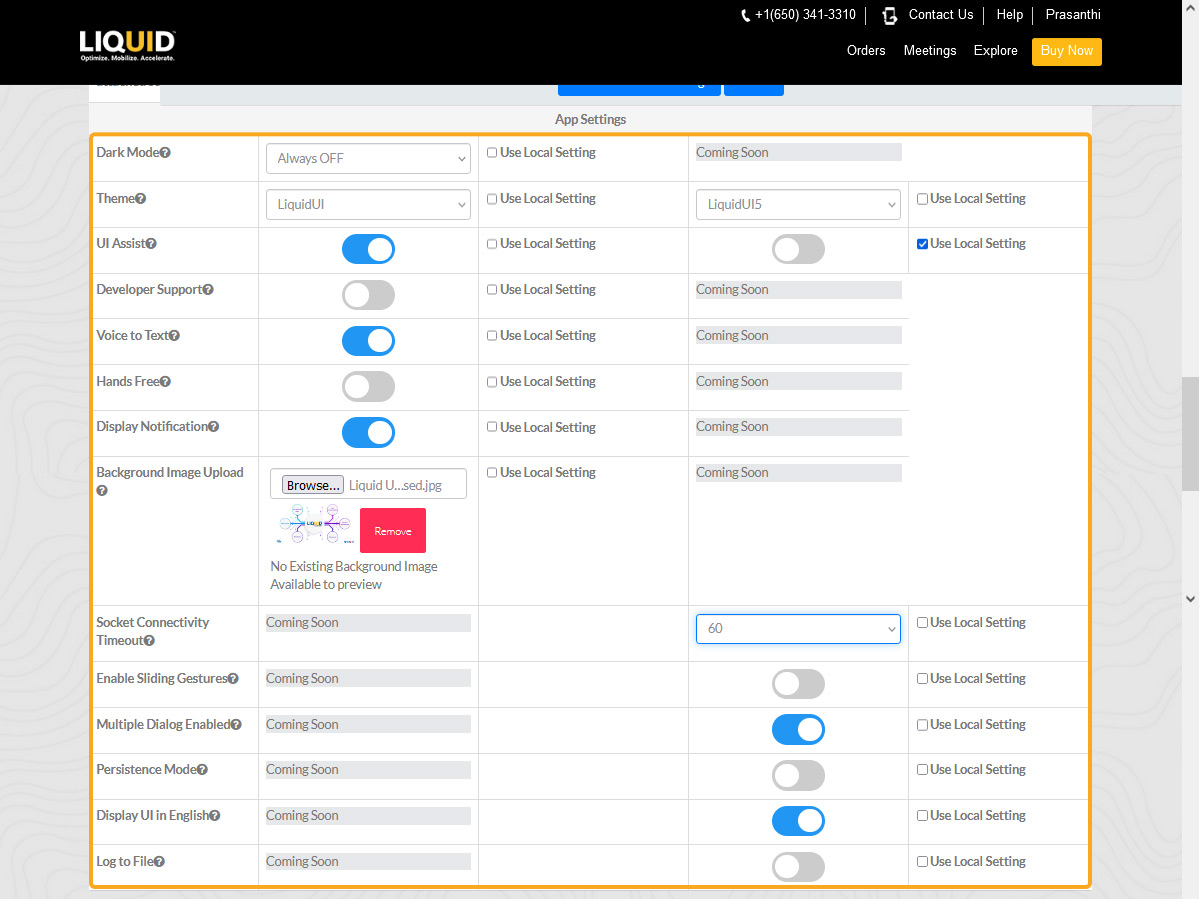
App Settings: Here, you can control the basic settings of your Liquid UI for Android and Liquid UI for iOS.
- DarkMode: Improves content visibility in low-light environments.
- Theme: Enable this option to change the theme and look of the user interface.
- UI Assist: Enable this option to perform actions through voice commands.
- DeveloperSupport: Enable trace logging and email logs to resolve issues that occurred while using the Liquid UI App.
- Voice To Text: Perform actions using voice commands.
- Hands Free: Enable hands-free actions with voice commands.
- Display Notification: Get notified about assigned actions or pending work.
- Background Image Upload: Set a custom background image in SAP.
App Settings that are only available for iOS Devices
- Socket Connectivity Timeout: Sets connection waiting time.
- Enable Sliding Gestures: Navigate with sliding gestures, such as Pinch open and close, double tap, and more.
- Persistence Mode: Stay connected to the network during idle or screen-off.
- Display UI In English: Change the display language to English.
- Log to File: Enable device activity logging to a file.