This article details configuring Multi-Factor Authentication (MFA) to your LAMP account. Follow the steps below to enable MFA.
Enabling MFA for your LAMP account
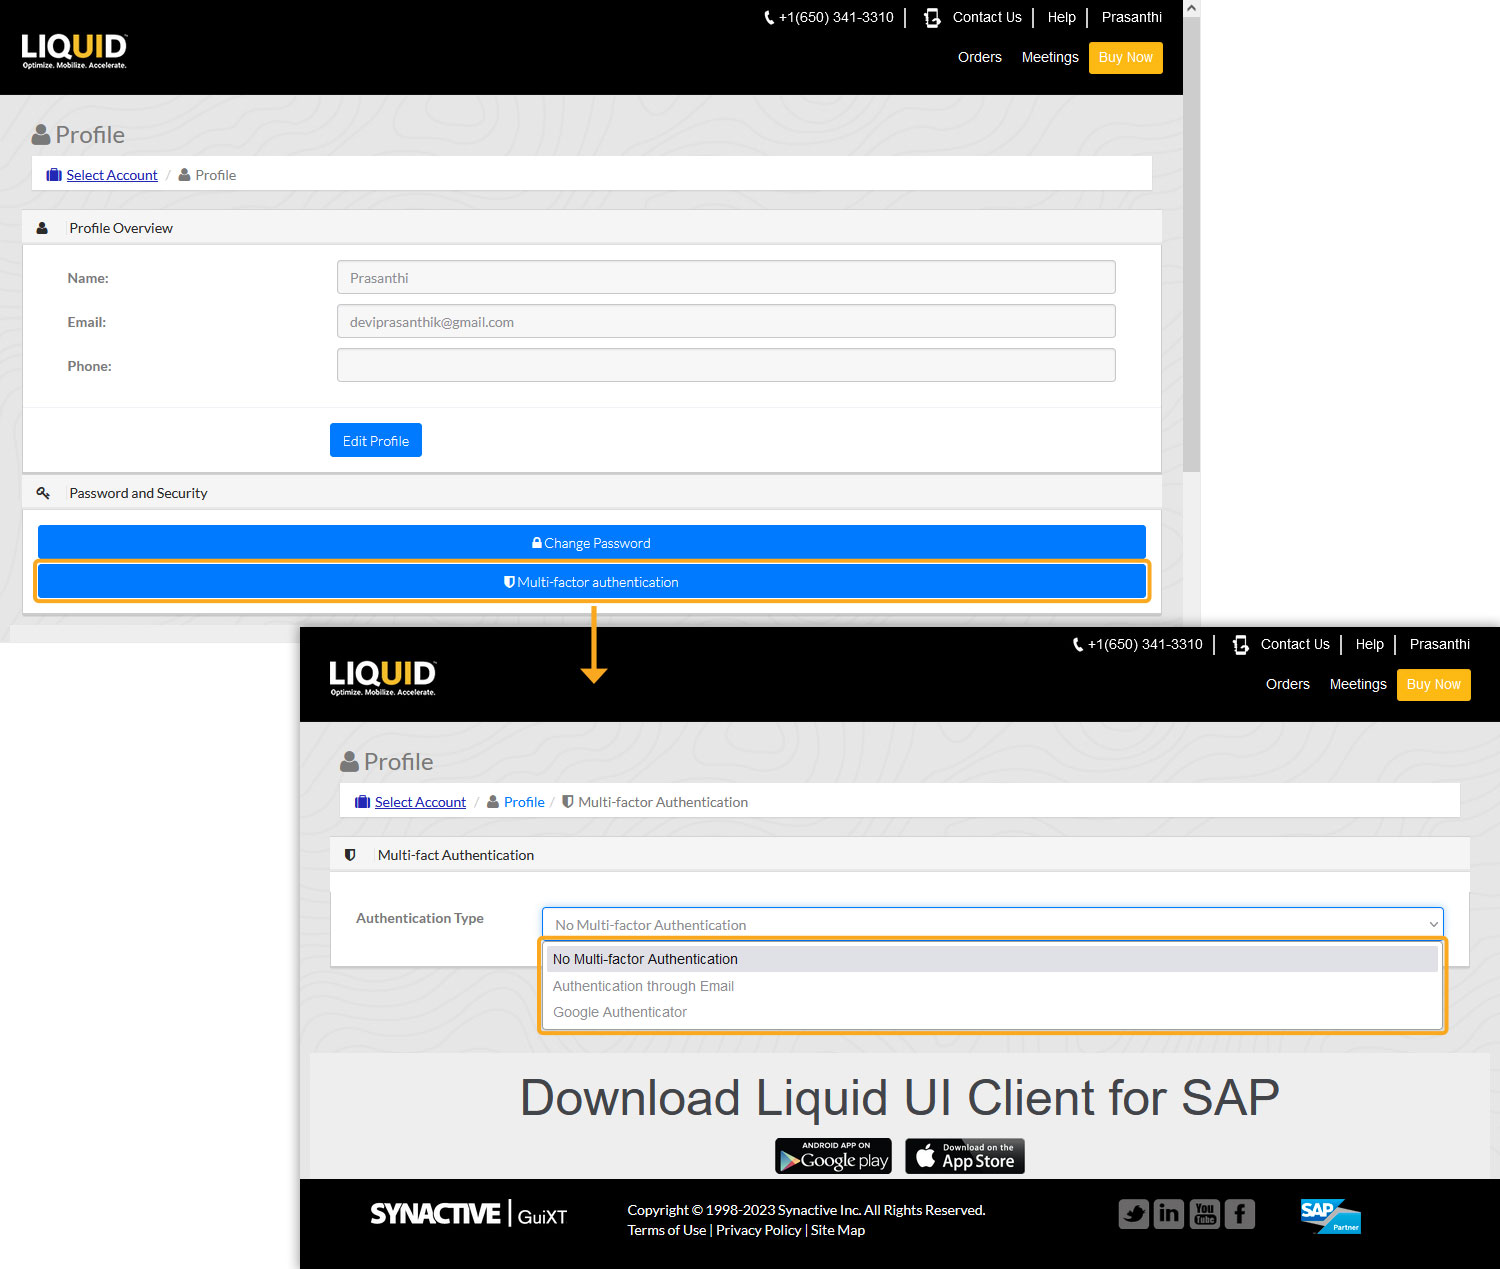
- Log into LAMP (ps.liquidui.com). Click on the username and choose My Profile from the drop-down menu. You will be directed to the Profile window, as shown below.

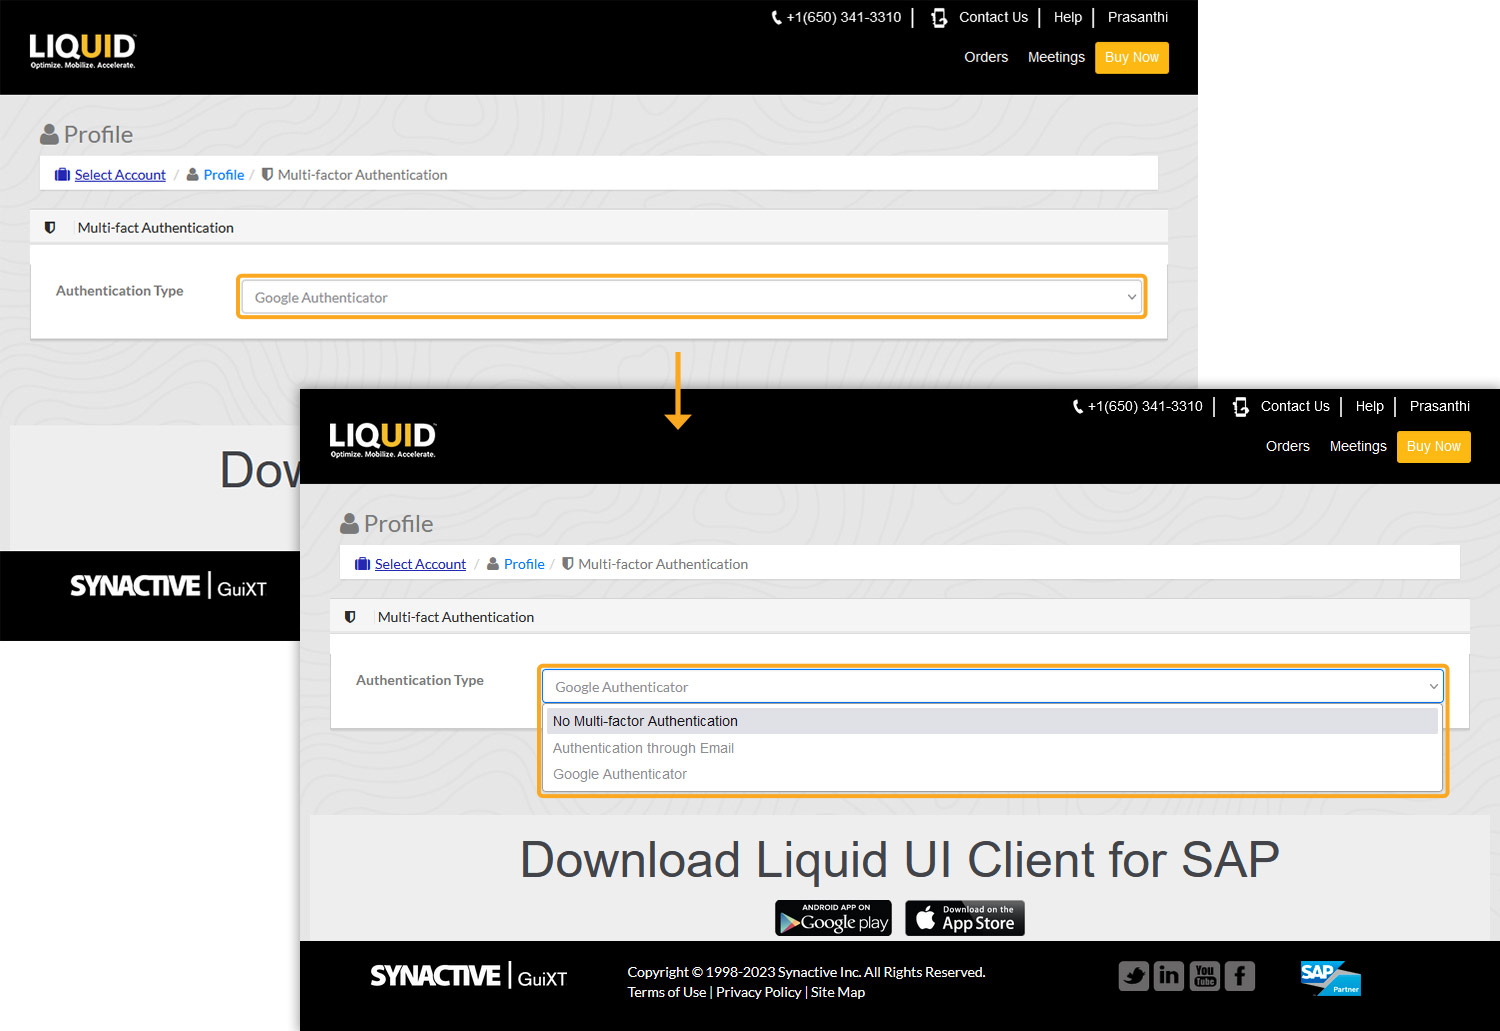
- Select the Multi-factor authentication option located under the Password and Security section, you will be directed to the Multi-fact authentication window containing the following authentication types:
- No Multi-factor Authentication (default type)
- Authentication through Email
- Google Authenticator
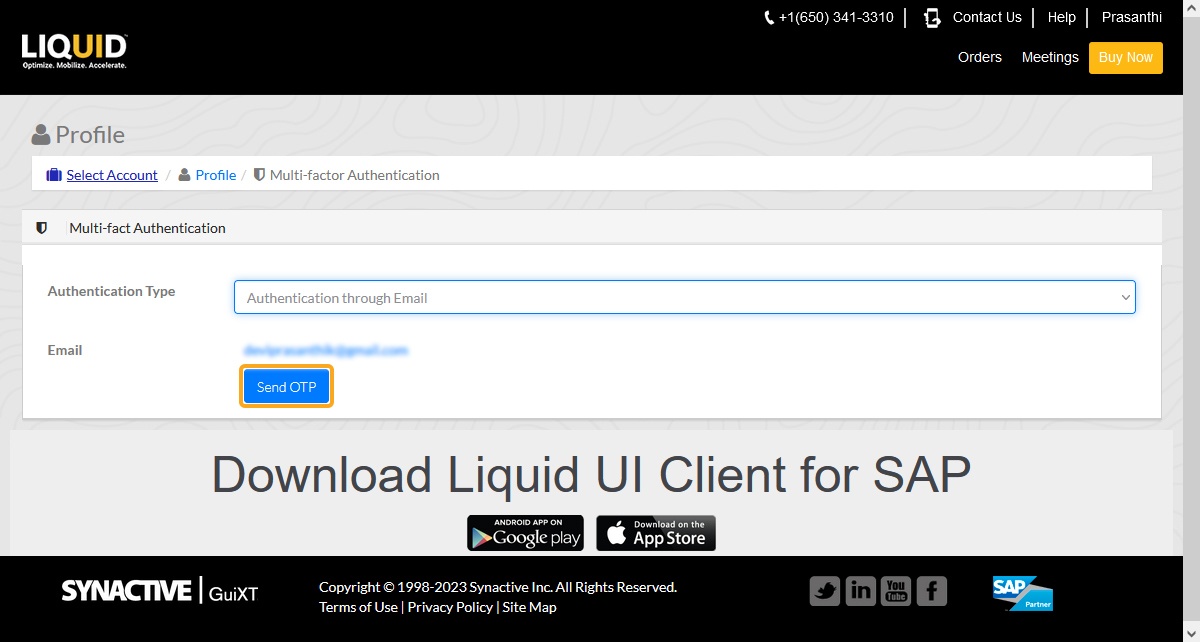
Authentication through Email
Enabling email authentication will result in a one-time password (OTP) being sent to your registered email address every time you log in. This OTP is a unique code with a limited validity period.
To configure this authentication method, follow these steps:
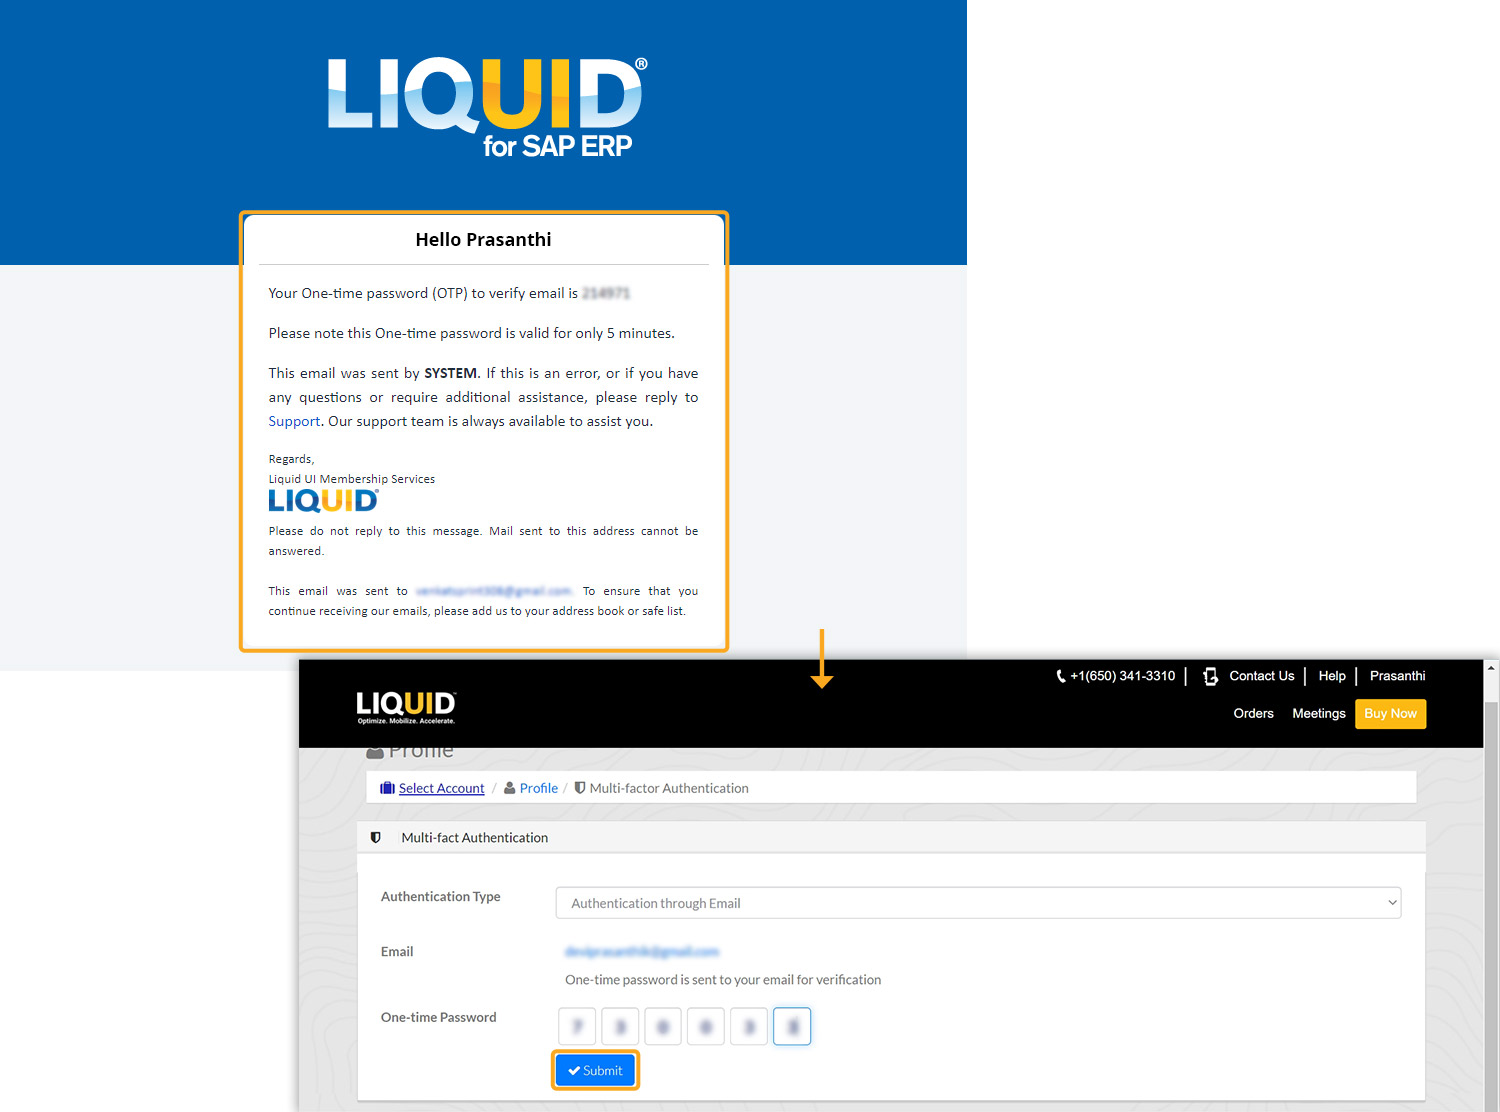
- Select Authentication through Email and click Send OTP to receive a 6-digit code to your email.
- Enter the OTP received via email and click Submit.
- A popup will appear stating Your Authentication preference has been updated!.

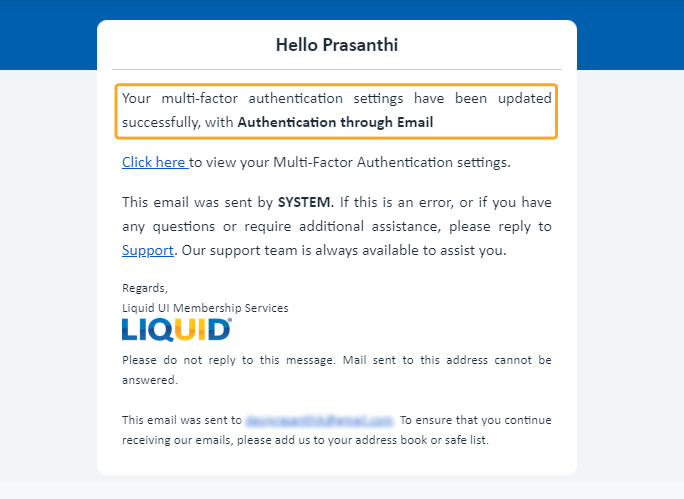
- You will receive an email from LAMP confirming the successful activation of Authentication through Email and a link to view your MFA settings.
Google Authenticator:
To set up Google Authenticator verification, please install the Google Authenticator app on your Android or iOS device and configure it using the system-generated QR code provided by LAMP.
Once you’ve downloaded the Google Authenticator app, follow these steps to configure Google Authenticator as your chosen MFA method:
- Select Google Authenticator. You will see a QR code and setup instructions.
- Follow the steps in the instructions box:
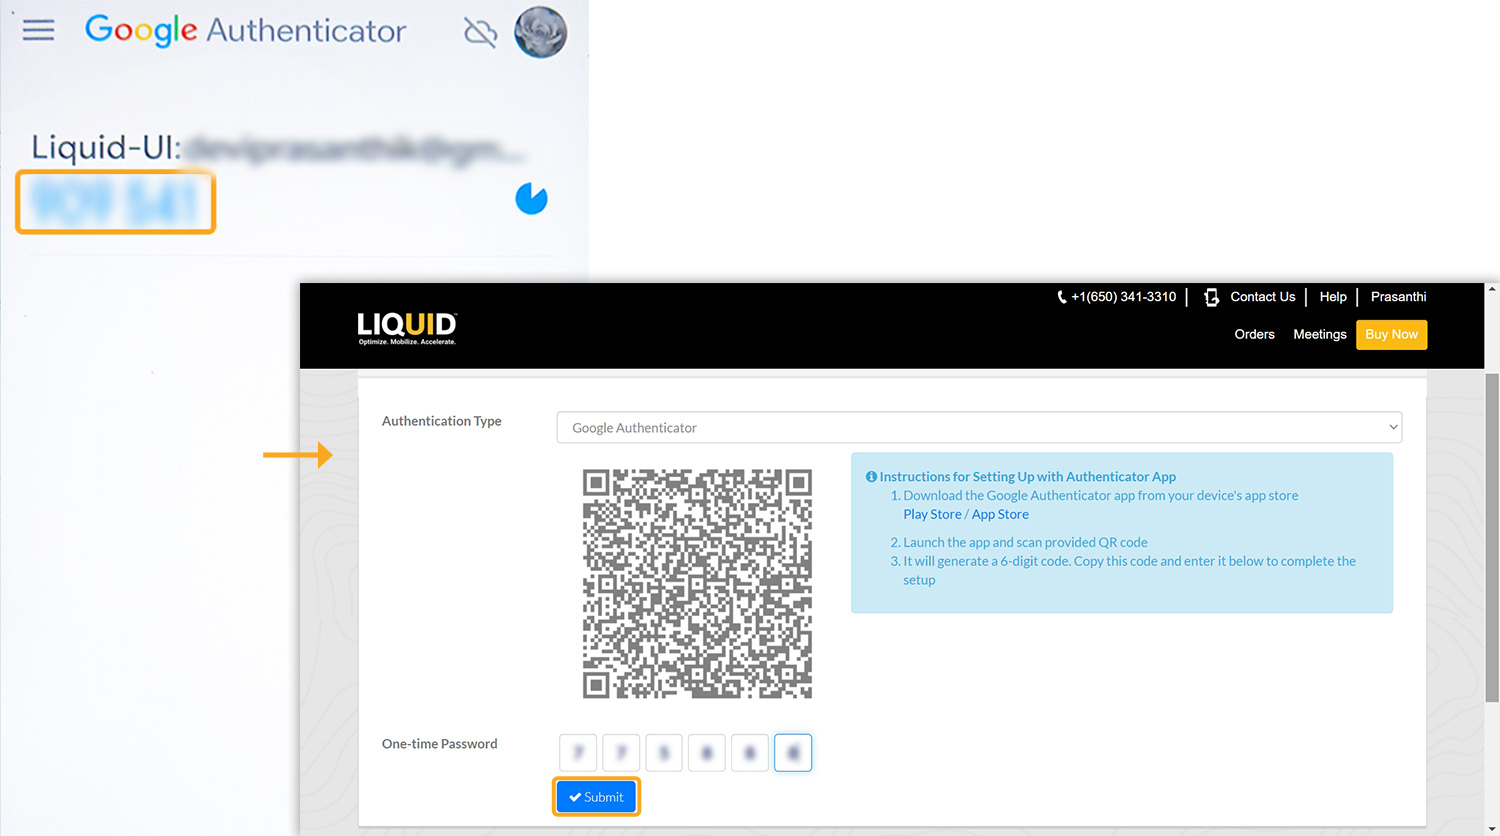
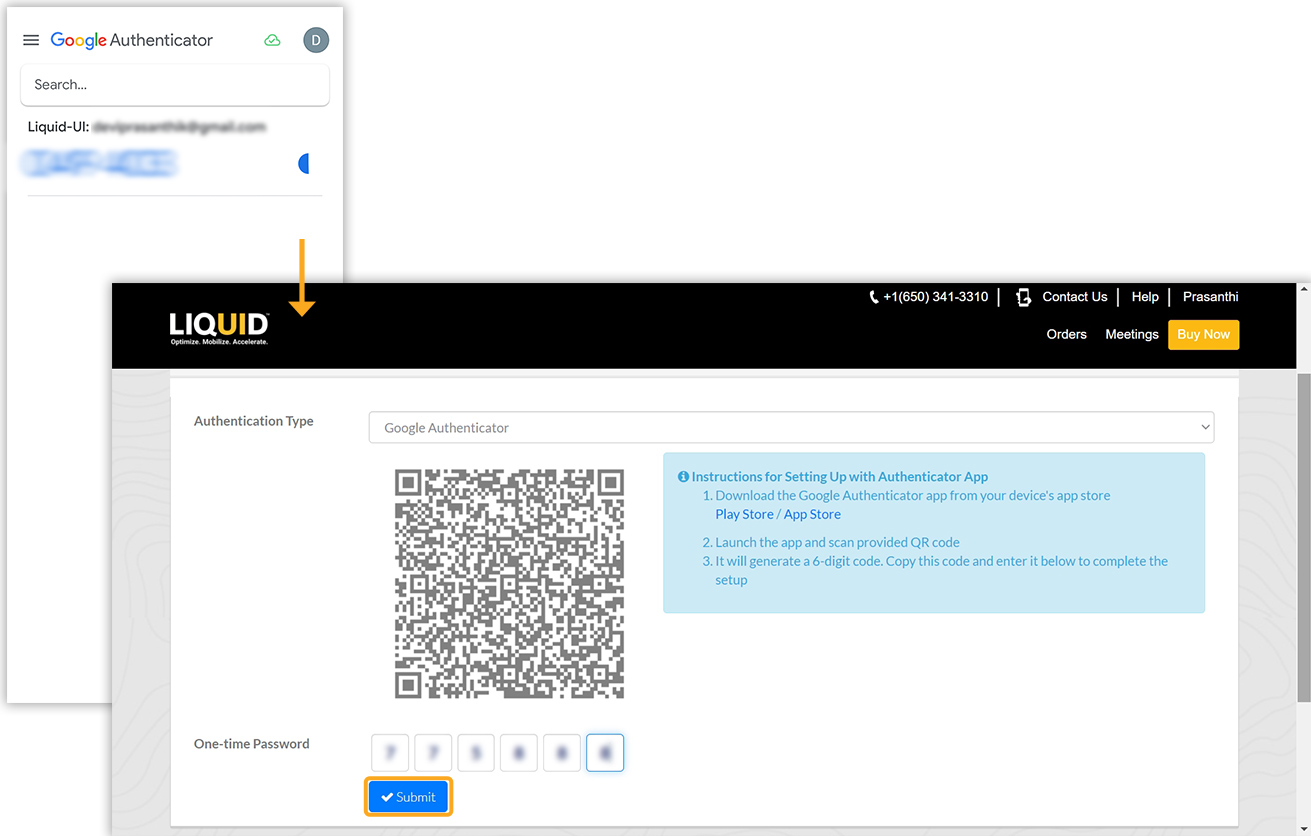
- Launch the Google Authenticator app and scan the QR code within the app
- This will generate a 6-digit code.
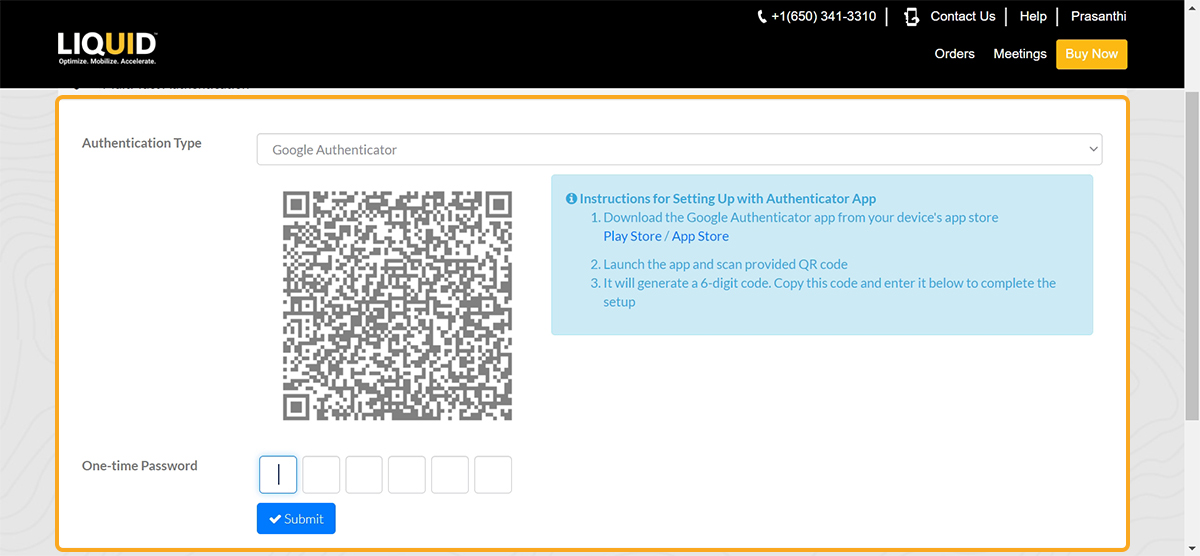
- Enter the 6-digit code and click Submit to proceed.
Configuring on an Android device:
Configuring on an iOS device:
- A popup will appear confirming the update of your authentication preferences.

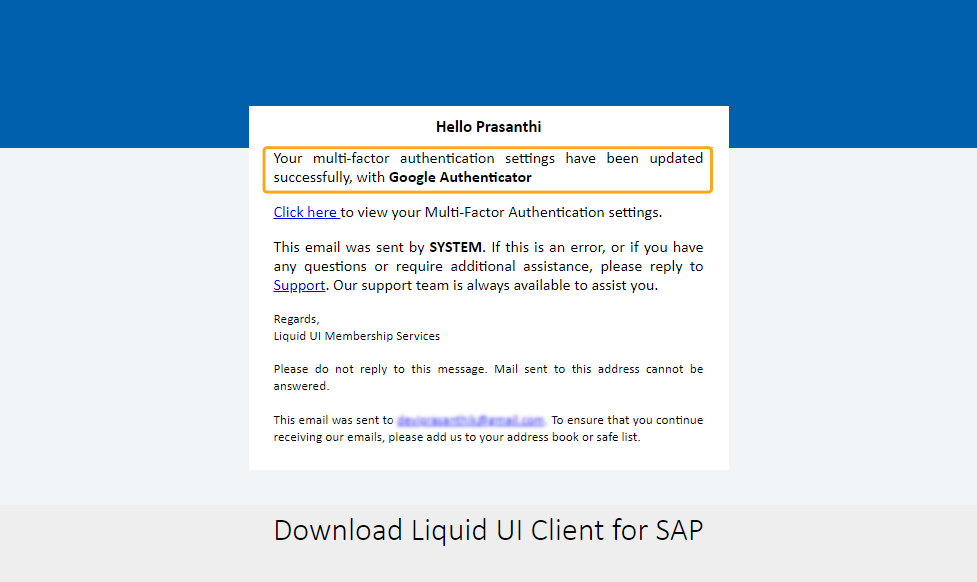
- You will also receive an email from LAMP confirming the successful activation of Google Authenticator, and a link to access your MFA settings.

Note: Users can enable/disable MFA based on their security preferences. It's advisable to keep MFA enabled for account safety.
To disable Multi-factor authentication for your LAMP account, follow the steps below.
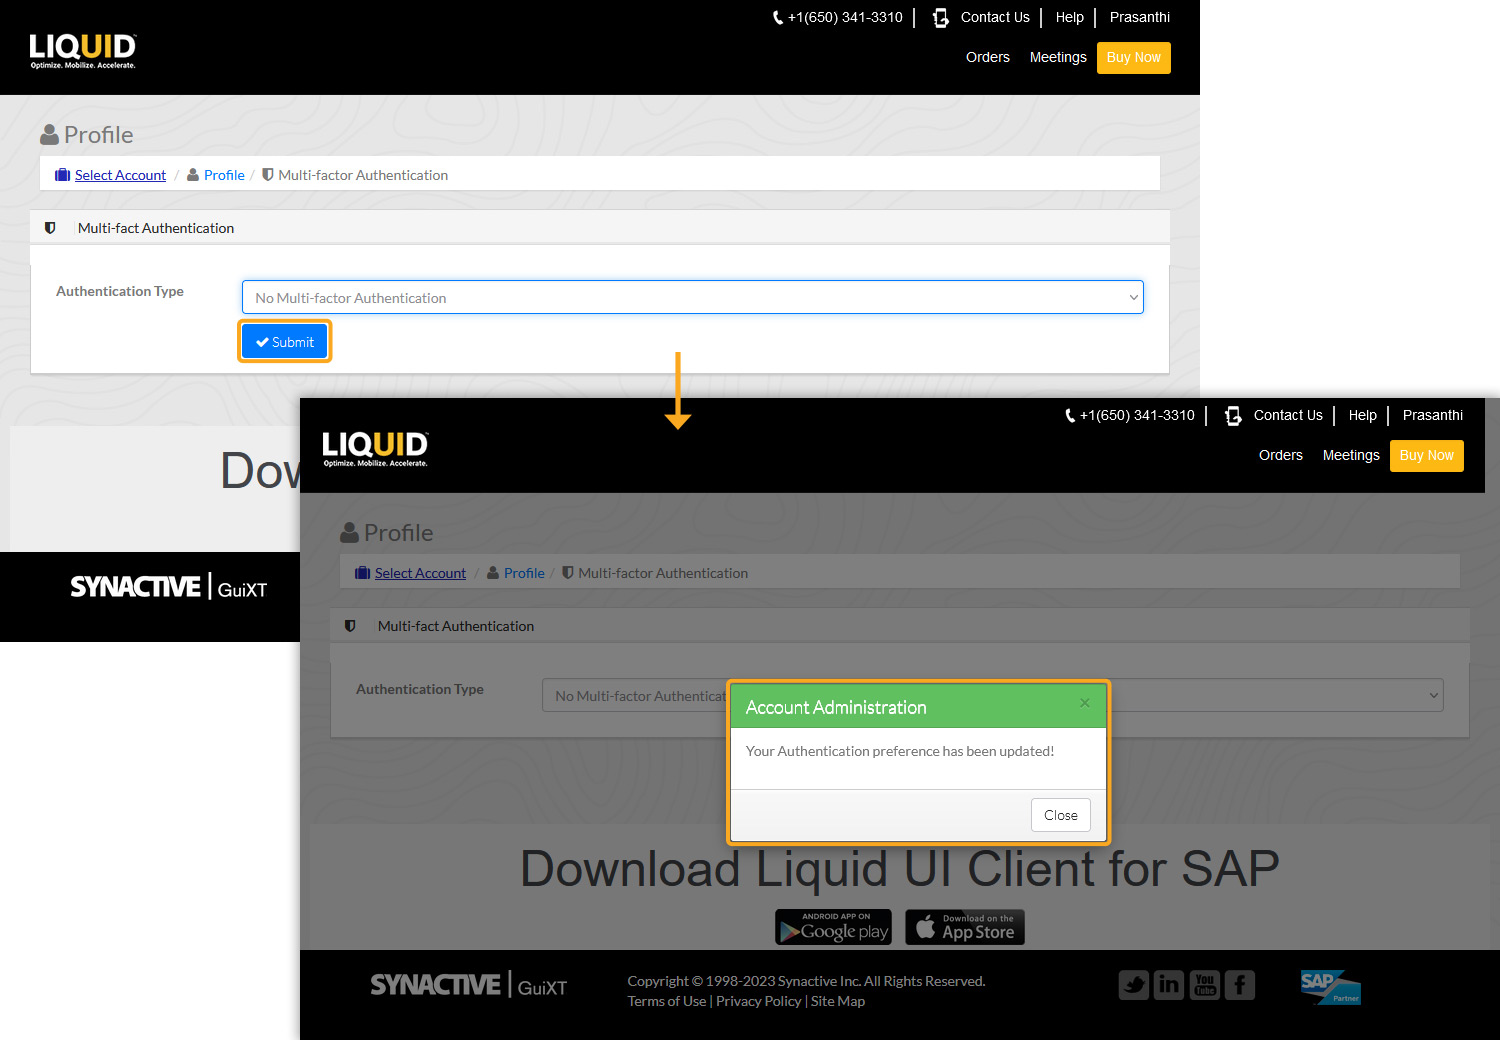
- Proceed with the regular login process, and navigate to the Multi-Factor Authentication window. Choose No Multi-factor Authentication (default type), as shown below.
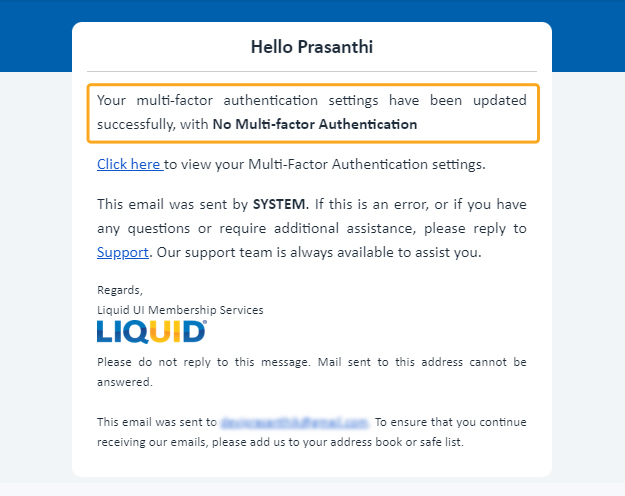
- A popup will appear confirming the update of your authentication preferences.
- You will also receive an email from LAMP confirming the update of your multi-factor authentication settings.