Liquid UI for iOS supports OCR functionality, which greatly reduces error-prone manual data entries in the SAP. It enables you to capture information from paper documents, e-mails, images, and other sources and quickly transfer the data to the appropriate SAP fields for further processing; therefore, it not only reduces manual keying but also speeds up business processes and improves data quality.
You can use the OCR functionality using a built-in camera on any Input Field. Long-pressing on any Input Field inside our app will show the OCR option along with other text editing options. Our OCR algorithm recognizes both printed and written text characters in the image.
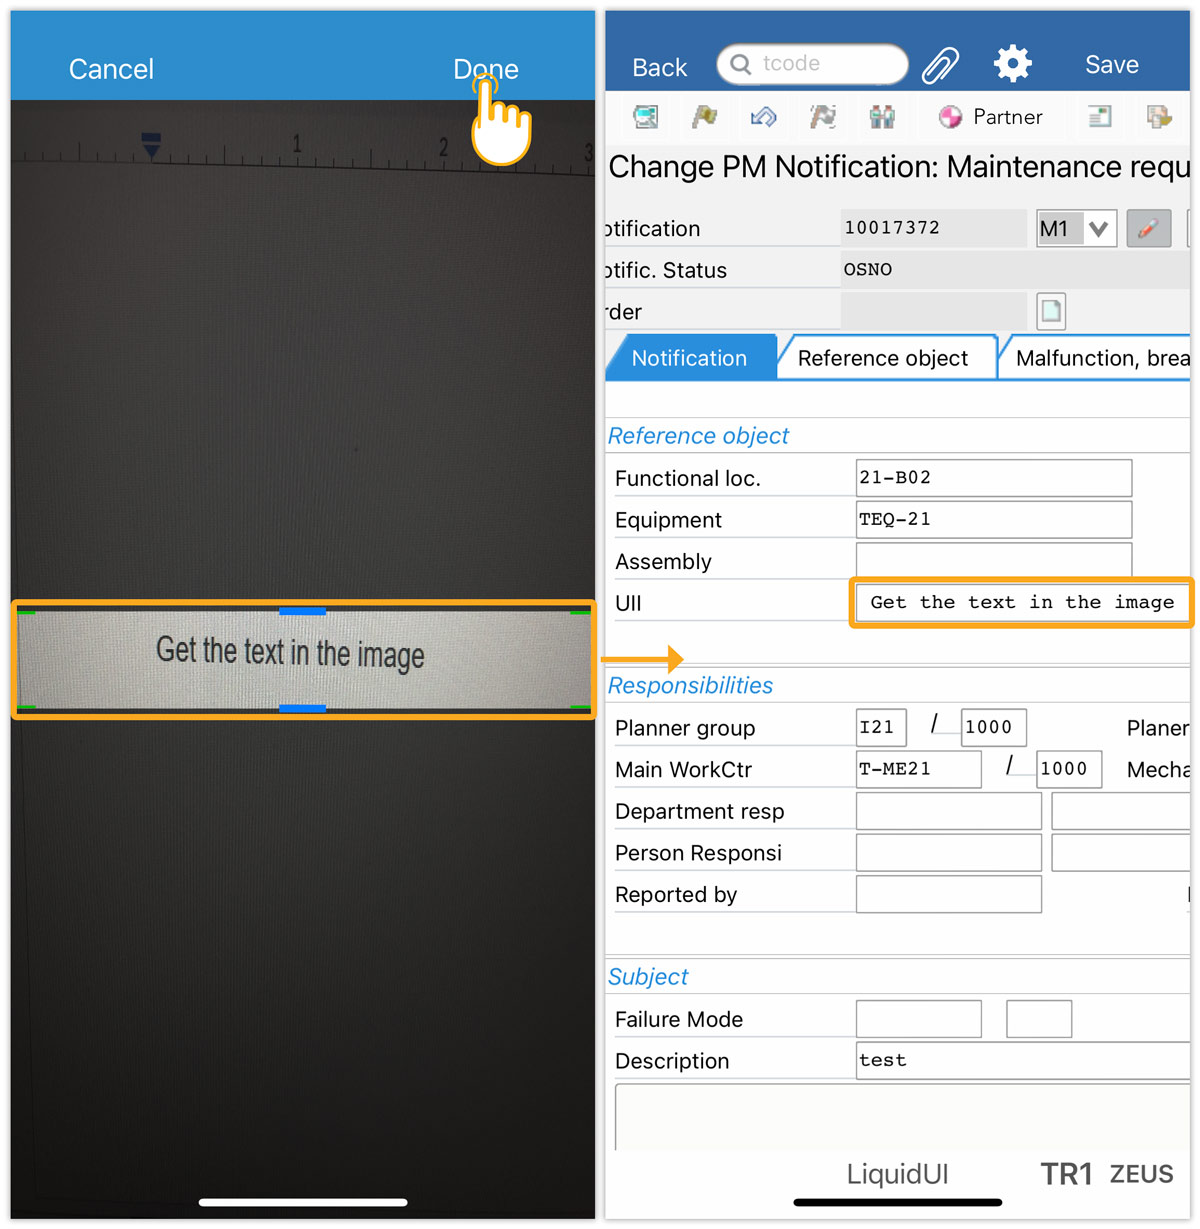
At Liquid UI, we understand that not all the image/text sizes are the same for scanning the required data, so a rectangular blue line box appears that allows you to change the scan area, thus helping you capture only the required text in the image. Furthermore, our OCR algorithm remembers the box size changes and will retain them the next time the user clicks on the same Input Field. Also, the user gets the option to edit the captured text or populate it as-is in the Input Field.
In this article, we'll demonstrate the OCR feature considering the Change PM Notification: Initial Screen, as an instance.
- Log on to Liquid UI for iOS and navigate to the IW22 transaction.
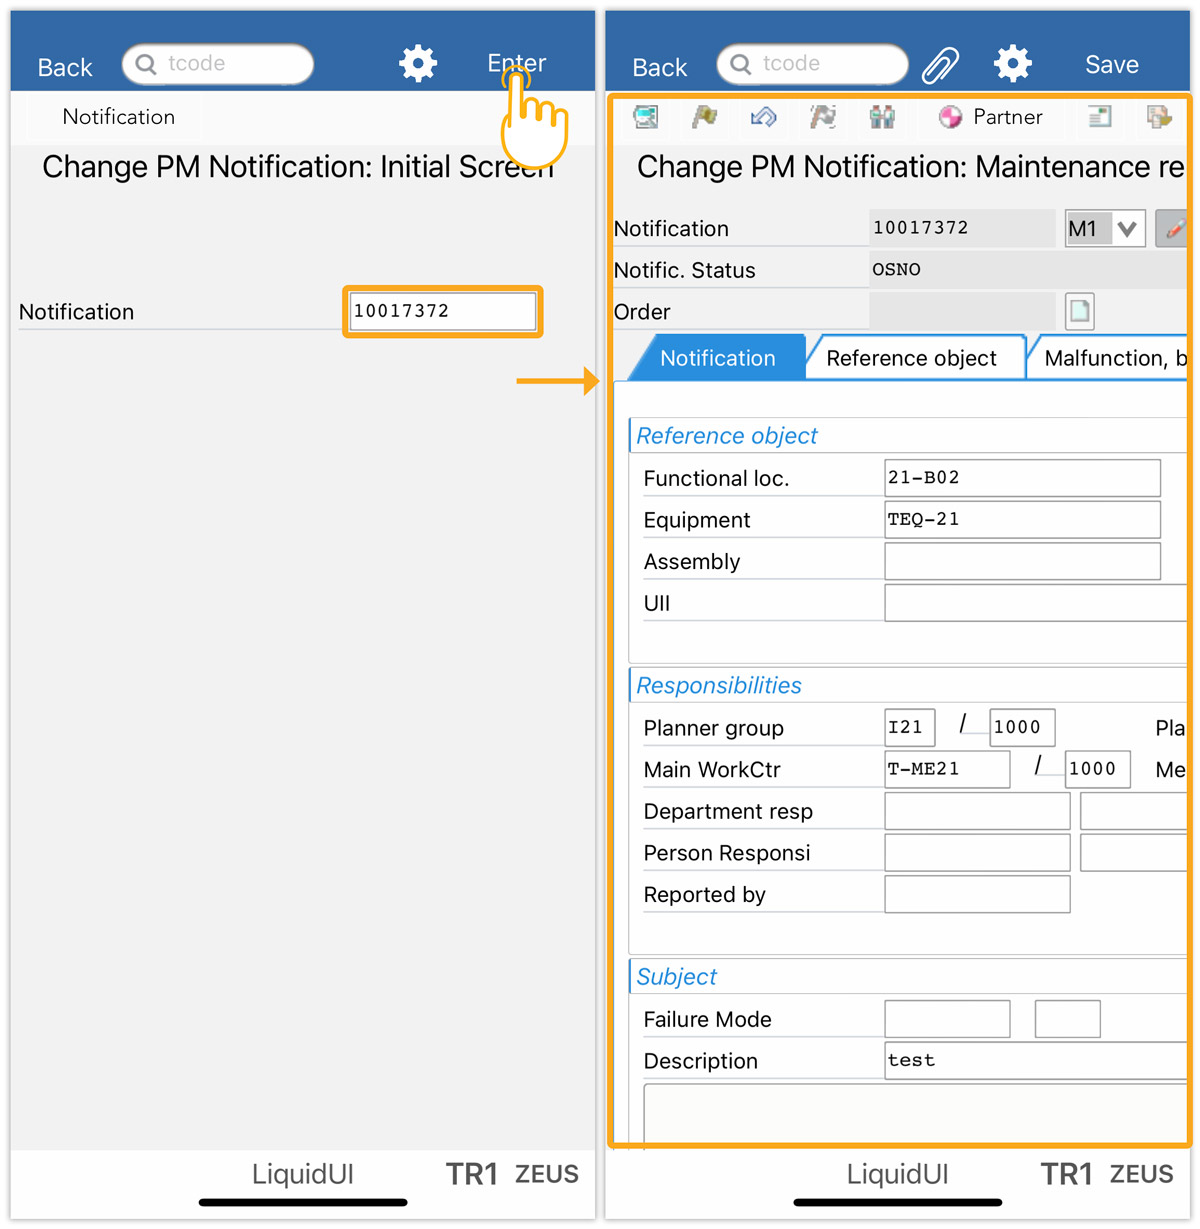
- On the Change PM Notification: Initial Screen (IW22), enter the Notification ID, then click Enter to navigate to the desired order details page, as shown below.
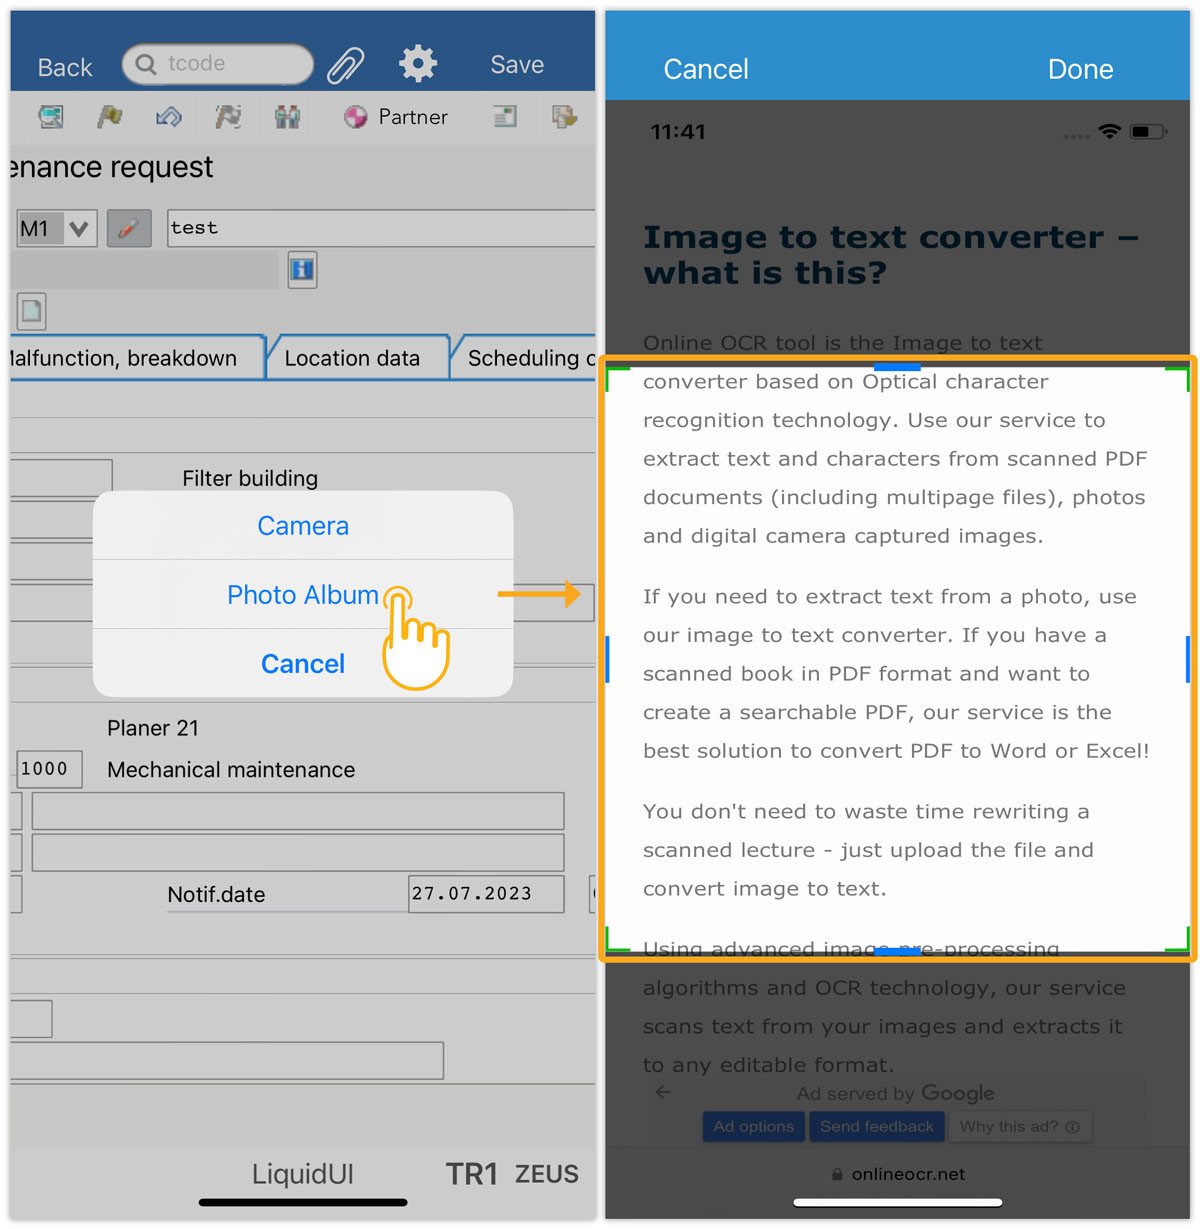
- A long press on the UII input field under the Notification tab displays the Input Field pop-up with available options. Select the Scan OCR option to capture text or images.
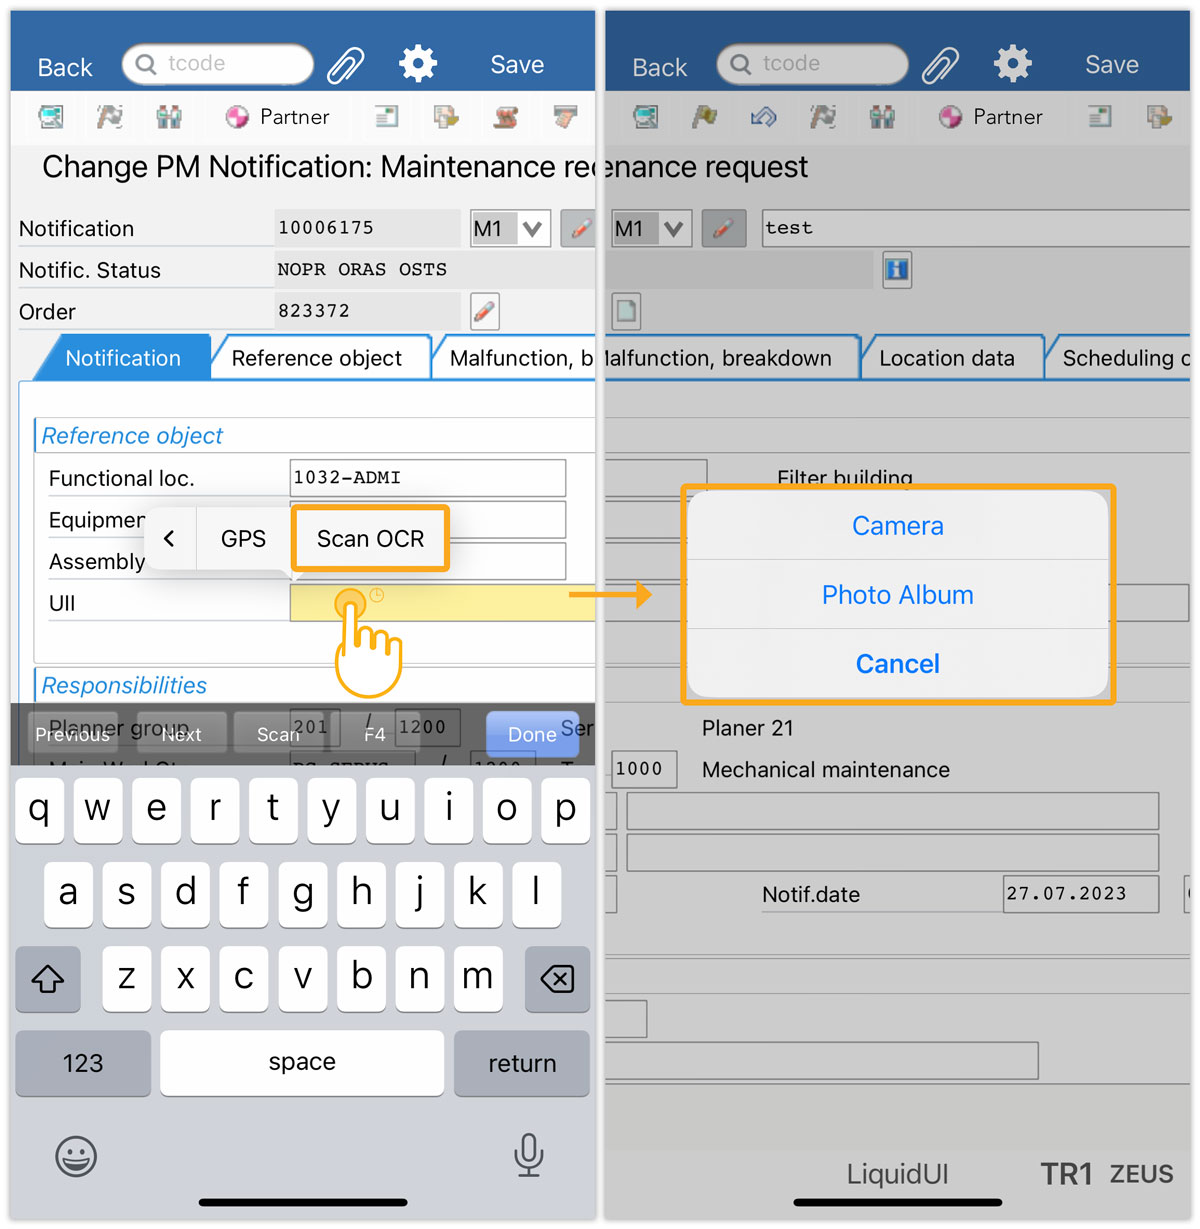
- Choose either the Camera or Photo Album option based on your requirements. Here, we selected the Camera and captured the text.
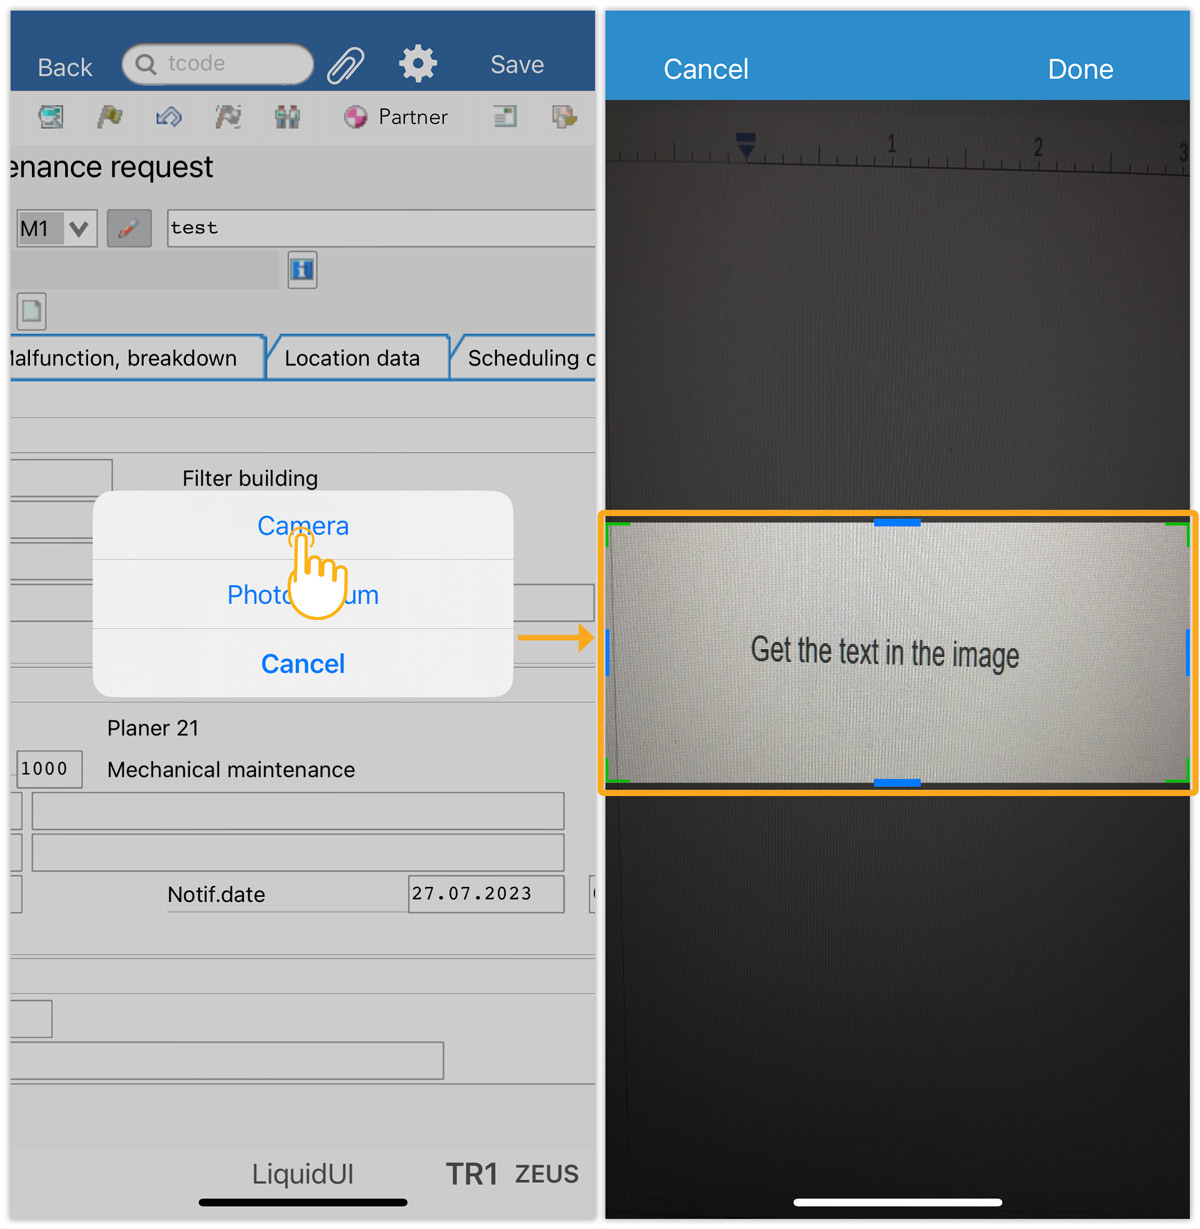
- Adjust the scan area and click Done to populate the captured data into the input field.
- Similarly, you can input data using existing images by selecting the Photo Album option.
- Adjust and click on Done populates the captured data into the input field, as shown below.