Prerequisites
- Products: Liquid UI WS, Liquid UI Server or Local DLL, Client Software
- Commands: radiobutton(), del(), set(), onUIEvents(), onscreen(), enter()
Purpose
The article demonstrates how to pass values to different screens, and pre-select radio buttons on different screens using radiobutton(), focusing on the Create Sales Order: Initial Screen.
Example-1: Assign values to fields on different screens using radio buttons
In the following example, we will use a set of radio buttons to pass values from the VA01 Initial Screen to the VA01 Overview Screen and we’ll guide you through the following:
- Navigate to the VA01 screen and add two radio buttons to set specified values on selection.
- Add a function to set values to the input fields.
User Interface
//Create the SAPMV45A.E0101.sjs file inside your scripts folder for customizing the Create Sales Order: Initial Screen.
//Now, add the Liquid UI script to the above file and save it.
Customization
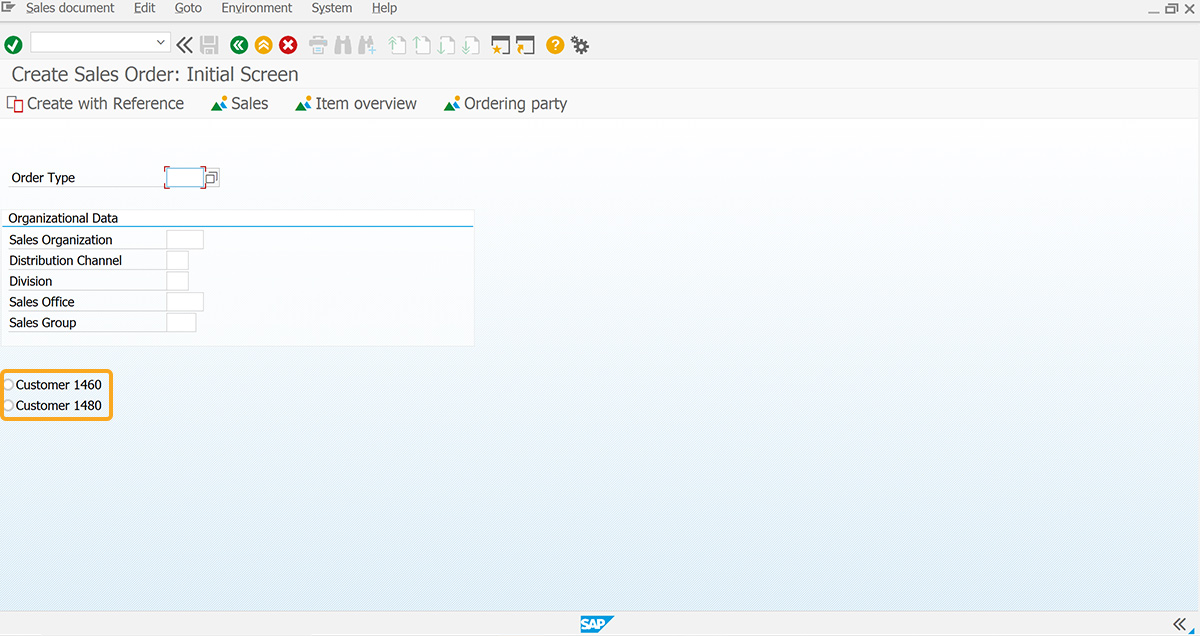
- Login to SAP and navigate to the VA01 screen, add two radio buttons labeled Customer 1460 and Customer 1480 to set the specified values on selection.
//Creates radio buttons to set the values
radiobutton([12,0], "Customer 1460",{"name":"z_cust", "value":"1460"});
radiobutton([13,0], "Customer 1480",{"name":"z_cust", "value":"1480"});
- Add the z_rad function to set the values to the input fields.
//Function to set values to the input fields
onUIEvents["enter"] = "z_rad;
function z_rad()
{
onscreen 'SAPMV45A.4001'
set("F[Sold-to party]", "&V[z_cust]");
set("F[Ship-to party]", "&V[z_cust]");
enter();
}
SAP Process
- Refresh the SAP screen enter OR in the Order Type input field select the Customer 1460 radio button and hit Enter. Then, you will be navigated to the va01 overview screen where you can see the values passed to the Sold-To Party and Ship-To Party input fields, as shown below.

Example 2: Pre-select the radio button on a different screen
User Interface
//Create the SAPLSMTR_NAVIGATION.E0100.sjs file inside your scripts folder for customizing the SAP Easy Access screen.
//Now, add the Liquid UI script to the above file and save it.
In the following example, we will use a set of radio buttons to pass values from the SAP Easy Access screen to the MB1C Overview Screen and we’ll guide you through the following steps:
- Delete the image container on the SAP screen
- Add a push button to execute the process
- Add radio buttons to set the specified value on selection
- Add a function to set the values to the radio buttons
Customization
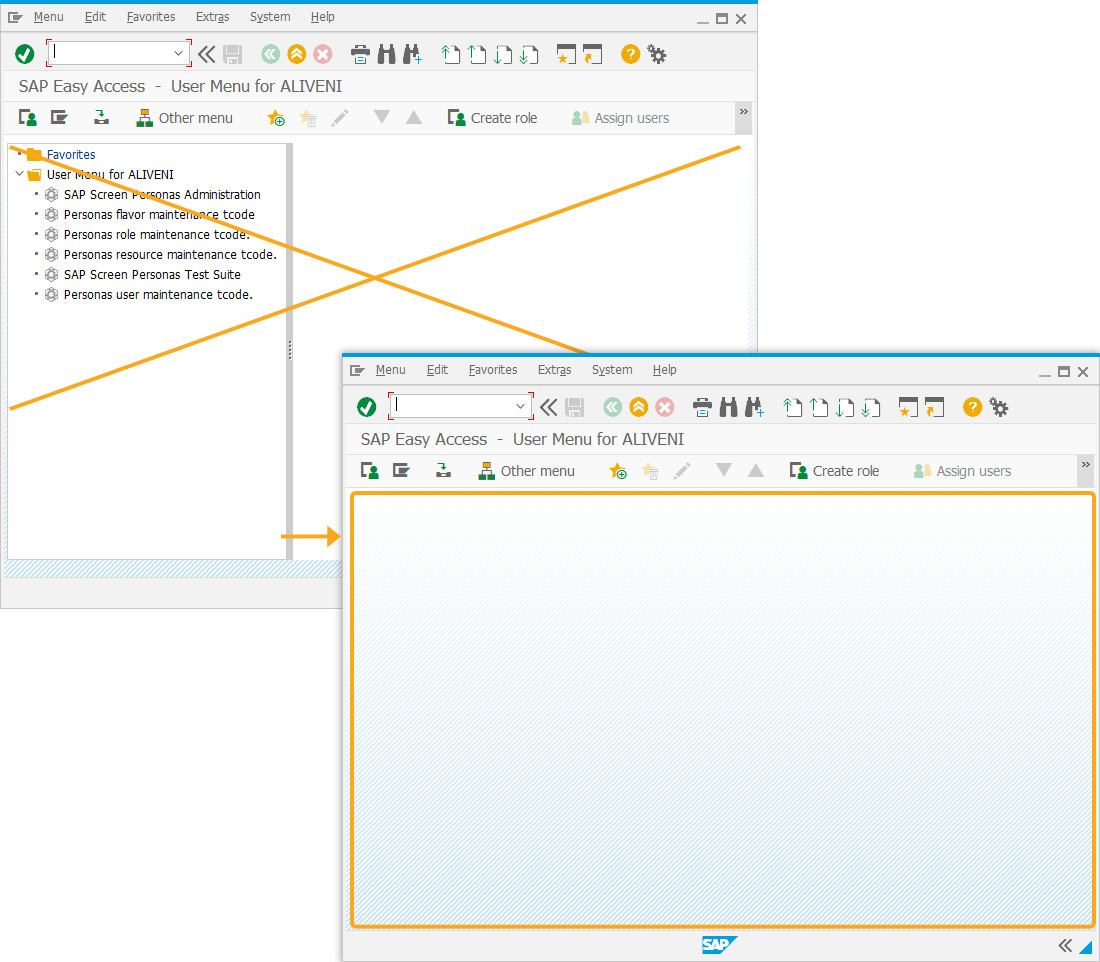
- Delete the image container on the SAP Easy Access screen using the del().
//Deletes the image container on the SAP screen
del('X[IMAGE_CONTAINER]');
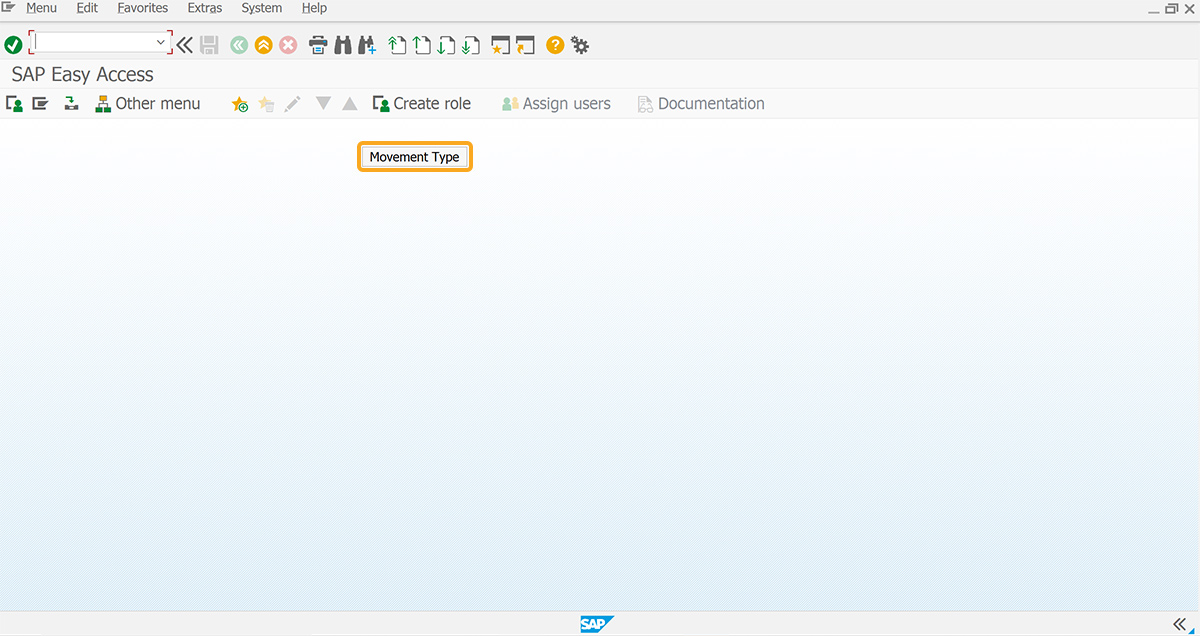
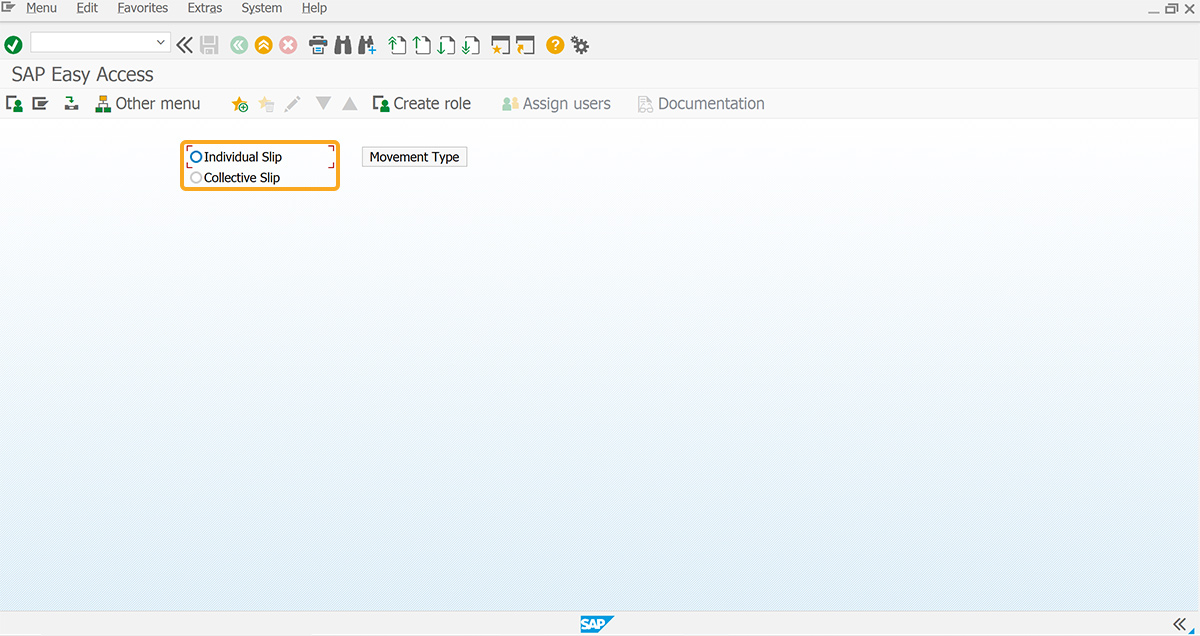
- Add a push button labeled Movement Type to execute the z_test process on click.
//Creates a push button to execute the process
pushbutton([1,48], "Movement Type", "/nmb1c",{"process":z_test});
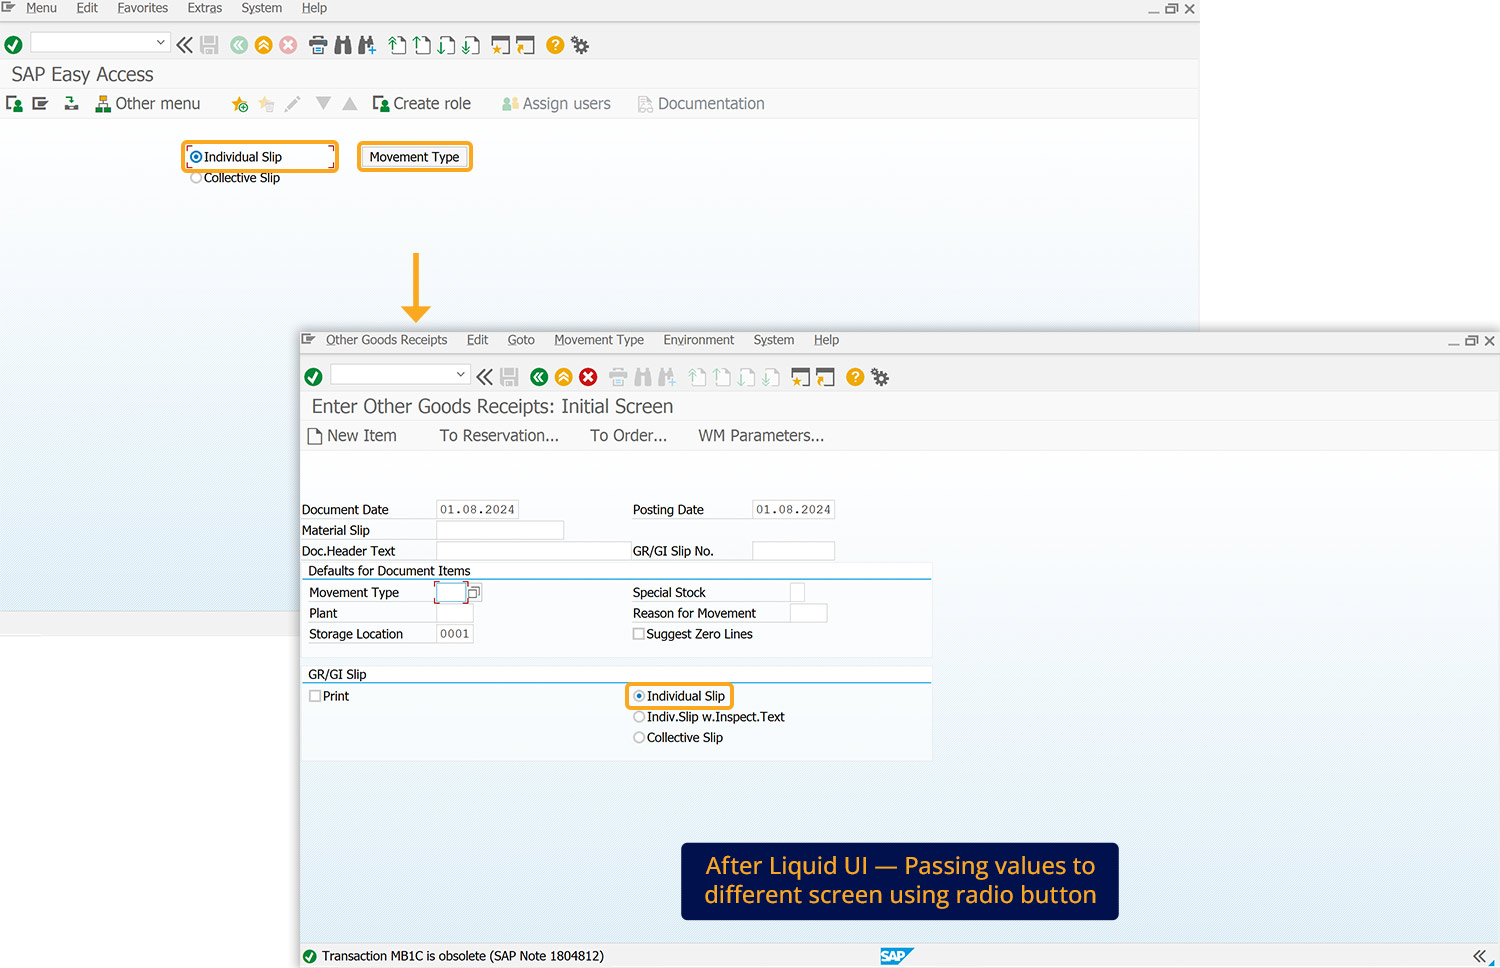
- Add two radio buttons labeled Individual Slip and Collective Slip to execute the z_test process on click.
//Creates radio buttons
radiobutton([1,25], "Individual Slip",{"name":"z_radio","value":"A"});
radiobutton([2,25], "Collective Slip",{"name":"z_radio","value":"B"});
- Add the z_test function to set values to radio buttons.
//Function to set the values to radio buttons.
function z_test() {
onscreen 'SAPMM07M.0400'
if(z_radio=="A")
{
set("R[Individual Slip]","X");
}
if(z_radio=="B") {
set("R[Collective Slip]","X");
         }
}
SAP Process
- Refresh the SAP screen, select the required radio button, and click the Movement type push button. Then, you can view the Individual Slip radio button pre-selected on the Goods Receipts screen(MB1C), as shown below.