As previously explained, you can run the bot either by manually triggering it from a command prompt or by creating a task in the Windows Task Scheduler. The first method is typically used for testing a process; the second is used for a production environment where user interaction is not desirable. In this section, we will explain and demonstrate both methods.
Warning: In order to run the bot successfully, all your scripts must be called from the default start transaction screen, or which are placed directly in the elogon.sjs file without using functions. If you decide to use functions, you can place them either in the elogon file or in an external file and use the 'load' command to call it as in the following example, where we are loading a file called 'functions.sjs'. Our elogon file would appear as follows.
load('functions.sjs');
set("F[User]",  "test");
set("F[Password]", "test");
enter();
Please note that the bot may experience problems while executing your scripts if you attempt to employ any other configuration.
If you decide to place your processes in functions, you can call those functions from the Easy Access screen, as in the following example, where we will call one of the functions in our 'functions.sjs' file.
enter({process:create_iw21});
Your scripts are now ready to run, so we will proceed to explain the two methods for running the bot.
Running bot with Command Prompt
To manually run bot from the command prompt, please do the following.
- Open a command prompt and navigate to the bot directory. In our example, we have placed the files in the following directory.
C:\fte
- In the command prompt, type the following line.
GuiXT4WebApp.exe -f avatar.js
- Press 'Enter'. bot will run and the progress will be displayed in the Console.
Running bot with Windows Task Scheduler
To run bot through the Windows Task Scheduler, please do the following.
- Open the Windows Task Scheduler. This tool is typically found in the following path.
Start > All Programs > Accessories > System Tools
- The Task Scheduler will appear as shown below.
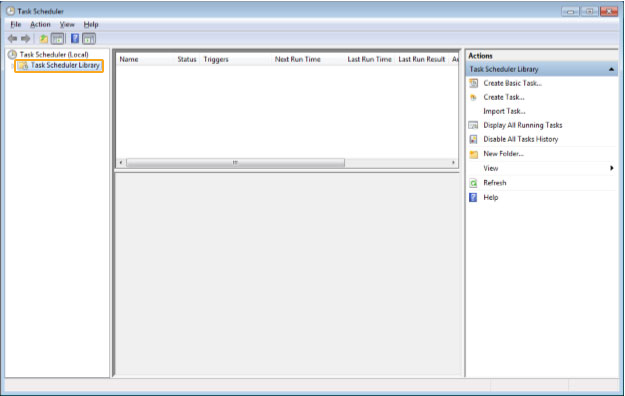
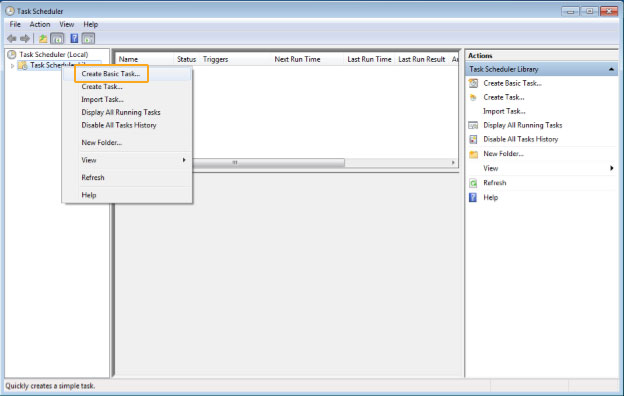
- Right-click on the Task Scheduler Library in the left pane. A context menu will appear. Choose the 'Select Basic Task' option as shown below.
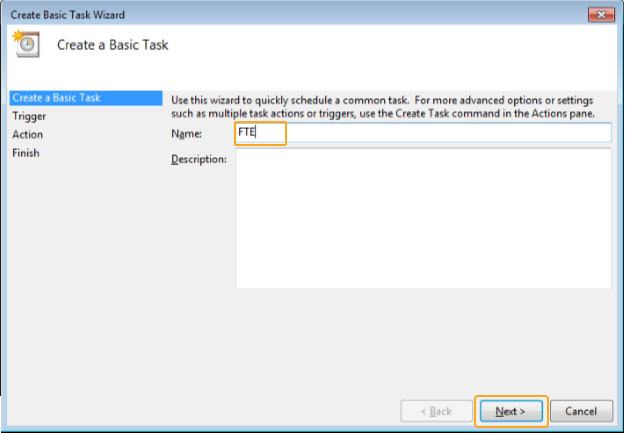
- A wizard will start. In the Name field, enter a name for your new task. We will call ours 'bot' as in the following example. you can also enter a description of the task. Then click Next.
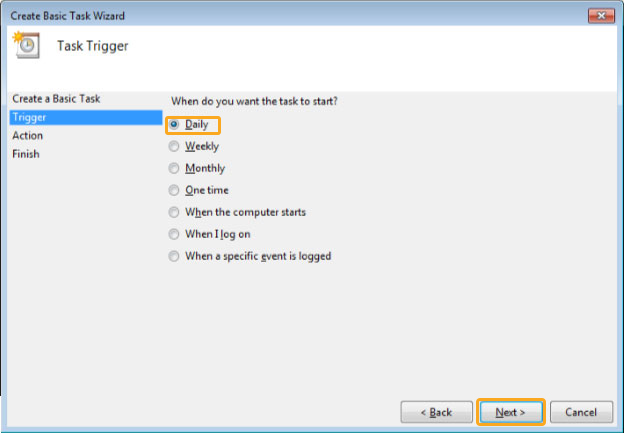
- The Task Trigger screen will display. In the 'Trigger' section, select the 'Daily' radio button and then click Next.
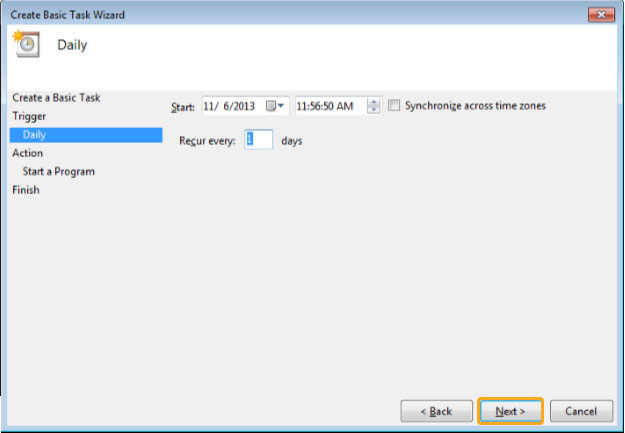
- The Daily screen will display as shown below. Choose the start date and start time for your task and then click Next.
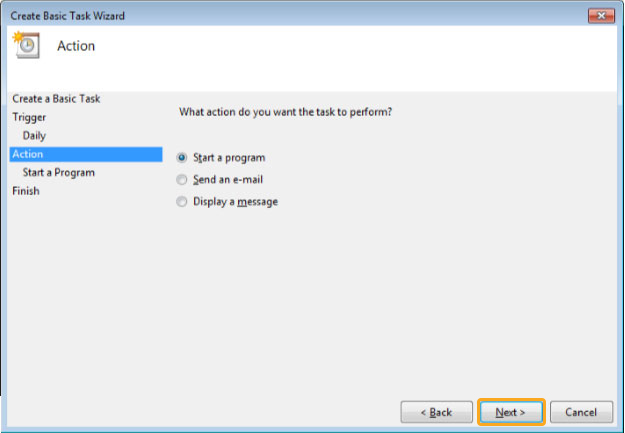
- The Action screen will display as shown below. Select the Start a program radiobutton and then click Next.
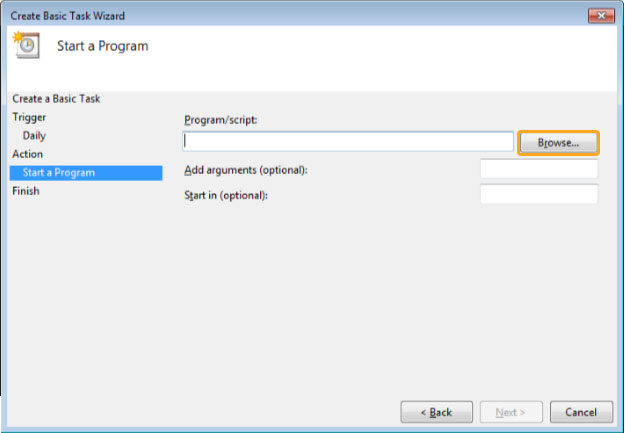
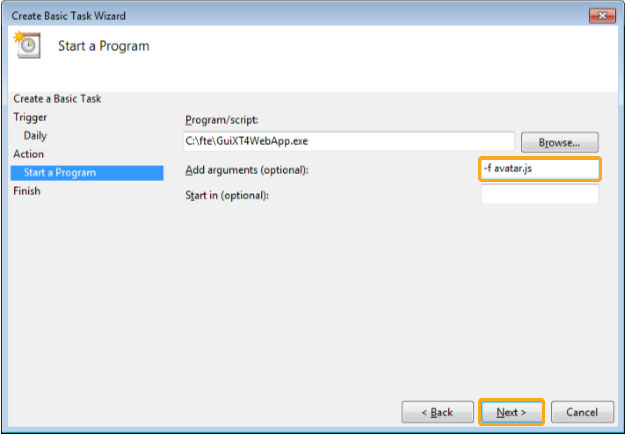
- The Start A Program screen will display as shown below. Click the 'Browse' button beside the 'Program/script' field.
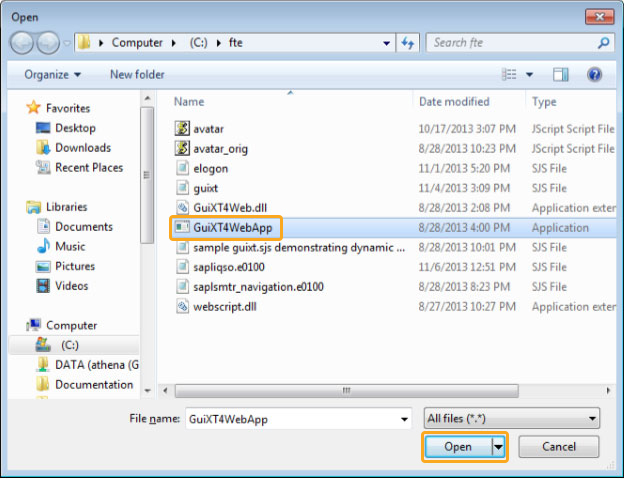
- Browse to the bot folder where your GuiXT4WebApp.exe file is stored as shown below and click Open. The file location will be added to the 'Program/script' field.
- In the 'Add arguments' field below the 'program/script' field, enter the following arguments. Then click Next.
-f avatar.js
Note: The '-f' signifies that we will be opening a file and the 'avatar.js' is the filename that the executable will be reading.
- The Summary screen will display with a summary of your choices as shown below. If they are not correct, use the wizard's back buttons to edit your settings. If these are correct, click Finish.

- The task is now created. To test your new task, highlight the task and then click 'Run' on the right sidepane. The task will proceed to run.
Note: Unlike a manual running, the Console will not appear and no progress will be displayed.