Liquid UI provides comprehensive native scanner configuration options. You can adjust the Default Barcode Type, add a new Barcode Type for auto tab or auto-enter functions, or remove an existing barcode type. Additionally, you can add prefixes and suffixes to Barcode Types to modify the scanned values according to your specifications.
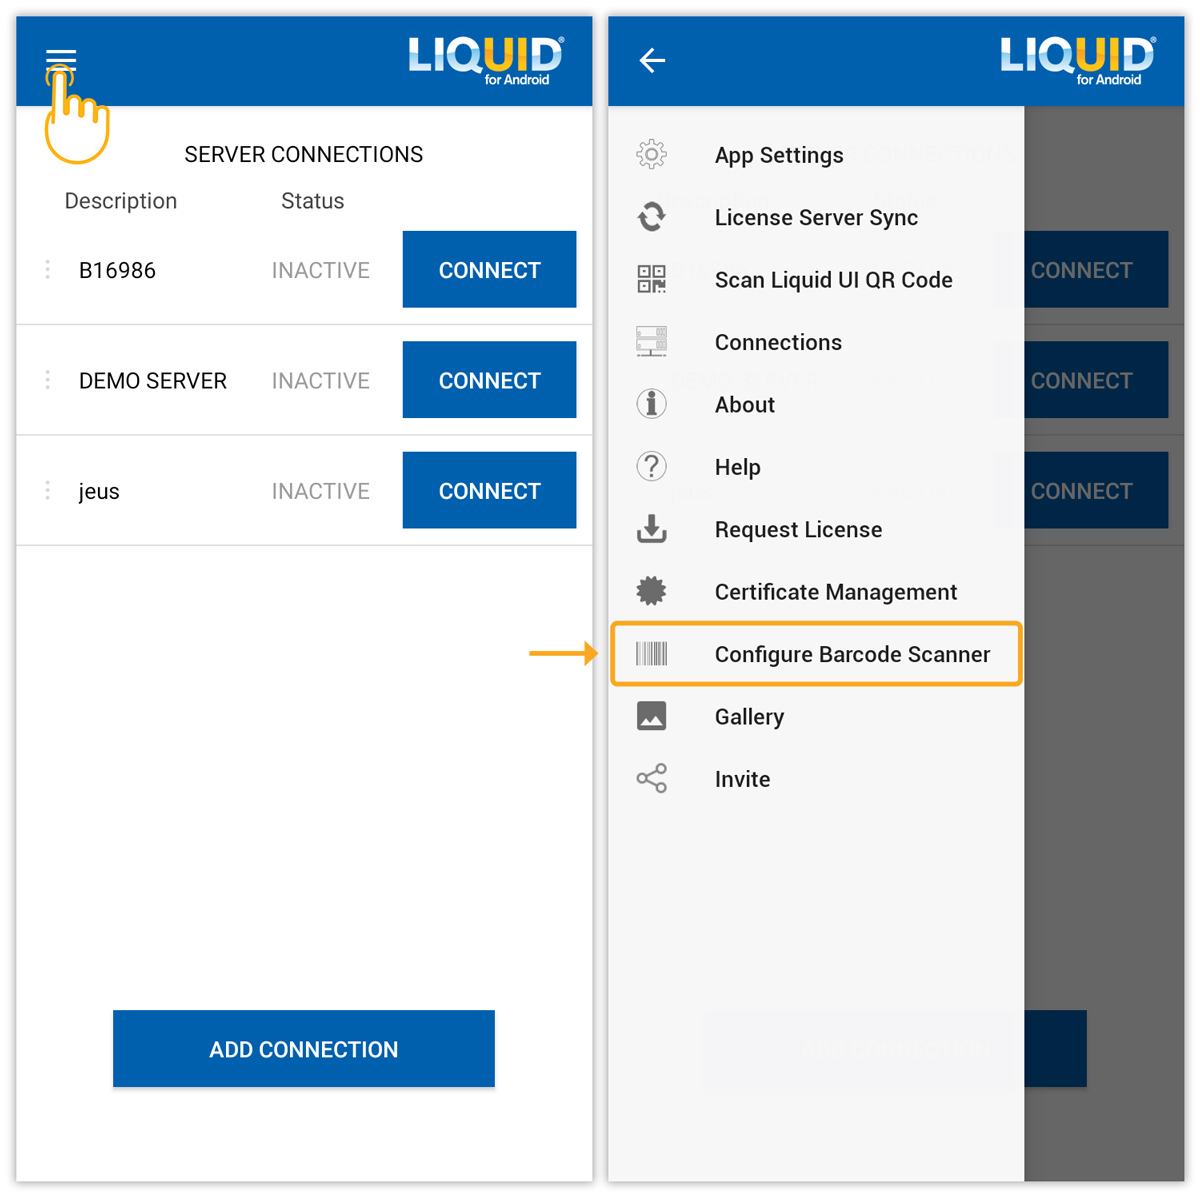
- Open Liquid UI for Android app and select the Configure Barcode Scanner under the Main Menu, as shown in the image below.
- Now, you will be navigated to the Barcode Types screen. Swipe left to the Default barcode type option to select the Edit option.
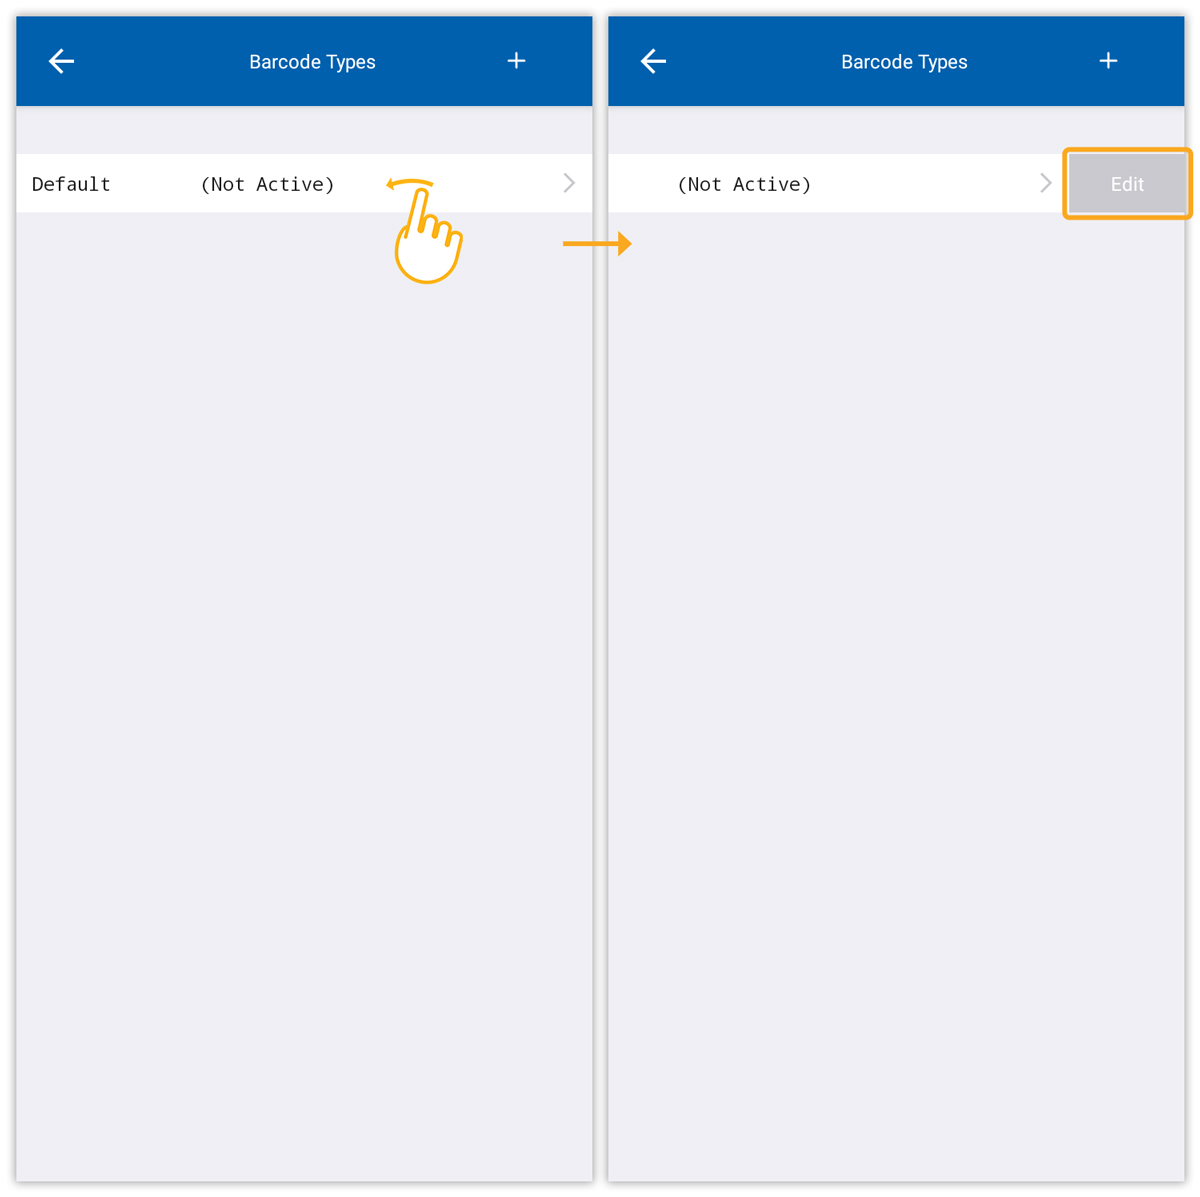

Note: You cannot delete the Default types.
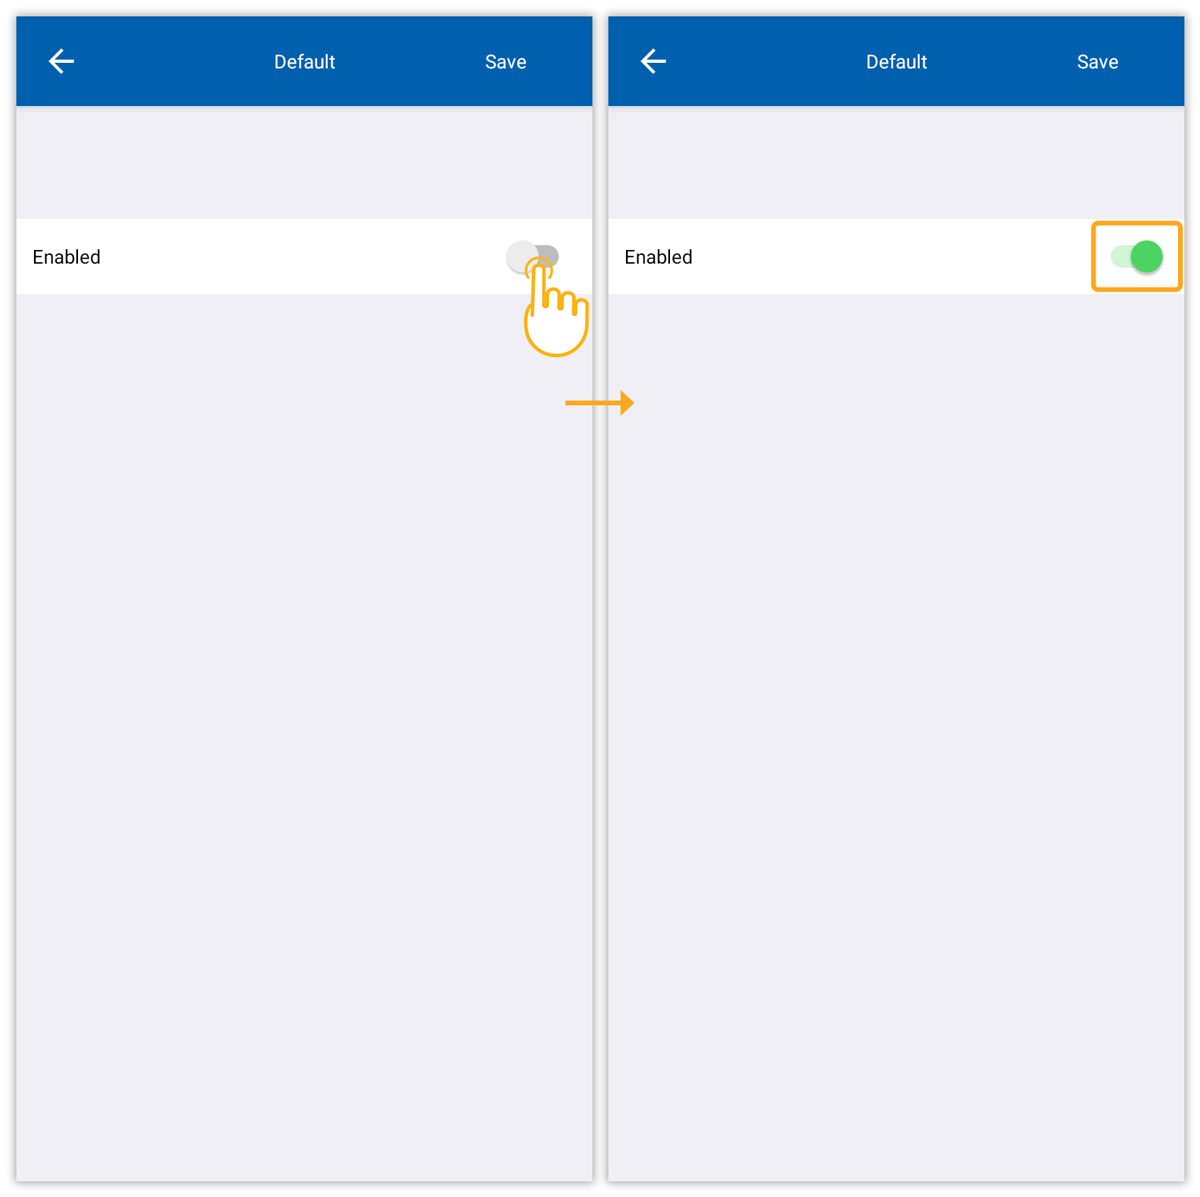
- Now, slide the Enabled control to turn on to activate the default barcode type.
- Select the Default (Active) barcode type to view the Scanner Prefixes screen.

- Swipe the Default element to the left and select the Edit option. You can view default settings with AUTO ENTER, AUTO TAB, and OFF options. Select the required option for the Default scanner element and click Save.
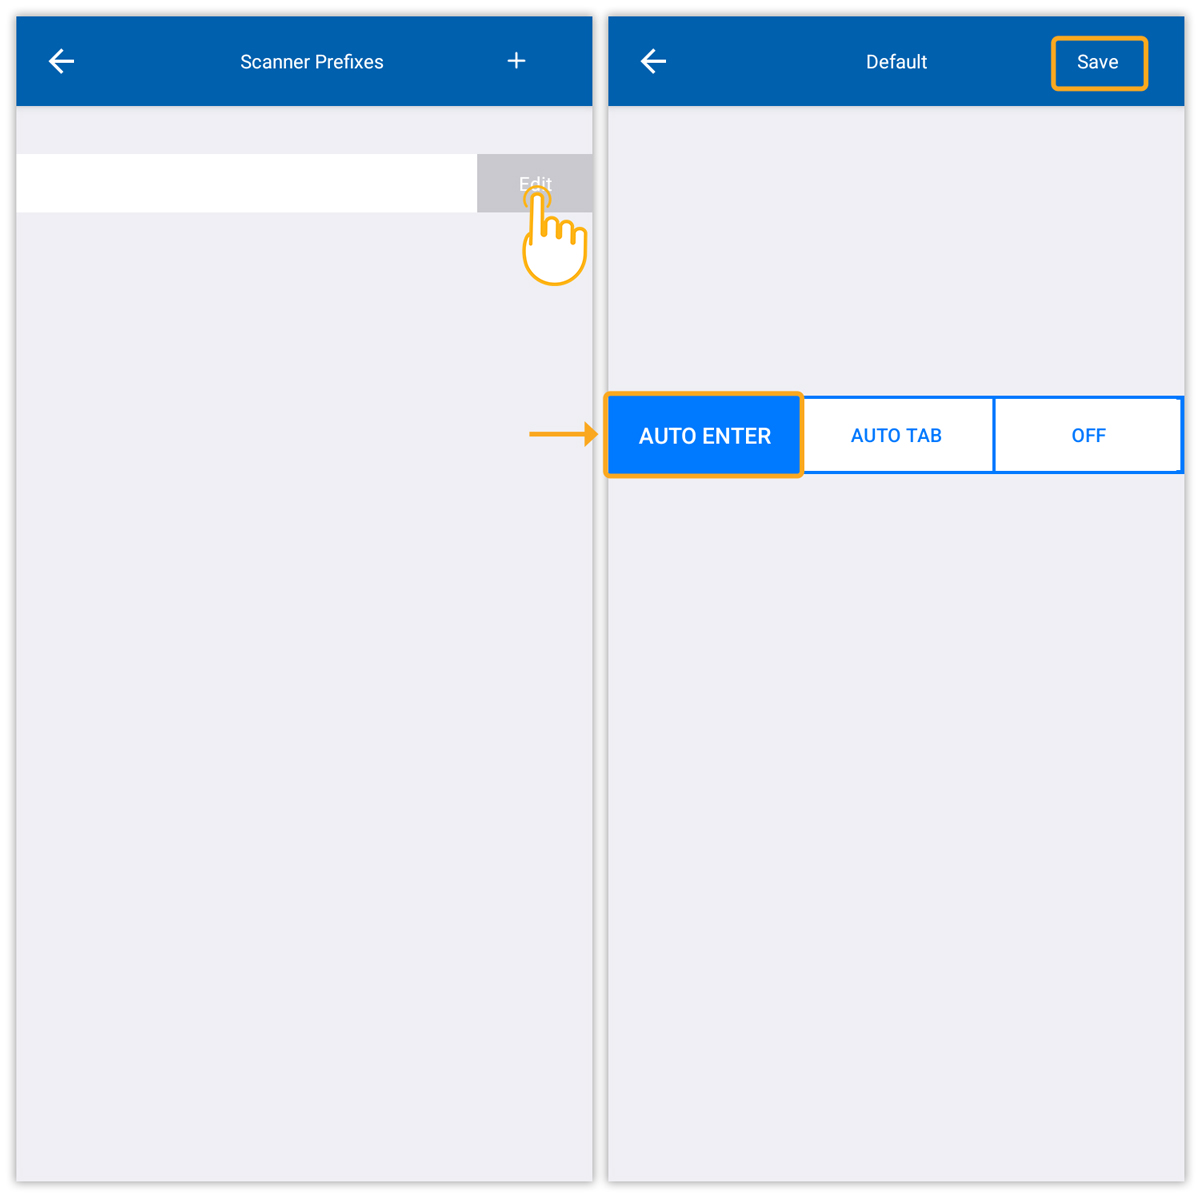
- AUTO ENTER: This option automatically performs enter after populating the scanned value into the scanned field.
- AUTO TAB: This option automatically places the cursor on the next field after populating the scanned value into the scanned field.
- OFF: Performs neither AUTO ENTER nor AUTO TAB.
- Now, under the Barcode Types screen, click the + symbol to add a new barcode type. Then, you will be navigated to the Add Barcode Type screen, fill in the required details, and click Save, as shown in the image below.
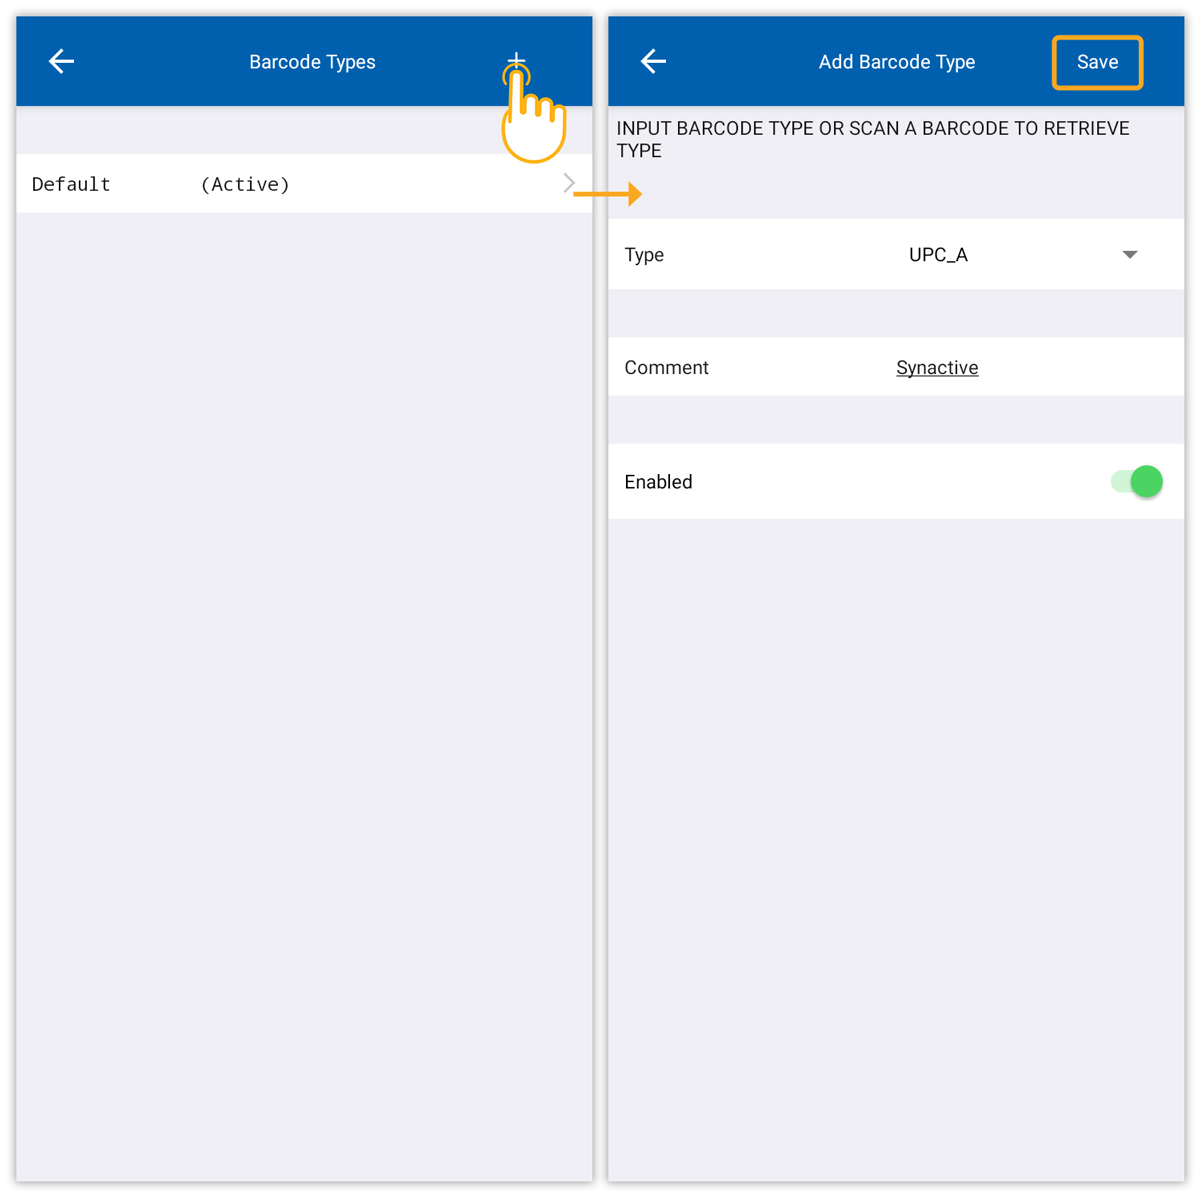
Add Barcode Type screen has the following fields,
- Type: This field indicates the class of barcode, which can be added in two ways;
- Manually select the barcode type from the list.
- Scan the barcode with the camera to retrieve the type.
- Comment: Describe the barcode type for further reference.
- Enabled: To activate or deactivate the barcode type
- Click Save. On success, the user will be taken back to the Barcode Types screen with an updated list.
- Type: This field indicates the class of barcode, which can be added in two ways;
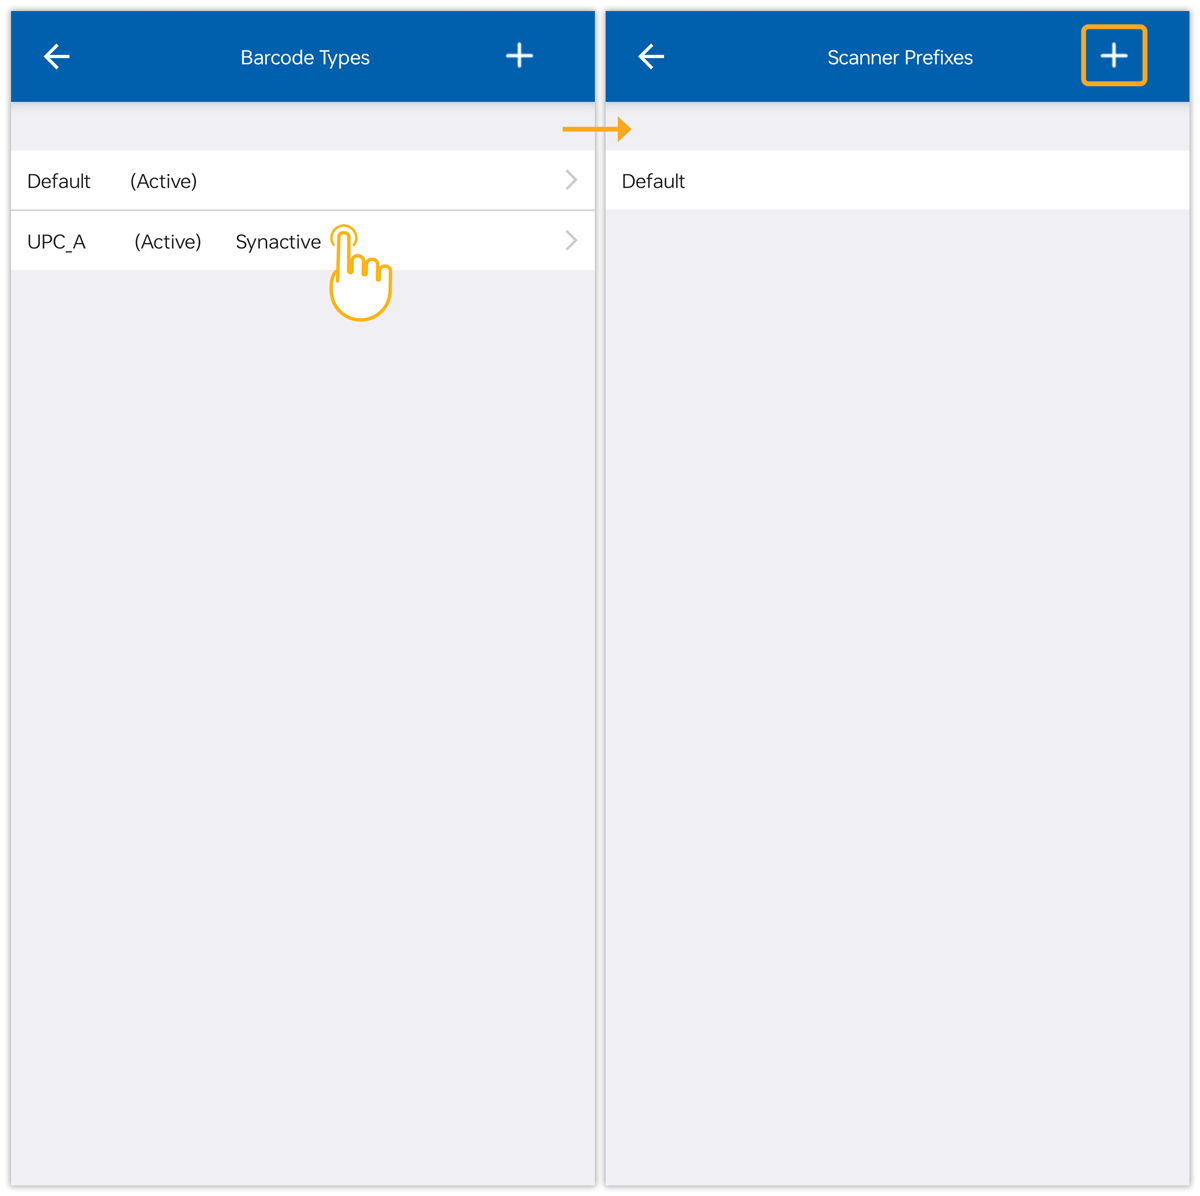
- The newly added barcode will be displayed in the Barcode Types screen. Select the barcode type, then you will be navigated to the Scanner Prefixes screen, click on the + symbol, as shown in the image below.
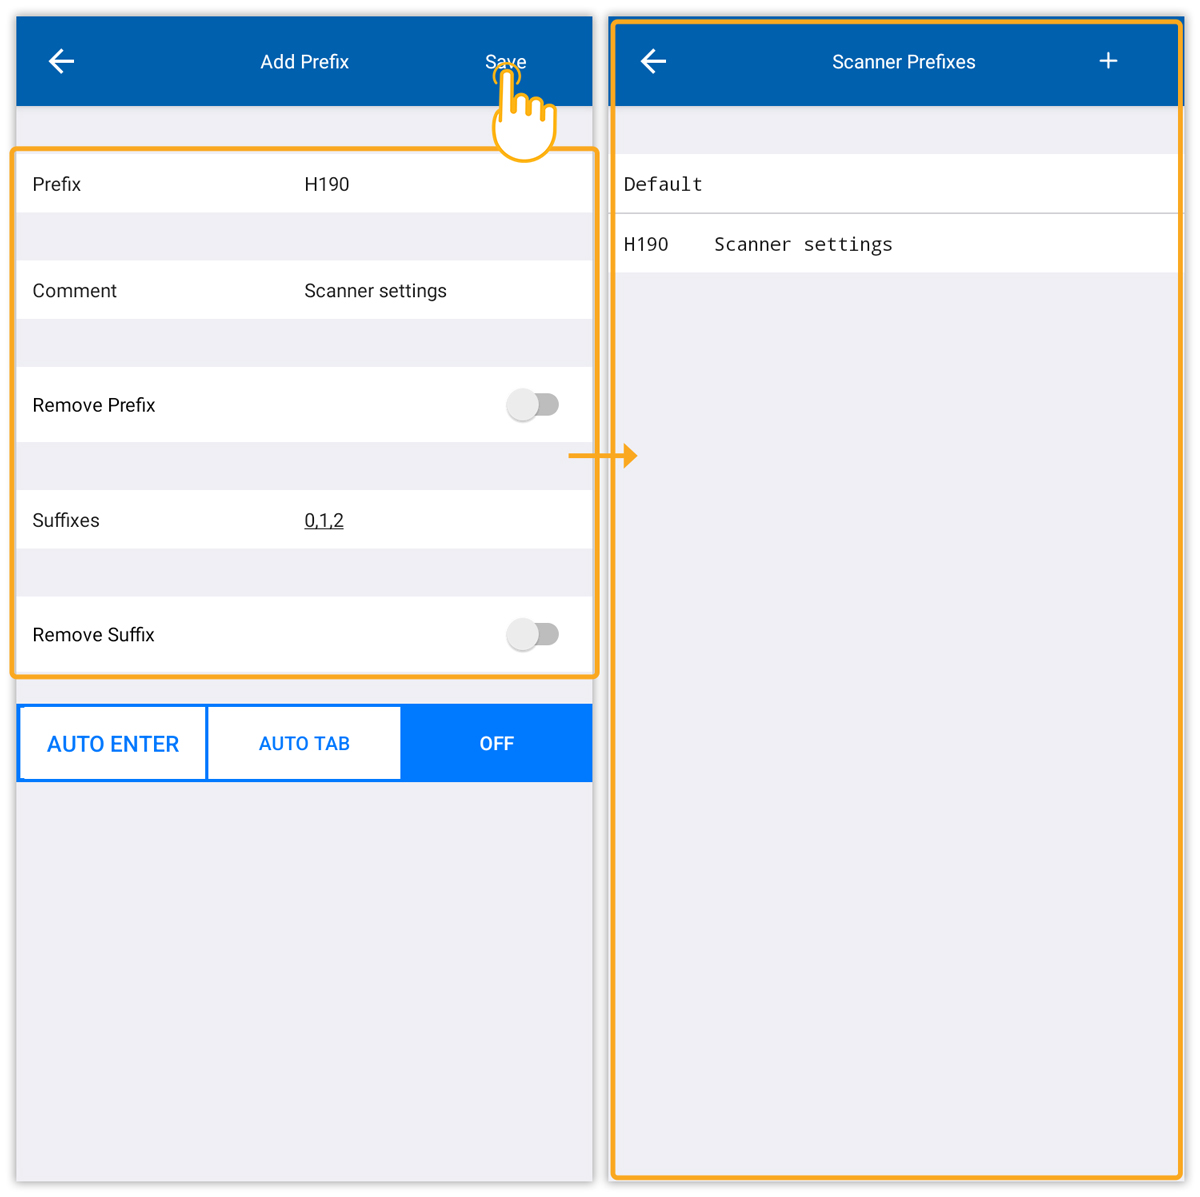
Note: You can select default to add AUTO ENTER or AUTO TAB functionality without adding prefixes or suffixes to the barcode.
- Enter Prefix, Comment, and Suffixes in the Add Prefix screen and click Save. Upon successful entry, you will be navigated to the Scanner Prefixes screen.
Note: You will receive license remainder emails from the LAMP at regular intervals to remind you about soon-to-expire licenses.
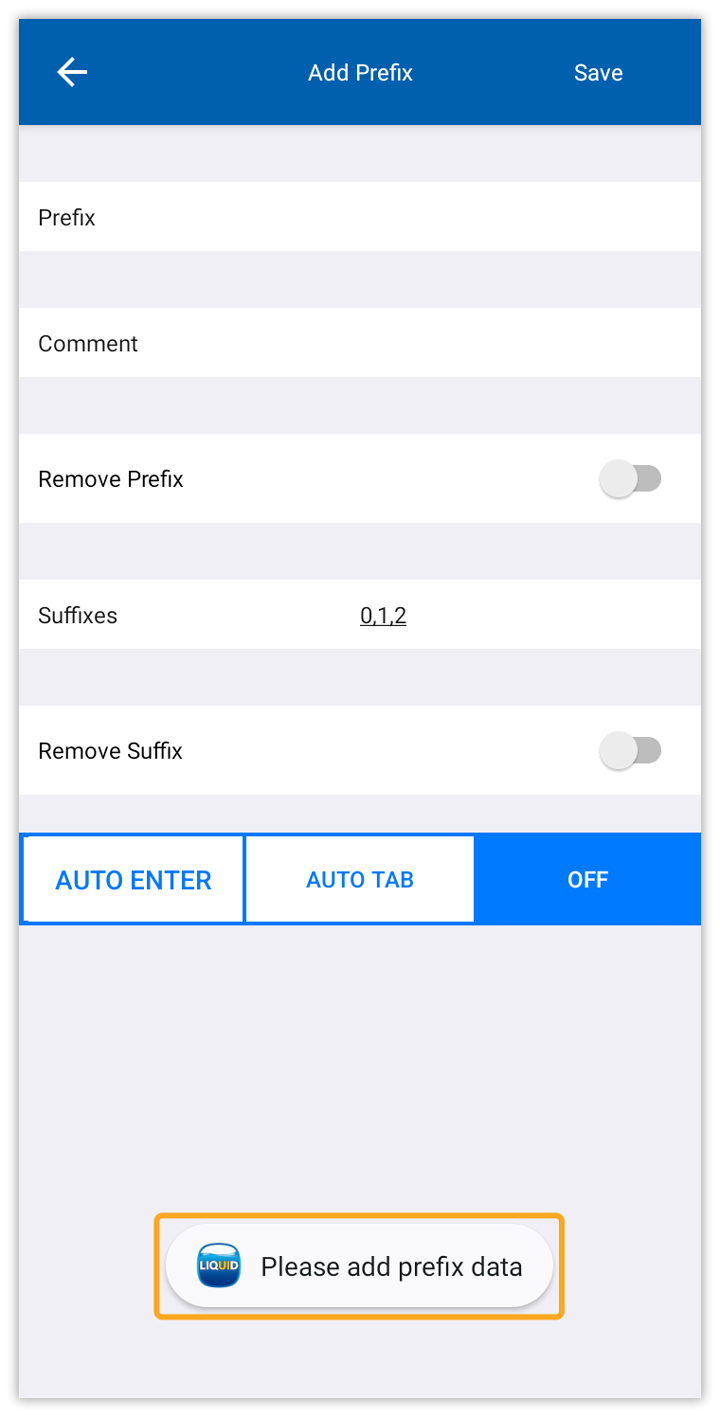
- If the user doesn’t enter the Prefix field, they will receive an alert message, as shown in the following screen.
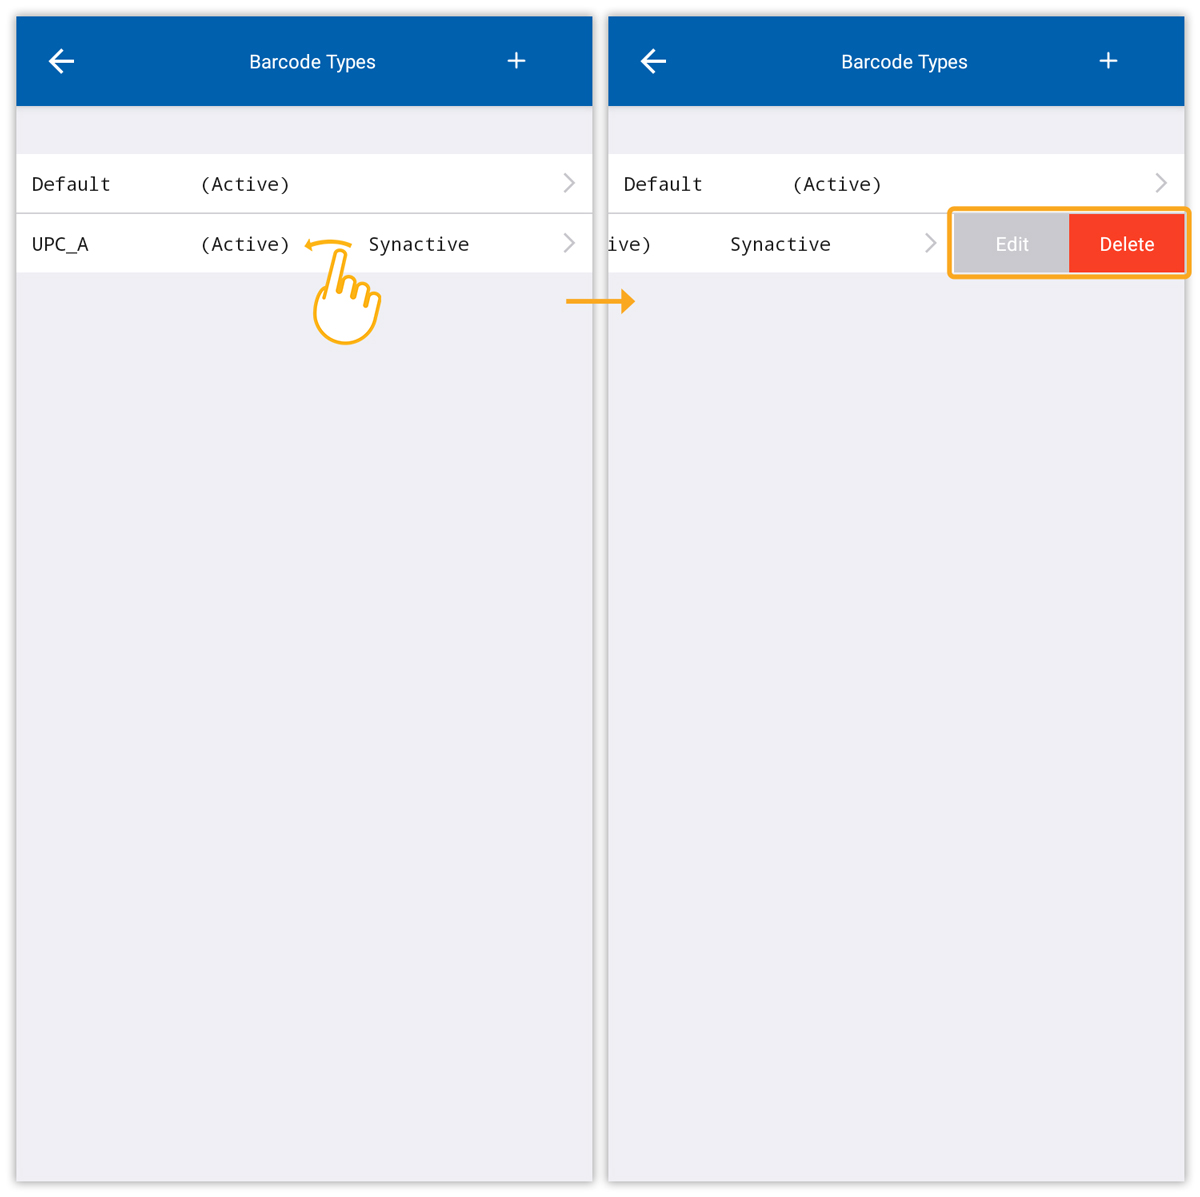
- Swipe the selected barcode type to the left to find Edit and Delete options. Select the Edit option to edit the barcode preferences and the Delete option to remove an item from the screen, as shown below.
Note: Default element cannot be deleted from the screen.