Purpose
Remote Function Call (RFC) is a standard SAP interface used for several functions, mainly to communicate between systems. RFC requires a valid username and password, which are stored in the Liquid UI profile. To diagnose the issue, users can check the RFC user authorization using the SU53 screen. This information can then be sent to the security team to grant proper authorization.
You may receive the RFC user authorization error when the remote function call returns an authority exception or when the data does not match the result from SE37. This error occurs if the RFC user doesn't have proper authority to execute a specific function module.
//Create the file SAPLSMTR_NAVIGATION.E0100.sjs inside your scripts folder for customizing the SAP Easy Access screen
//Now, add the Liquid UI script to the above file and save it.
User Interface
This article details how to check the RFC user authorization error in your SAP.
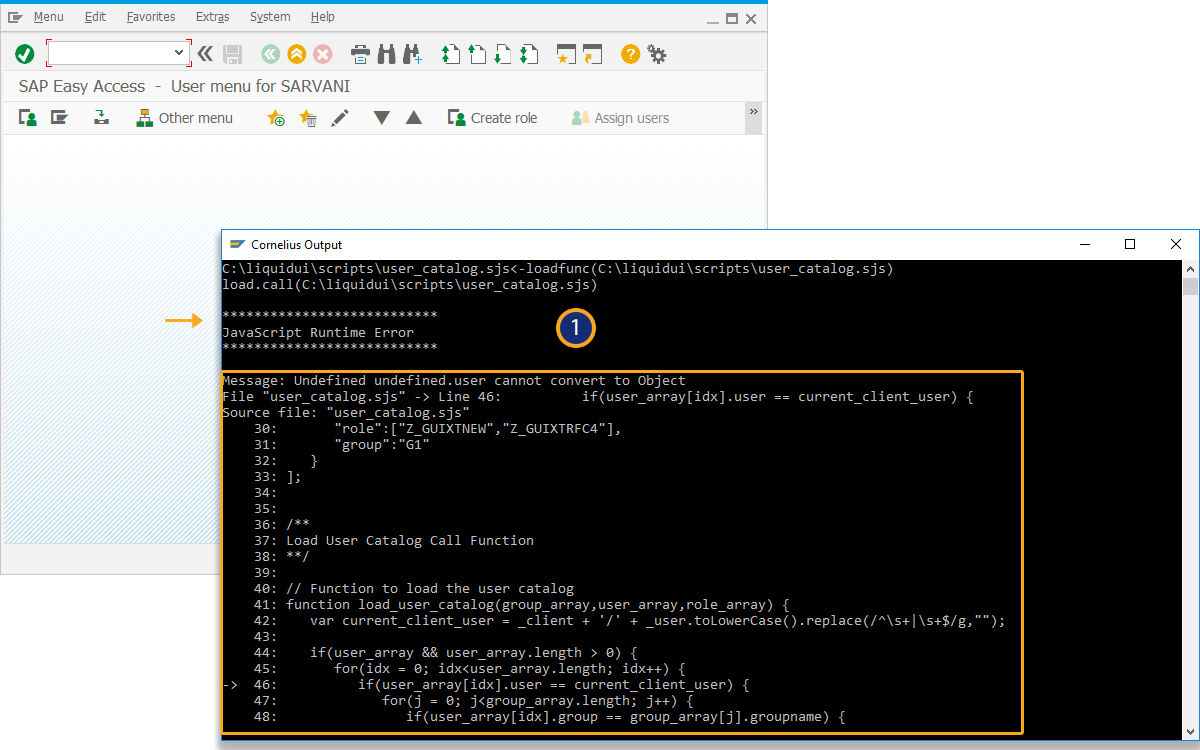
- Execute the function module call via script. If an RFC exception occurs, SAP will capture the authorization issue.
- If incorrect RFC details are used, an authorization error will be displayed.
- Load the file in the SAP Easy Access screen.
load('user_catalog.sjs');//Create the USER_CATALOG.sjs file inside your scripts folder.
//Now, add the Liquid UI script to the above file and save it. - Add an array to define the group names, directories, and transactions.
//Creates the group catalog array with group names, directories, and transaction codes /** User Group Corresponding to Directory1 var GROUP_CATALOG_ARRAY = [ { "groupname":"G1", "d1":"c:\\guixt\\G1\\d1", "tcode":"/nsmen" }, { "groupname":"G2", "d1":"SAPWR:Z.GUIXT", "tcode":"/nva01" }, { "groupname":"G3", "d1":"\\\\guixt.com\\usr\\SYNACTIVE\\Accounts\\Sempra\\M&I Group\\Consulting\\Scripts\\LC-FOS-DOC_scripts", "tcode":"/nva01" } ]; **/ - Add an array to associate specific users to their respective groups.
//Defines the user catalog array mapping users to specific groups var USER_CATALOG_ARRAY = [ { "user":"800/umang", "group":"G1" // User '800/umang' belongs to Group 'G1' }, { "user":"800/zlee", "group":"G3" // User '800/zee' belongs to Group 'G3' } ]; - Create an array determining, which roles need to be checked for a user.
//Defines the role catalog array linking roles with user groups var ROLE_CATALOG_ARRAY = [ { "role":["Z_GUIXTNEW","Z_GUIXTRFC4"], // Roles assigned to Group G1 "group":"G1" // These roles apply to Group G1 } ]; - Add load_user_catalog function to check the user, group, and roles, which then navigate to the corresponding directory or transaction code.
//Function to load the user catalog
function load_user_catalog(group_array,user_array,role_array) {
   var current_client_user = _client + '/' + _user.toLowerCase().replace(/^\s+|\s+$/g,"");

   if(user_array && user_array.length > 0) {
       for(i = 0; i<user_array.length; i++) {
           if(user_array[i].user == current_client_user) {
               for(j = 0; j<group_array.length; j++) {
                   if(user_array[i].group == group_array[j].groupname) {
                       if(group_array[j].d1) {
                           enter(group_array[j].tcode +"/d1=" + group_array[j].d1);
                           break;
                       }
                   }
               }
               break;
           }
       }
   }

   if(role_array && role_array.length > 0) {
       var Z_ROLES = [];
       call('BAPI_USER_GET_DETAIL', {"in.USERNAME":"&V[_user]","table.ACTIVITYGROUPS":"Z_ROLES"});
       for(i = 0; i<role_array.length; i++) {
           var role_match_count = 0;
           for(m = 0; m <role_array[i].role.length; m++) {
               for (j = 0; j < Z_ROLES.length; j++) {
                   var z_userrole = Z_ROLES[j].toString().substring(0,30);
                   if(role_array[i].role[m].toLowerCase().replace(/^\s+|\s+$/g,"") == z_userrole.toLowerCase().replace(/^\s+|\s+$/g,"")) {
                       role_match_count++;
                   }
               }
           }
           if(role_match_count == role_array[i].role.length) {
               for(k = 0; k<group_array.length; k++) {
                   if(role_array[i].group == group_array[k].groupname) {
                       if(group_array[k].d1) {
                           enter(group_array[k].tcode +"/d1=" + group_array[k].d1);
                           break;
                       }
                   }
               }
               break;
           }
       }
   }
}
// Ensures the function is executed only once during the session
if(!load_user_catalog_flag) { load_user_catalog_flag = 'X'; // Set flag to indicate the function has been called load_user_catalog(GROUP_CATALOG_ARRAY,USER_CATALOG_ARRAY,ROLE_CATALOG_ARRAY); // Call the function to load the user catalog }
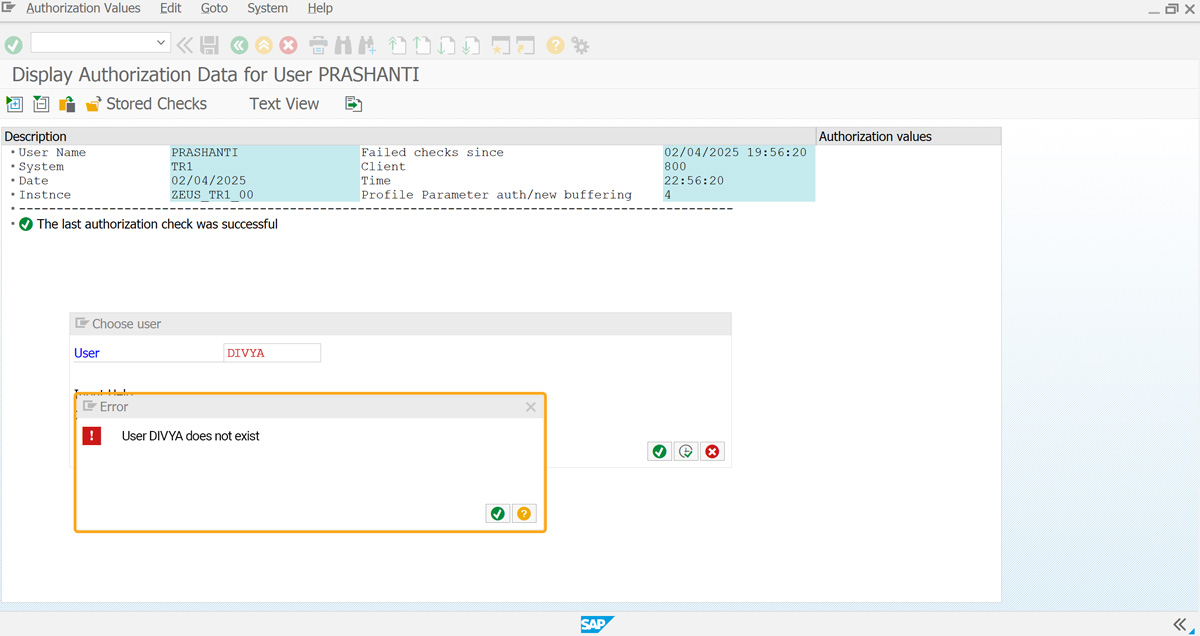
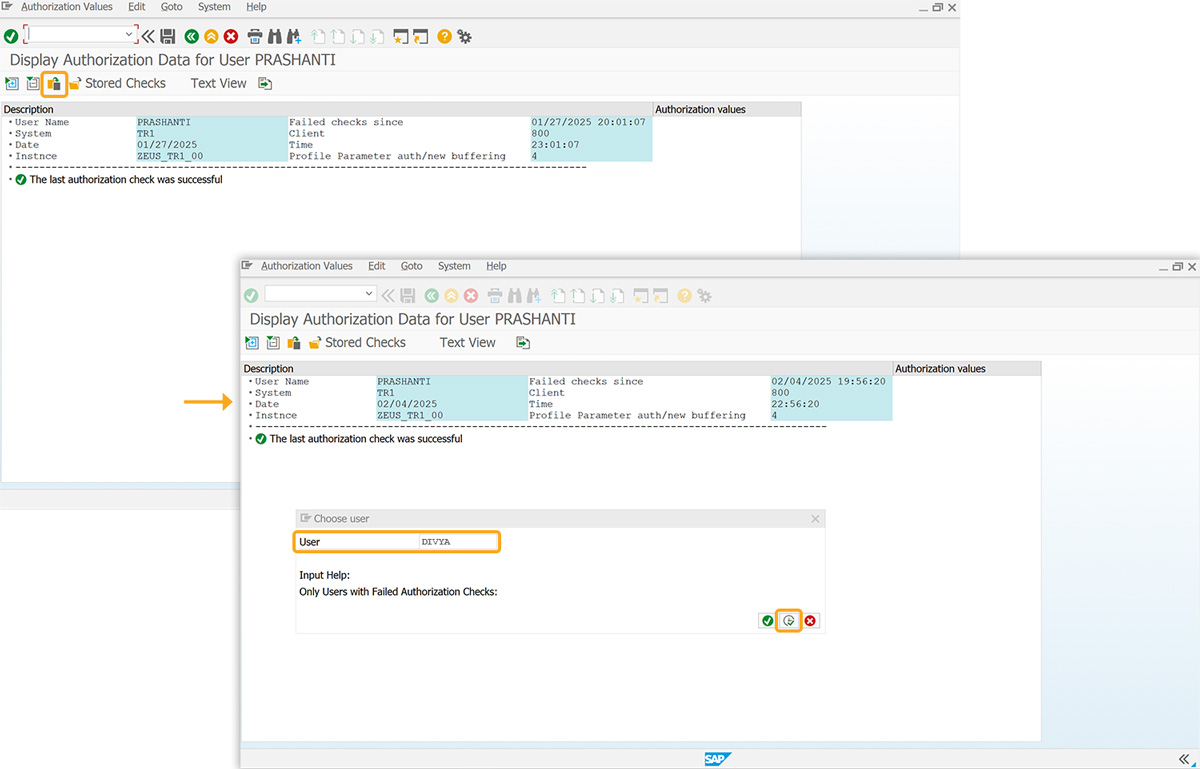
- Navigate to the SU53 screen to view the authorization error. Click on Display for Different User in the toolbar. A popup window will appear, where you can select a user in the User field and click Execute.
- If the user doesn’t exist, an error will appear stating: User does not exist, as shown in the image below.