This section will explain how to do the following actions in License Manager:
Importing Licenses
- Locate the license file you received from Synactive. It will be in a .SY3 format.
- Launch License Manager (Start > Programs > Synactive Inc > FTE >License Manager).
- On the right side of the License Manager window, click the Import License File located at the bottom.
- Use the Windows browse utility to browse to the license file you received from Synactive.
- Select the license file you wish to use and then click the Open button in the Windows file open utility.
- The file will be imported into the License Manager
- Click Apply to apply the license to your Web Server.
- Proceed to the Validate section below.
Manually Adding Licenses
In addition to importing licenses as described above, you can also manually add licenses into the License Manager with the help of the following steps:
- Open the License Manager and click Add.
- A window will display as shown below:
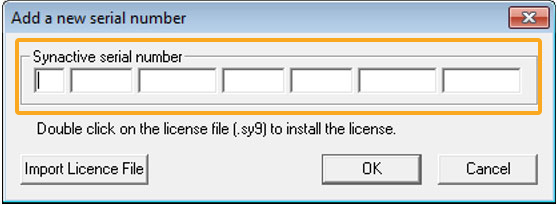
- Type in the serial number that you received from Synactive and click OK. You can also launch the import process described above by clicking the Import License File button in the bottom left corner.
Note: When you import a license, make sure to click the Apply button after adding it or the license will be fully imported. - The license will be added to the License Manager.
Removing Licenses
To remove a license from the License Manager, please do the following:
- Open License Manager and highlight the license you wish to remove.
- Click the Remove button.
- Click the Apply button.
- The license serial number will be removed from the License Manager.