Purpose
You will learn how to create a self-signed Client CA certificate that provides end to end security from Liquid UI Server to Liquid UI for Android and iOS.
Prerequisites
- Import private key and server cert key in your Liquid UI Server
- Download and install OpenSSL software in your Liquid UI Server
- Configure your sapproxy.ini file in your Liquid UI Server
Get Client CA certificate
Walkthrough the following steps to Get Client CA certificate:
-
Import private key and server certificate files in your Liquid UI Server as shown below.
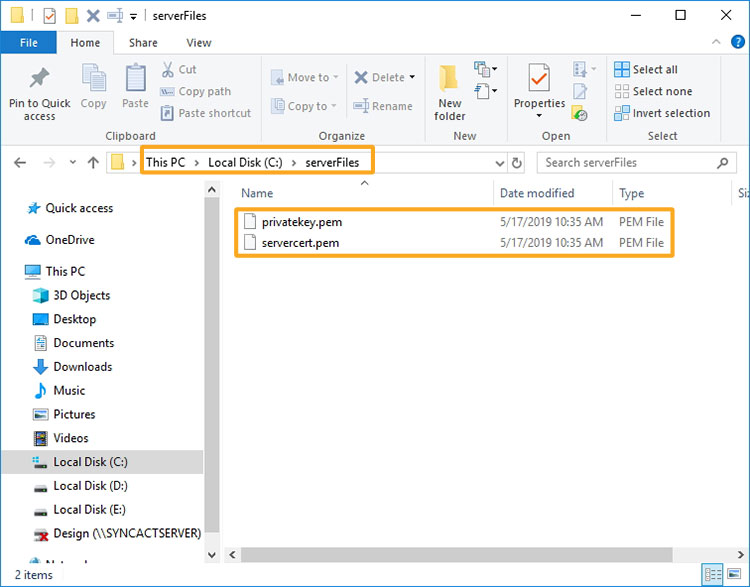

Note: Private key and server cert keys can be purchased or created using OpenSSL software.
-
Download and install OpenSSL software in your Liquid UI Server to generate a client CA certificate.
-
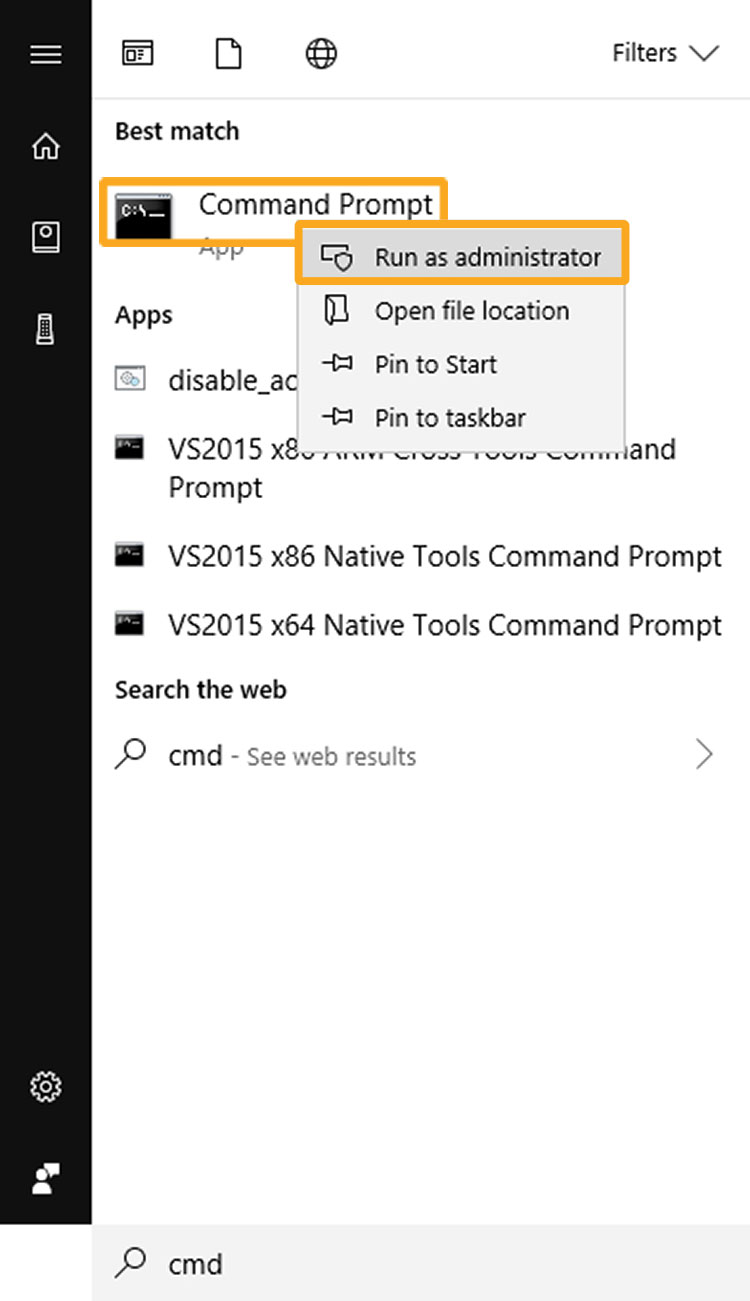
Open the command prompt, and run as an administrator.
-
Run the following command line steps to initiate a client certificate request.
openssl req -config "c:\openssl.cnf" -newkey rsa:2048 -nodes -subj "/CN=sarvani/ST=CA/C=US" -keyout l_sarvanikey.pem -out l_sarvanireq.csr
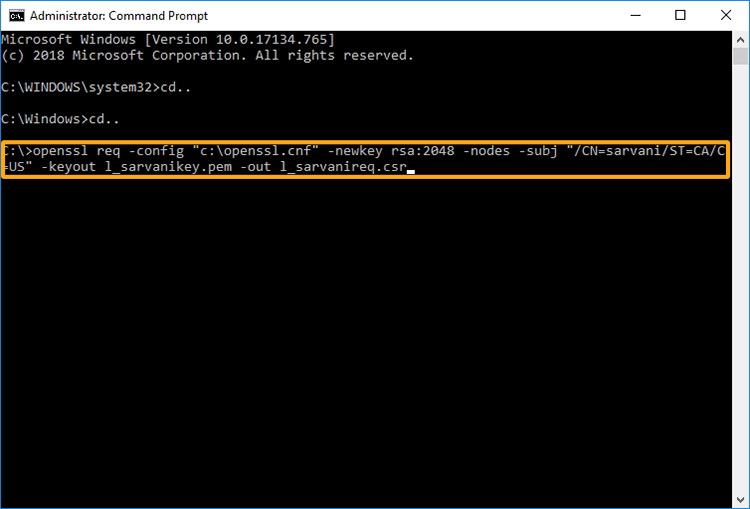
Note: You can replace the name (sarvani) in the above command, |/CN=sarvani| with your SAP login username.
-
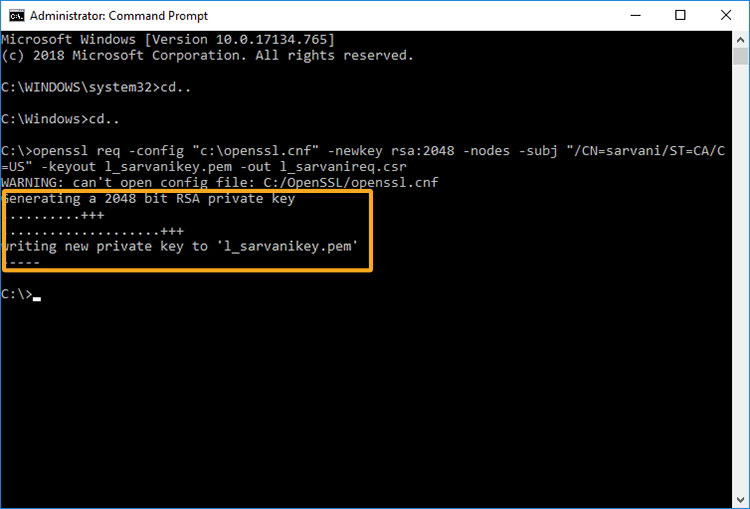
You will find a message indicating a new RSA private key generated as shown below.
-
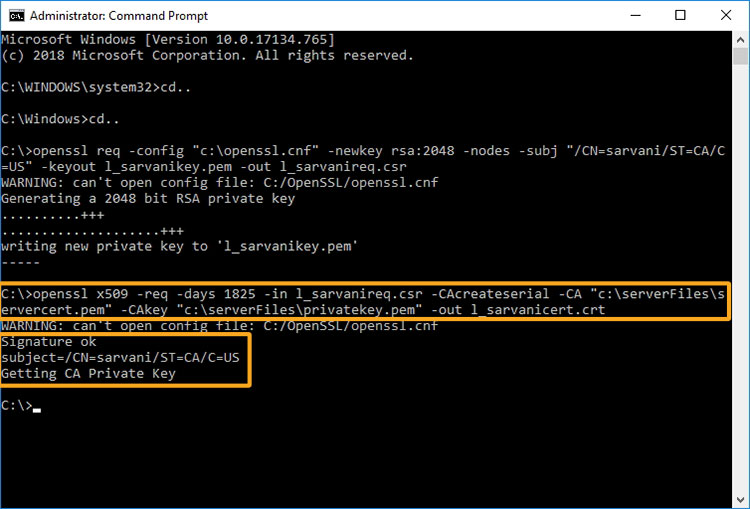
Using the above-generated files, run the following command line steps to create your certificate against the Liquid UI Server. In this command line, you need to include the location of the servercert.pem and privatekey.pem files present in your system. Then, you will find the message as getting CA Private Key.
openssl x509 -req -days 1825 -in l_sarvanireq.csr -CAcreateserial -CA "c:\serverFiles\servercert.pem" -CAkey "c:\serverFiles\privatekey.pem" -out l_sarvanicert.crt
-
Run the following command line steps to create your PKCS12 file to install in your Liquid UI for Android.
openssl pkcs12 -export -out sarvaniclientcert.p12 -inkey l_sarvanikey.pem -in l_sarvanicert.crt
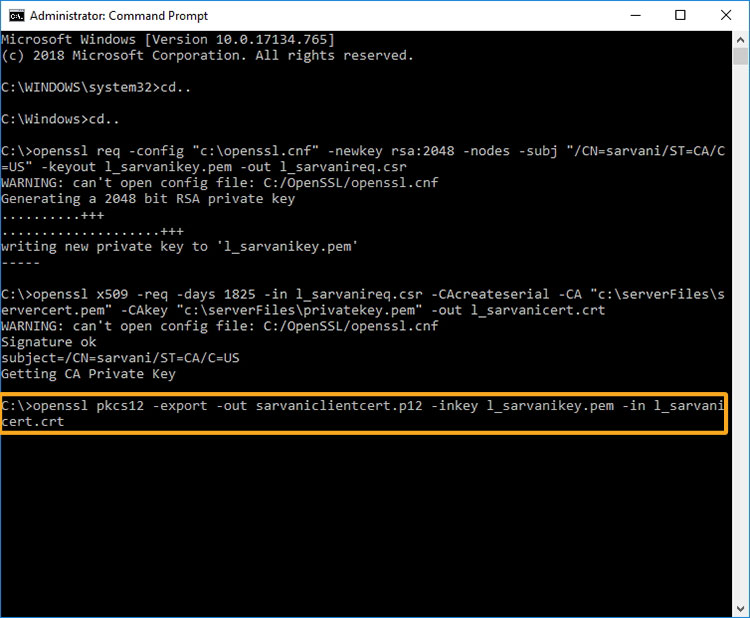
Note: This will generate a sarvaniclientcert.p12 client certificate file.
-
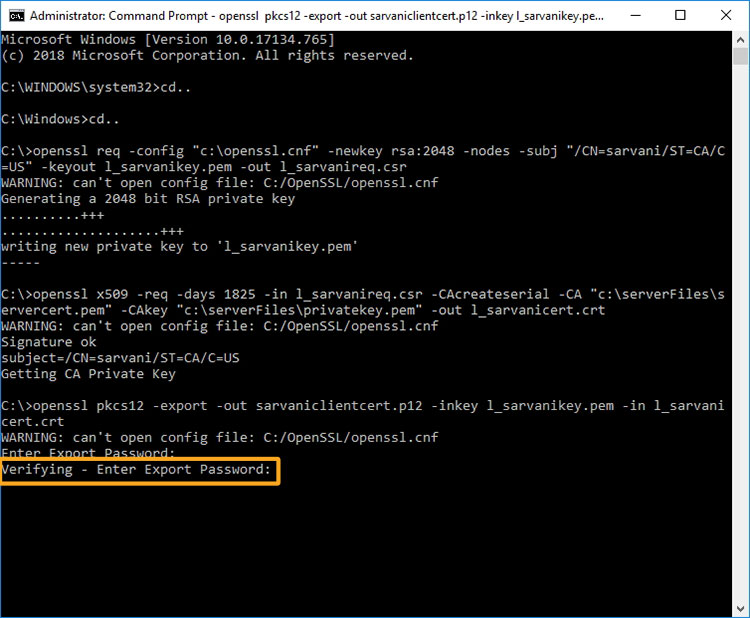
Enter the required password for the client certificate file to authenticate before using it.

-
Renter the same password for confirmation and click enter.
-
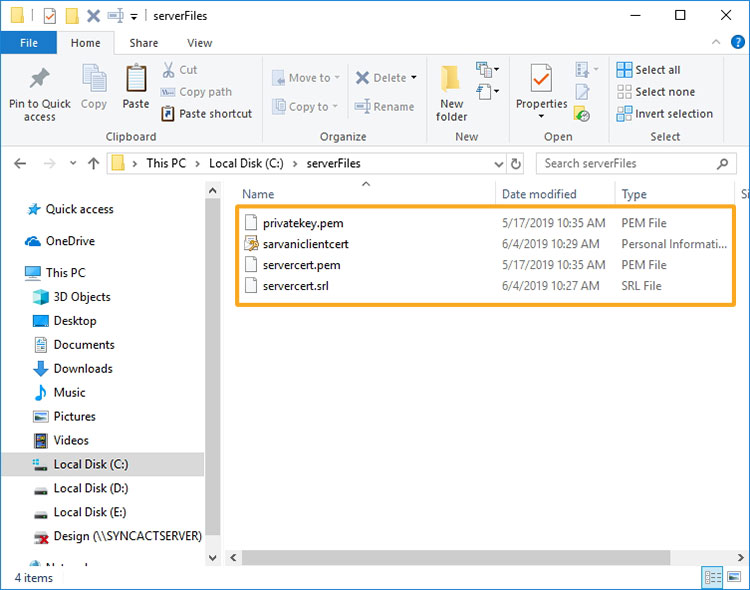
You will see the sarvanicert.p12 file generated in the C drive. Place all the keys and .p12 files in the specified file to access them as shown below.
-
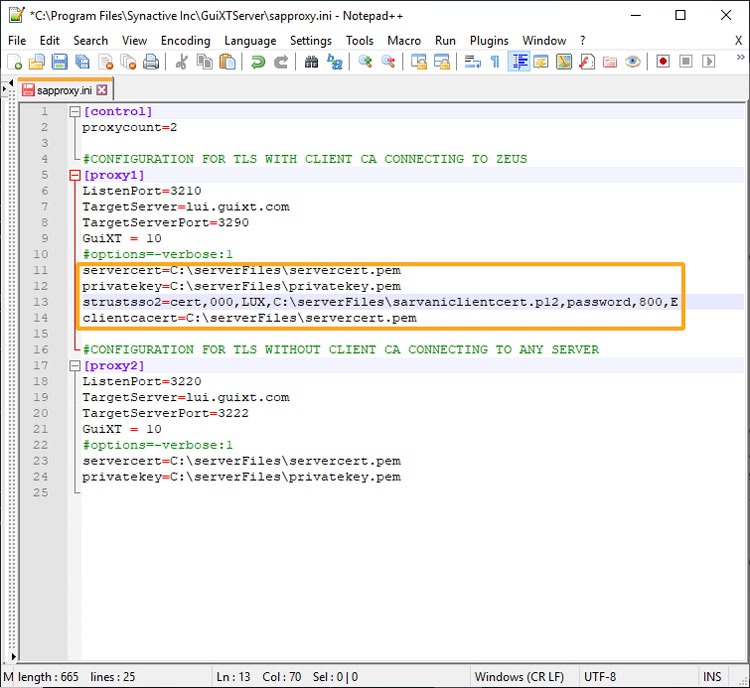
Open the sapproxy.ini file in your Liquid UI Server folder to specify the path of the private key, servercert key, and the generated .p12 file and its password as shown below.
-
You can run the Liquid UI Server to connect through Liquid UI for Android with the end to end security.