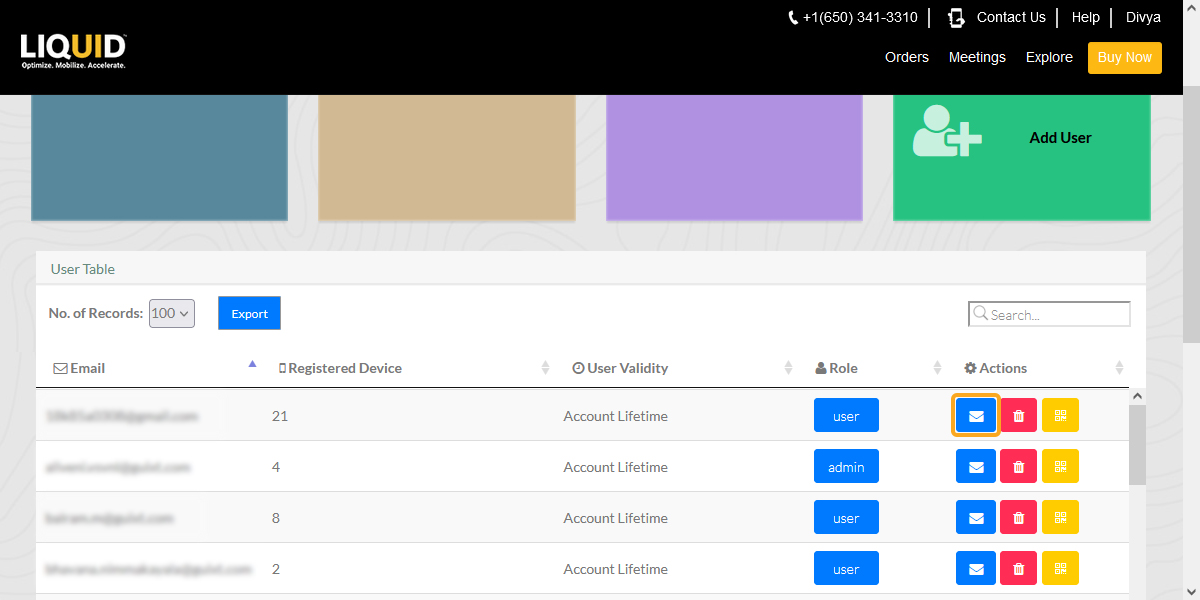
The User Details table present in the Liquid UI Access Management Portal (LAMP) provides all the relevant details specific to the users, such as linked email address, registered device, user validity, and user role.
From this page, you can change the role of a user to admin and vice versa. Also, you can resend the license email or revoke the license of the user. Further, the newly added pagination feature allows you to select the number of records to be displayed on a given table.

To view the user details present in your LAMP account, please follow the instructions below:
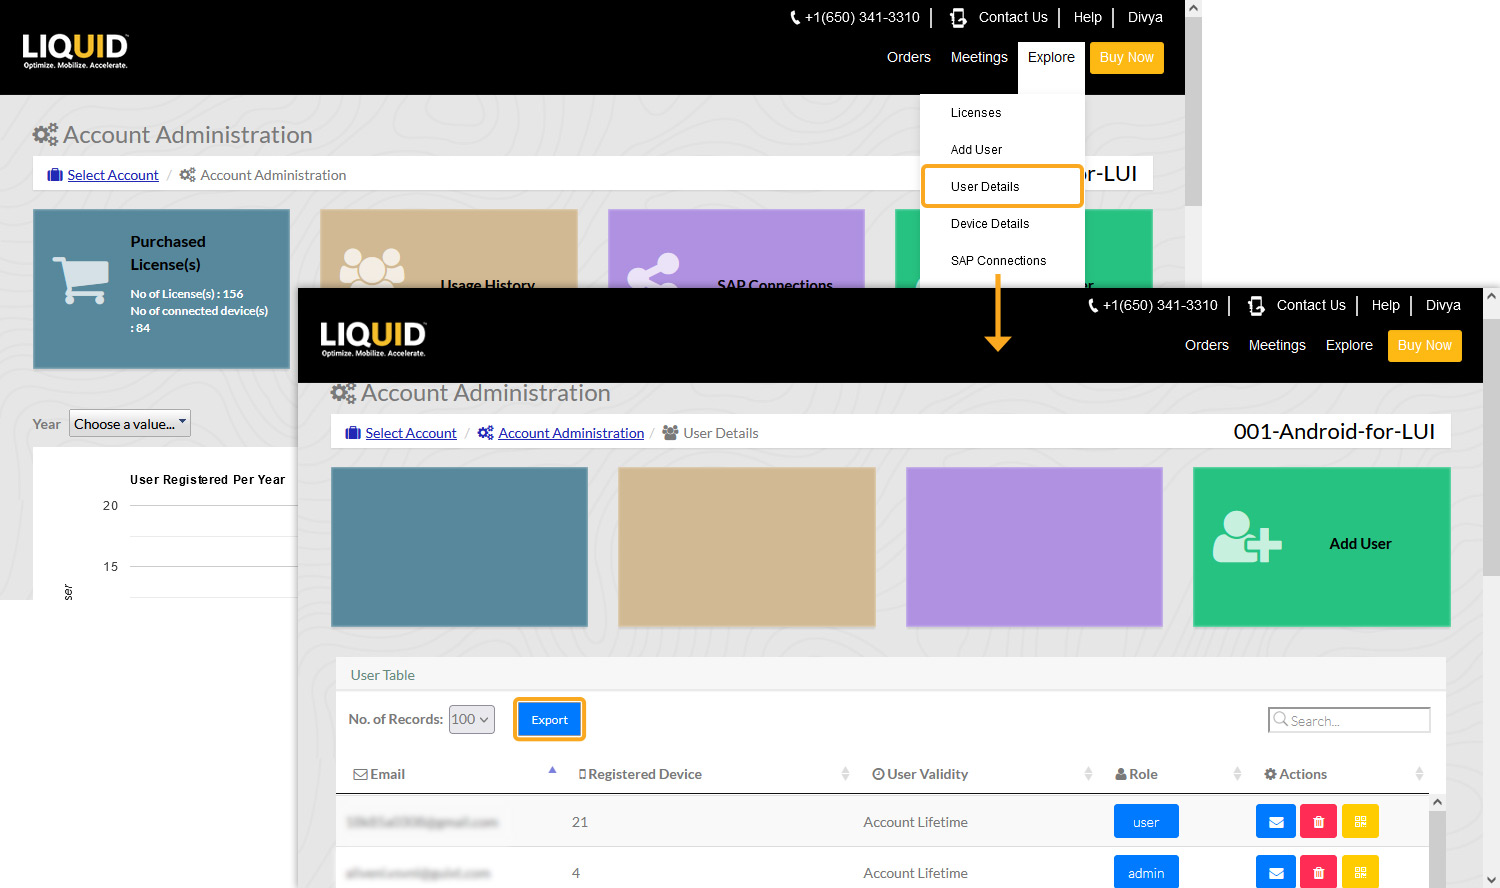
- Log in to LAMP and navigate to your Account Administration screen. Select the User Details tab from the Explore menu to navigate to the User Table screen, as shown in the image below.
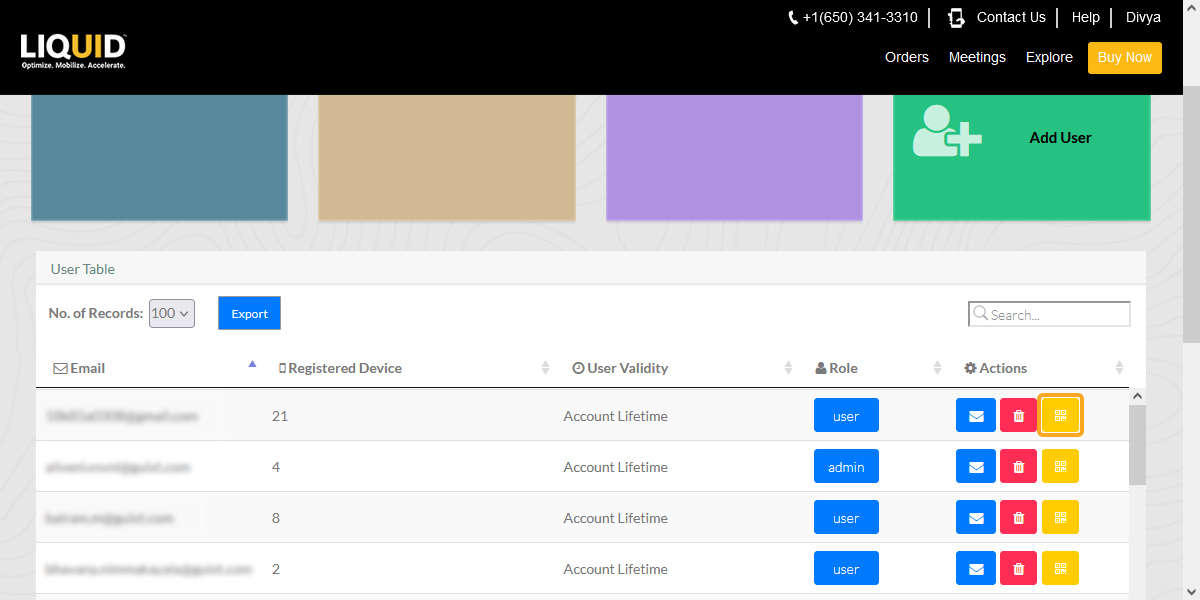
- The User Table provides details related to the registered users, such as user Email, Registered Device, User Validity, Role, and Actions, as shown in the image below.
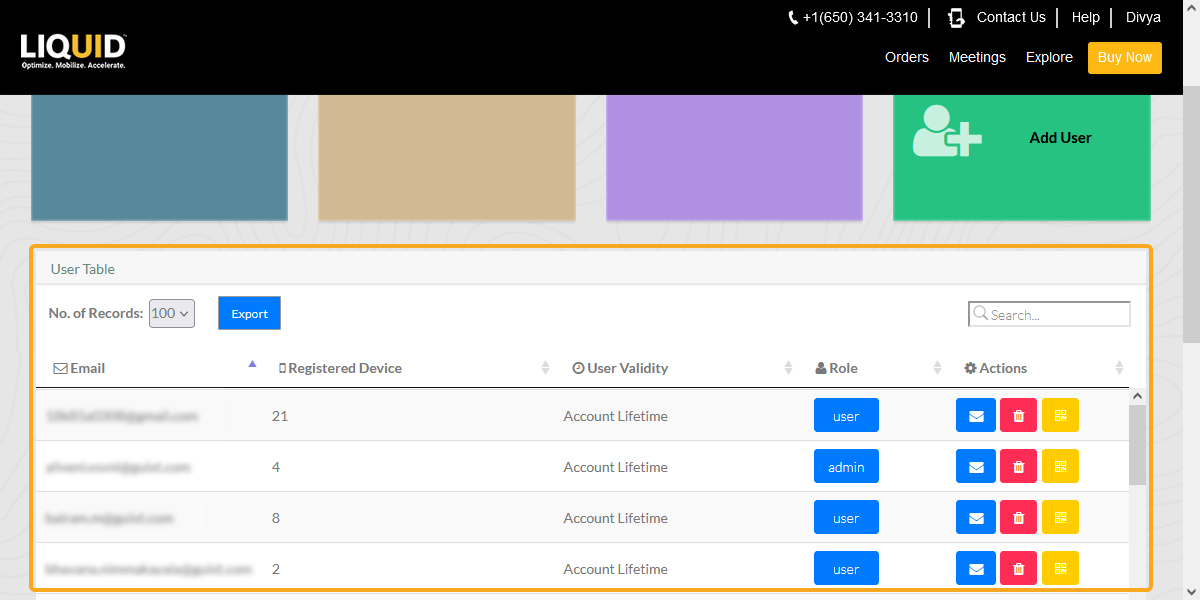
User Table
Email Address
It displays the email address of the user. Here, the device is activated using the license sent from this email.
Registered Device
It displays the number of mobile devices applied for licenses using the email sent from this email address.
User Validity
It displays the license expiry date for the user.
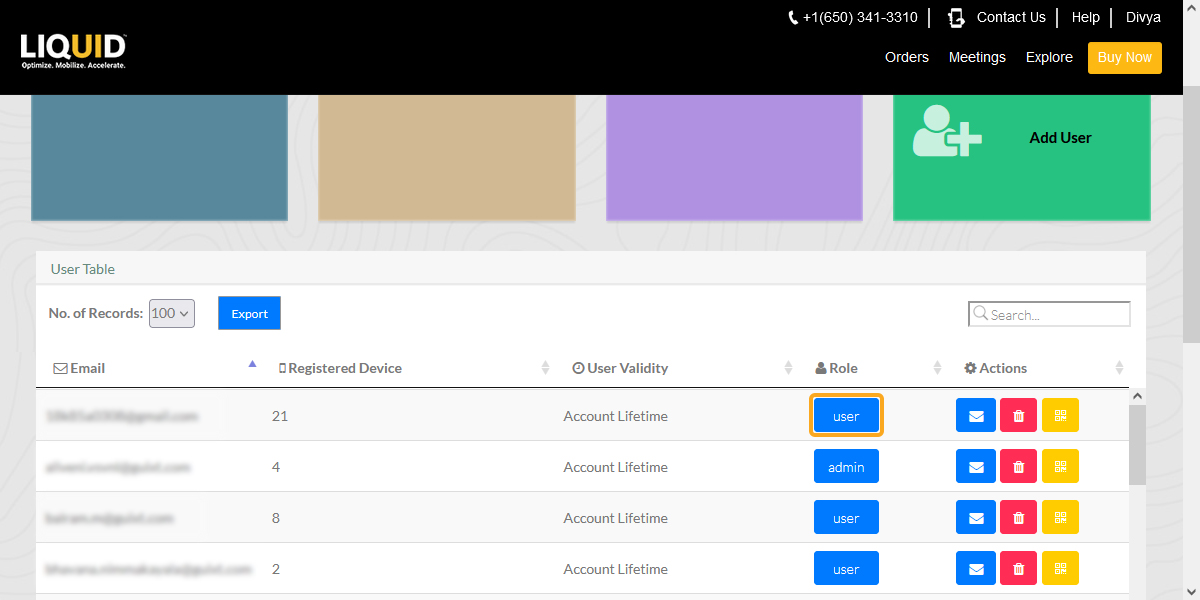
Role
Allows you to change the role of a user
Actions
Allows you to perform the Revoke operation or send an email to the user, and a QR code to activate the device license for the user
- To change the user role to admin and vice versa, click the user button under the Role column. Visit Change User Role for more information regarding the same.
- You can also remove users with the help of the Revoke button under the Action column. Visit Remove User for more information regarding the same.

- You can send an email with the help of an email button under the Action column.
- You can scan the QR-code with the help QR-code button under the Action column to activate the device license for the user.