Purpose
Liquid UI's OCR (Optical Character Recognition) functionality greatly reduces error-prone manual data entries in the SAP. The OCR feature enables you to capture information from paper documents, e-mails, images, and other sources, and quickly transfer the data to the appropriate SAP fields for further processing. This feature will reduce manual keying, speed up business processes, and improve data quality.
You can use the OCR functionality using the built-in camera on any input field. Long-pressing on any input field inside our app will show the OCR option with other text editing options. Our OCR algorithm recognizes both printed and written text characters in the image.
At Liquid UI, we understand that not all the image/text sizes are the same for scanning the required data, so a rectangular blue line box appears, that allows you to change the scan area, thus helping you capture only the required text in the image. Furthermore, our OCR algorithm remembers the box size changes and will retain them the next time the user clicks on the same input field. Also, the user can edit the captured text or populate it as-is in the input field. Thus, eliminating manual keying and speeding up your SAP business process.
In this article, we’ll demonstrate the OCR feature in the Liquid UI for Android app. Over here, we will go through how to activate the OCR, scan the vehicle license number on the number plate, and display it on the required input field in the PRMD transaction.
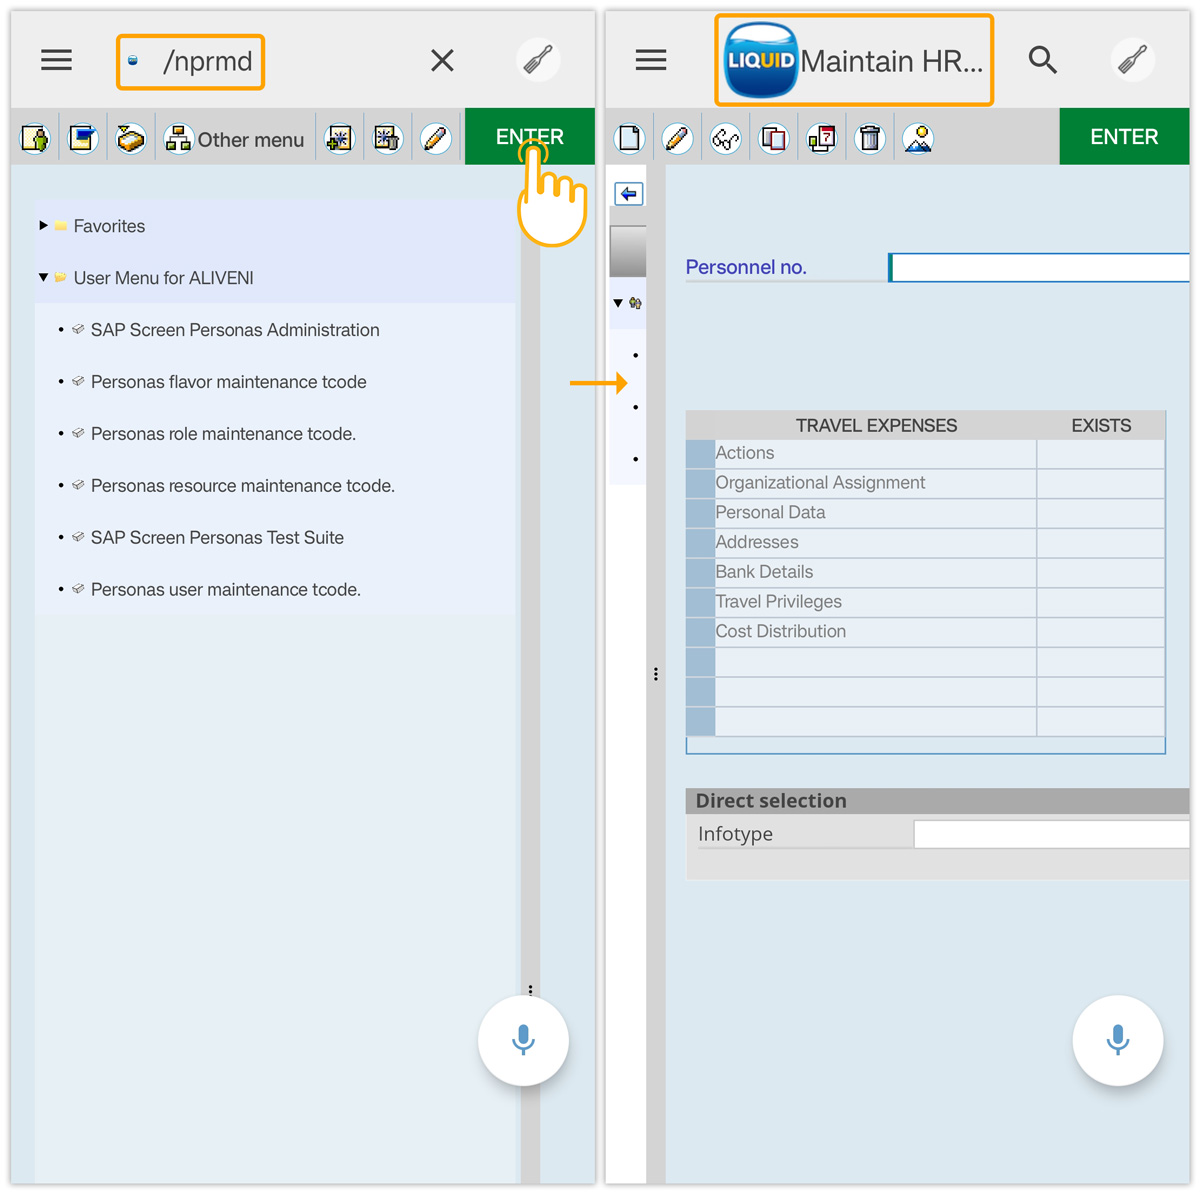
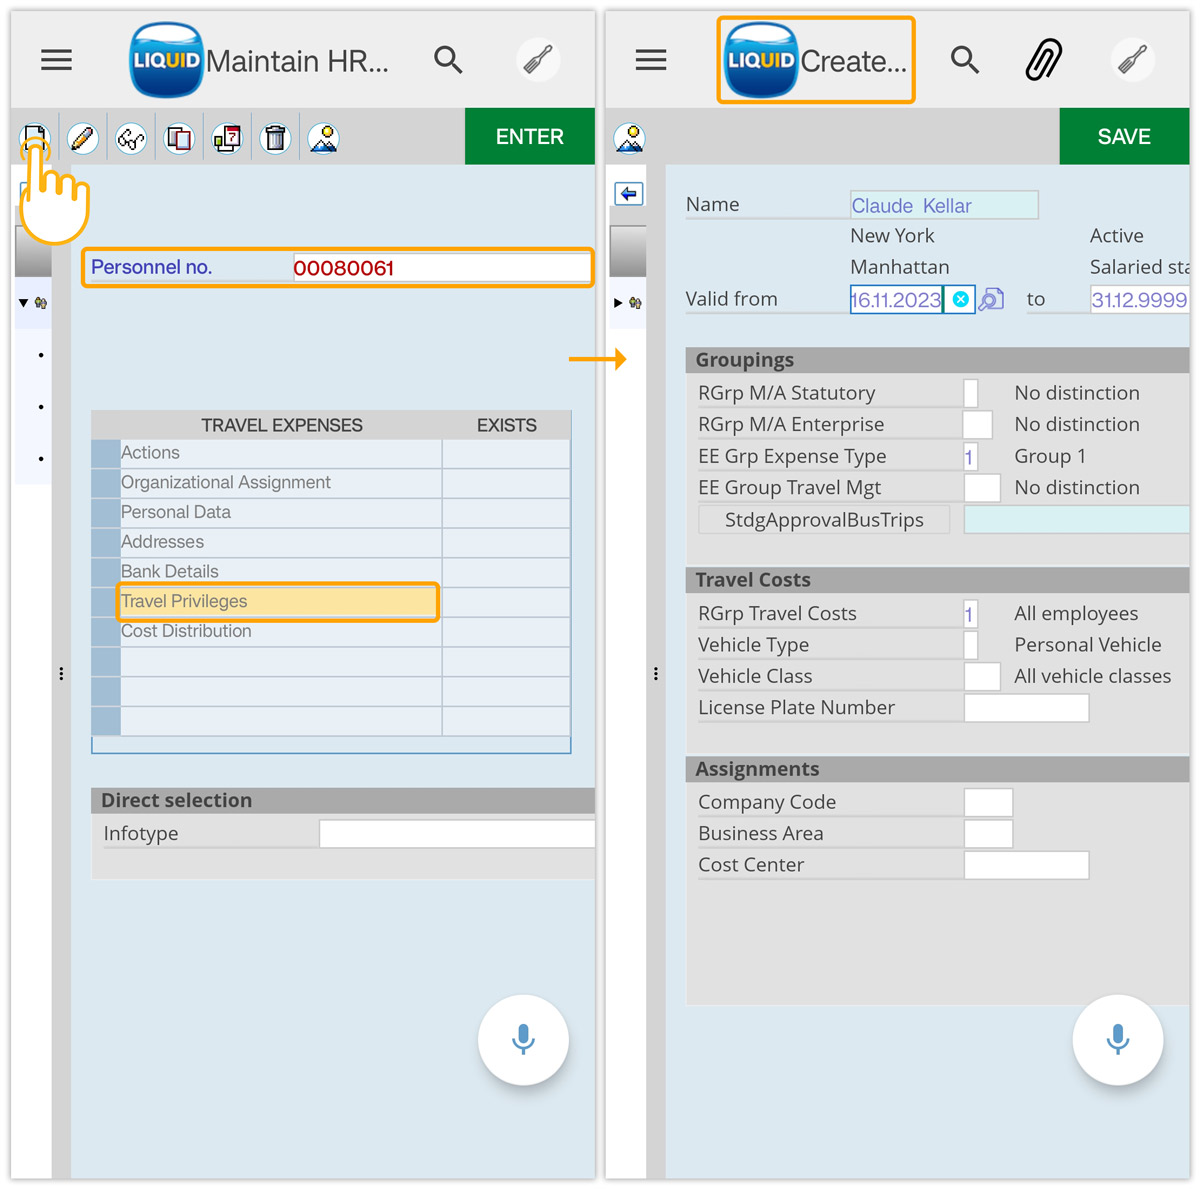
- Log in to SAP and navigate to the PRMD (Maintain HR Master Data) transaction, as shown below.
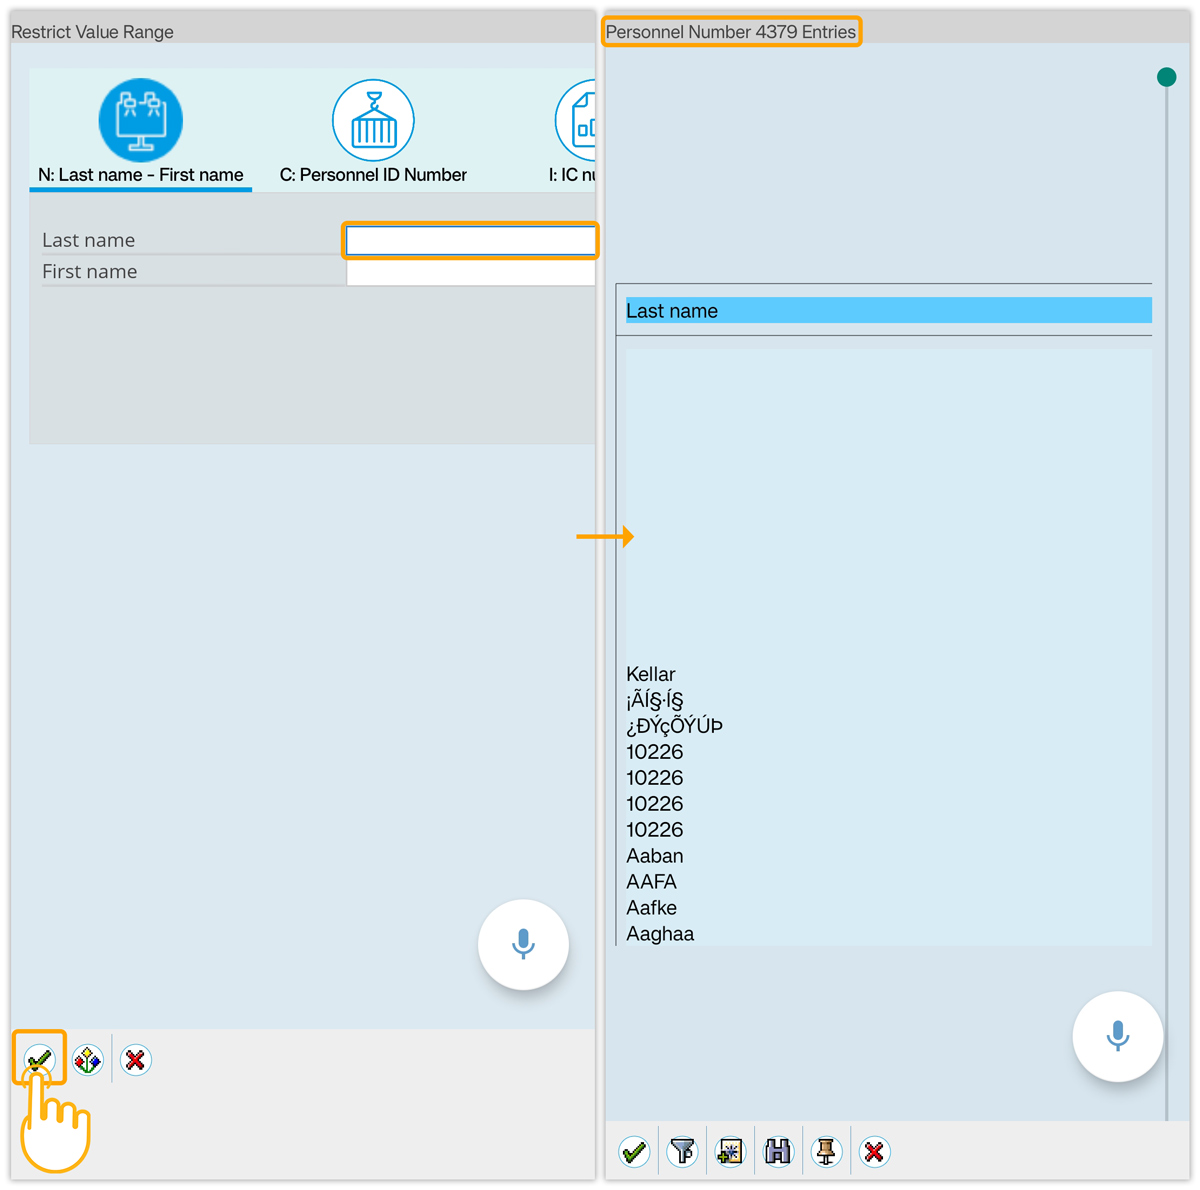
- Place the cursor on the Personnel No. input field and then click F4 to view its possible entries. Then, you will be navigated to the Restrict Value Range screen, as shown in the image below.

- Place the cursor on the Last name input field and click the continue button. Then, you can view the possible entries for the Personnel no. input field.
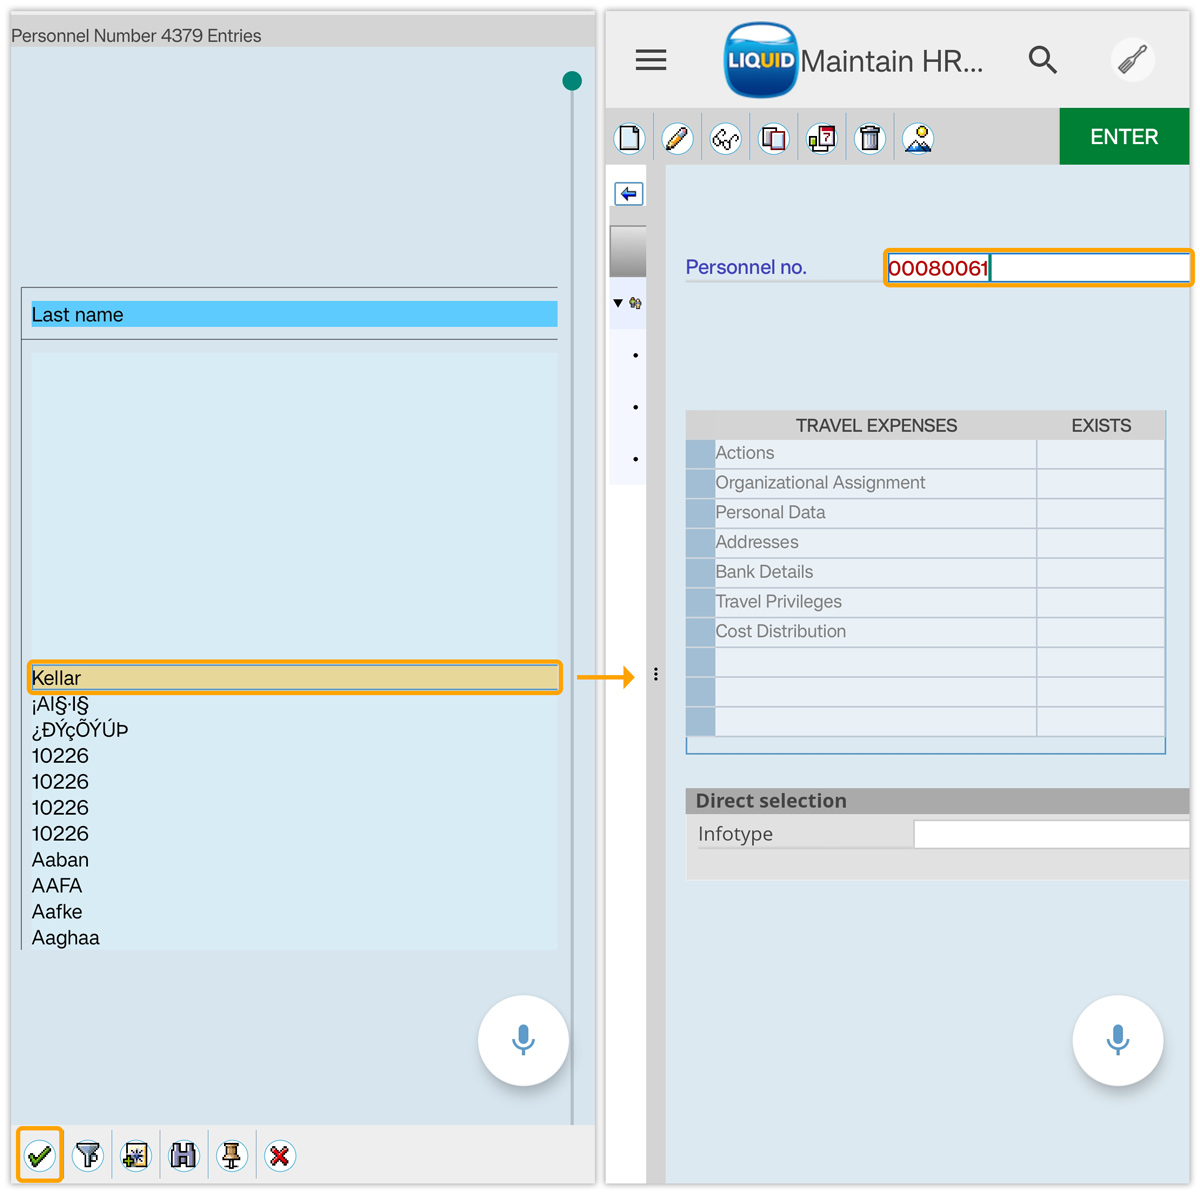
- Select the user name and click the Continue button. Then, the Personnel number of the selected user is displayed on the input field as shown below:
- Select the Travel Privileges option from the TRAVEL EXPENSES tab. Then, click the Create button on the toolbar. Then, you will be navigated to the Create Travel Privileges screen.
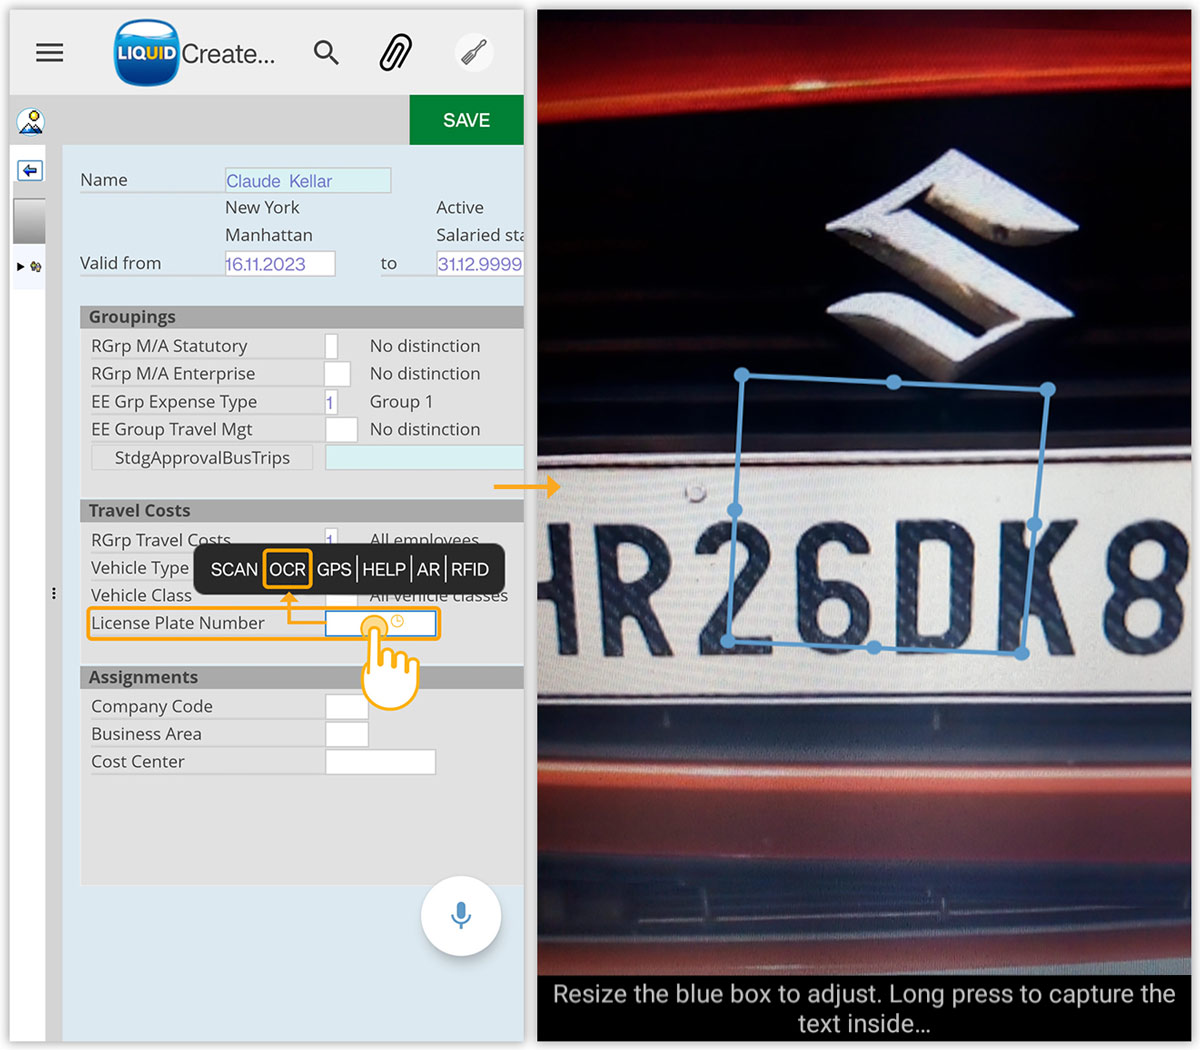
- Long-press on the License Plate Number input field and select the OCR option to scan the vehicle license number. Then, your device’s built-in camera is activated. Adjust the scanning area to the desired level by modifying the dimensions of the blue rectangular box that appears on the screen:

Note: Liquid UI for Android retains box size adjustments during scanning, ensuring consistent data capture.
- If you rotate your device, the app will recognize the device is in landscape mode and automatically rotate the rectangular box (scan area) by 90 degrees to suit your preference. Once the scanning area is adjusted, long-press anywhere on the screen to scan the selected text.

Note: Enable auto-rotate in device settings for optimal view.
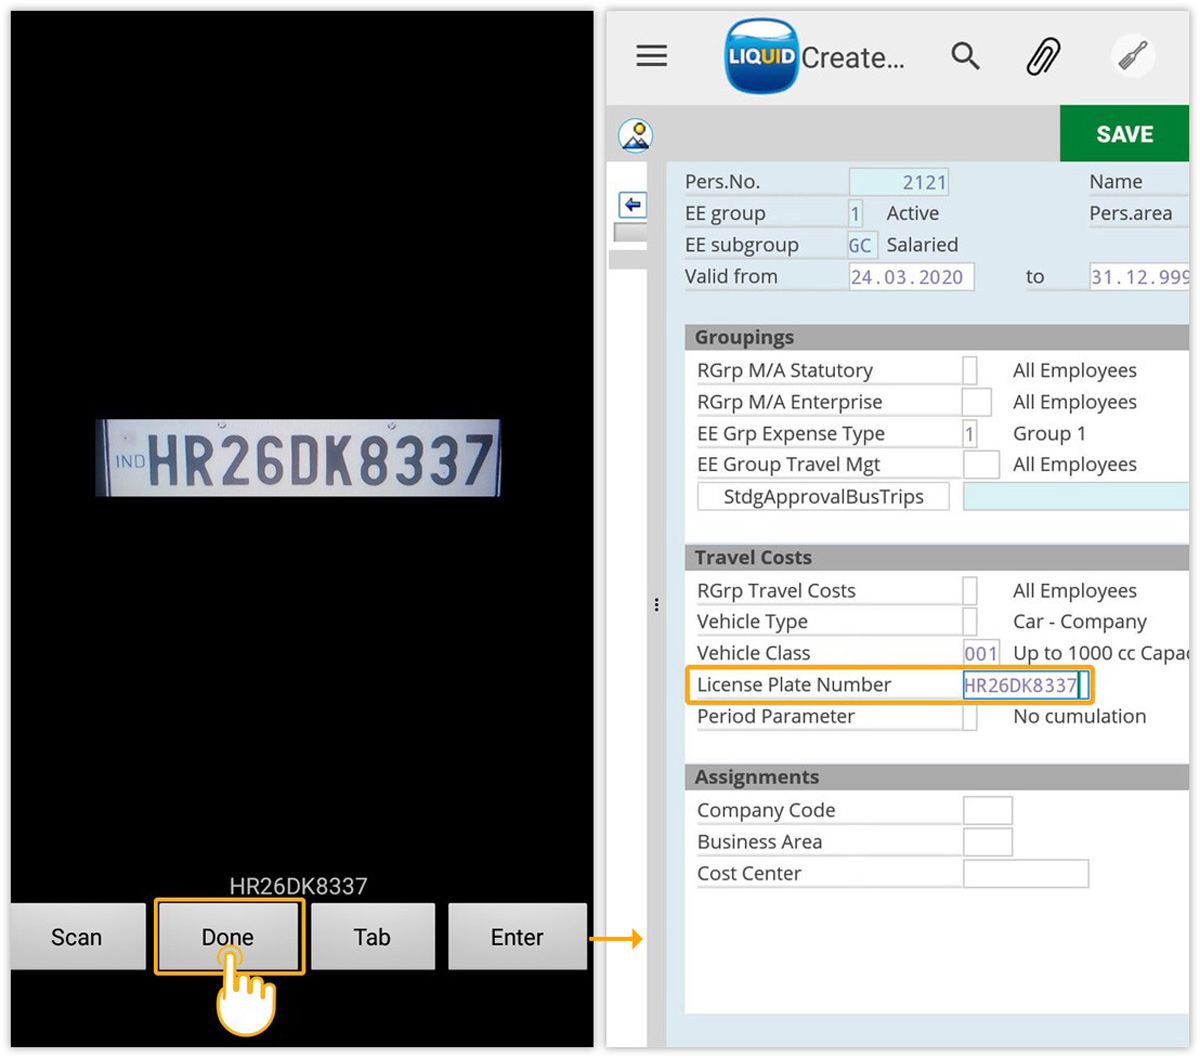
- Liquid UI identifies text within a designated area from the image. The recognized text is then displayed on the screen along with four options, as shown below.

- Scan: This button will restart the scanning process.
- Done: This button will populate the scanned value into the input field.
- Tab: This button will execute the Tab function, after populating the scanned value into the input field, mimicking SAP GUI functionality.
- Enter: This button will execute the Enter function, after populating the scanned value into the input field, mimicking SAP GUI functionality.
- Click Done to display the scanned vehicle license plate number in the input field, as shown below: