Purpose
The Electronic Signature feature of Liquid UI allows you to securely access and add your signature directly from your SAP transactions, ensuring the precise identification signatory of a digital document. This eliminates the need for physical papers and administrative tasks, streamlining the review process and enhancing efficiency. By incorporating signature support within SAP, Liquid UI for Android significantly improves process efficiency. Here are the key benefits that electronic signature support offers to SAP users:
- Enhanced security
- Paperless workflow
- Improve user convenience
- Privacy concerns addressed
- Easy to apply digital signature
- Way better experience for your clients
In this article, we’ll showcase how to use the electronic signature feature considering the Change Order: Initial Screen (IW32) and attach a signature file to the transaction.
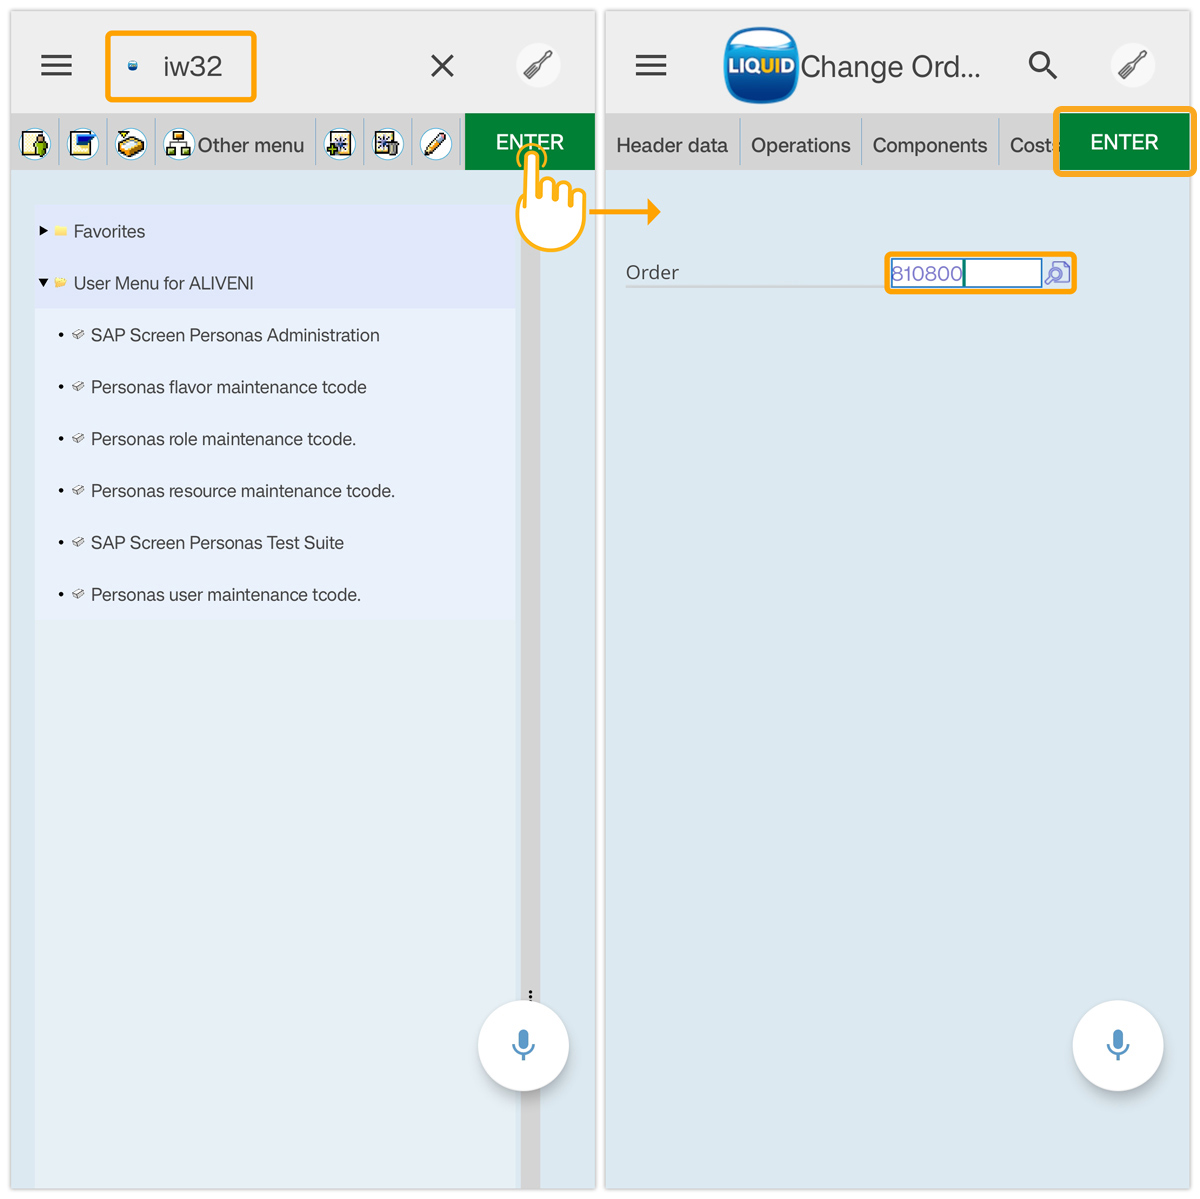
- Log into SAP and navigate to the IW32 transaction. Input the order number and click ENTER.
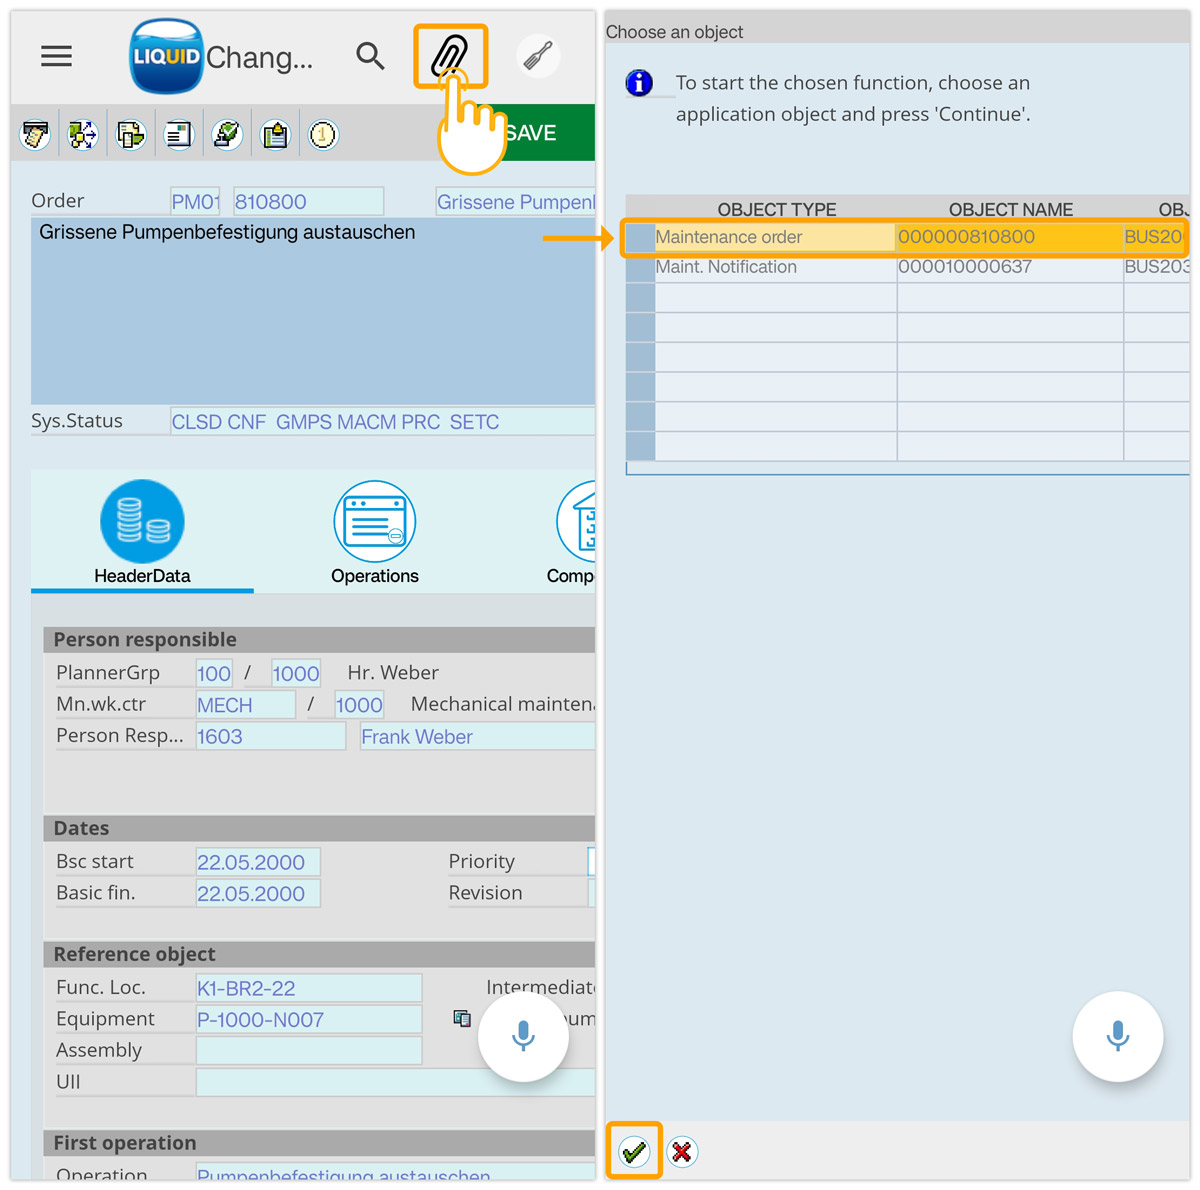
- Click the Attachment symbol, choose an Object, and click the Continue button.
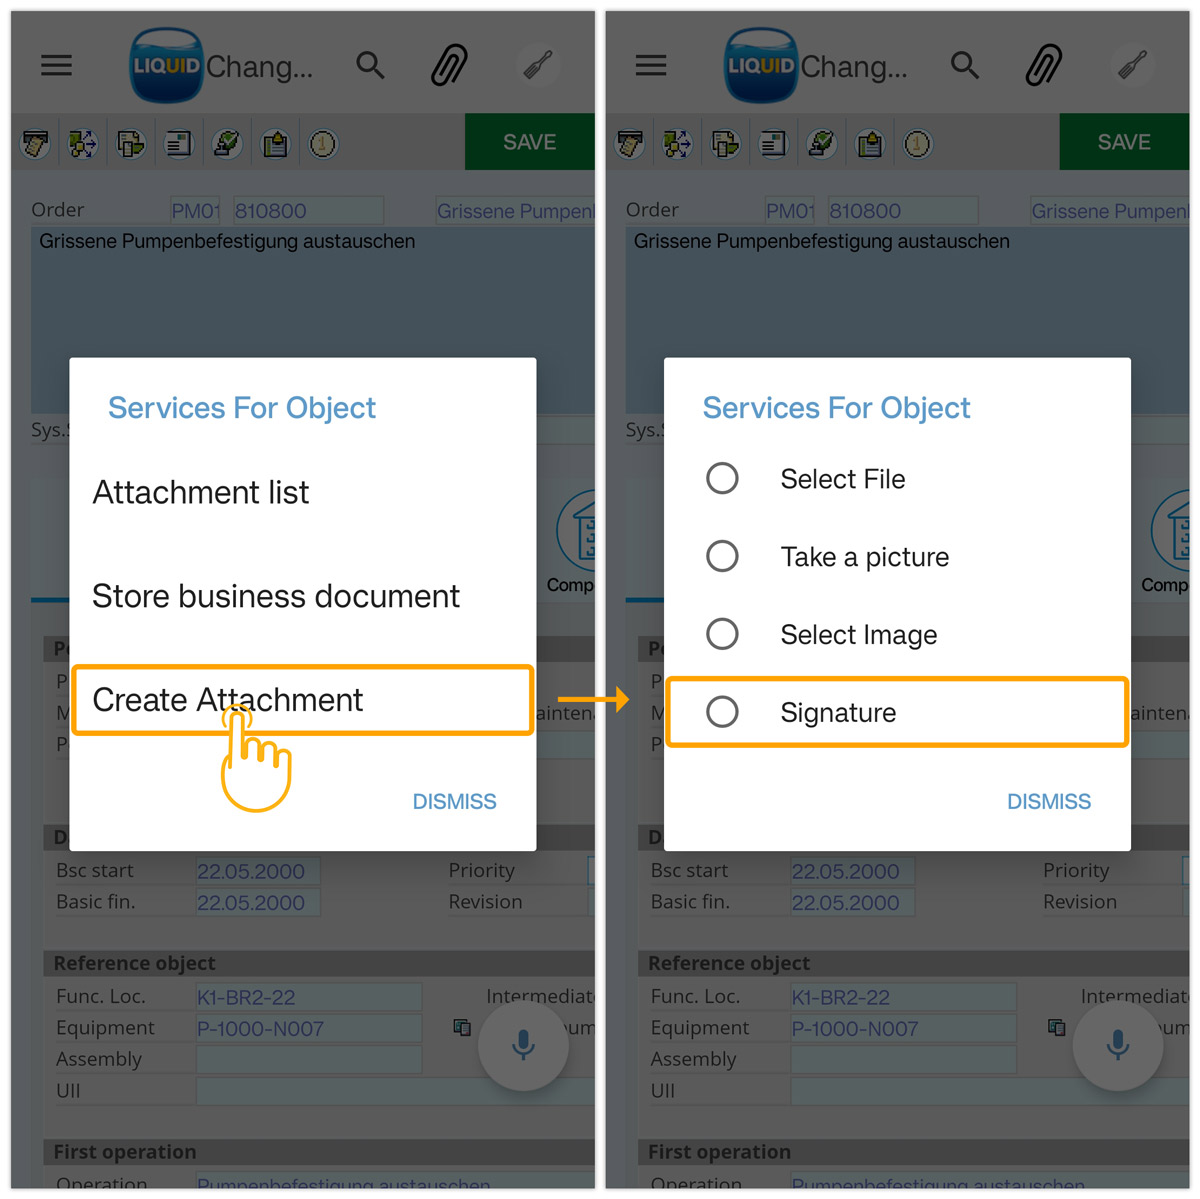
- Click Create Attachment and choose the Signature from the Service For Object popup, as shown below.
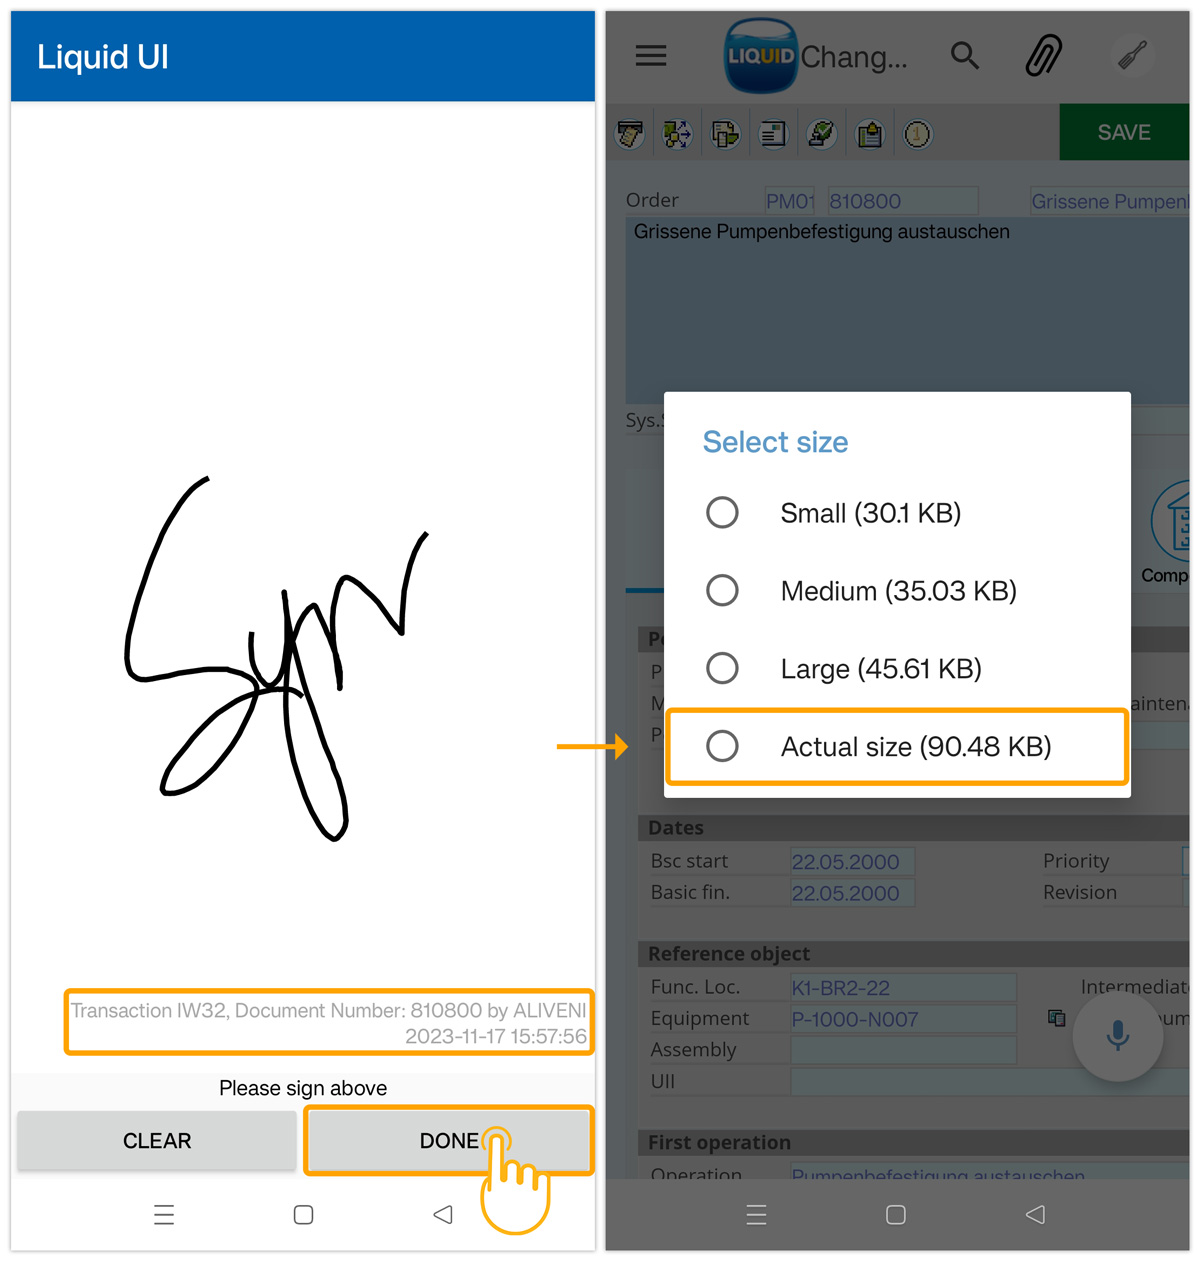
- The digital pad appears, displaying information such as the transaction code, document number, SAP username, date, and timestamp. To proceed, sign on the screen, tap DONE, and select the desired size, as shown below.
- Edit the file name as per requirement and click DONE to save it as an attachment. Then, you will receive a message at the bottom of the SAP screen stating The attachment was successfully created.