Sometimes, it can be challenging for account administrators to recognize the registered devices with their device IDs. Considering the ease of management, we have now introduced the annotation feature in the LAMP that lets you add/edit/delete names to registered devices. It means enterprises can add device identifiers based on their internal terminology. Furthermore, you have the flexibility to edit and delete these annotations, as required. Additionally, you can sort and group devices based on the annotations.
In this article, you will learn the following:

Note: You need to be an account admin to update device annotations.
Adding Device Annotations
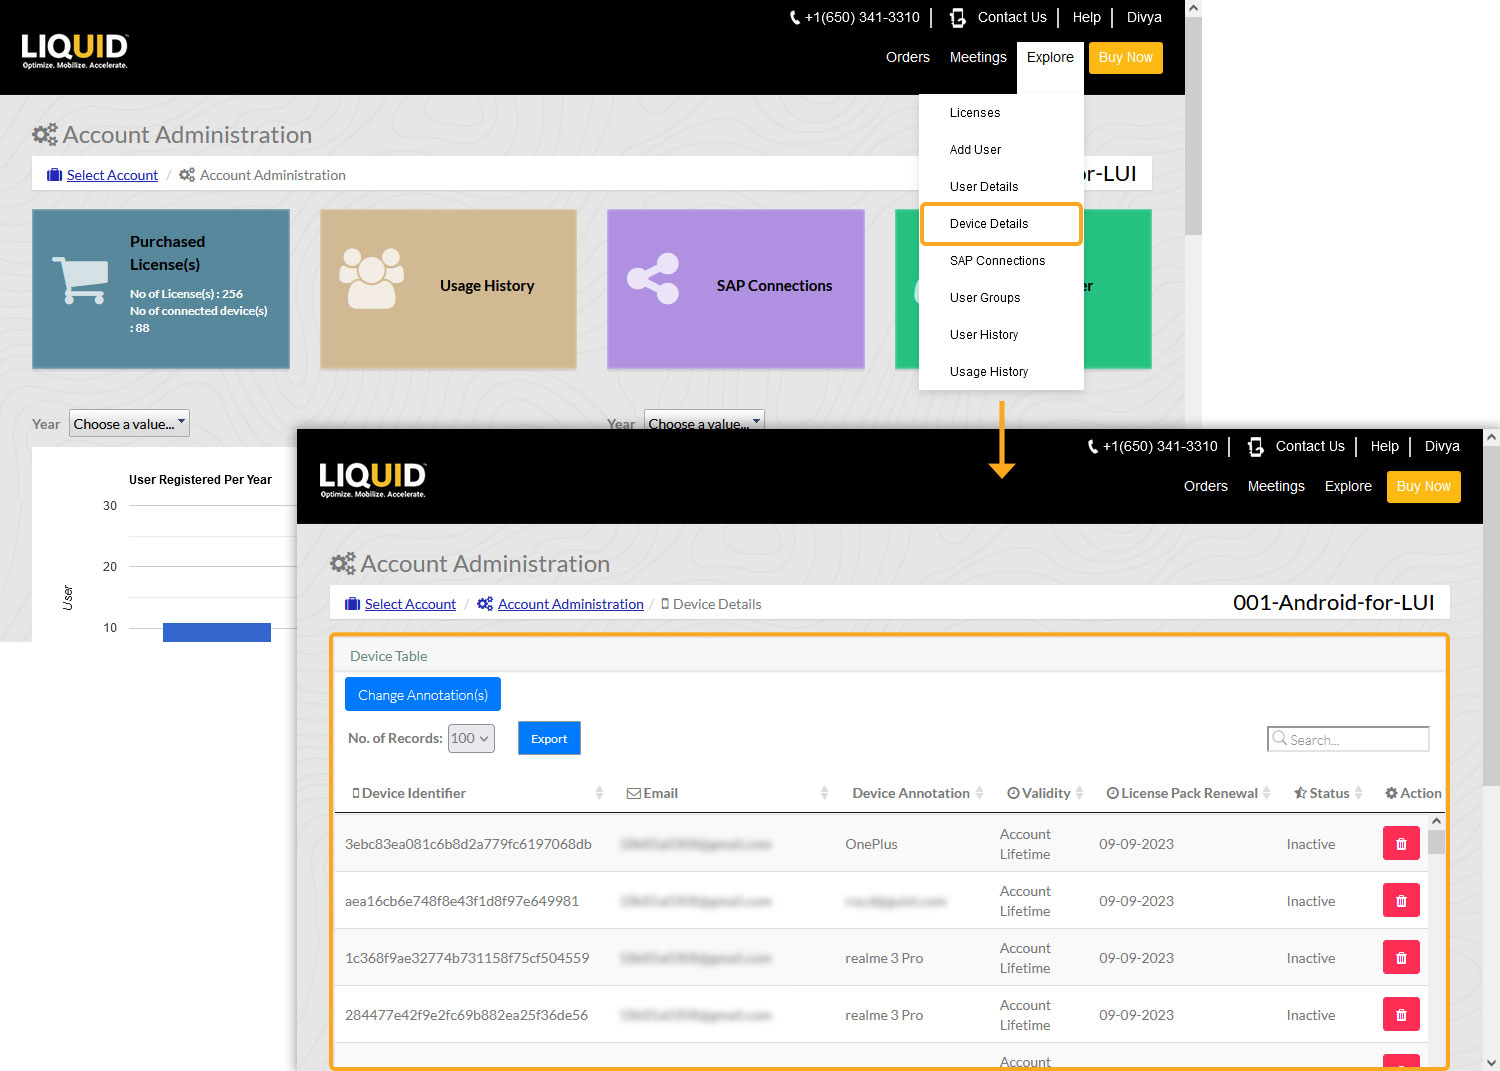
- Log in to LAMP and navigate to your Account Administration screen. Select the Device Details tab from the Explore menu to navigate to the Device Table.
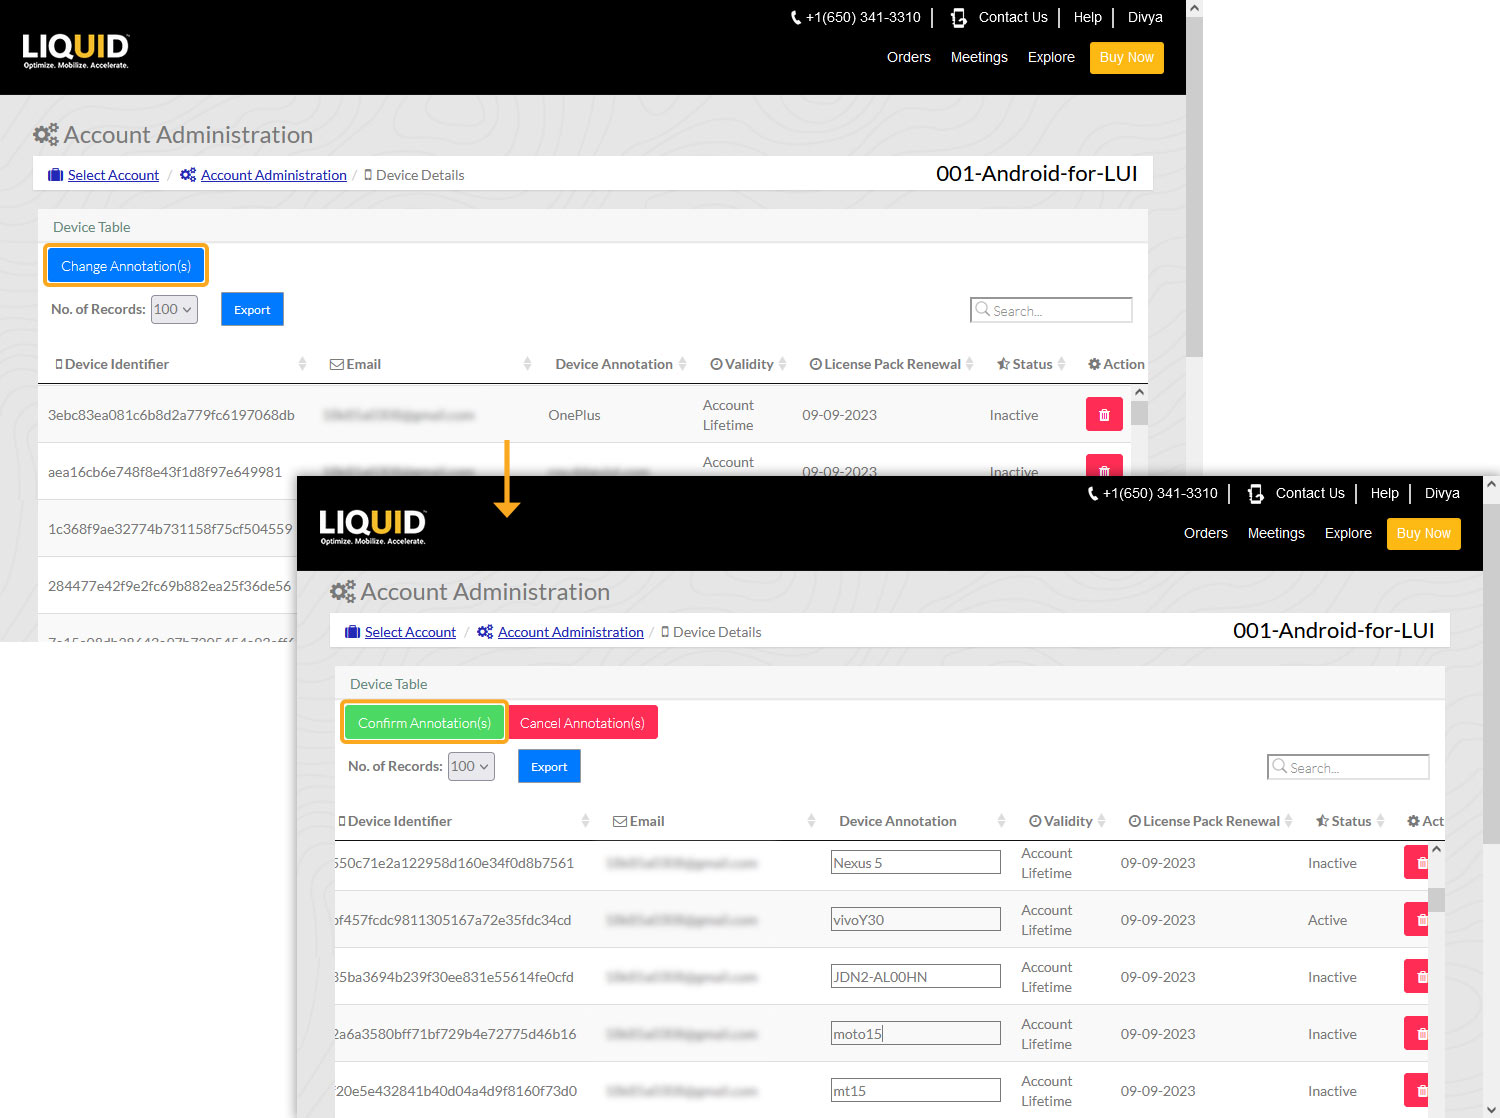
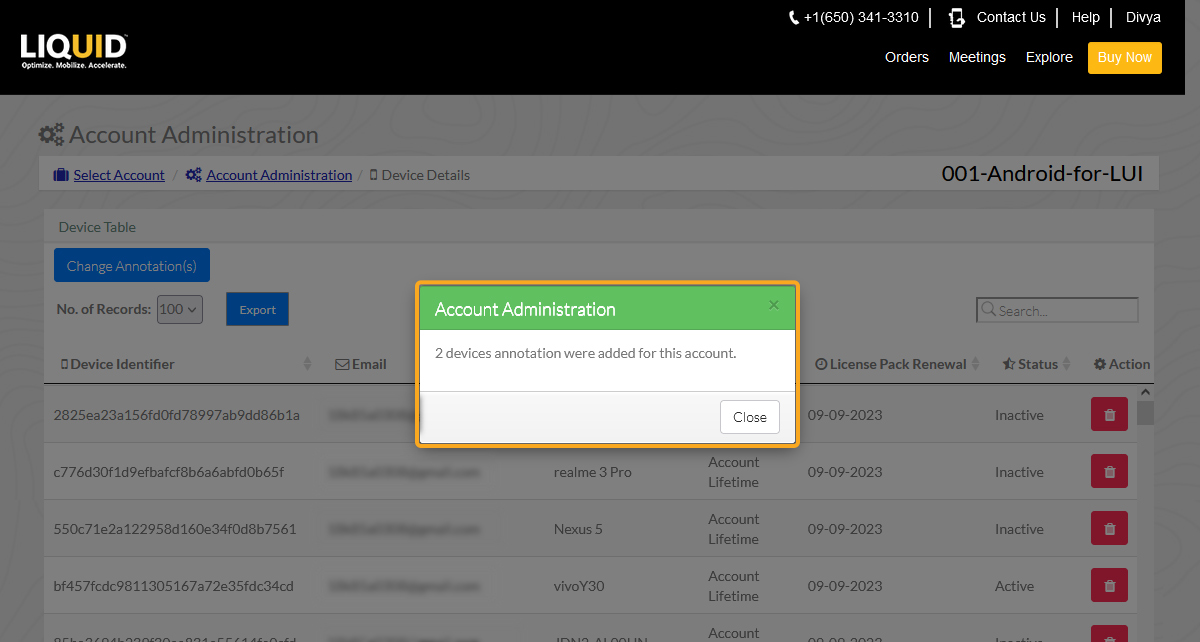
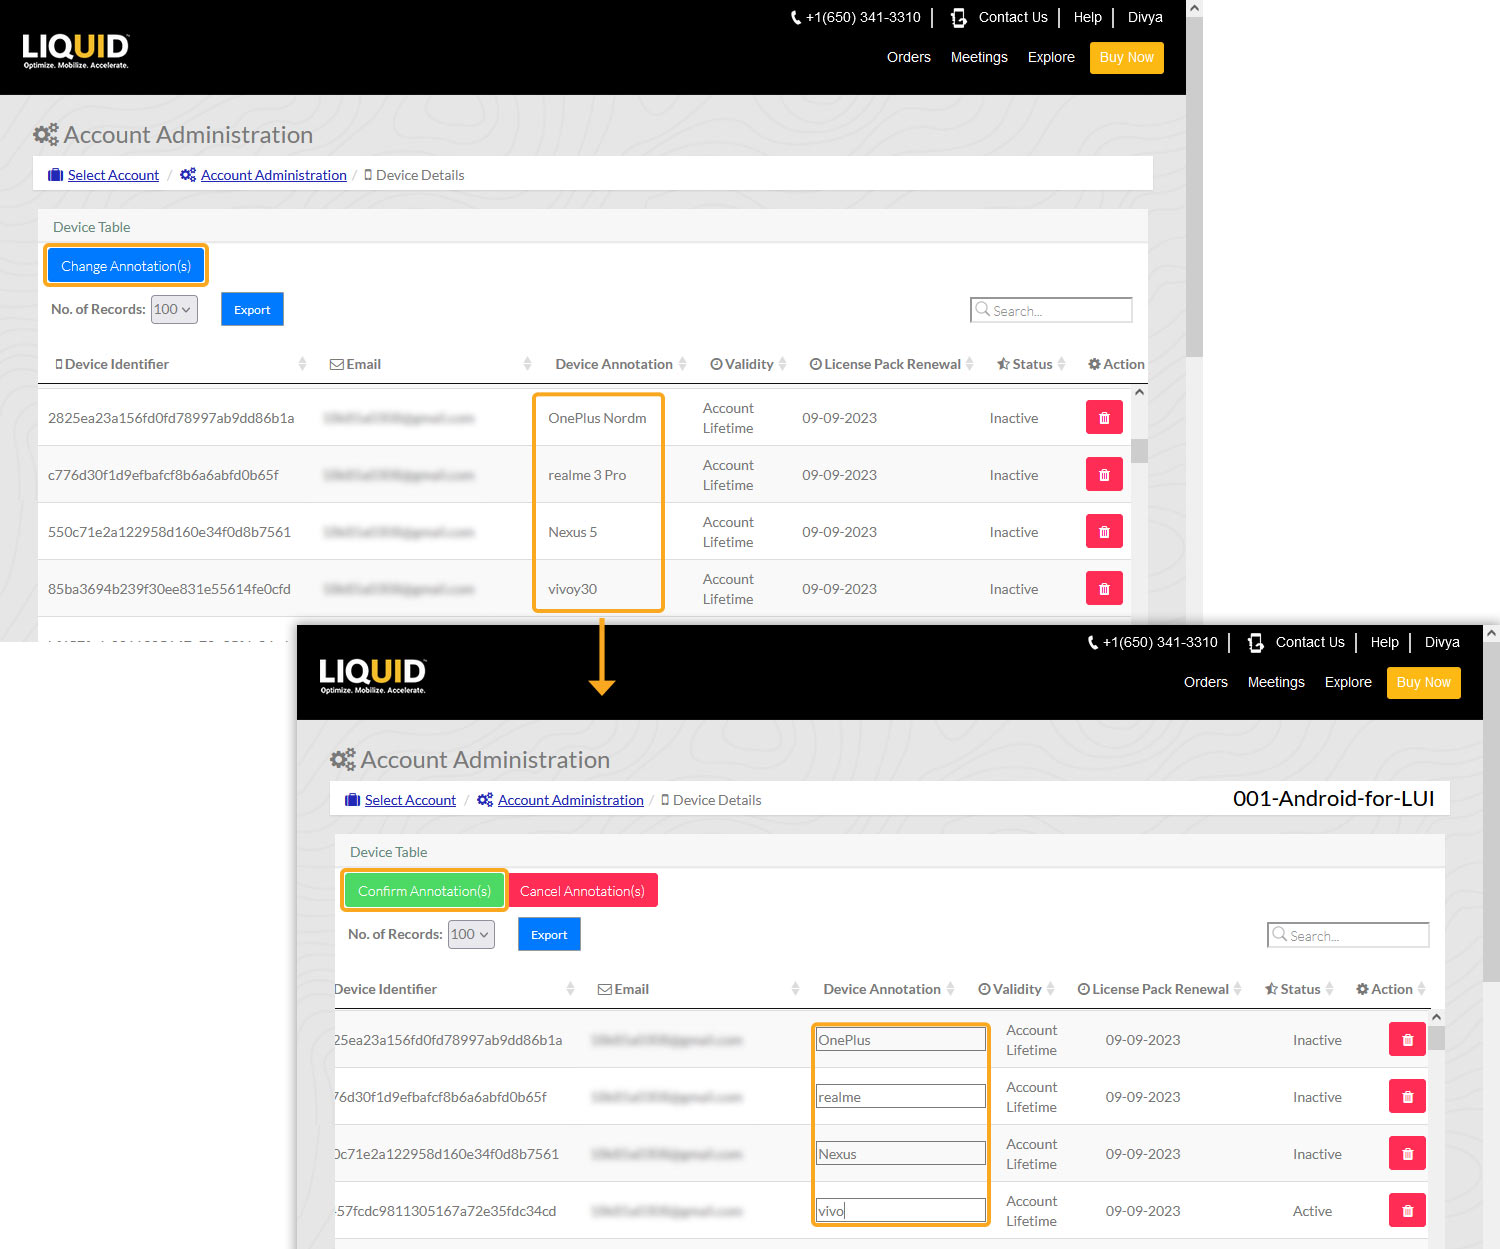
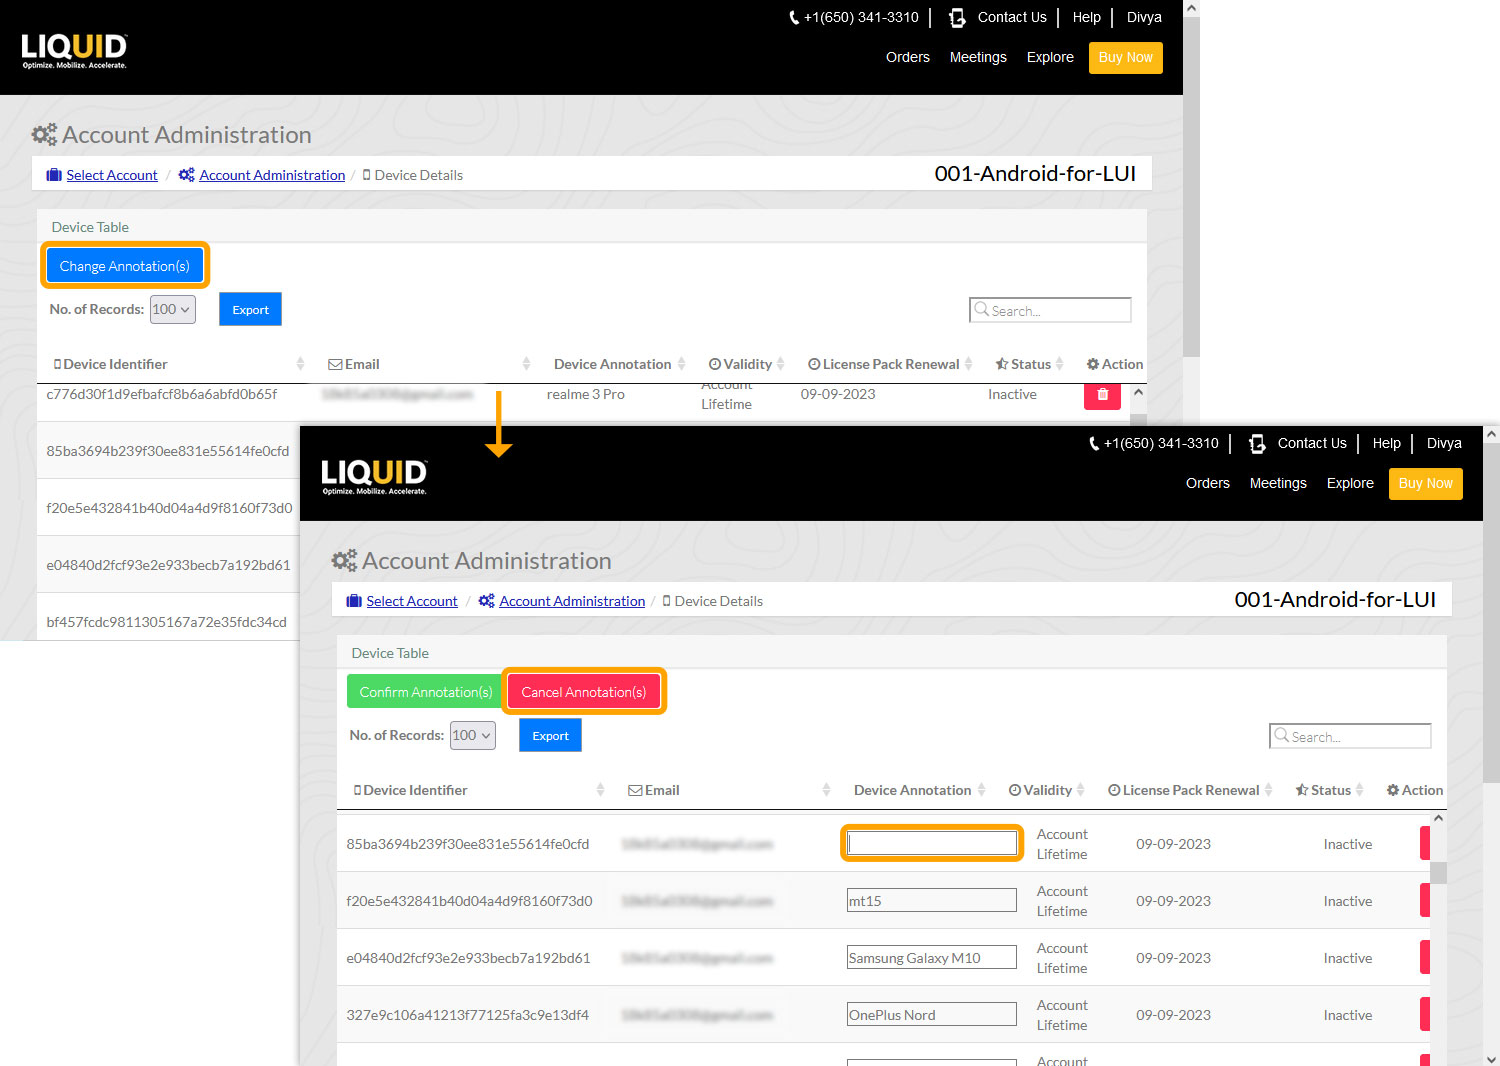
- Click the Change Annotation(s) icon located at the top of the Device Table to add the annotations, as per your requirement. After adding the description for the devices, click the Confirm Annotation(s) option present at the top of the table to add the annotations.
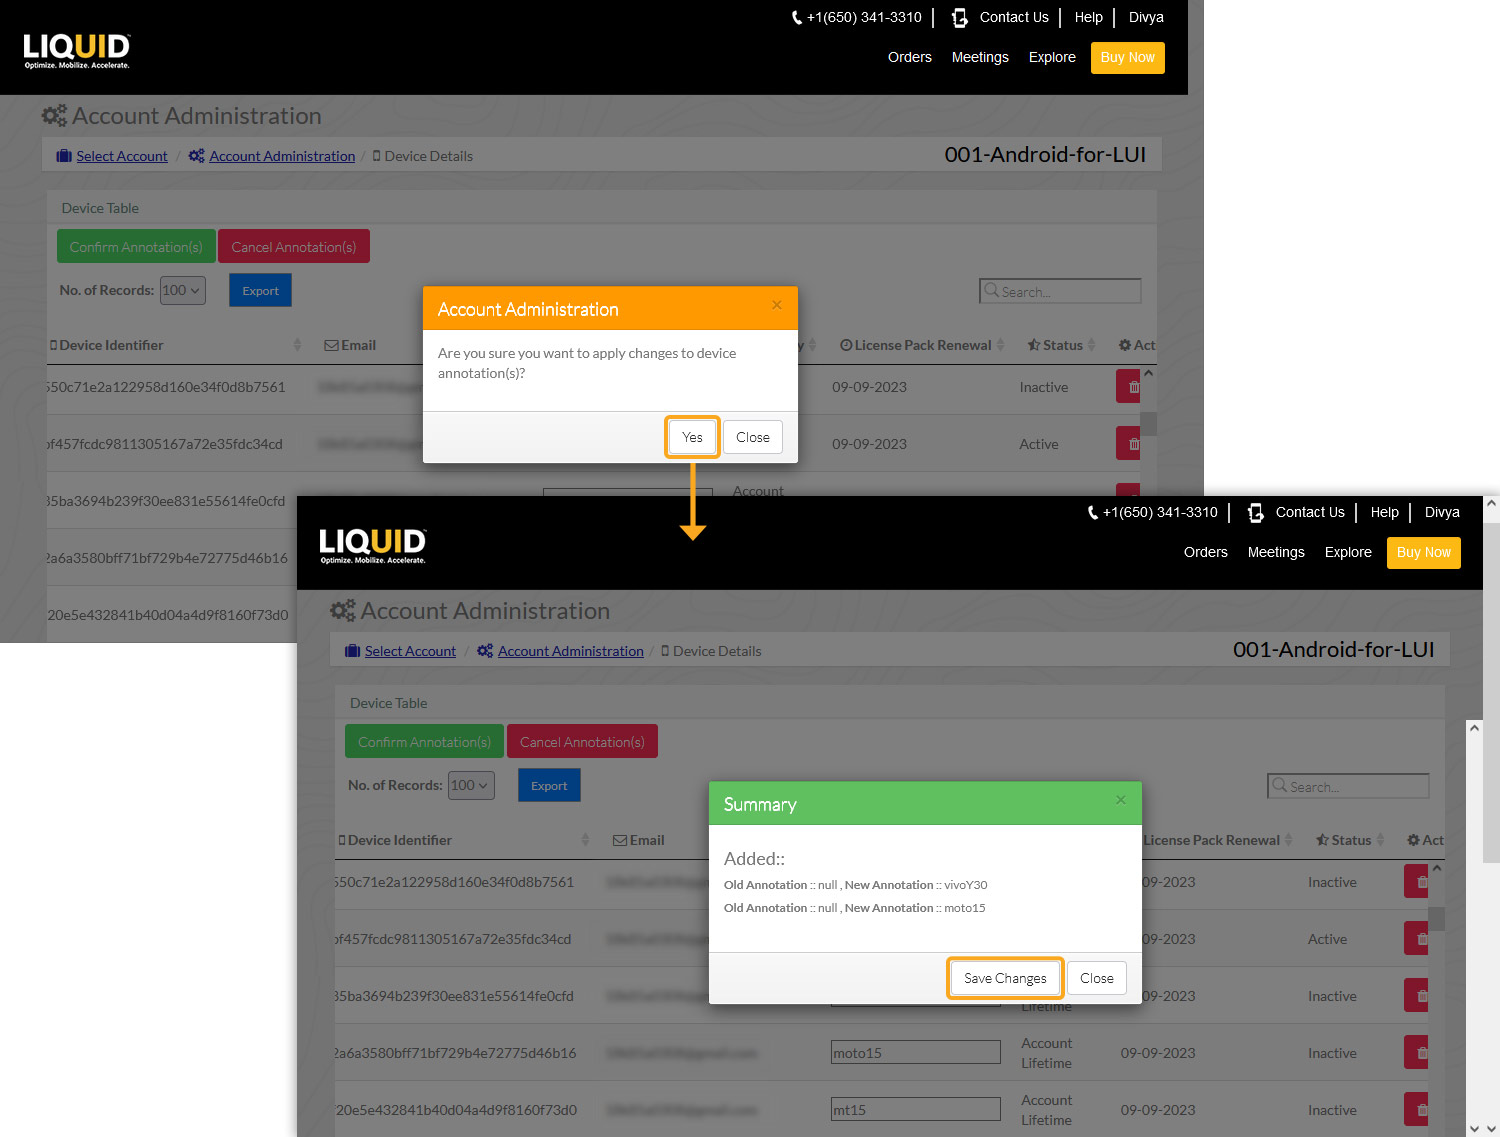
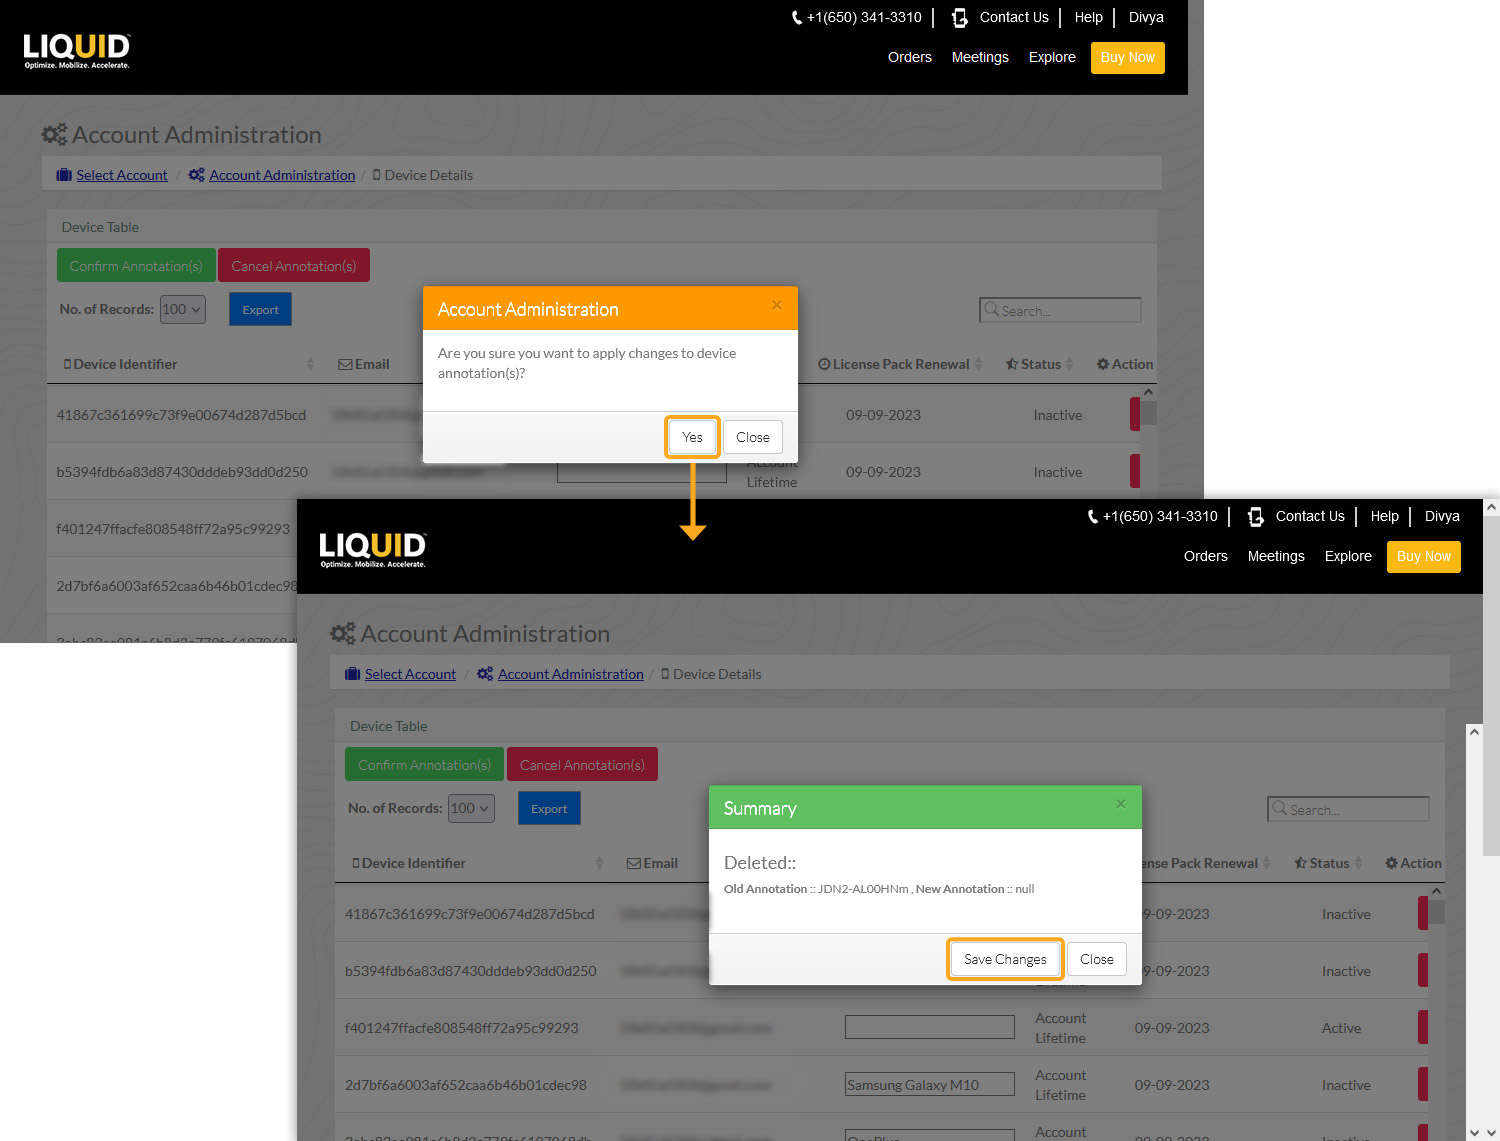
- You will receive a confirmation popup asking you to apply the changes to the device annotations. Click Yes to proceed, and click on Save Changes, to apply the changes.
- After a successful update, you will receive a confirmation popup message displaying that device annotations were added for this account.
Editing Device Annotations
- Click the Change Annotation(s) icon located at the top of the Device Table to edit the annotations. Edit the device names as per your requirements and click on the Confirm Annotation(s) icon.
- You will receive a confirmation popup message displaying, “Are you sure you want to apply changes to device annotation(s)?; Click Yes to continue. Then, a pop-up appears, indicating successful updation, as shown below. Click Save Changes to update the device annotations.
- After successfully updating the device annotations, you will receive a popup window displaying that License annotations are updated successfully!.

Delete Device Annotations
- Click the Change Annotation(s) icon located at the top of the Device Table to delete the annotations. Delete your device annotations as per your requirements, and then click Confirm Annotation(s).
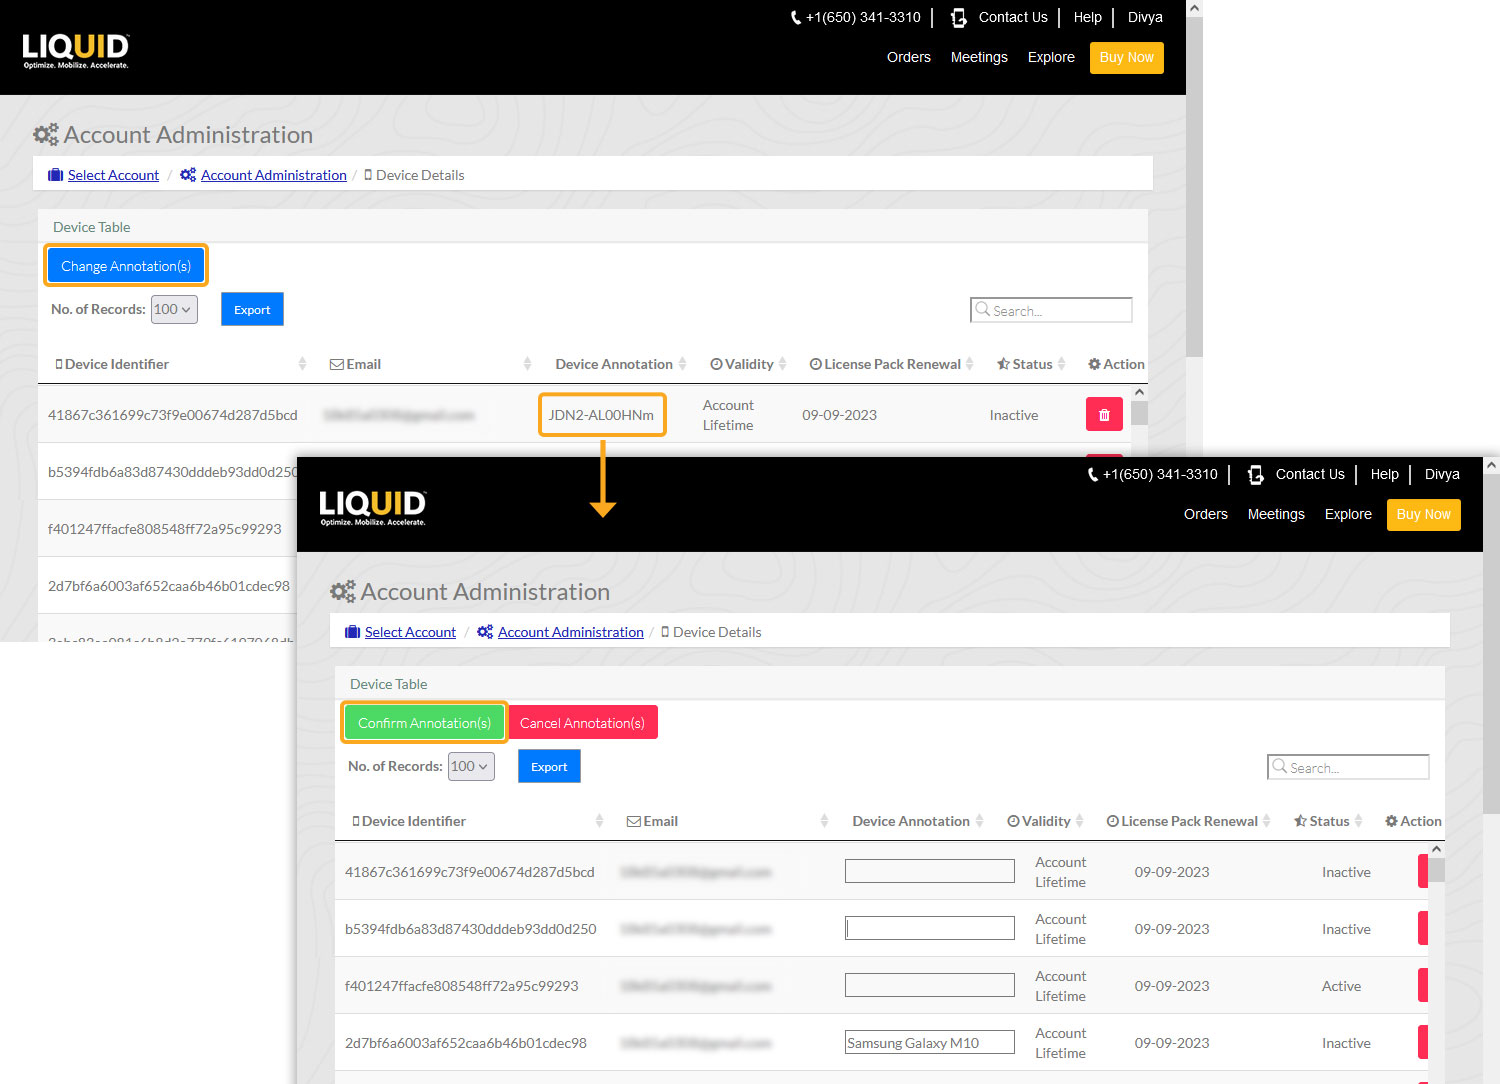
- Upon successful deletion of the device annotations, you will receive a confirmation popup message displaying, “Are you sure you want to apply changes to device annotation(s)?; Click Yes to continue. Then, a pop-up will appear indicating a successful update, as shown below.
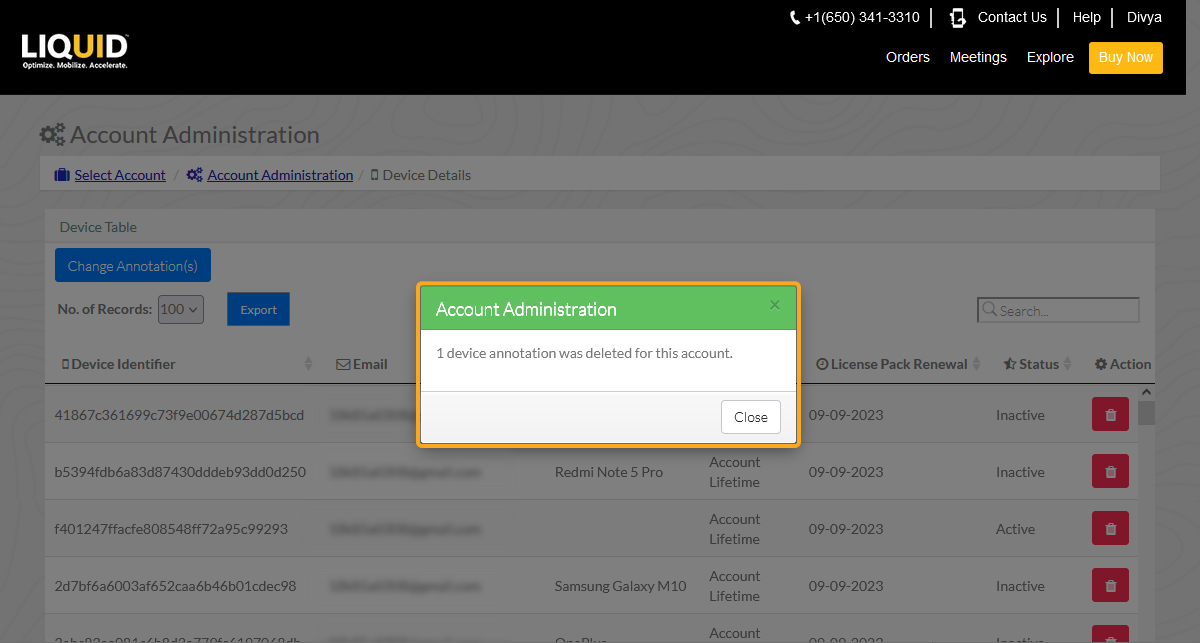
- After successfully deleting the device annotations, you will receive a popup message that 1 device annotation was deleted for this account.
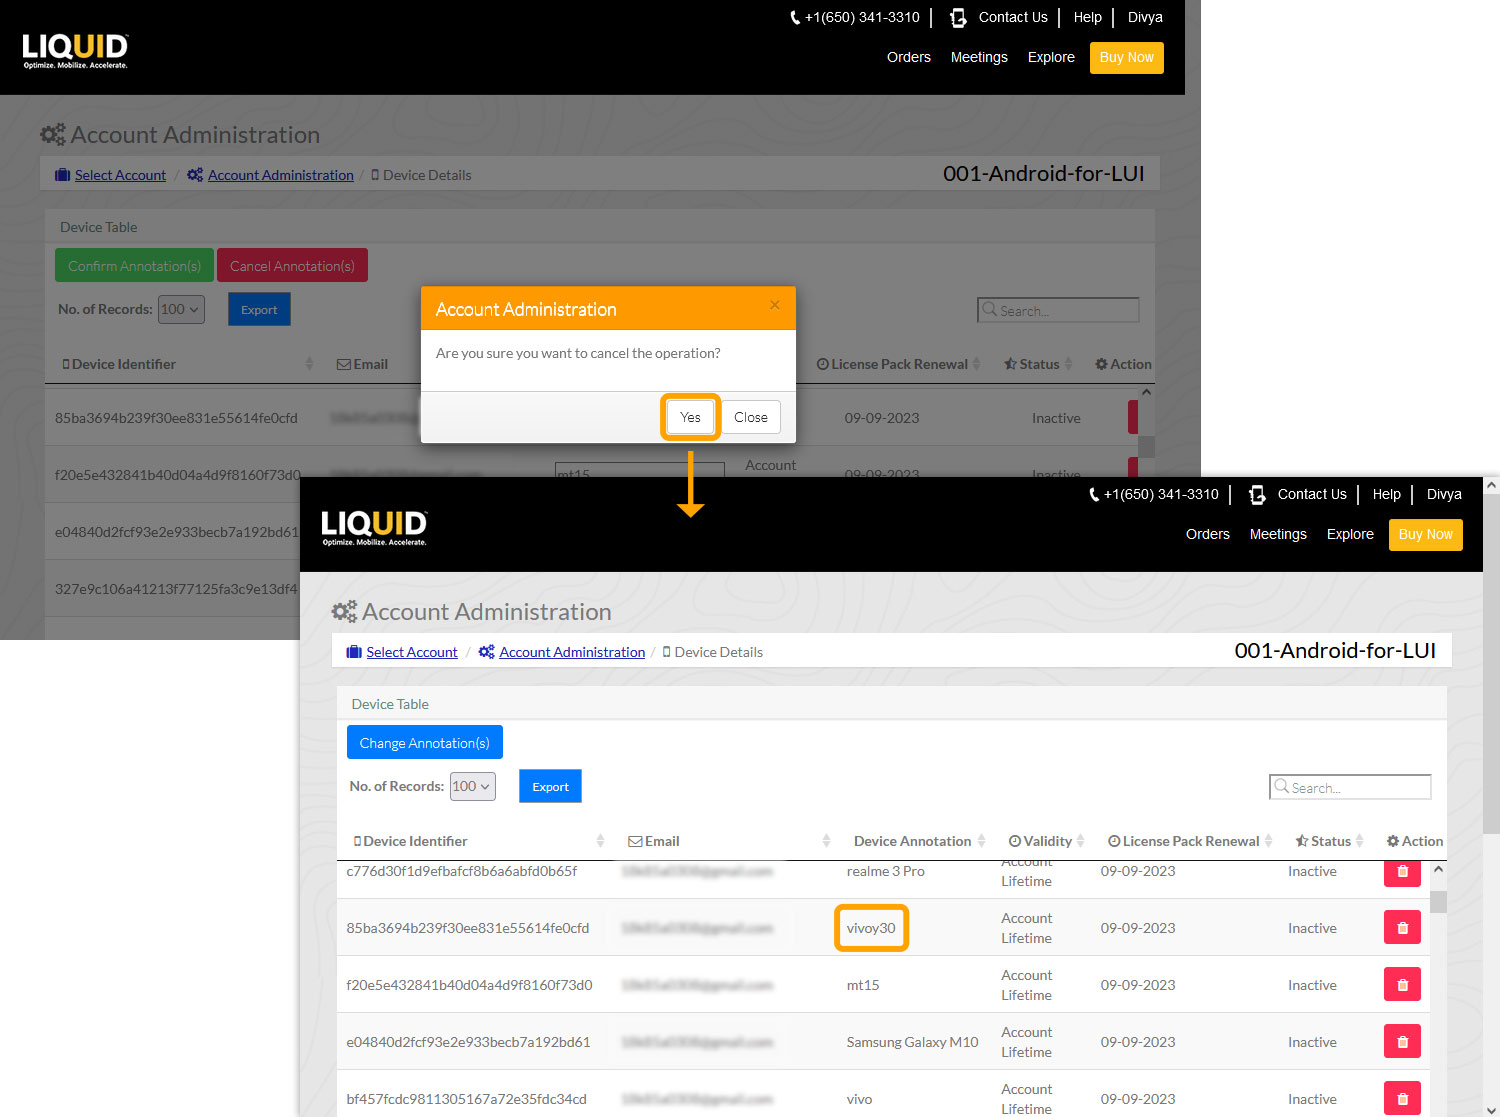
- If you wish to cancel the changes you have made, click the Cancel Annotation(s) icon, as shown in the image below.
- Then, you will receive a confirmation popup message displaying " Are you sure you want to cancel the operation?", click Yes to proceed.