Liquid UI for Android enables you to view all the grid controls as you see in your SAP GUI. The ALV Grid Control is a flexible tool to display lists. Here you can see a toolbar, a title, and an output table displayed in a grid control.
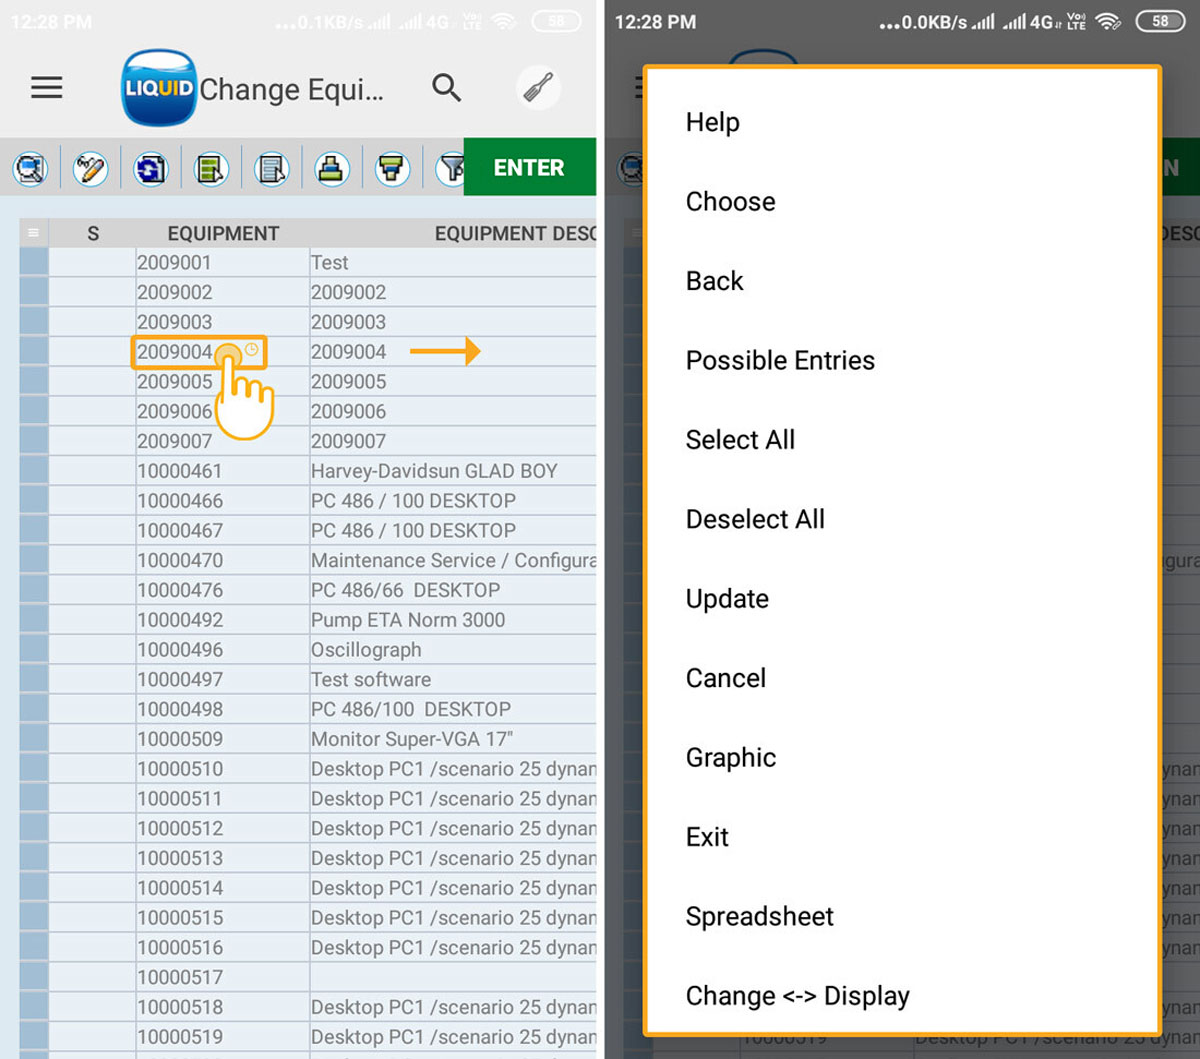
With Liquid UI, you can hide the title and the standard functions of the toolbar as per your requirements. You can do a long-press anywhere on the grid control to display the context menu. Furthermore, you can use the options in the context menu to perform various actions on the list data to sort, filter, print and so on that helps to manage the list data easily.
- Navigate to IE05 transaction in your Liquid UI for Android App and click execute.
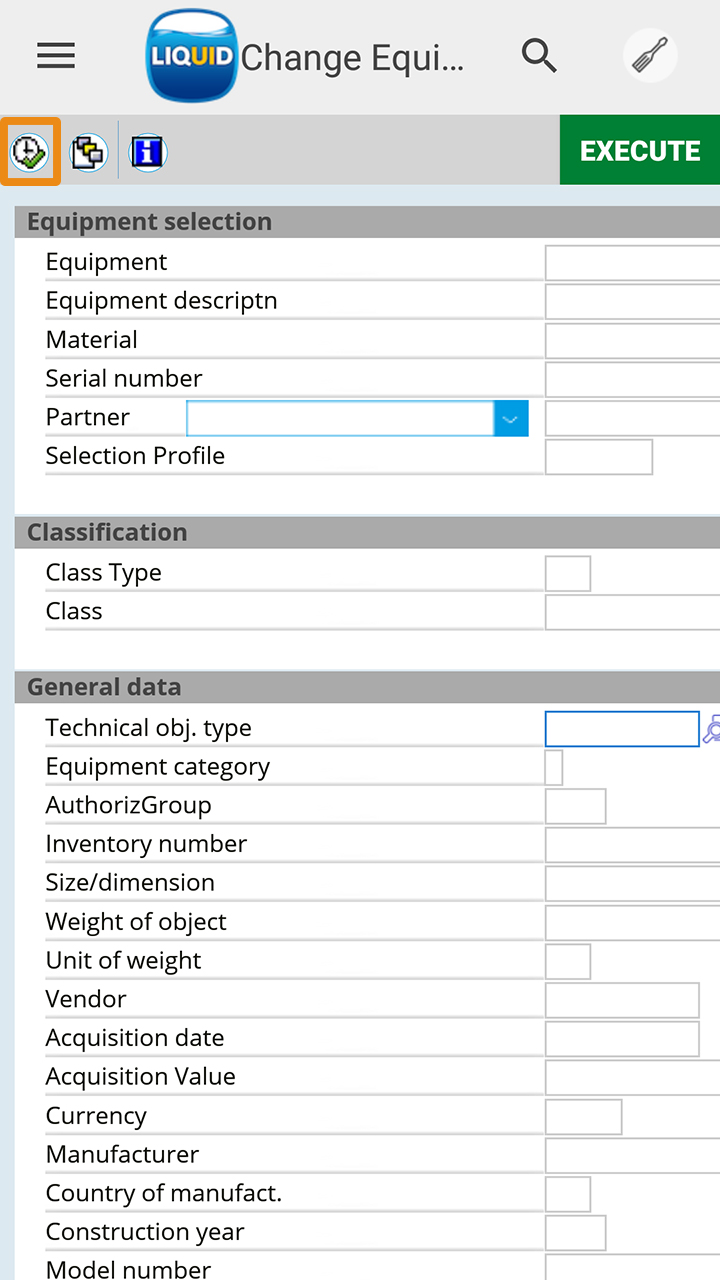
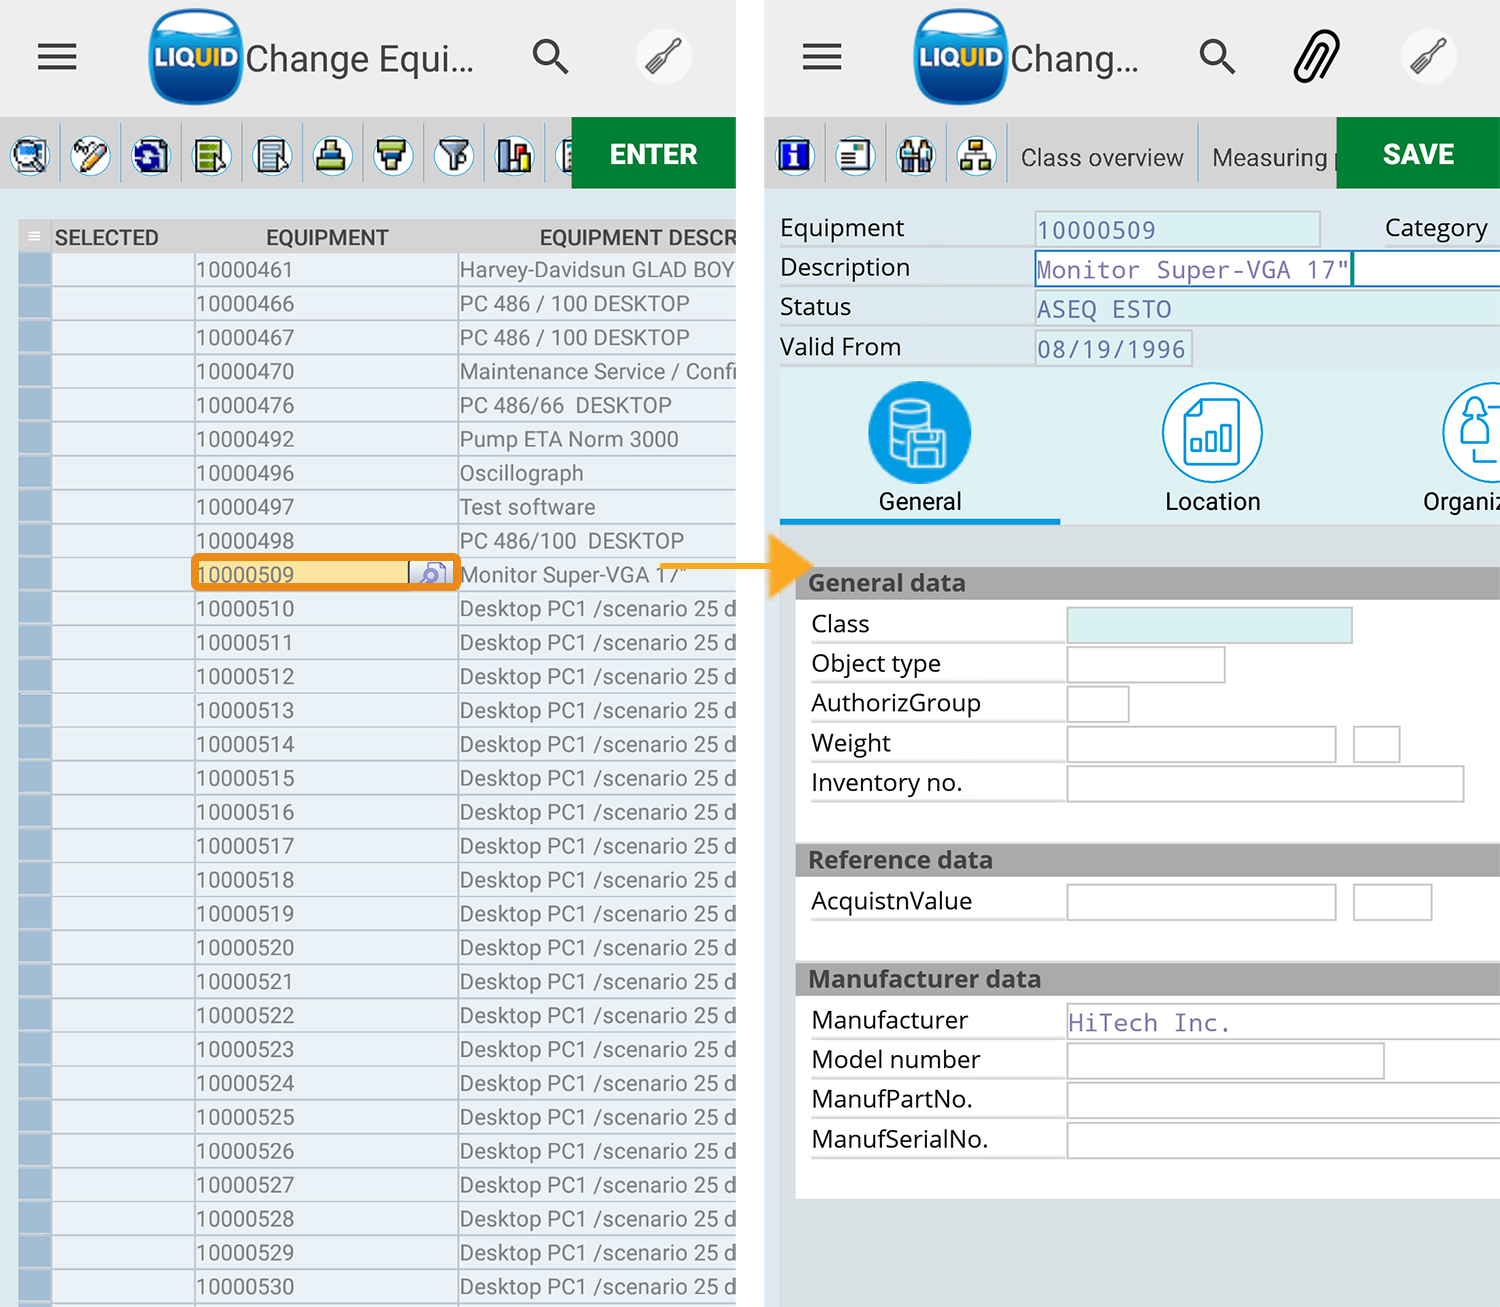
- You will be navigated to the Change Equipment: Equipment screen and able to see a toolbar, a title, and the output table displayed in a grid control.
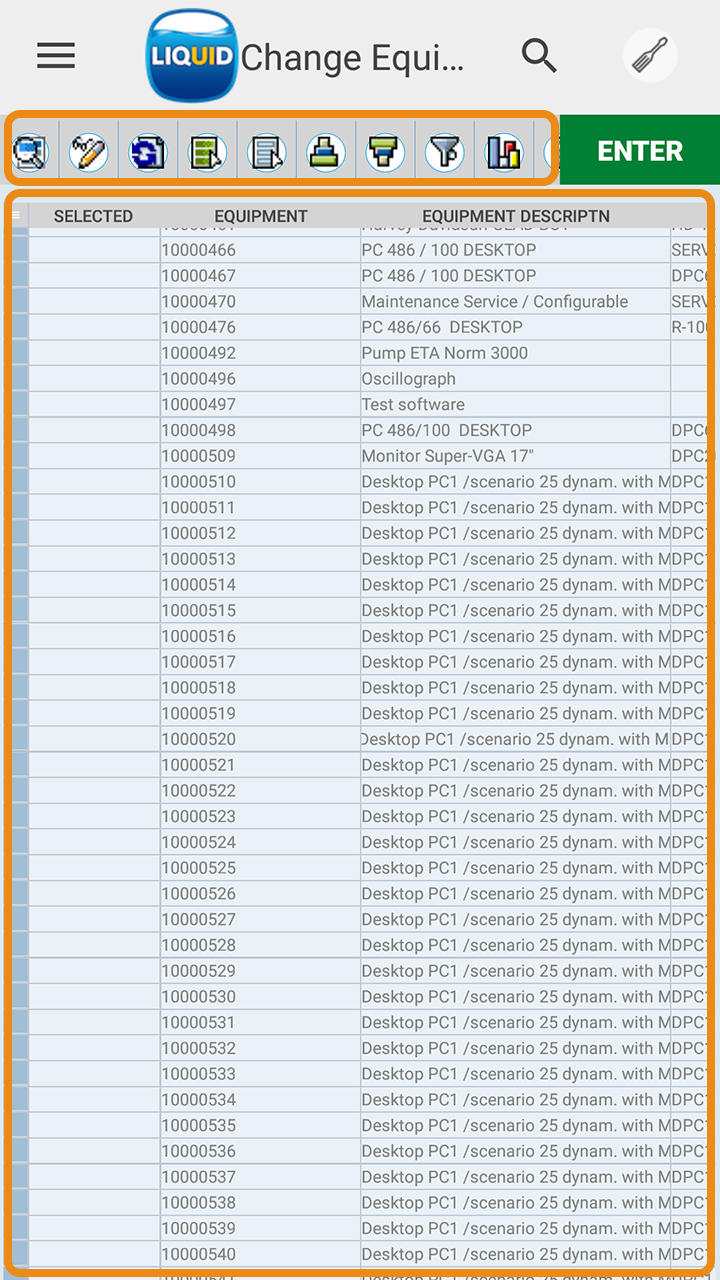
- You can swipe the grid columns to the left to view all the columns.

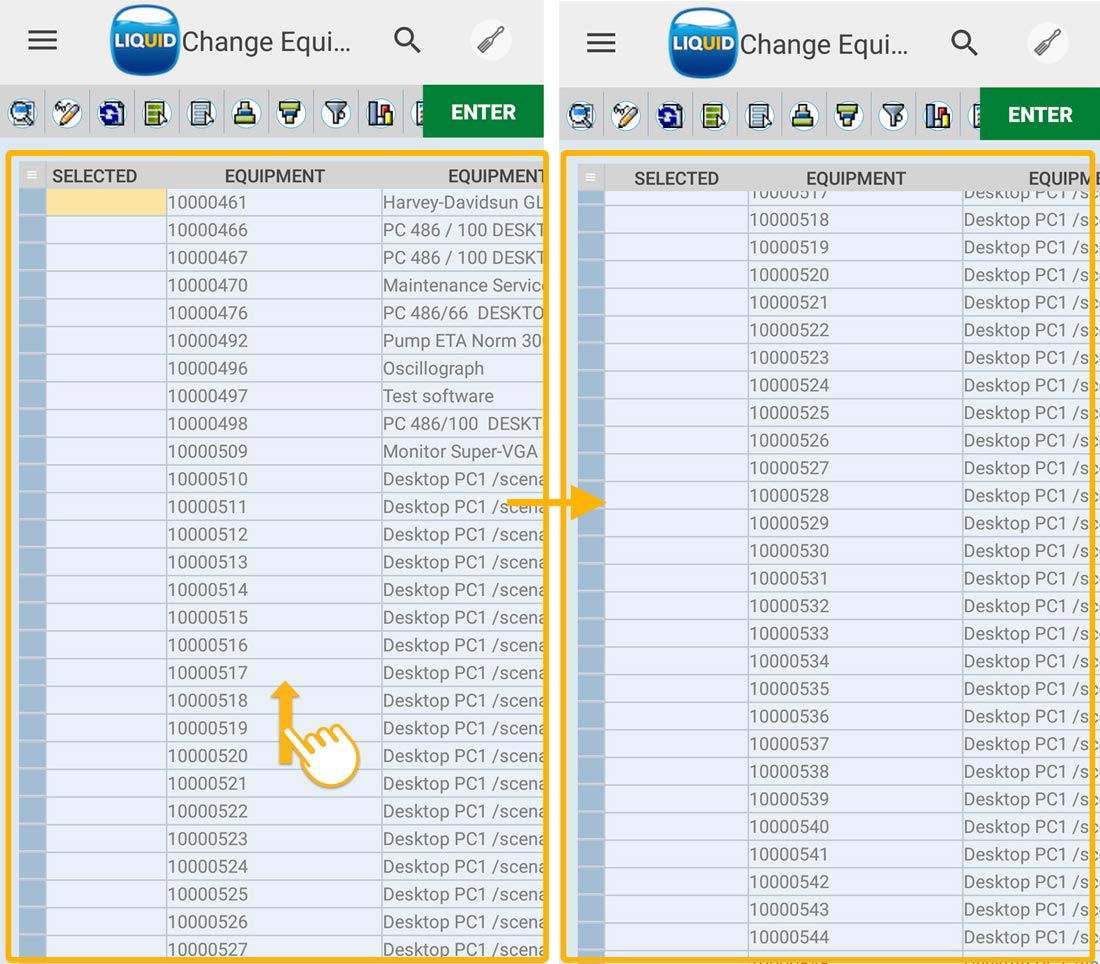
- You can swipe the table rows up to view all the rows.
- To find responses for the user actions, double-click on any grid cell under the Equipment column, which will navigate you to Change Equipment: General Data screen.
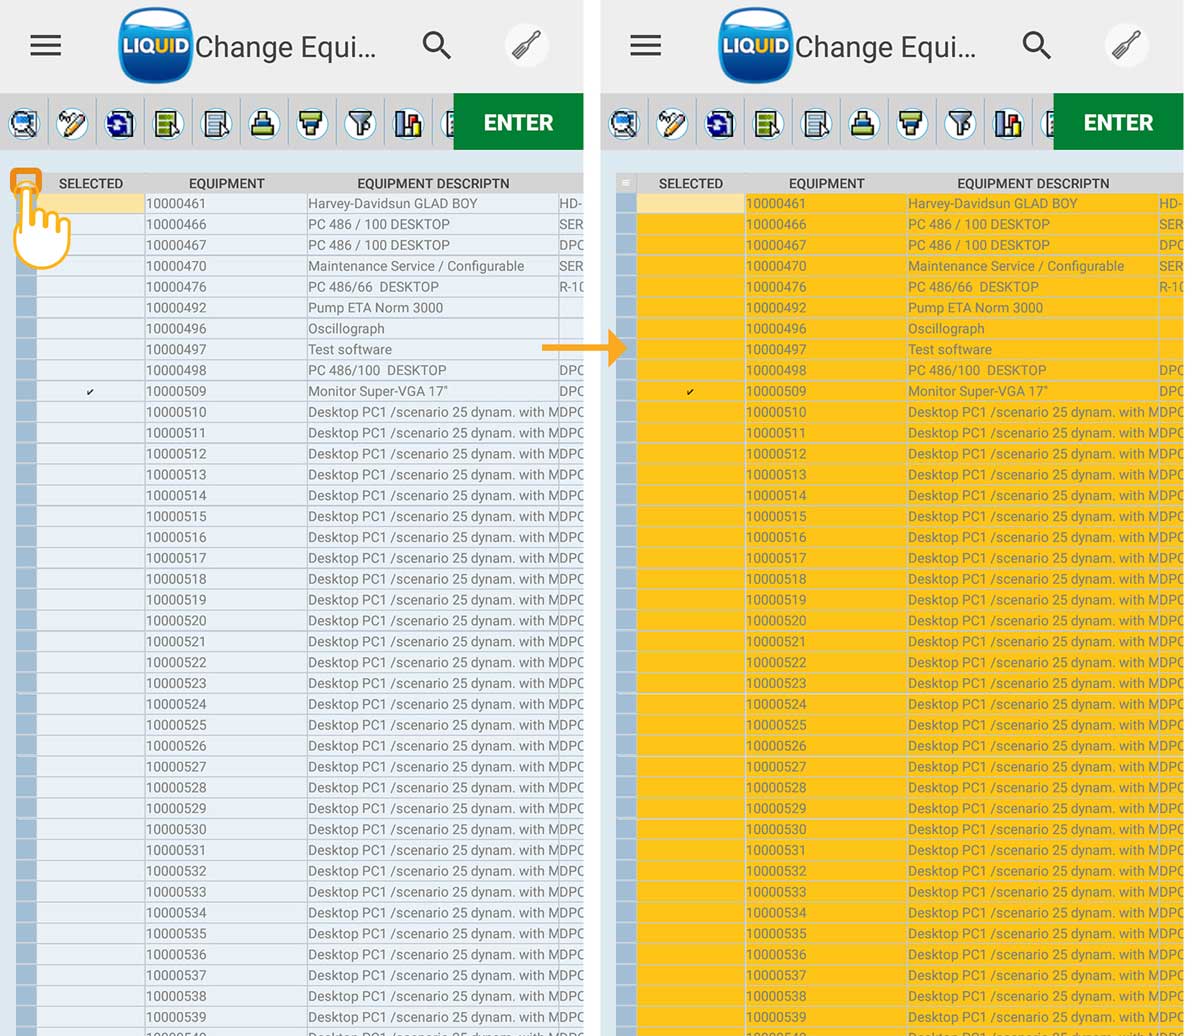
- Click on the Select All button on the left corner of the grid control to select all the grid data.
- Long pressing on any grid cell displays a table row pop-up, which allows you to enter values into columns without scrolling. Using Prev, Next, Enter, and Done options you can move within the grid rows. These four options are detailed below.
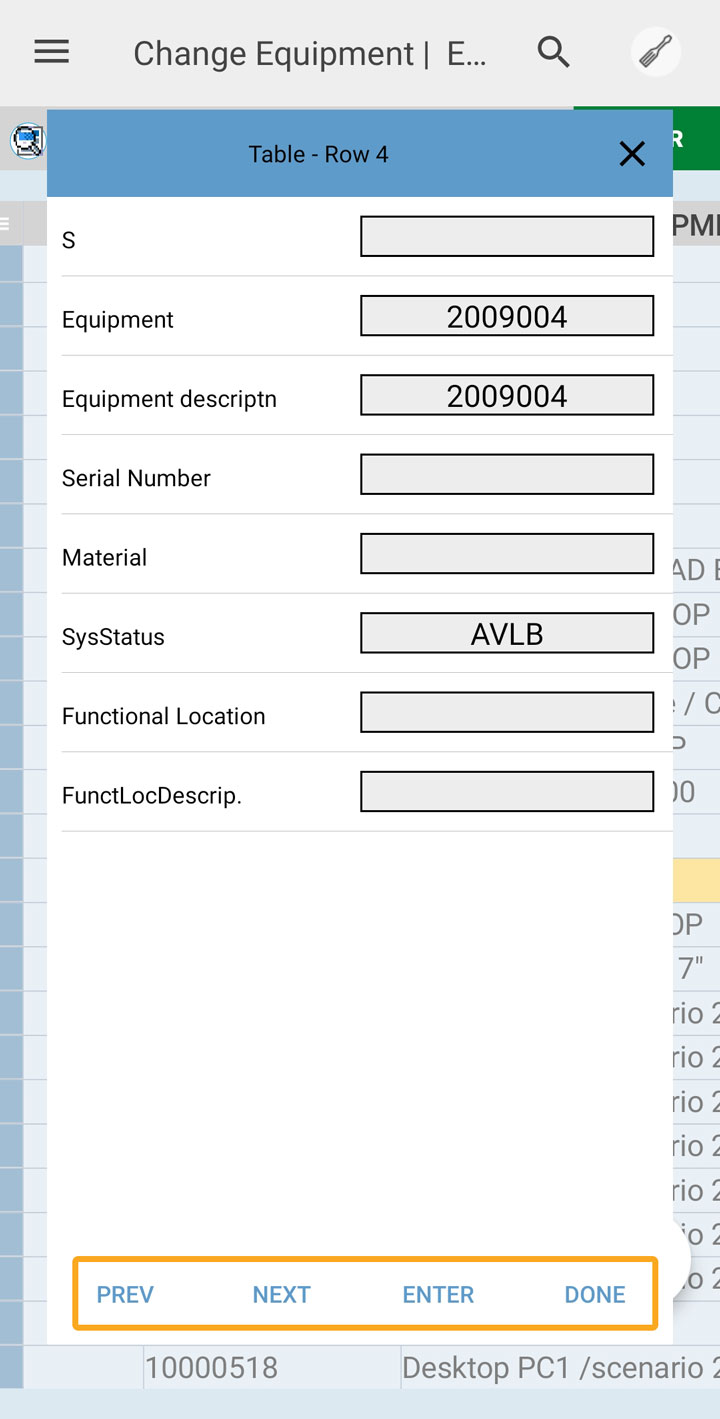
Previous: Using this button you can view or edit the Previous row values of the table.
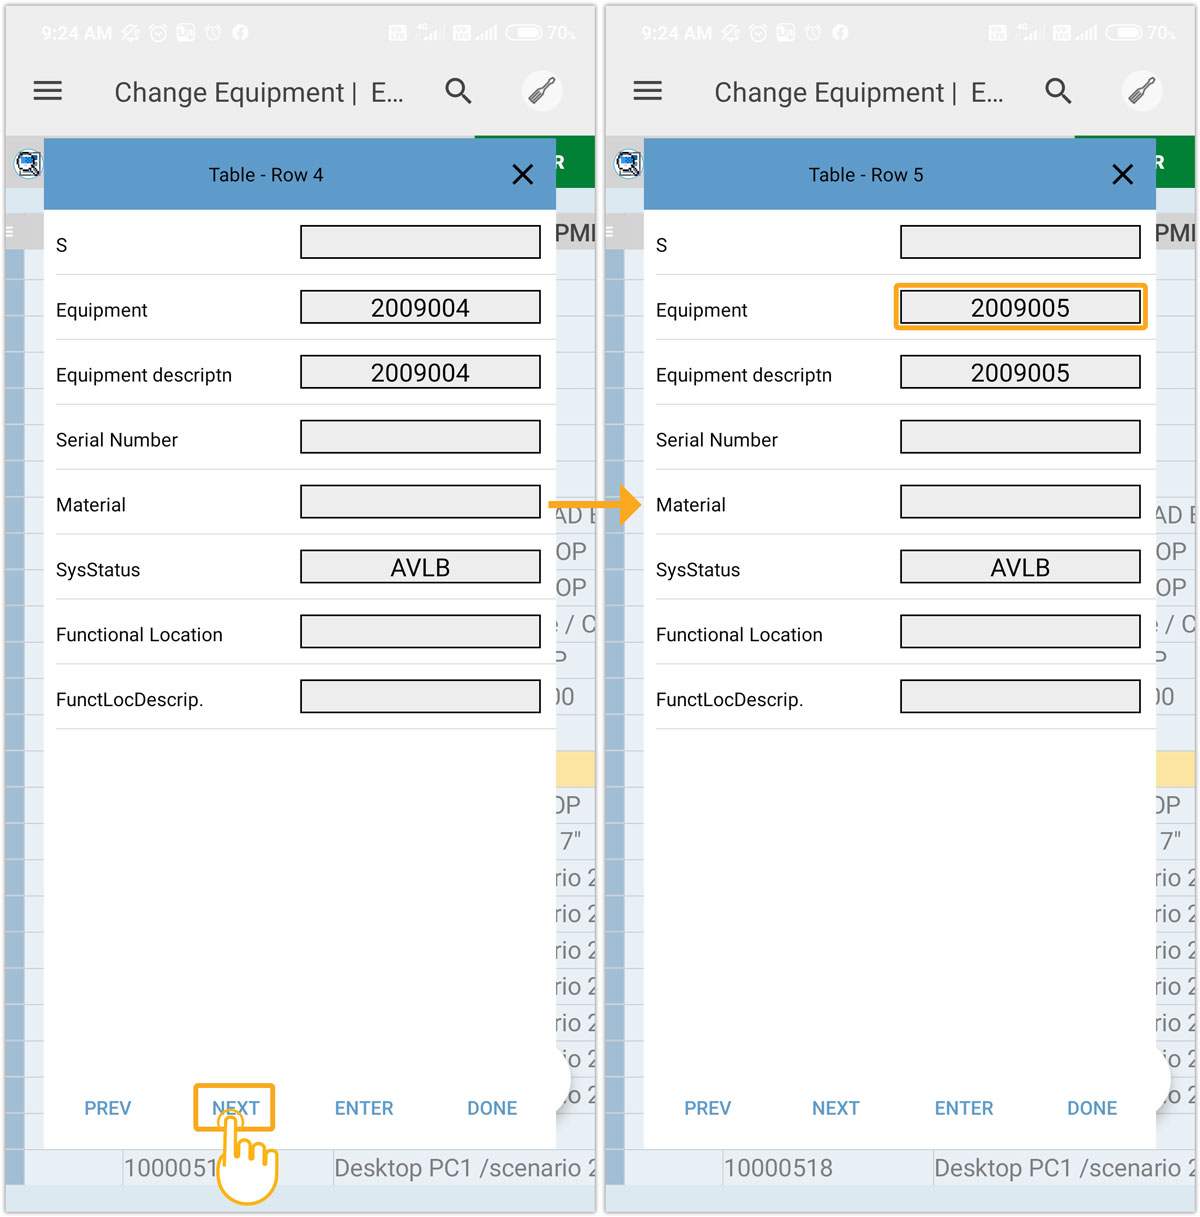
Next: Using this button you can view or edit the Next row values of the table.
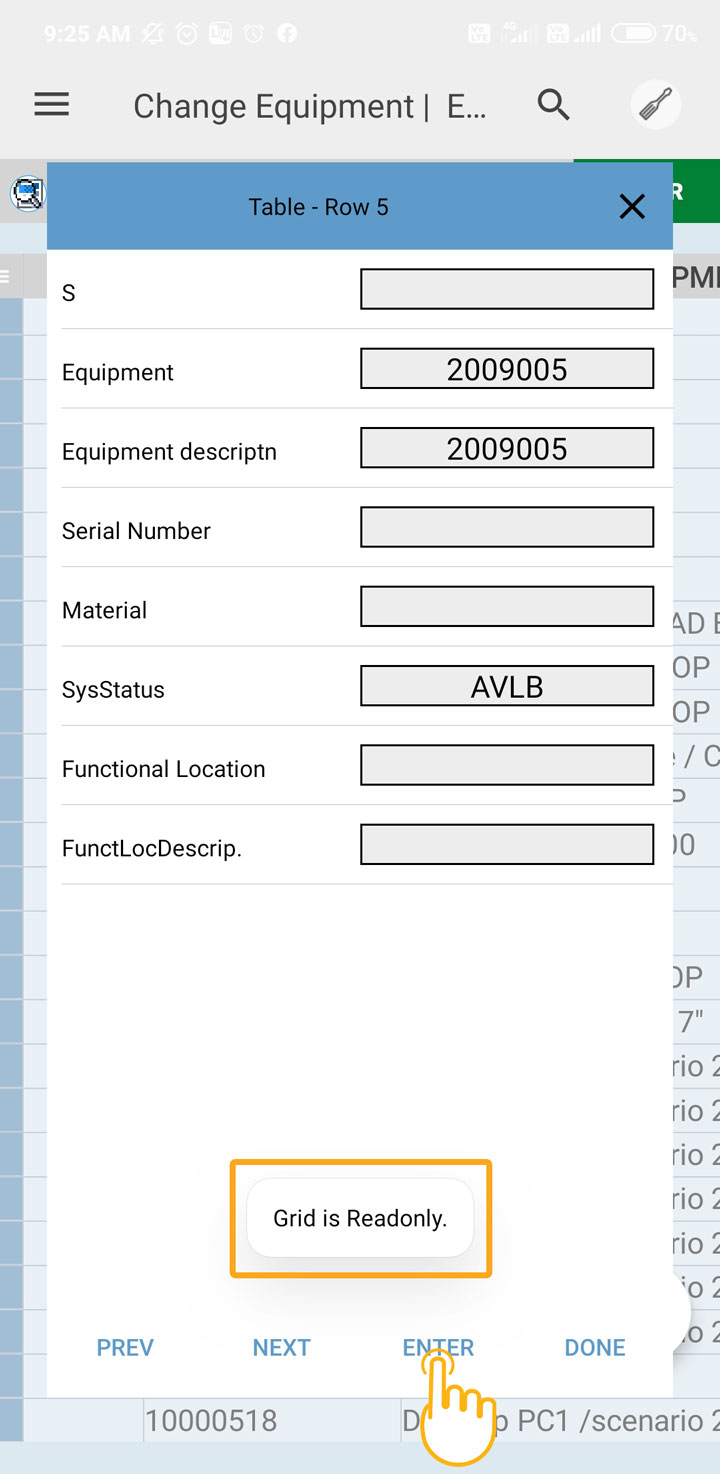
Enter: Using this button, you can update the column values directly.
Done: This button populates entered values into the table.
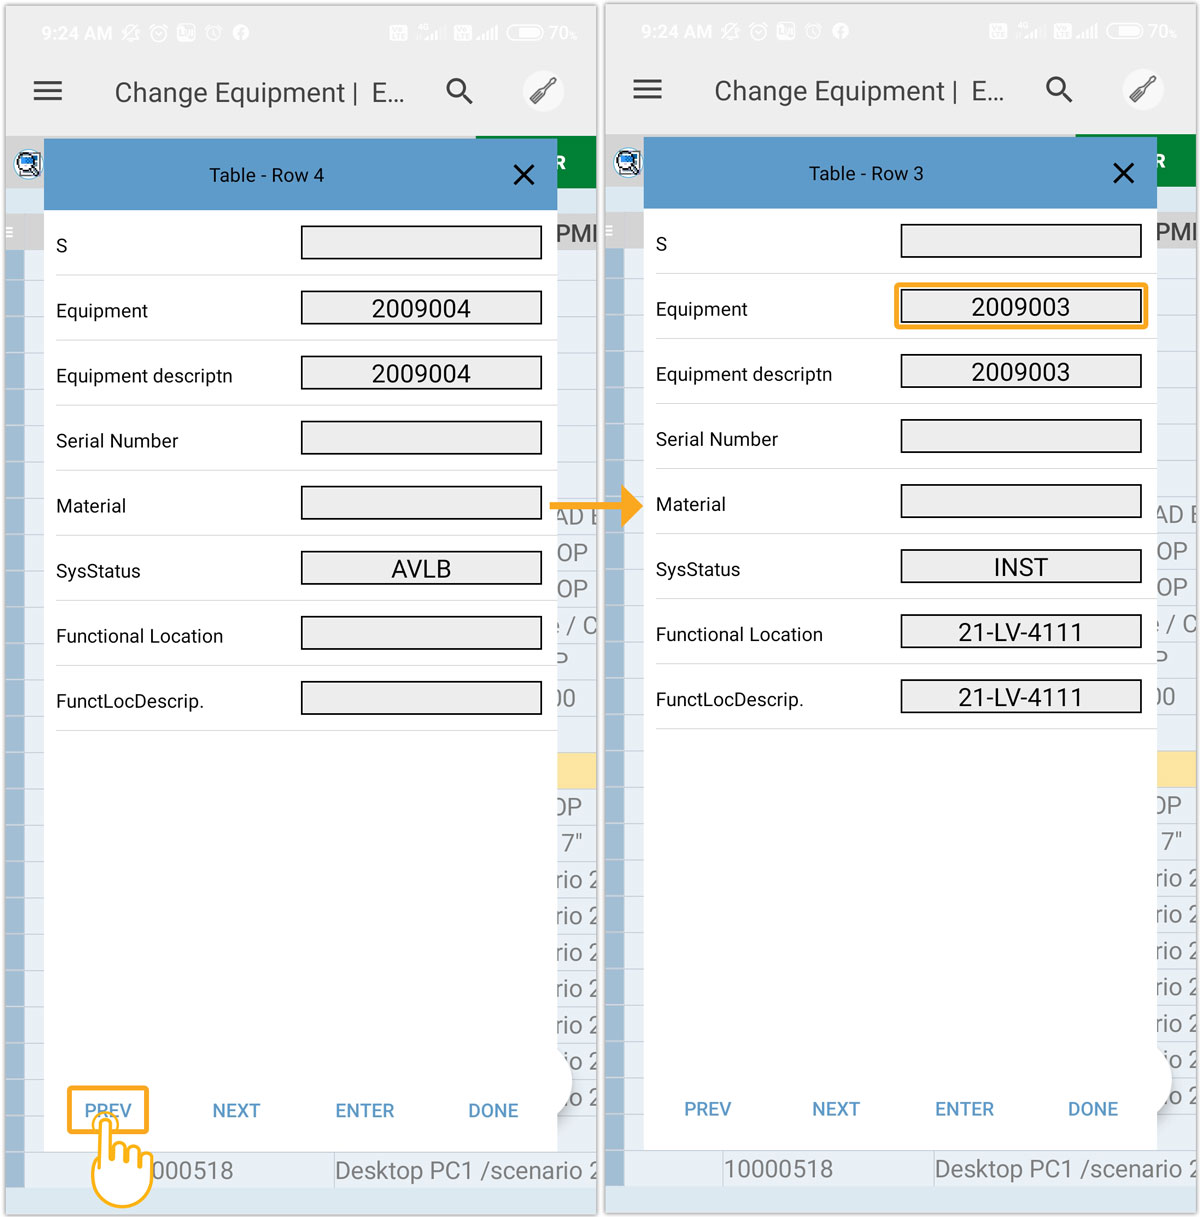
- To view previous row values, click on the Previous button, as shown below.
- To view Next row values, click on the Next button, as shown below.
- Instead of scrolling and entering the values into the rows and columns, you can directly update the values using Enter button. If the grid is set to the readonly option, then displays a message as “Grid is Readonly”, as shown below.
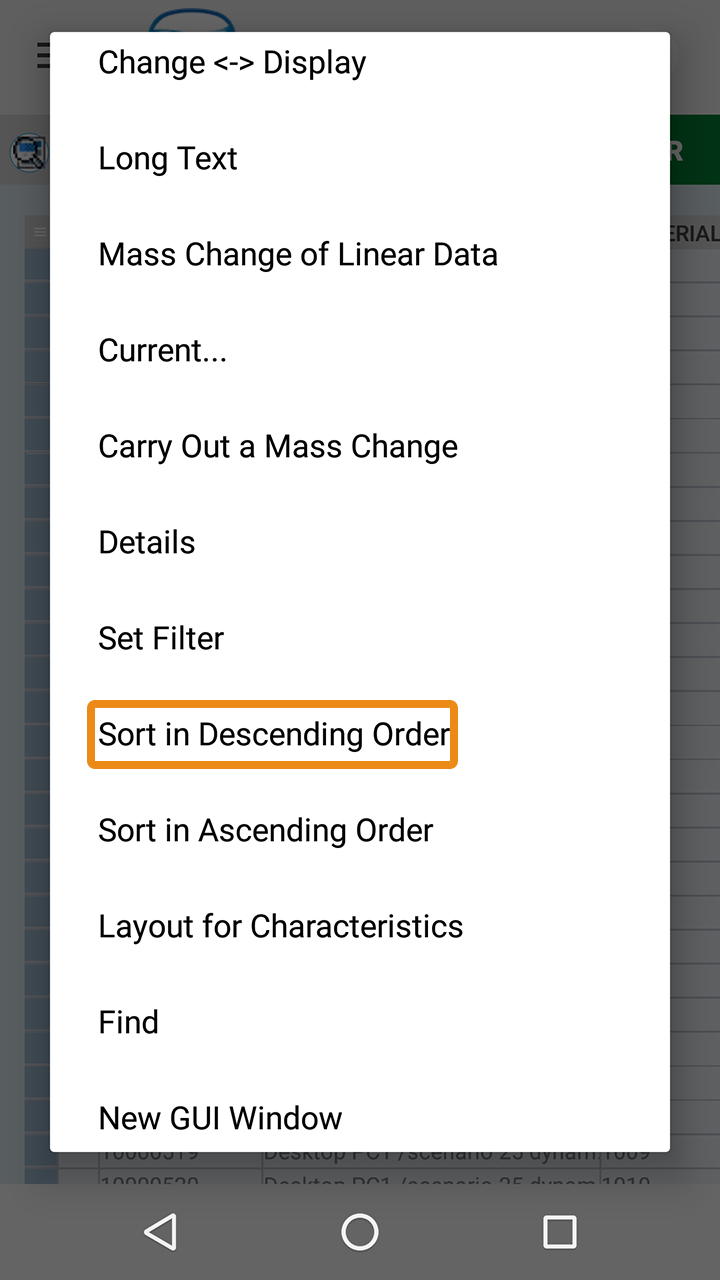
- Long pressing anywhere other than grid displays a context menu which helps you to customize and simplifies the process, as shown below.
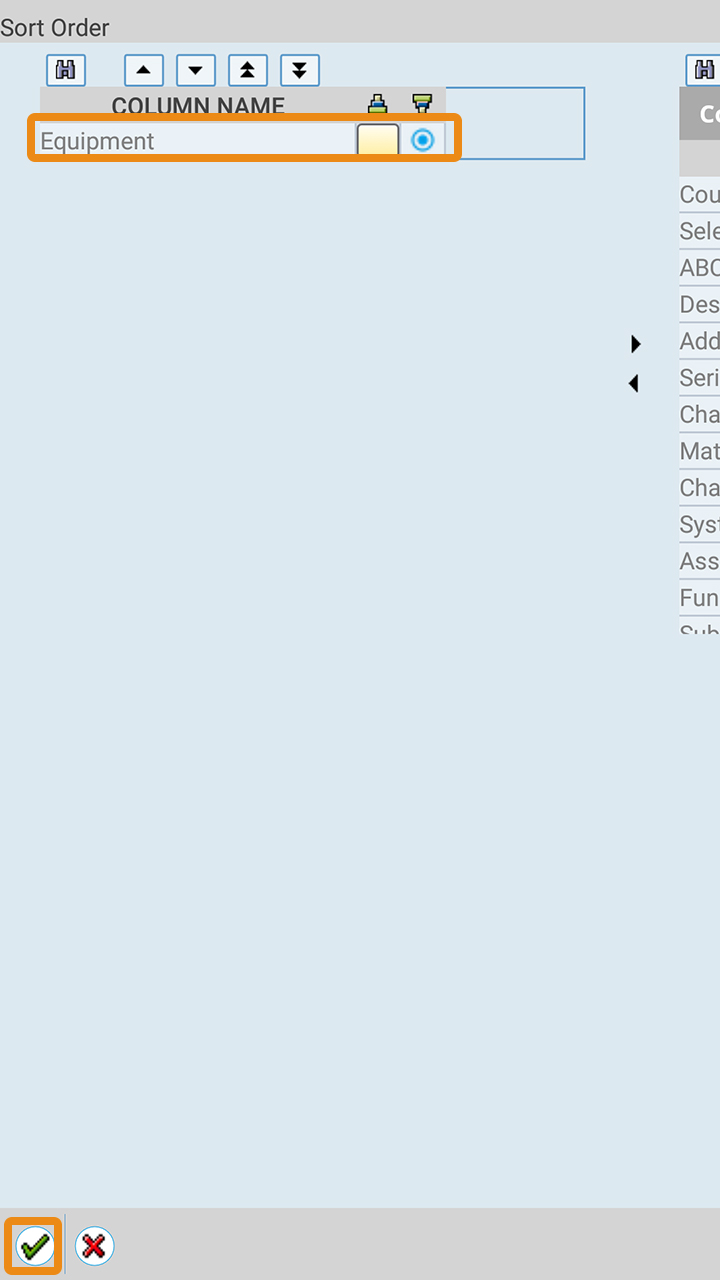
- You can scroll up the context menu to view list functions such as Sort, filter, and print avoiding extra programming on the grid control screen. Select the Sort in Descending Order option to sort the Equipment column values in descending order.
- You will find the Sort Order screen. Then, select the desired column to sort its values. Here we have selected the Equipment column to sort its values in descending order and click Continue button, as shown below.
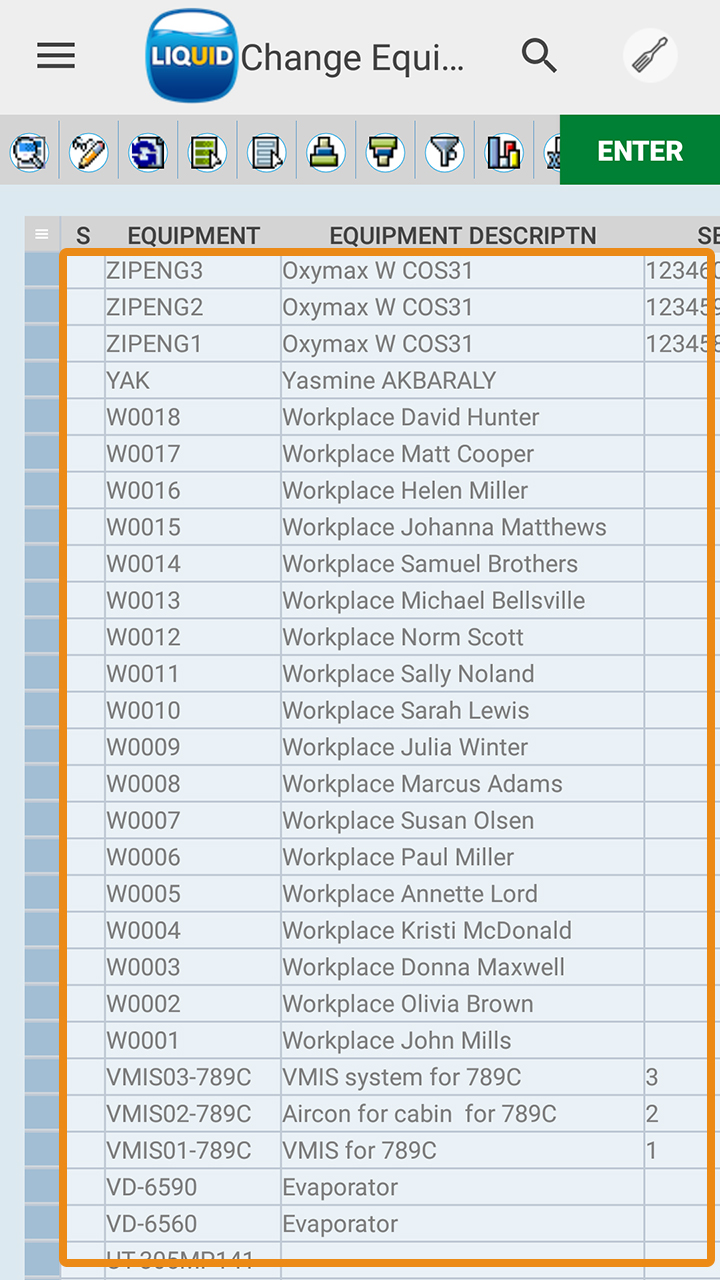
- You will see the Equipment column values arranged in descending order.
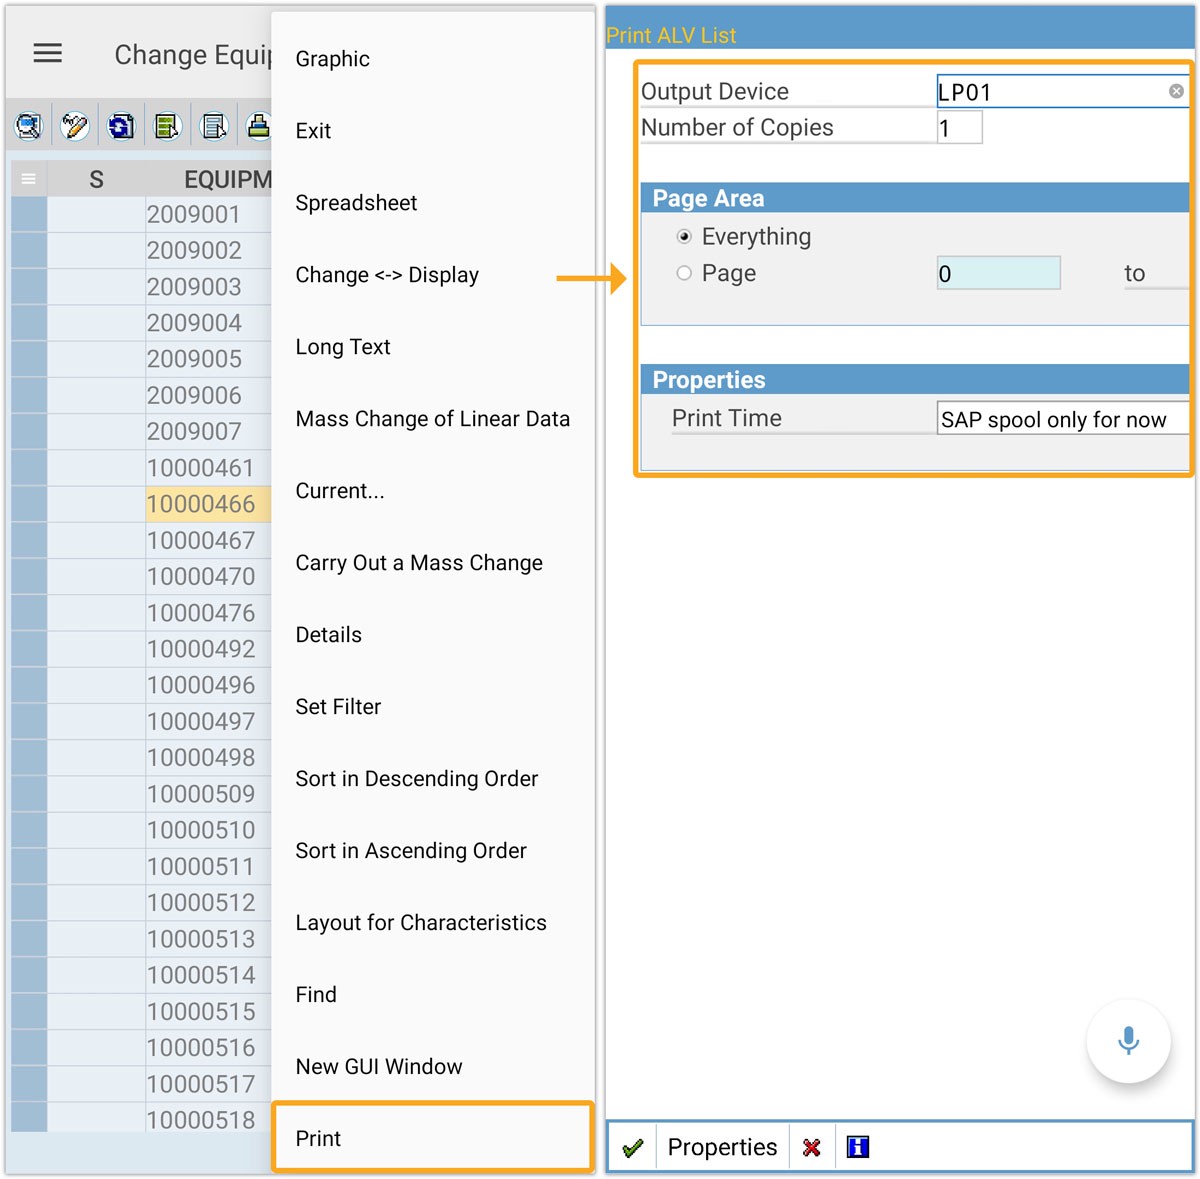
- Select the Print option and enter the details like output device, number of pages, and others. Now, click continue to get a print.